Authorizing Laserfiche
Prerequisite
For Customers using Laserfiche on-premise, the Laserfiche API needs to be installed. Please contact Velosimo Support to obtain the Laserfiche API.
Authorizing Laserfiche
Login to Velosimo Connect Admin - https://admin.velosimo.io
Navigate to Authorizations in the left menu and locate the Laserfiche authorization row.
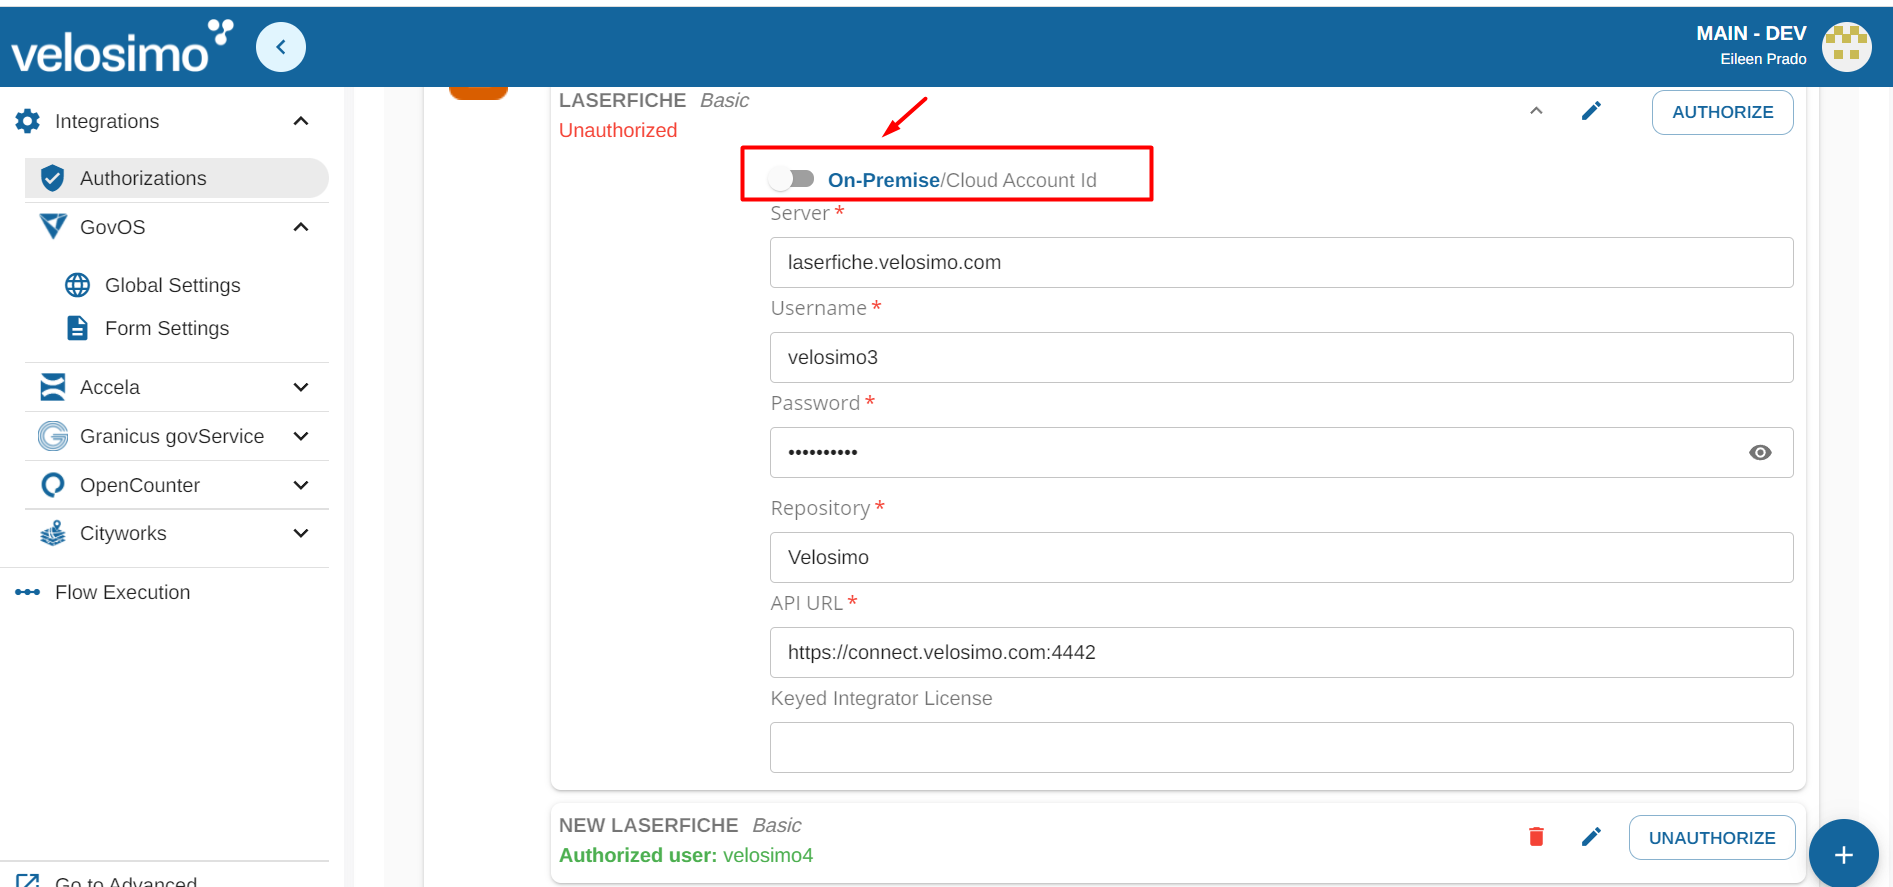
There are two ways to authorize Laserfiche, "On-Premise" or "Cloud Account ID". Use the slider on the left to select which settings.

Laserfiche On Premise
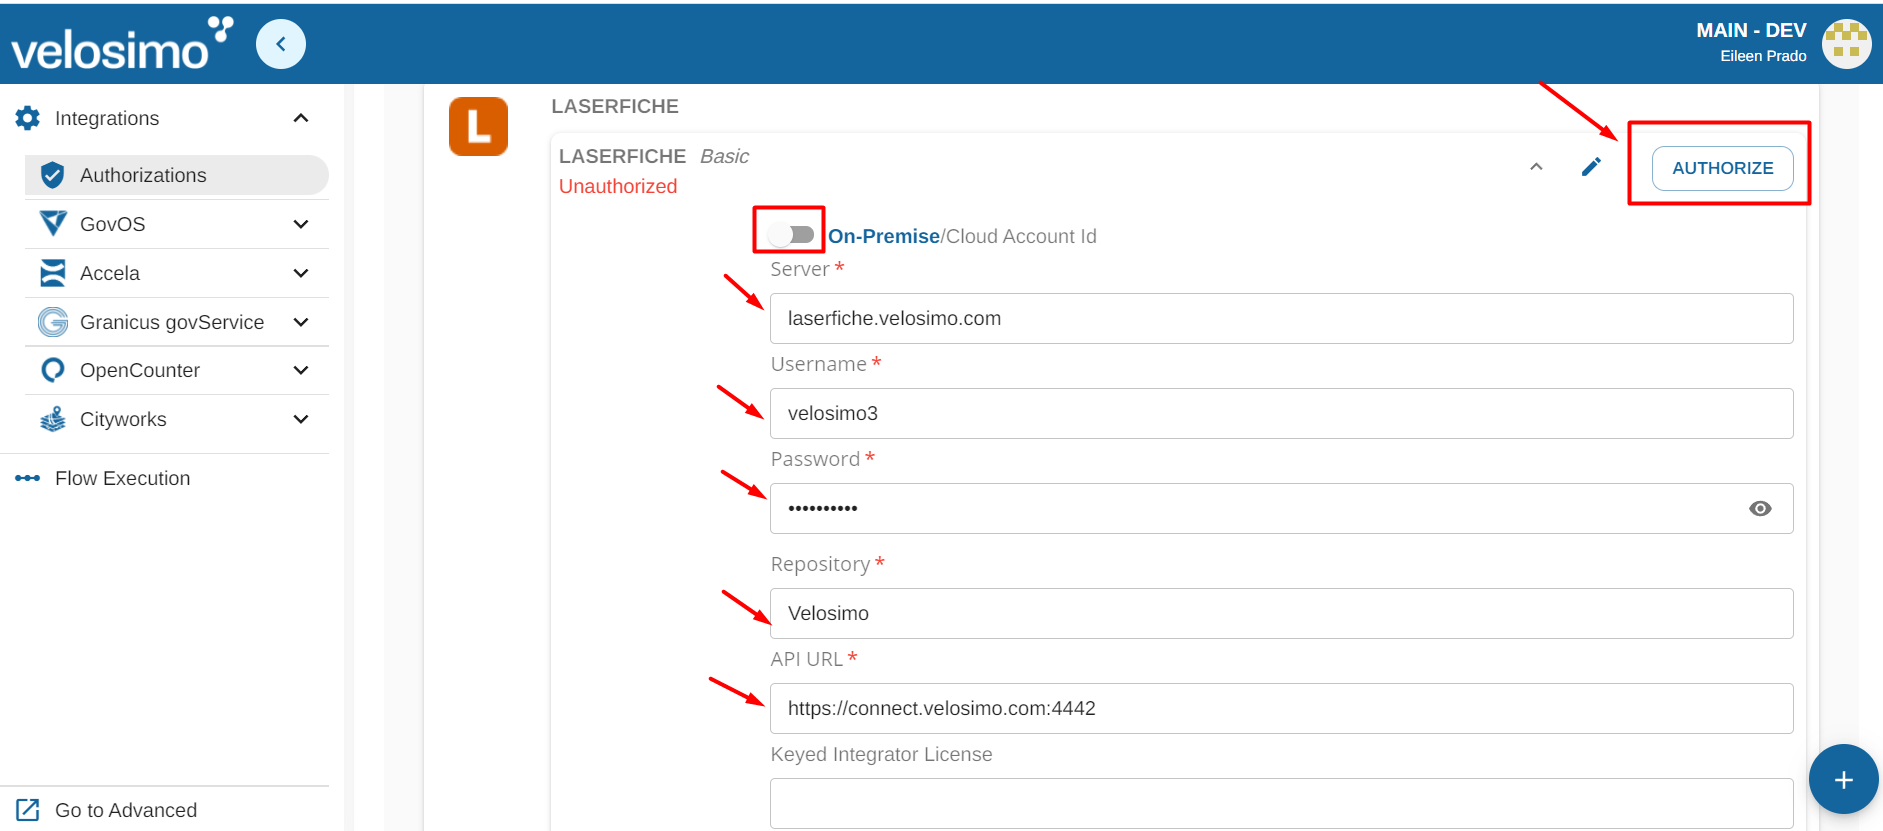
For "On Premise" authorization enter in a Server, Username, Password, Repository and API URL. Then click “Authorize”.
The server address is the public URL to Laserfiche.
The Laserfiche user that is used for the integration (associated with the username and password) needs to have the expected permissions to upload, create, and read for any files, folders, templates and volumes that are used to configure the velosimo admin. This requires a FULL License Type.
The API URL is the external IP address that was established during the API install on your IIS Server.

Laserfiche Cloud
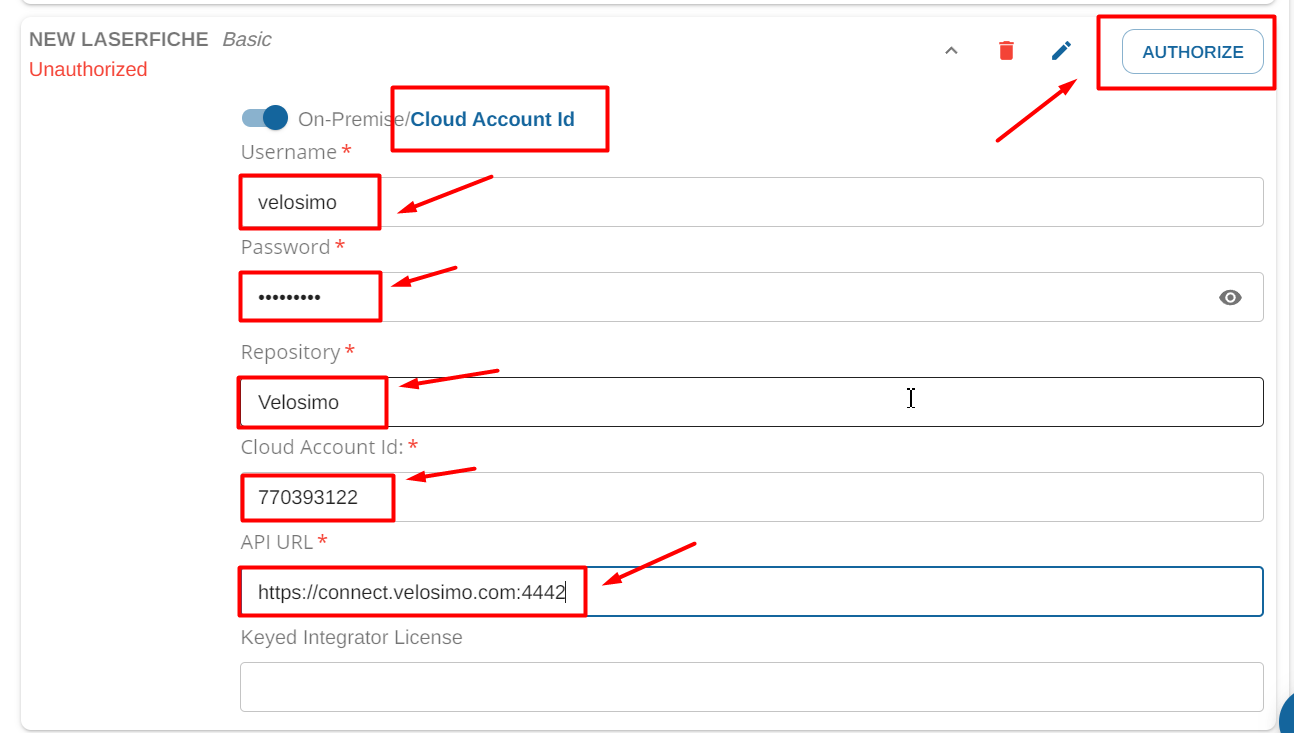
For "Cloud Account ID" authorization enter in a Username, Password, Repository, Cloud Account Id and API URL. Then click “Authorize”.
The Laserfiche user that is used for the integration needs to have the expected permissions to upload, create, and read for any files, folders, templates and volumes that are used to configure the velosimo admin.

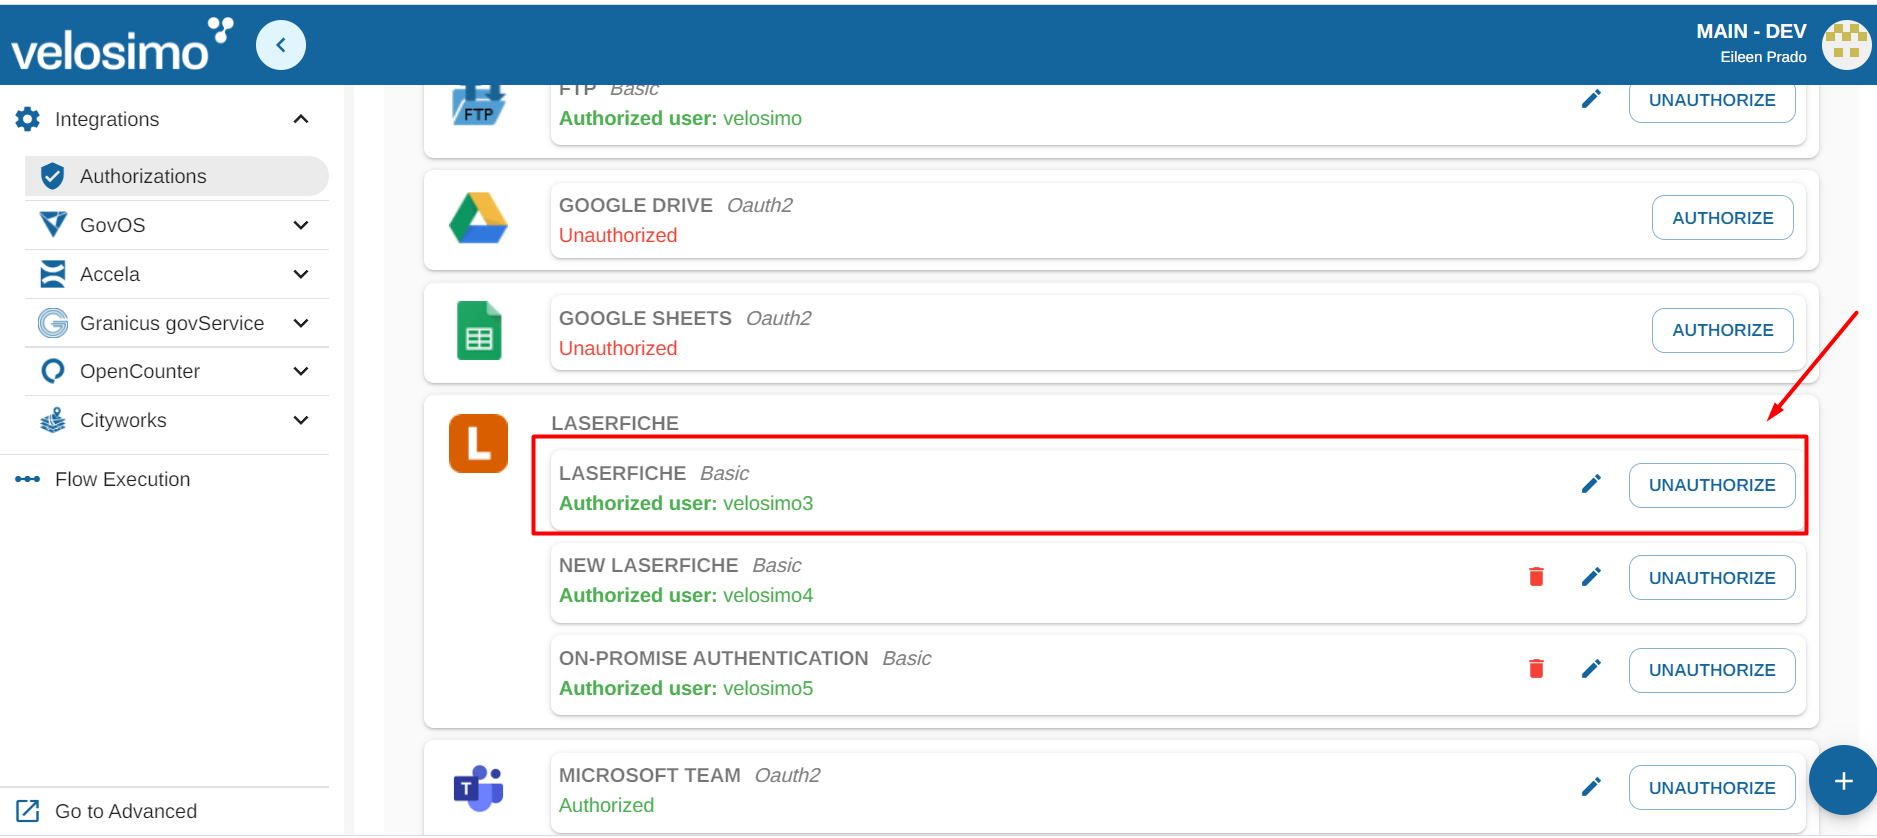
If the credentials are validated, you will be redirected back to the Authorizations page and Laserfiche will be authorized.

Updated 3 months ago
