Authorizing the Connector Endpoints
Create/Define Integration Users
For Accela Civic Platform:
Velosimo requires a named user within Accela that has Full Access to FID 0364.
Please remember to select the correct Accela tenant when prompted (TEST/SUPP/PROD) during the login process.
Authorizing the Connector Endpoints from the application
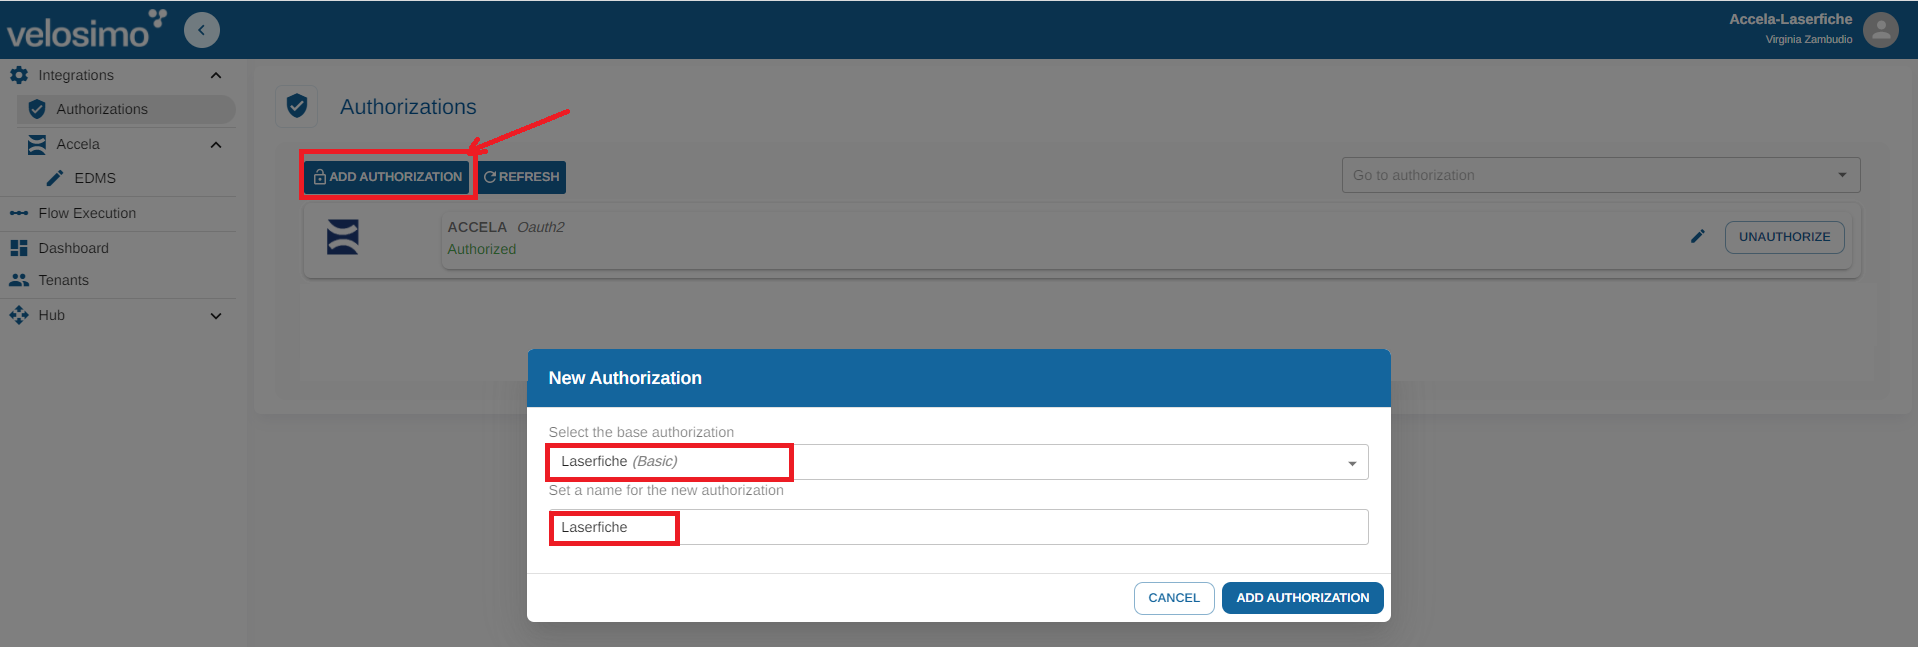
Navigate to admin.velosimo.io and login with appropriate user credentials. Once logged in, click Authorizations from the left side menu:

Click on 'Add Authorization' button. This action will open the modal to create a New Authorization. Select 'Laserfiche' as the base authorization and complete with the name you want.

Click on 'Add Authorization' button. It will add a new authorization for Laserfiche.

You can search it by the dropdown on the right top of the authorization page:

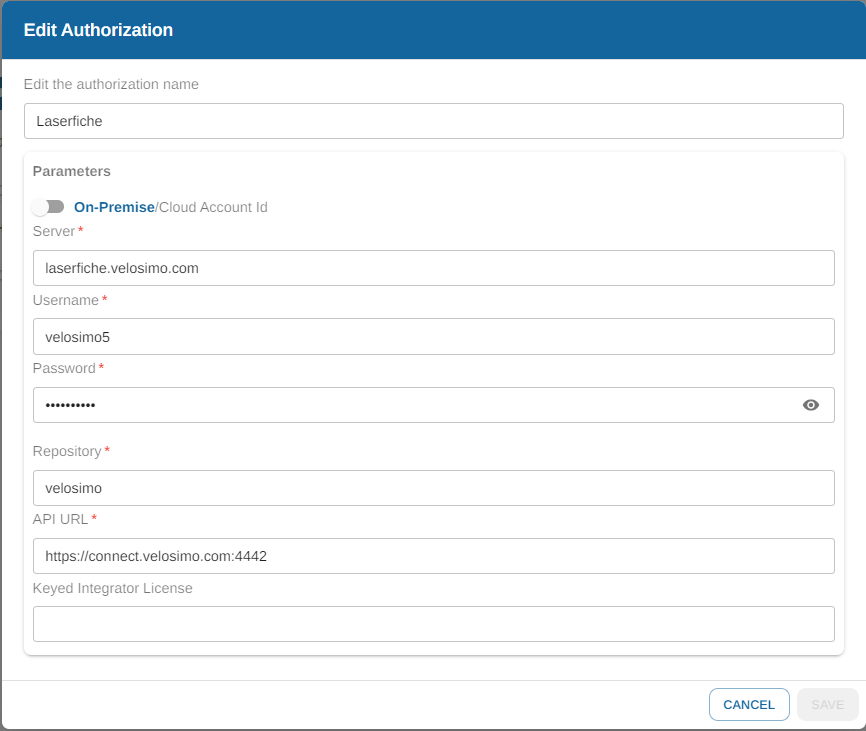
The new authorization will be displayed Unauthorized. Click on the button 'Edit' button to complete the information needed.

Complete the parameters to authorize Laserfiche and Save.
For On-Premises configurations:
The server address is the URL to your Laserfiche Server.
The Laserfiche user that is used for the integration (associated with the username and password) needs to have the expected permissions to upload, create, and read for any files, folders, templates and volumes that are used to configure the Velosimo admin.
The API URL is the external IP address that was established during the LF API install on your IIS Server and has Velosimo's IPs whitelisted.

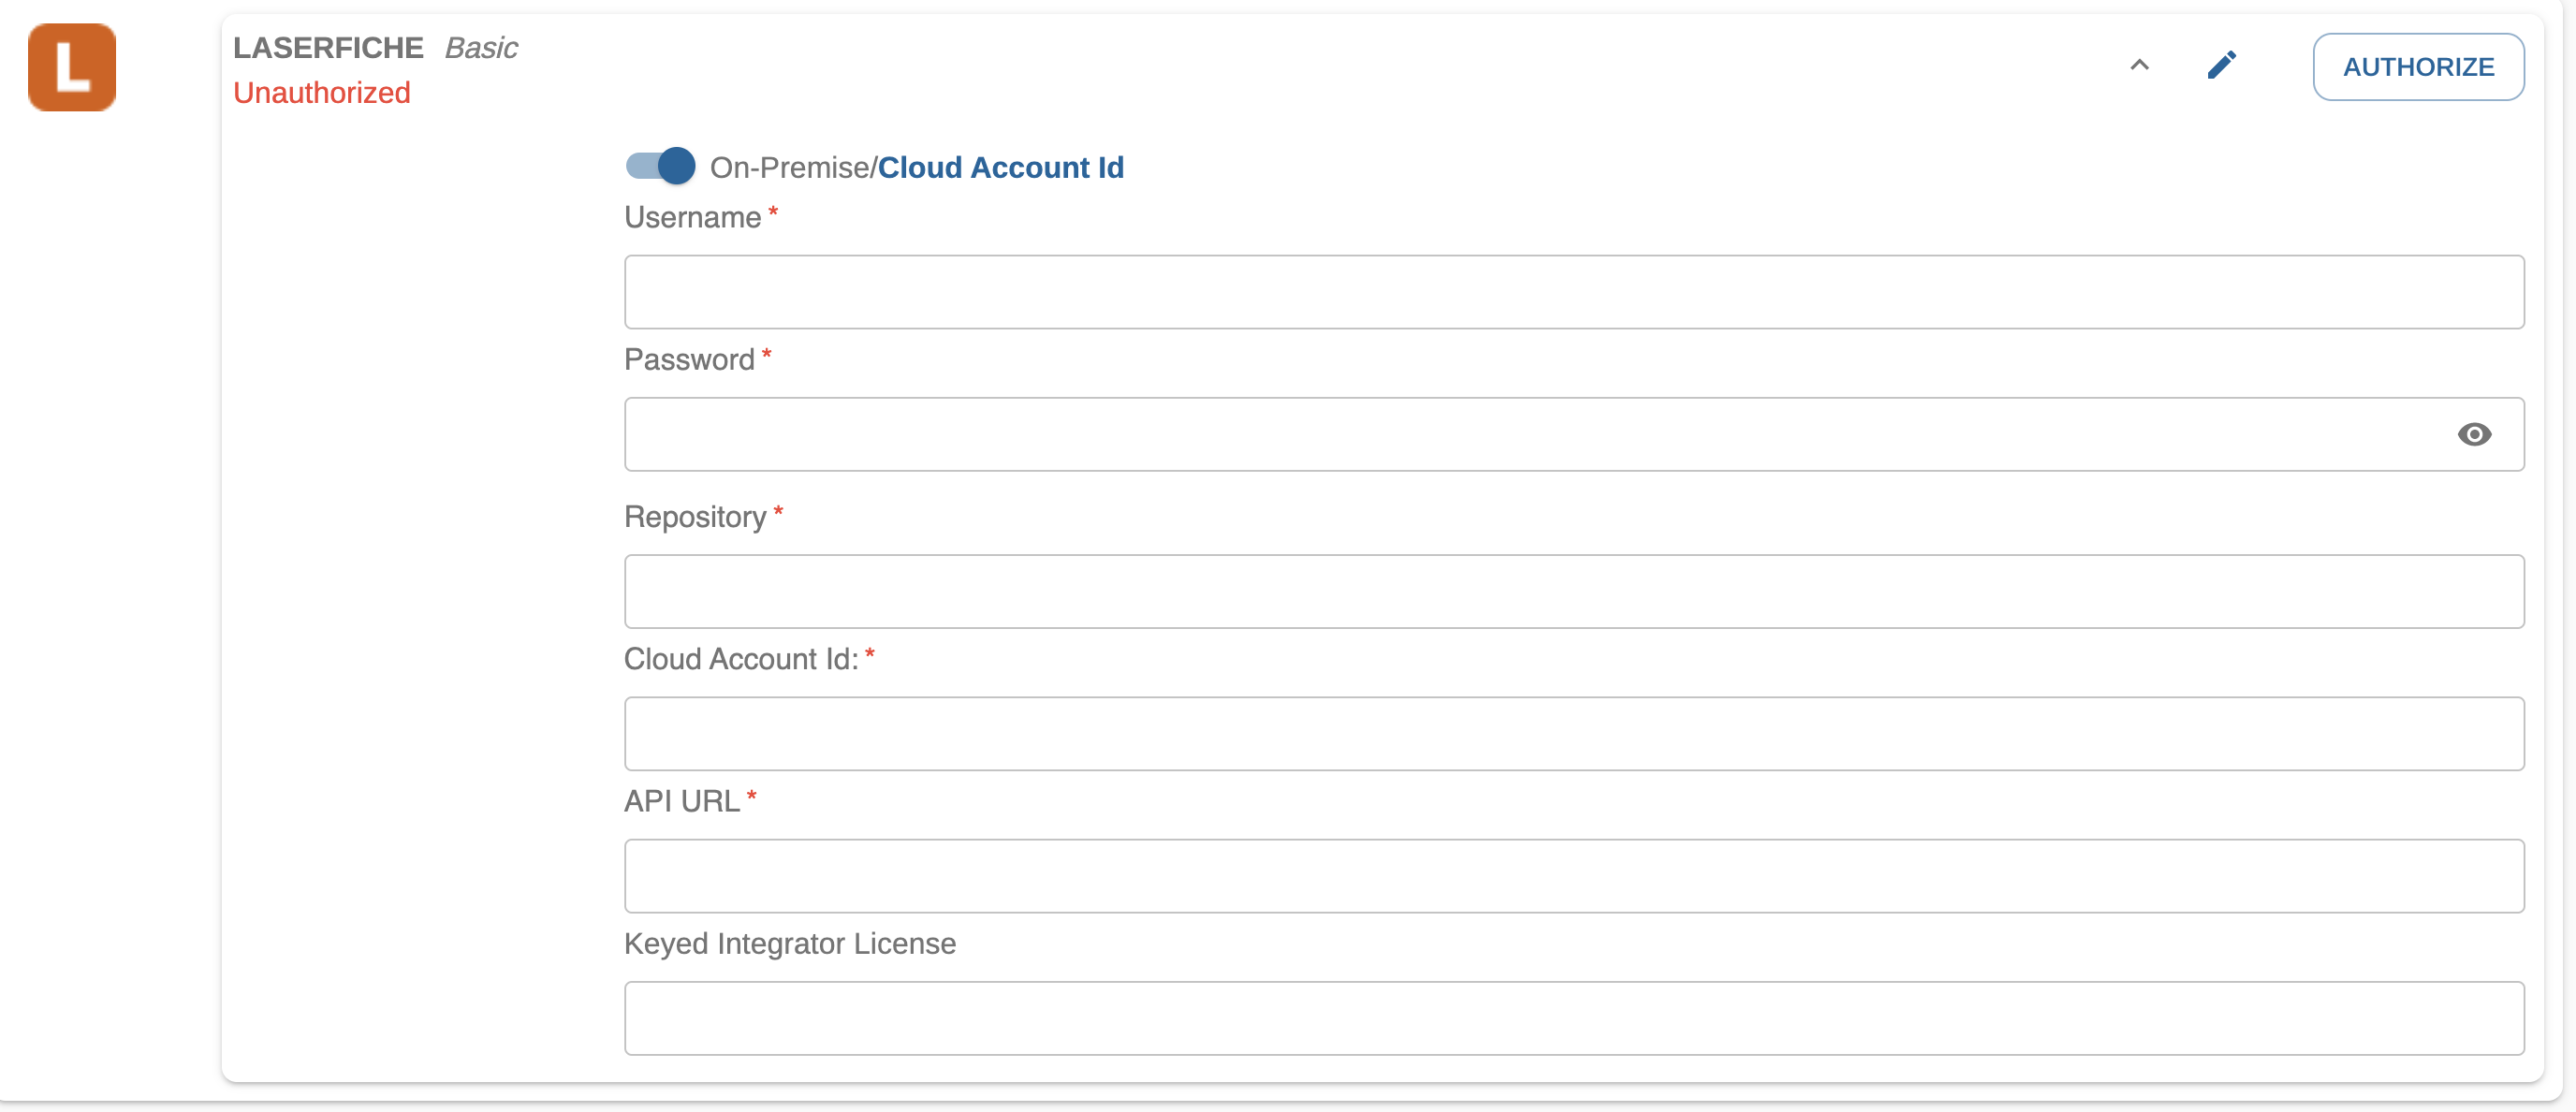
For Cloud configurations:
Toggle the radio button so that Cloud Account Id is in blue text
The Username and Password that is associated with the integration user account needs to have the expected permissions to upload, create, and read for any files, folders, templates and volumes that are used to configure the velosimo admin.
The Cloud Account ID is from your Laserfiche Cloud instance
The API URL will be provided by Velosimo and will connect to the Cloud Velosimo Laserfiche API.

Laserfiche is authorized properly:

Updated 3 months ago
