Configure: Accela + DocuSign
Manage Connector Mappings
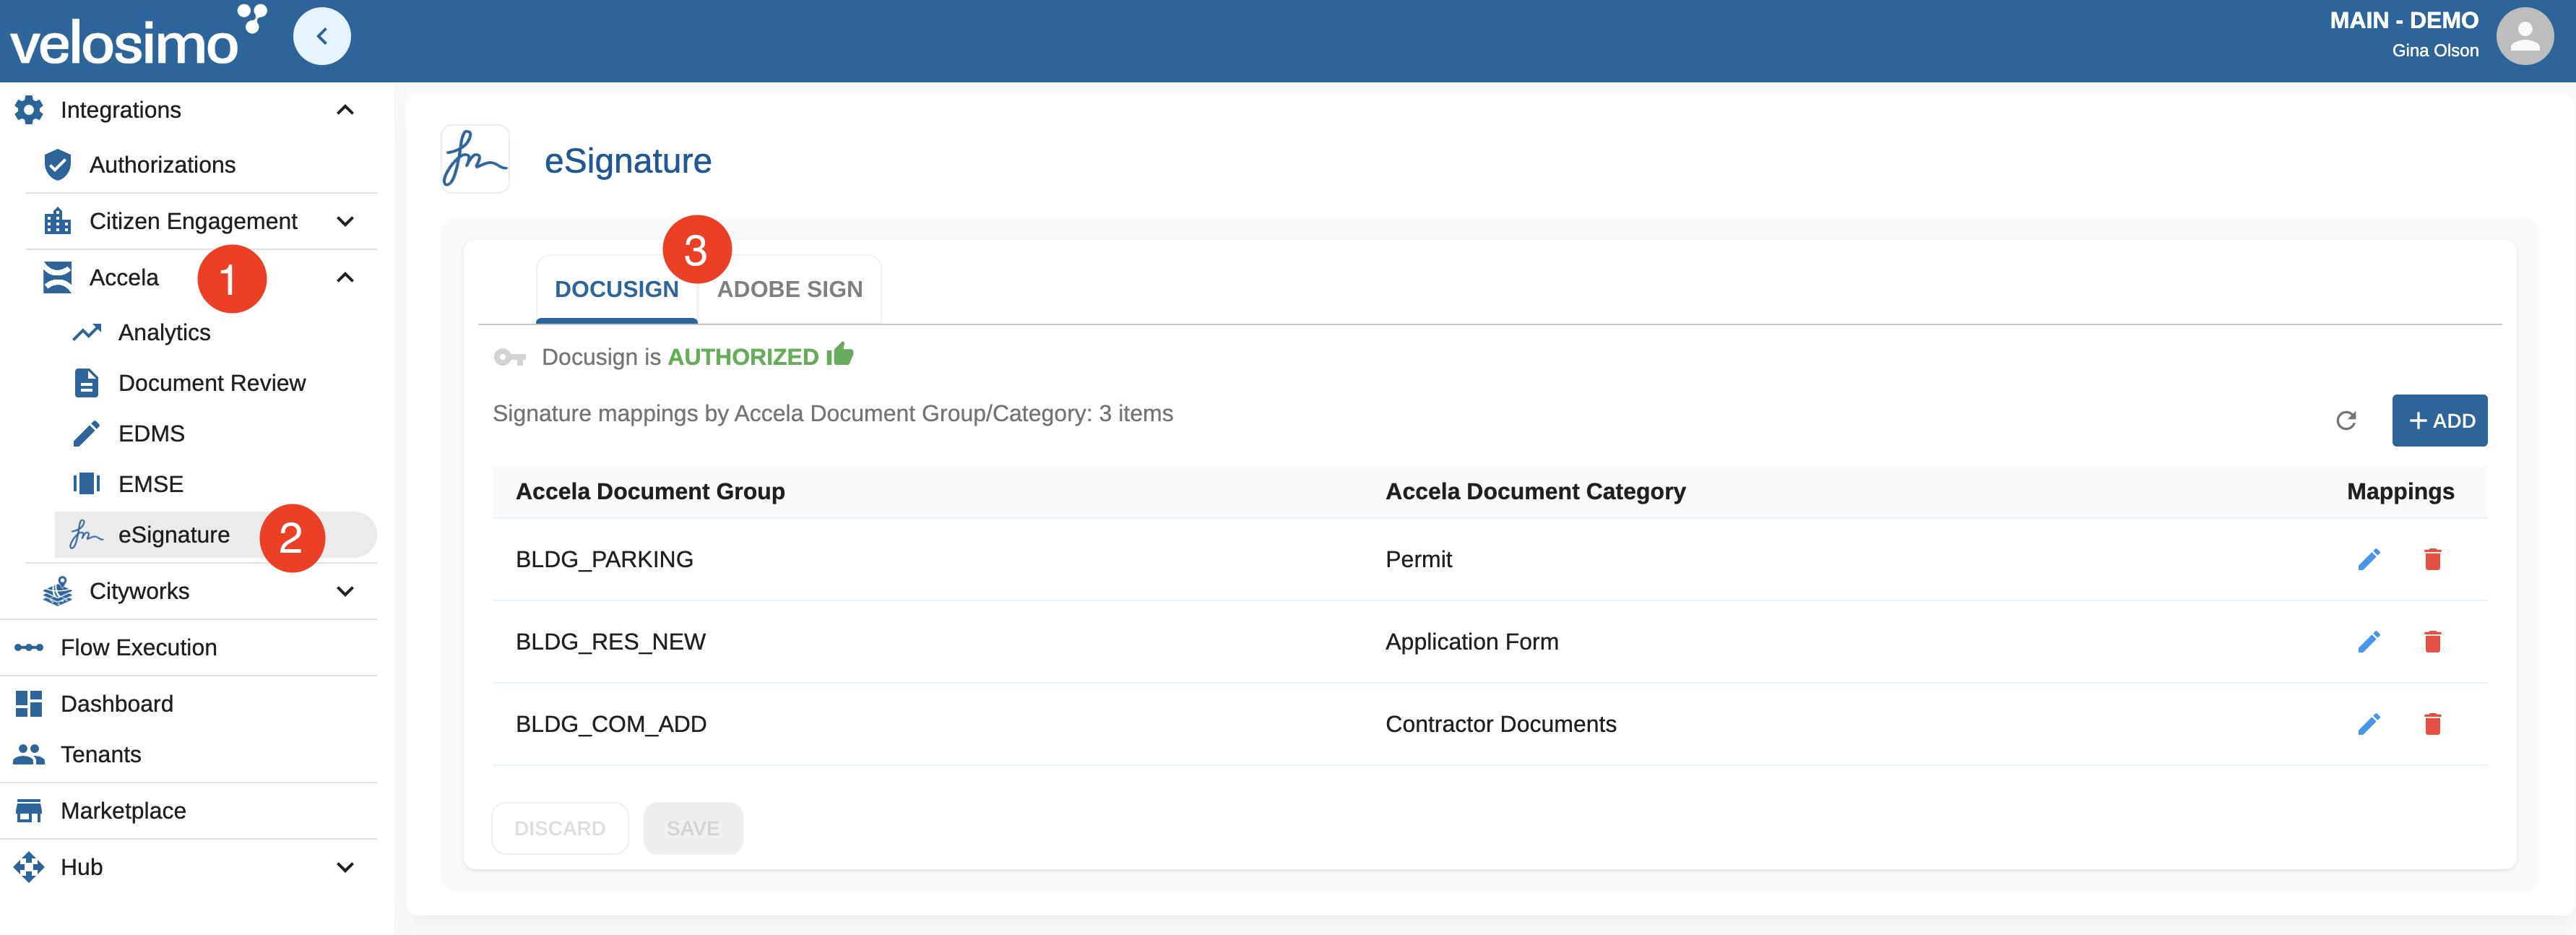
Navigate to the Accela-eSignature option in the left menu. Click on the DocuSign tab to see the the DocuSign mapping values
Navigate to Accela + Adobe Sign administration
Use the Add button to add a new row, then select the Accela Document Group and Category to set the signature mappings for those documents. Once a Group/Category is selected, click on the gray pencil to complete the configuration.

Add new Document Groups/Categories
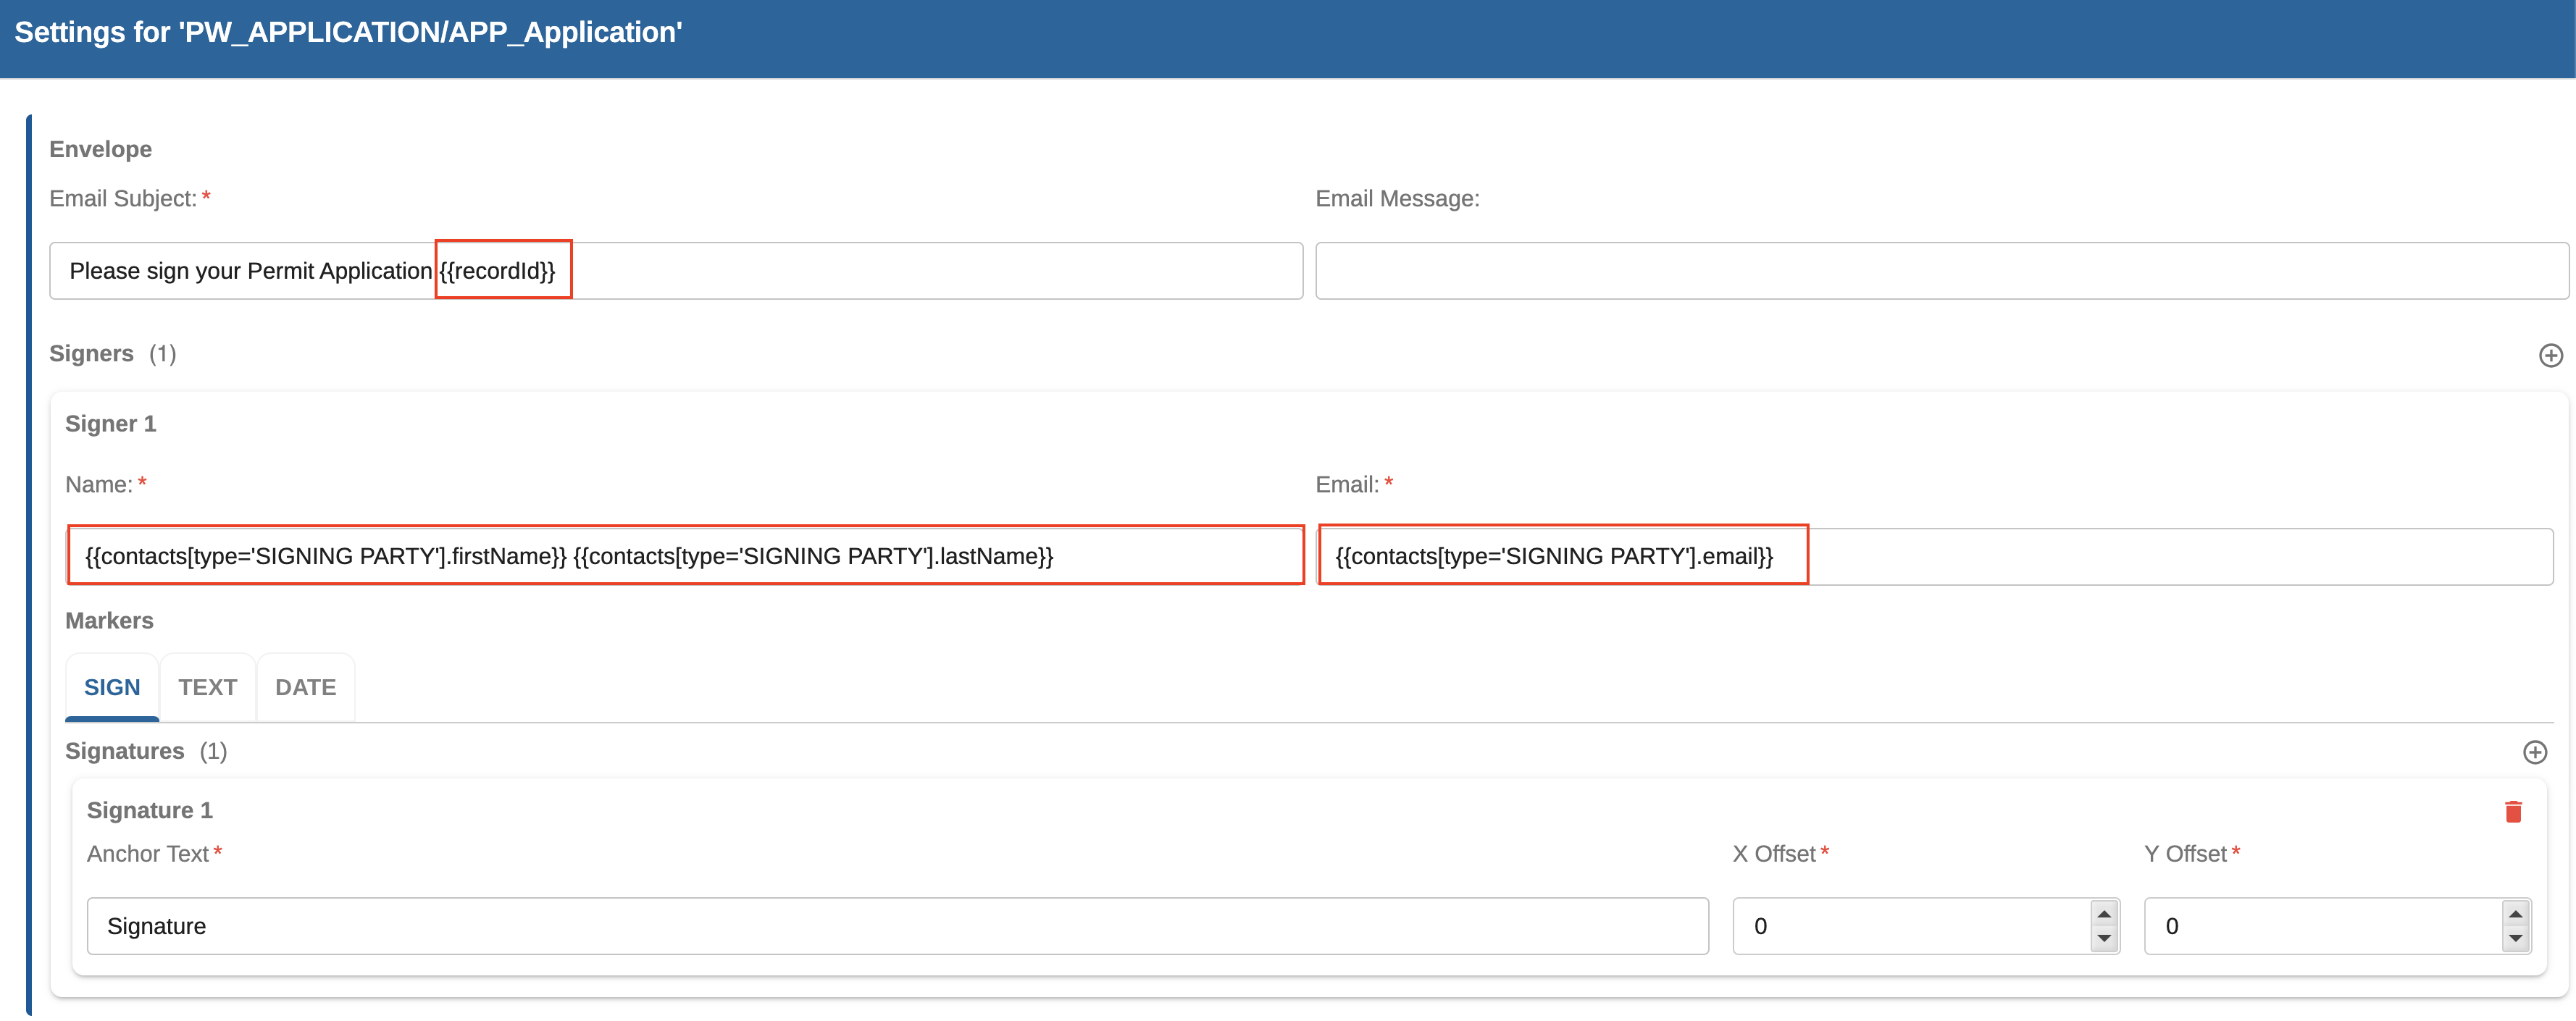
After clicking the gray pencil, the agreement settings page is displayed. Enter the information related to the email message and parties required to sign the document.
Most of the fields support using variable field data from Accela as illustrated in the screen shot below. To include a variable, place your cursor where you want the Accela field variable to be located and click to display a drop down list of variable options. You can start typing the variable by name to filter the list and more easily find and select the desired variable.
DocuSign agreement settings in Velosimo Admin
Configuration Fields:
Email Subject: Create the email subject you would like your emails to have. As noted above, variable information can be included.
Email Message: If your DocuSign instance has a standard email message body template that will be used in addition to what is entered in the Email Message field.
Defining a Signer (Signer 1, Signer 2, etc):
Additional Signers can be added by using the + option.
Place your cursor in the Name field and click to locate and find the Accela field for the type of signer you want. Typically, Contacts are used. Once you select the variable you will see the following fields to complete the process:

Place your cursor in each of the fields, Object Field, Object Field Variable and Object Field Property to complete the mapping. Depending on your desired selections, it may look like this when finished.

Replicate the same process for the Signer's Email as you did for the Signer's Name

Markers
SIGN:
Signature Anchor Text: The DocuSign signature marker will be placed in all of the places your document has the defined anchor text.
Best Practices for selecting your Anchor Text:
- If you want a single signature marker then the Anchor Text will need to be unique, otherwise the DocuSign signature markers will appear anywhere the Anchor Text exists in your report document.
- Anchor Text does not need to be visible in the report/document. You could change the font color to disguise the Anchor Text
X Offset/Y Offset: This is the X and Y Pixel Offset from the Anchor Text in your document. X is to the right. Y is upward.
Sometimes finding the exact X and Y will require some testing and fine tuning.
DATE: DocuSign places the Date function in a specific location, it does not use the Anchor Text concept.
Select the + option to start the configuration
Additional DATE markers can be added by using the + option
Document: Enter 1 in this field
Page Number: Enter the page number where the Date should appear
X Offset/Y Offset: This is the X and Y Pixel from the bottom left of the report.

The easiest way to find the X and Y pixels for the date is to start a signature in DocuSign, place a marker and use the DocuSign properties for the pixel placement of the marker.
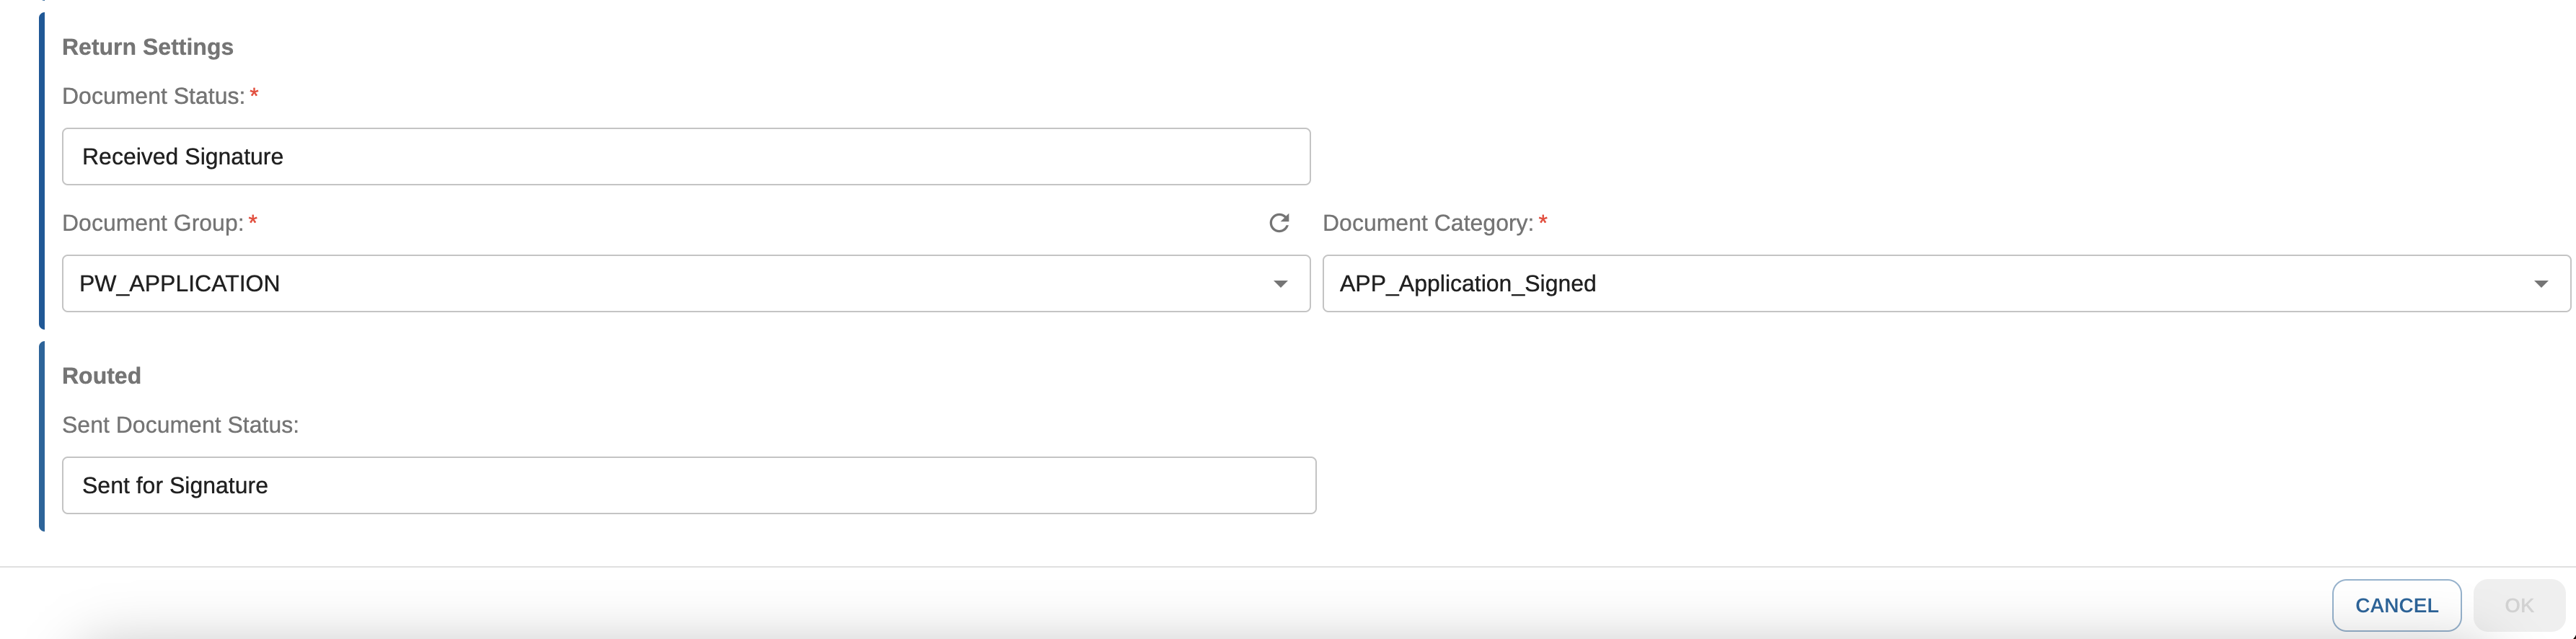
Return Settings
These are the settings for when the document has been signed and returned to Accela from DocuSign.
Document Status: What status do you want the returned document to display in Accela. Examples might be: Signature Received or Signed.
Document Group and Document Category: This could be set to the same or a different Group and Category as initially configured.
Routed
This is the status for when the document has been sent for signature to DocuSgin and you are waiting for the signed document to be returned.
Sent Document Status: An example might be 'Sent for Signature'
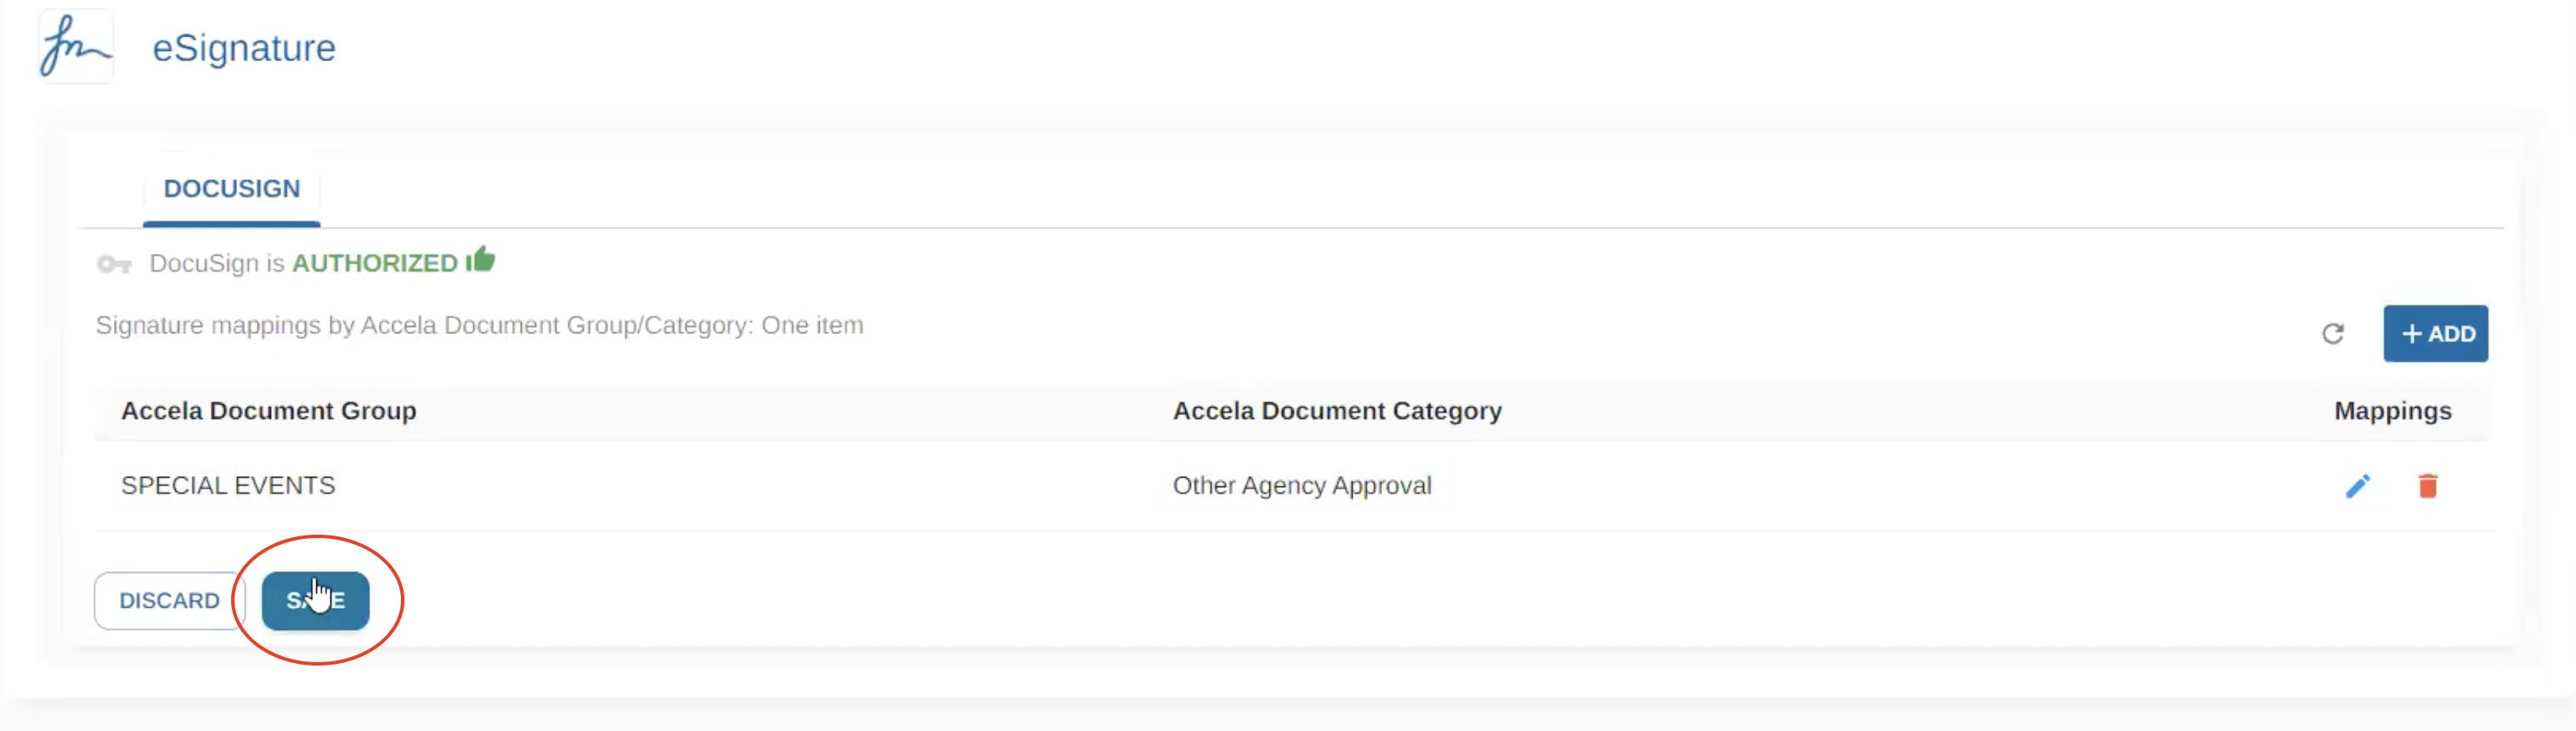
Once all of the required fields have been completed, select OK at the bottom to return to the previous page.

Then Save to save all of your configuration settings.
Now you are ready to send the event from Accela to validate the configuration.
Updated 8 months ago