How to build a connector
Table of Contents
- Create Connection
- Create Datatype
- Create New Event
- Create Flow
- Creating a Status Callback
- Testing the SMS Message
- Creating a Webpage
Create Connection
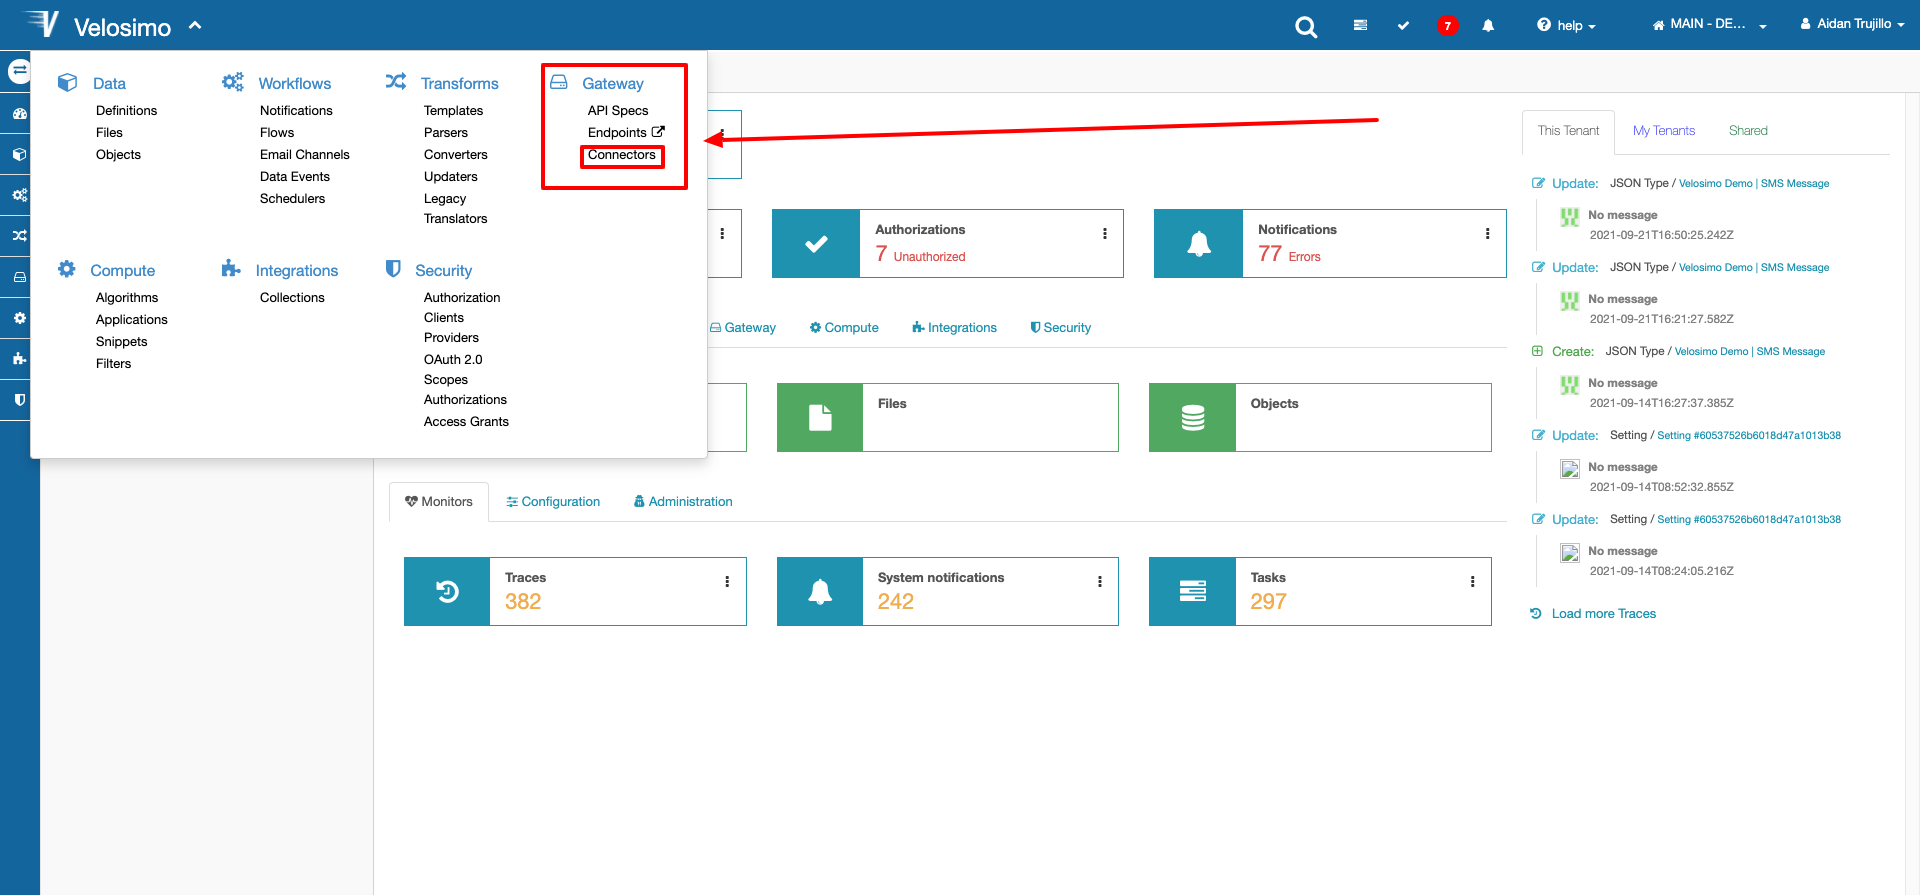
Navigate to Gateway -> Connectors on the Velosimo menu.
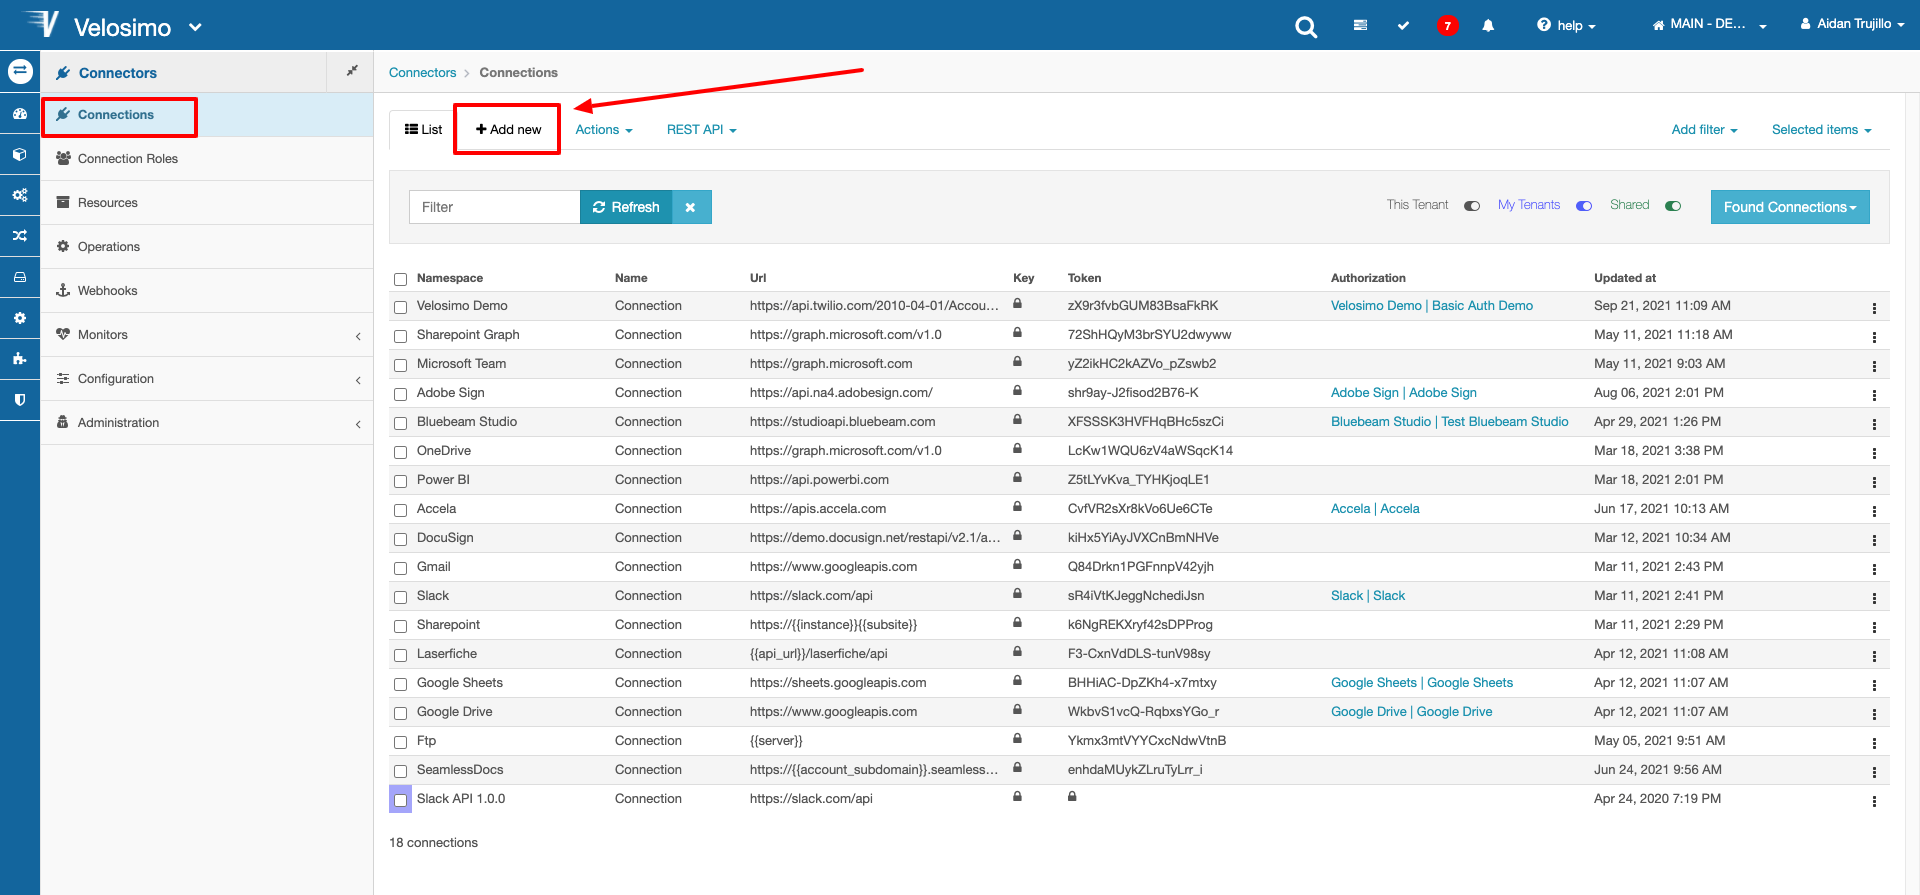
Select Connections from the side menu, then click Add New at the top of the page.
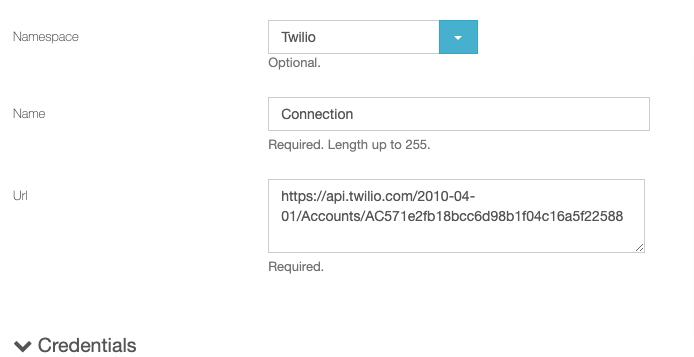
Create a namespace. This will be the one you use for every element created for this integration. Then, enter a name and the Base URL for the API you are using.
Authorization
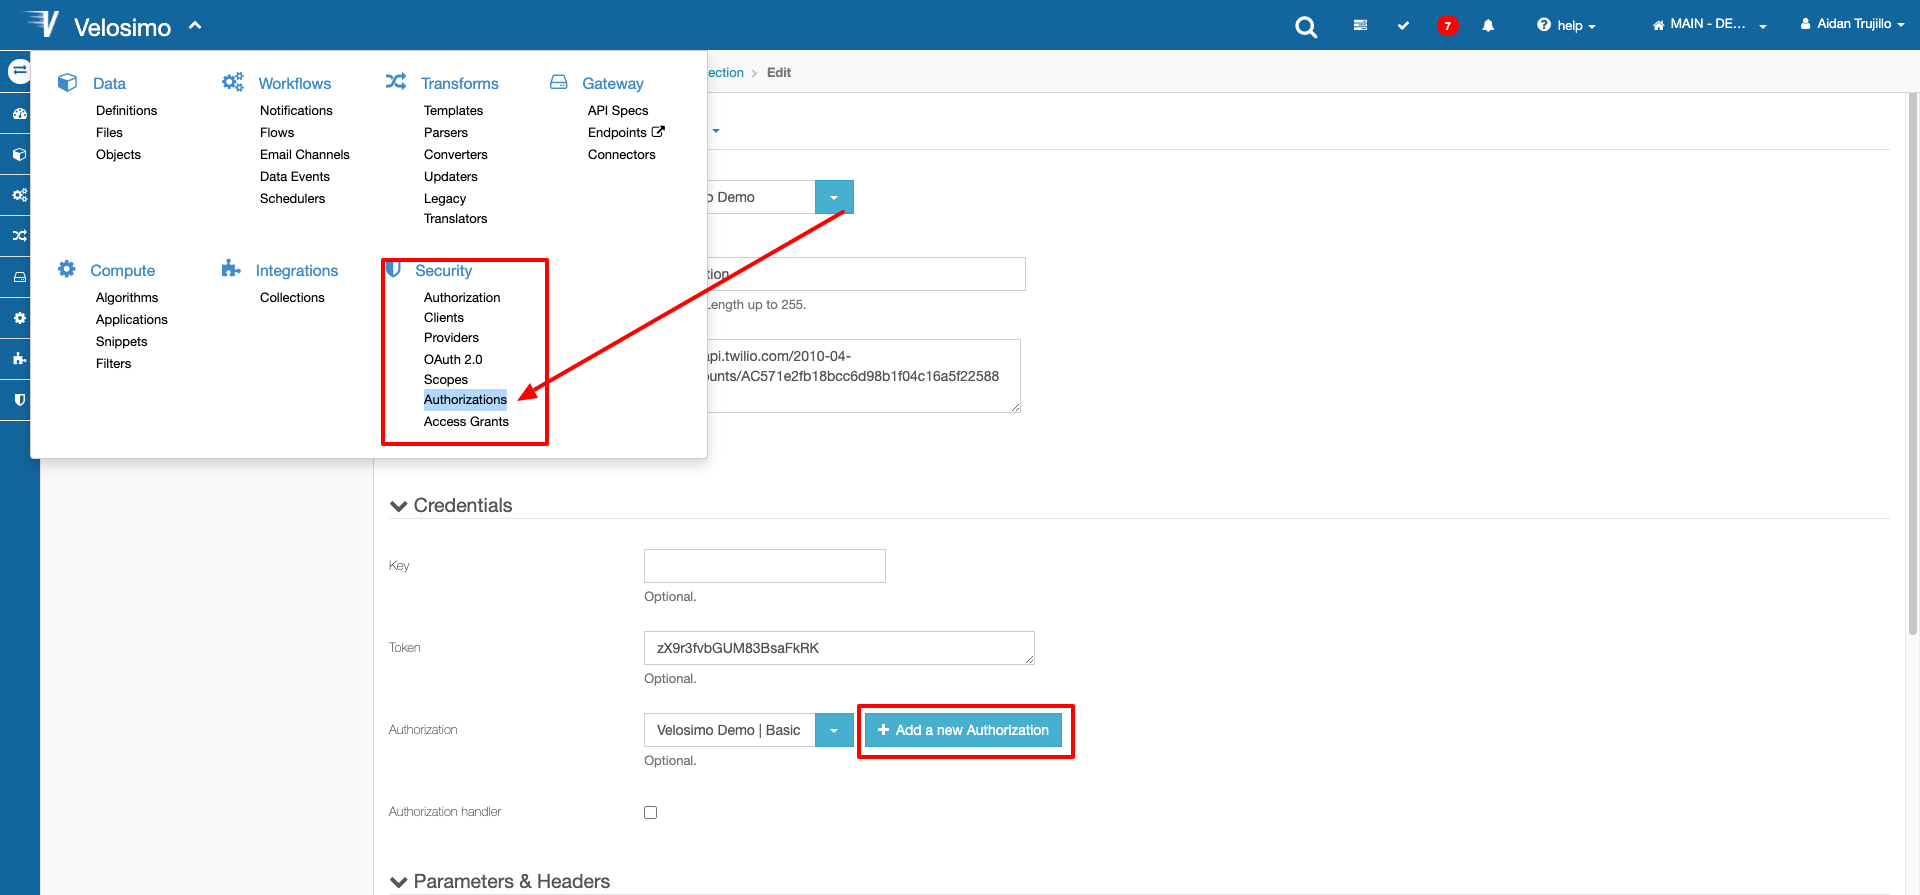
To create Authorization for your connection, either click the Add a new Authorization button or navigate to Security -> Authorizations section with the navigation menu.
Select the authorization type used by the API you are configuring and click Next.
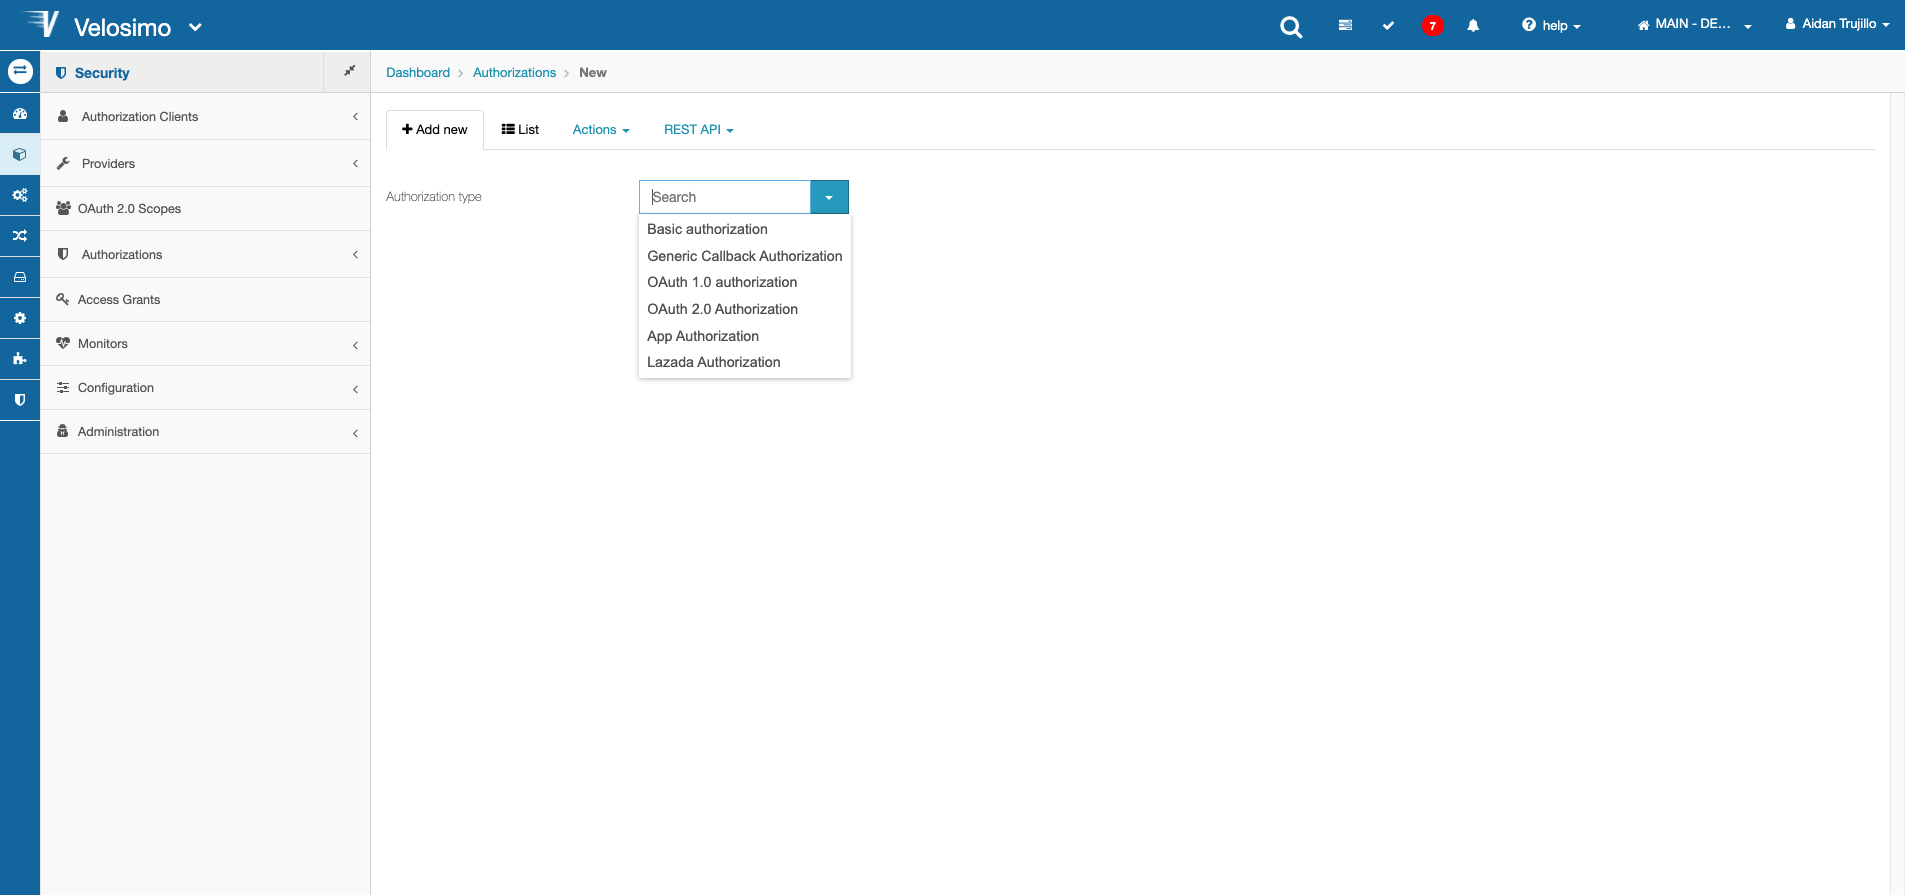
To learn more about the Authorization types, go here
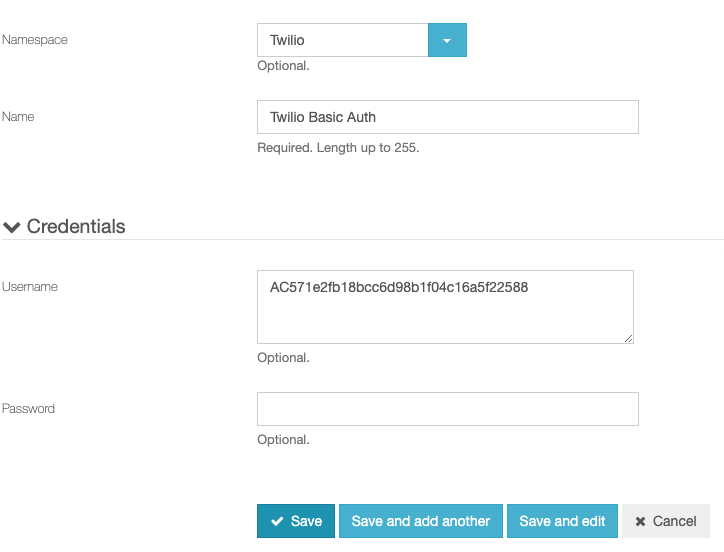
Enter the namespace and create a name. Configure the credentials to your API's authorization data. Keep in mind that value entered into the Password input will be hidden after saving for security. Click Save at the bottom once completed.
Now back in the Connection configuration form, set Authorization to the Authorization that was just created. By setting this, your API will require the correct authorization headers to run correctly.
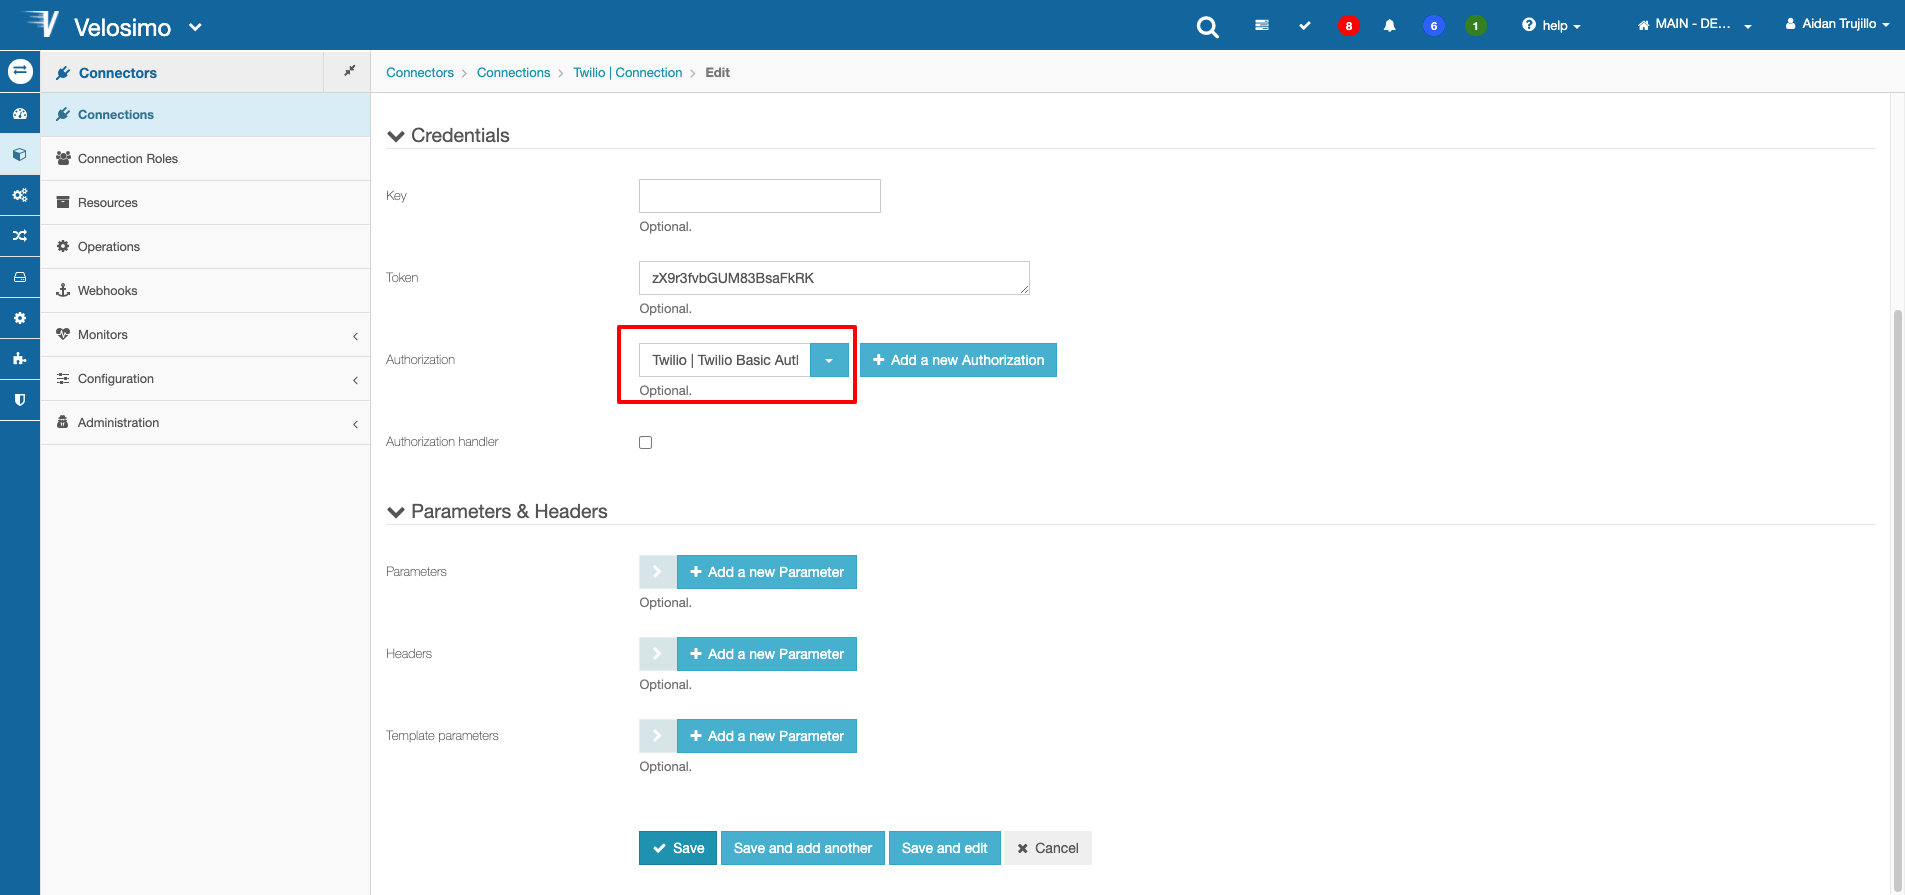
Click Save once completed.
Create Datatype
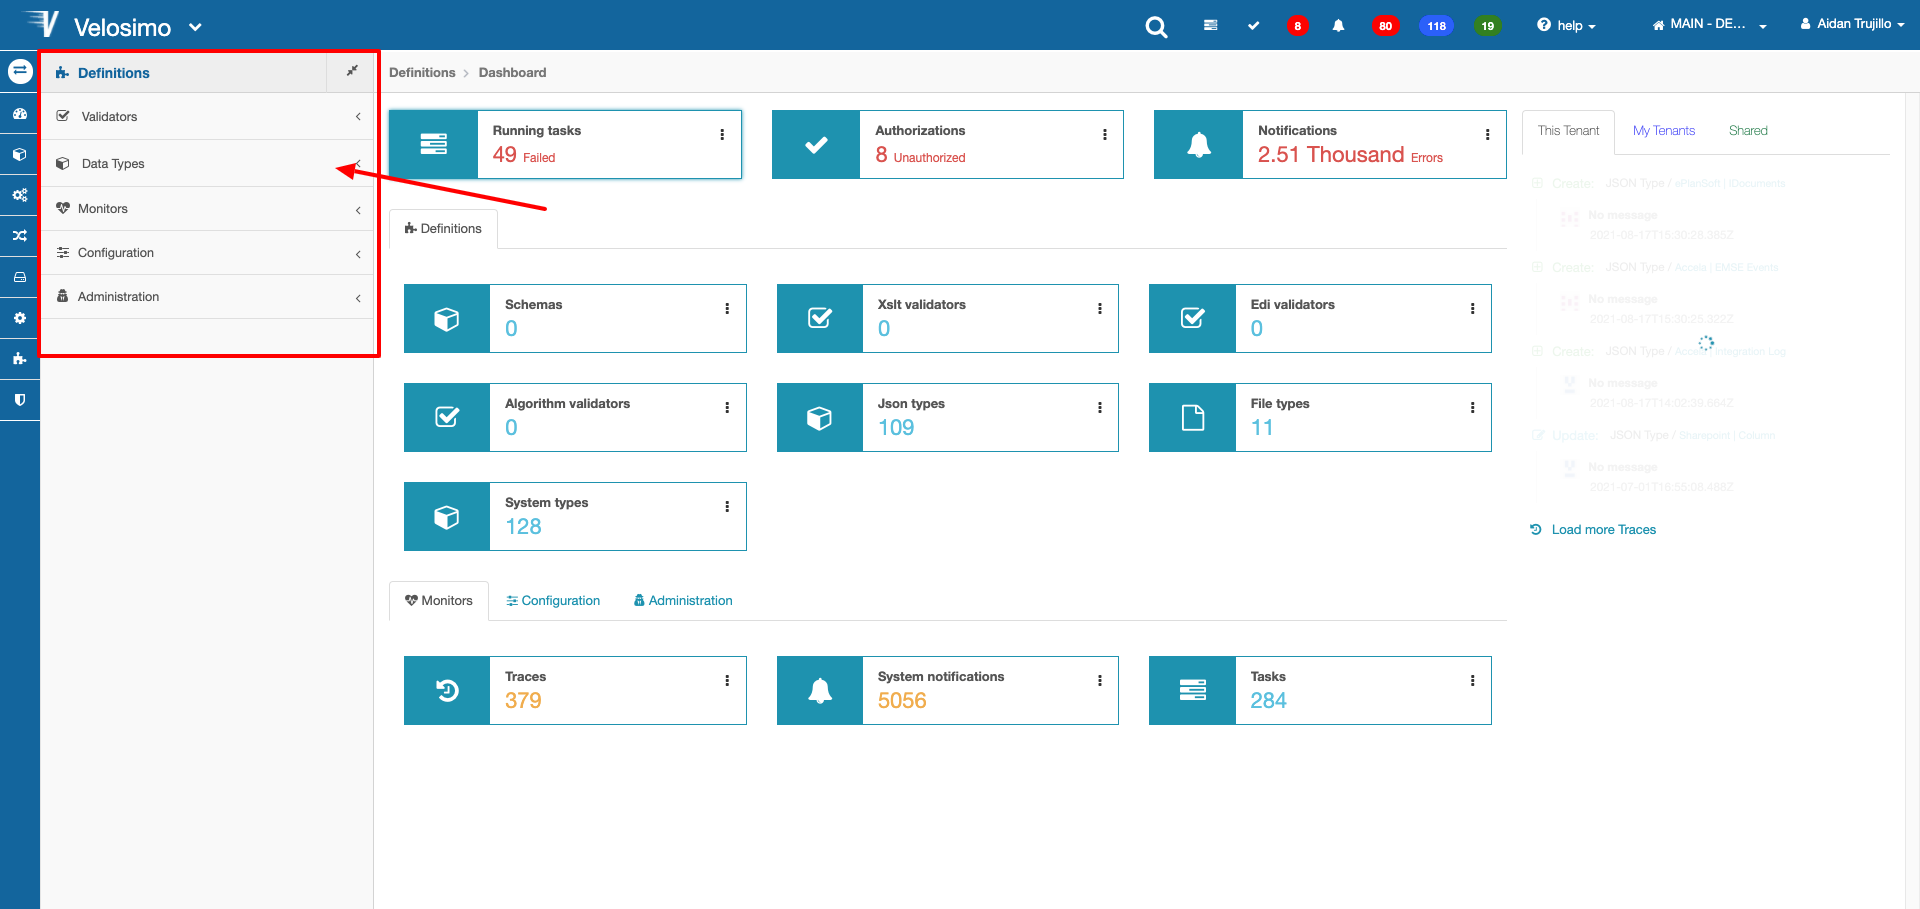
Navigate to Data -> Definitions on the Velosimo menu.
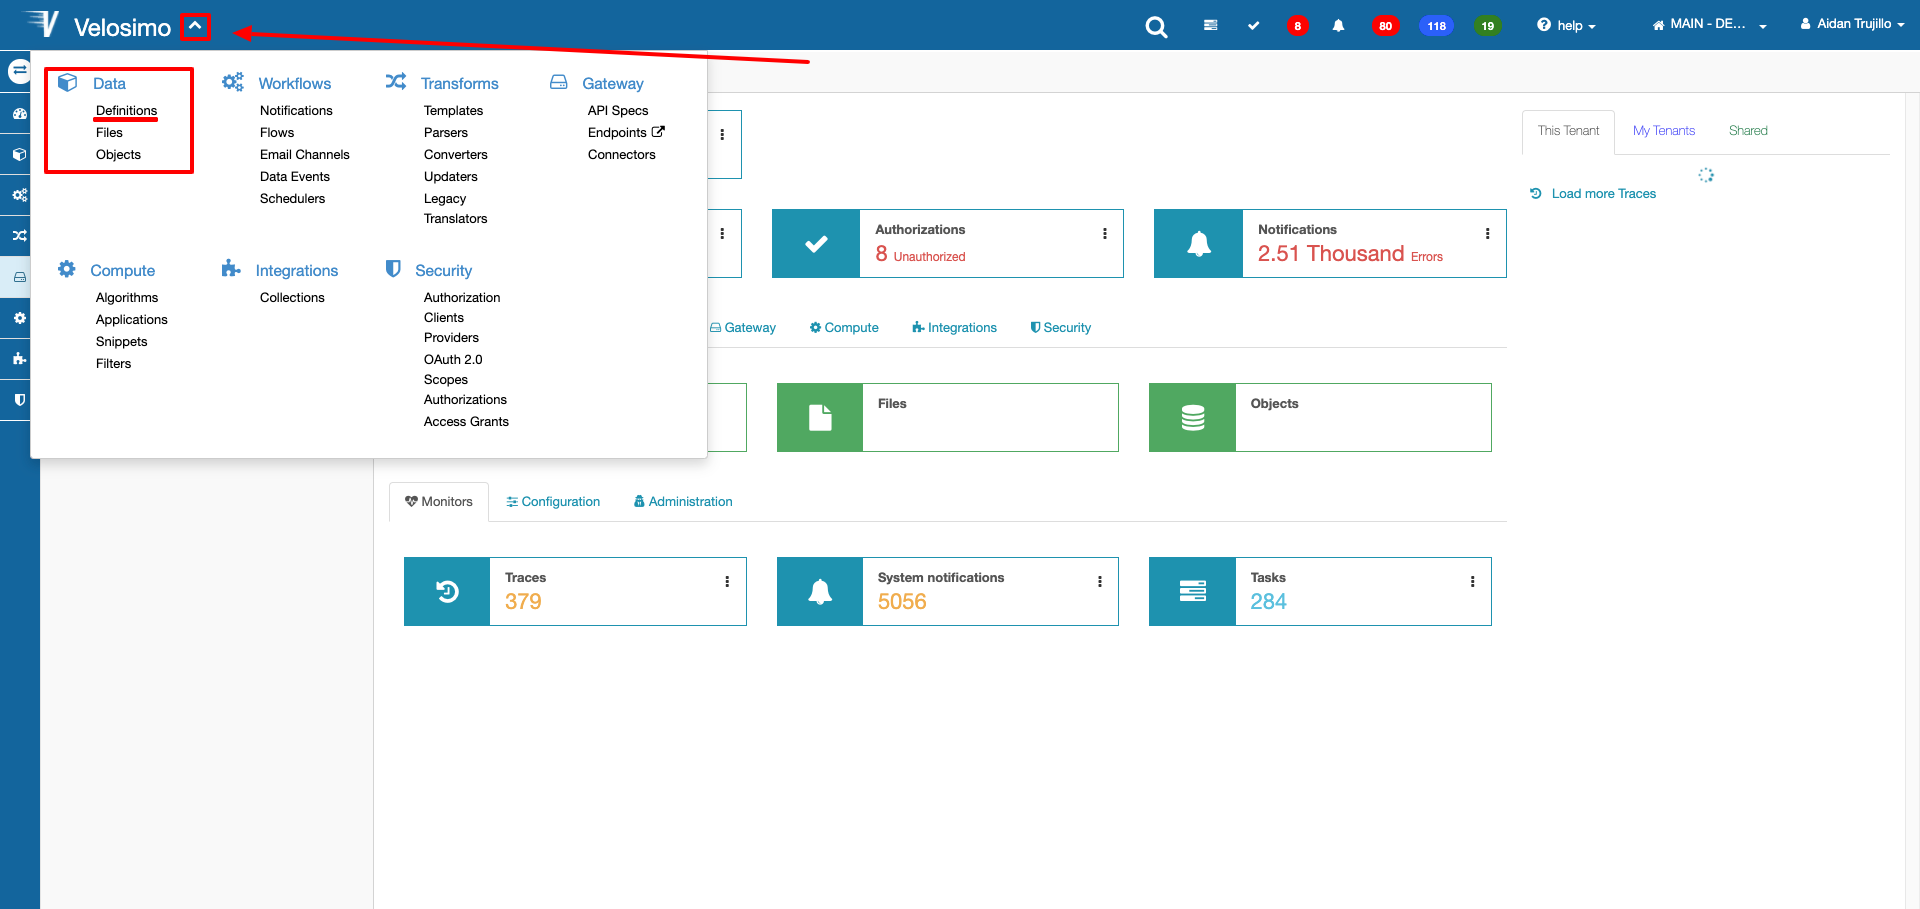
Select Data Types from the side menu.
Select JSON Types from the list.
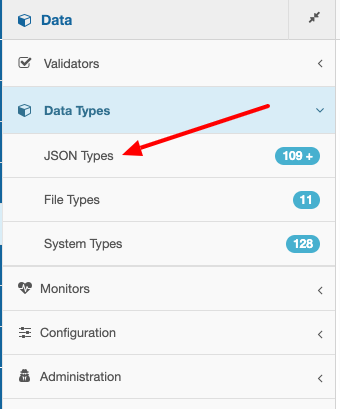
If you would like to know more about the other Data Types, go here
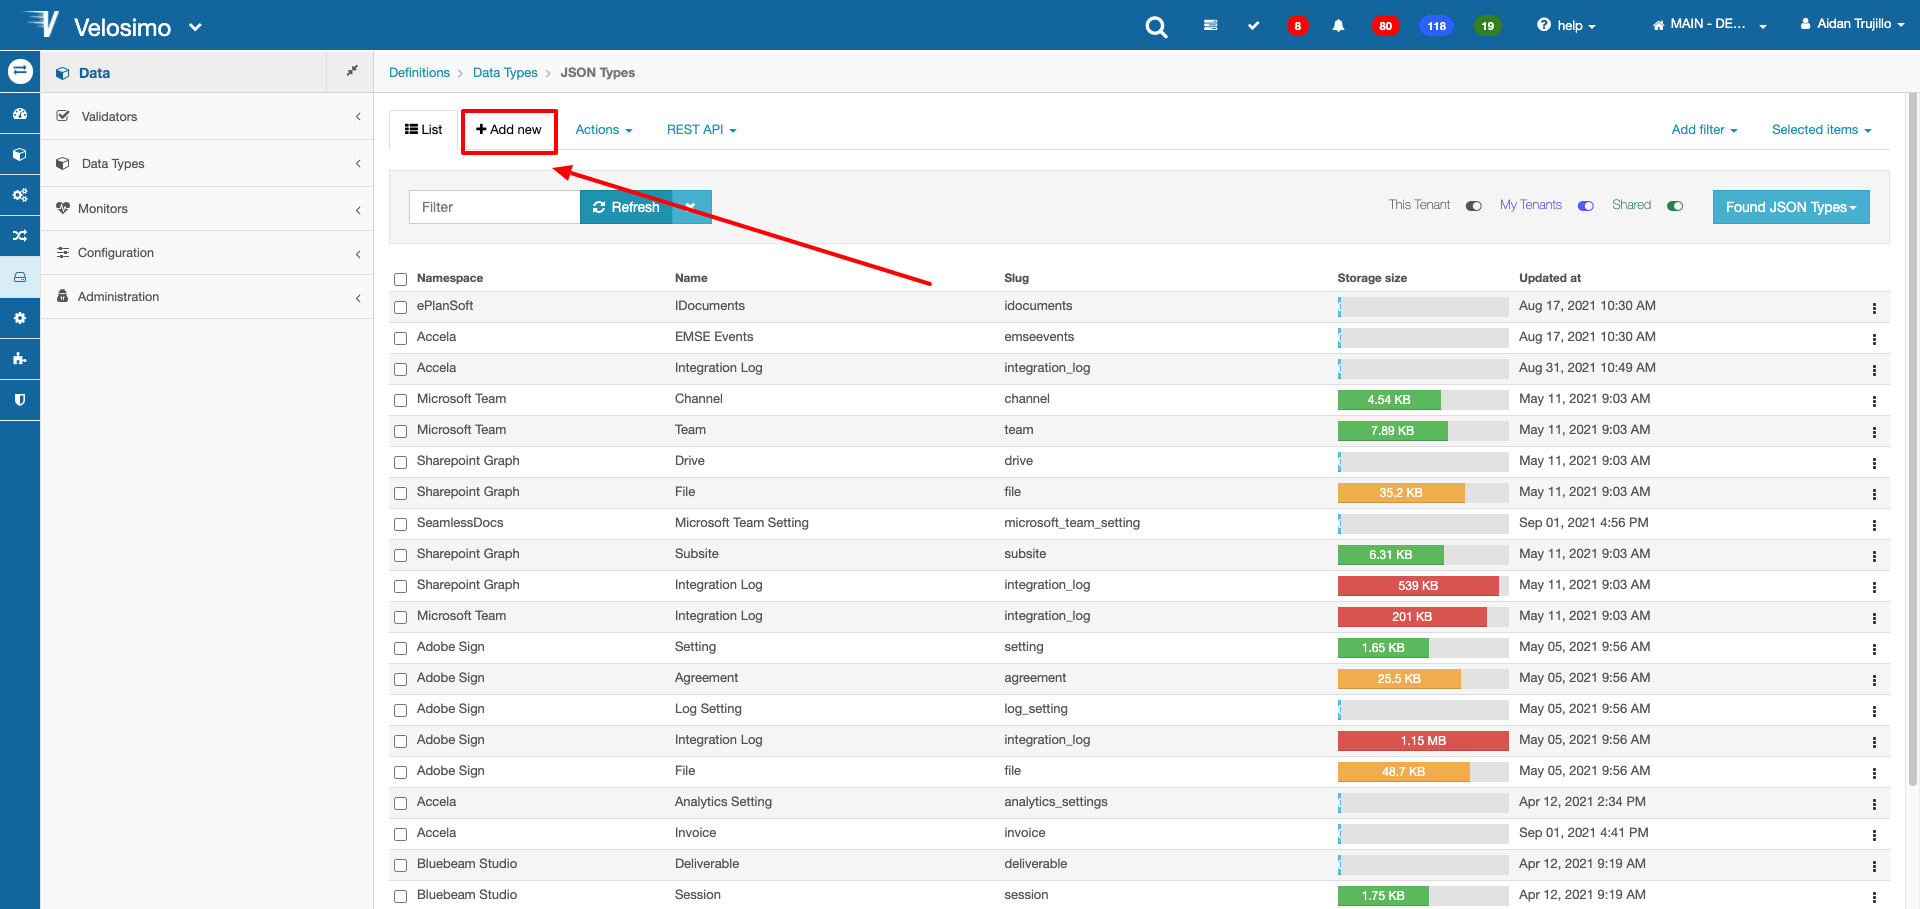
Click Add new at the top of the page.
First, enter a namespace and name for the new data type.

Next, configure the JSON schema for the data type. Keep in mind that this is only to define the properties of the data type and the type of data each one should expect to receive. Click save once completed.

This schema defines that our new SMS Message data type will be an object with the properties: to(string), from(string), body(string)
Now that we have created a new data type, we can create a new entry. Select the Action menu on the data type and select Records.
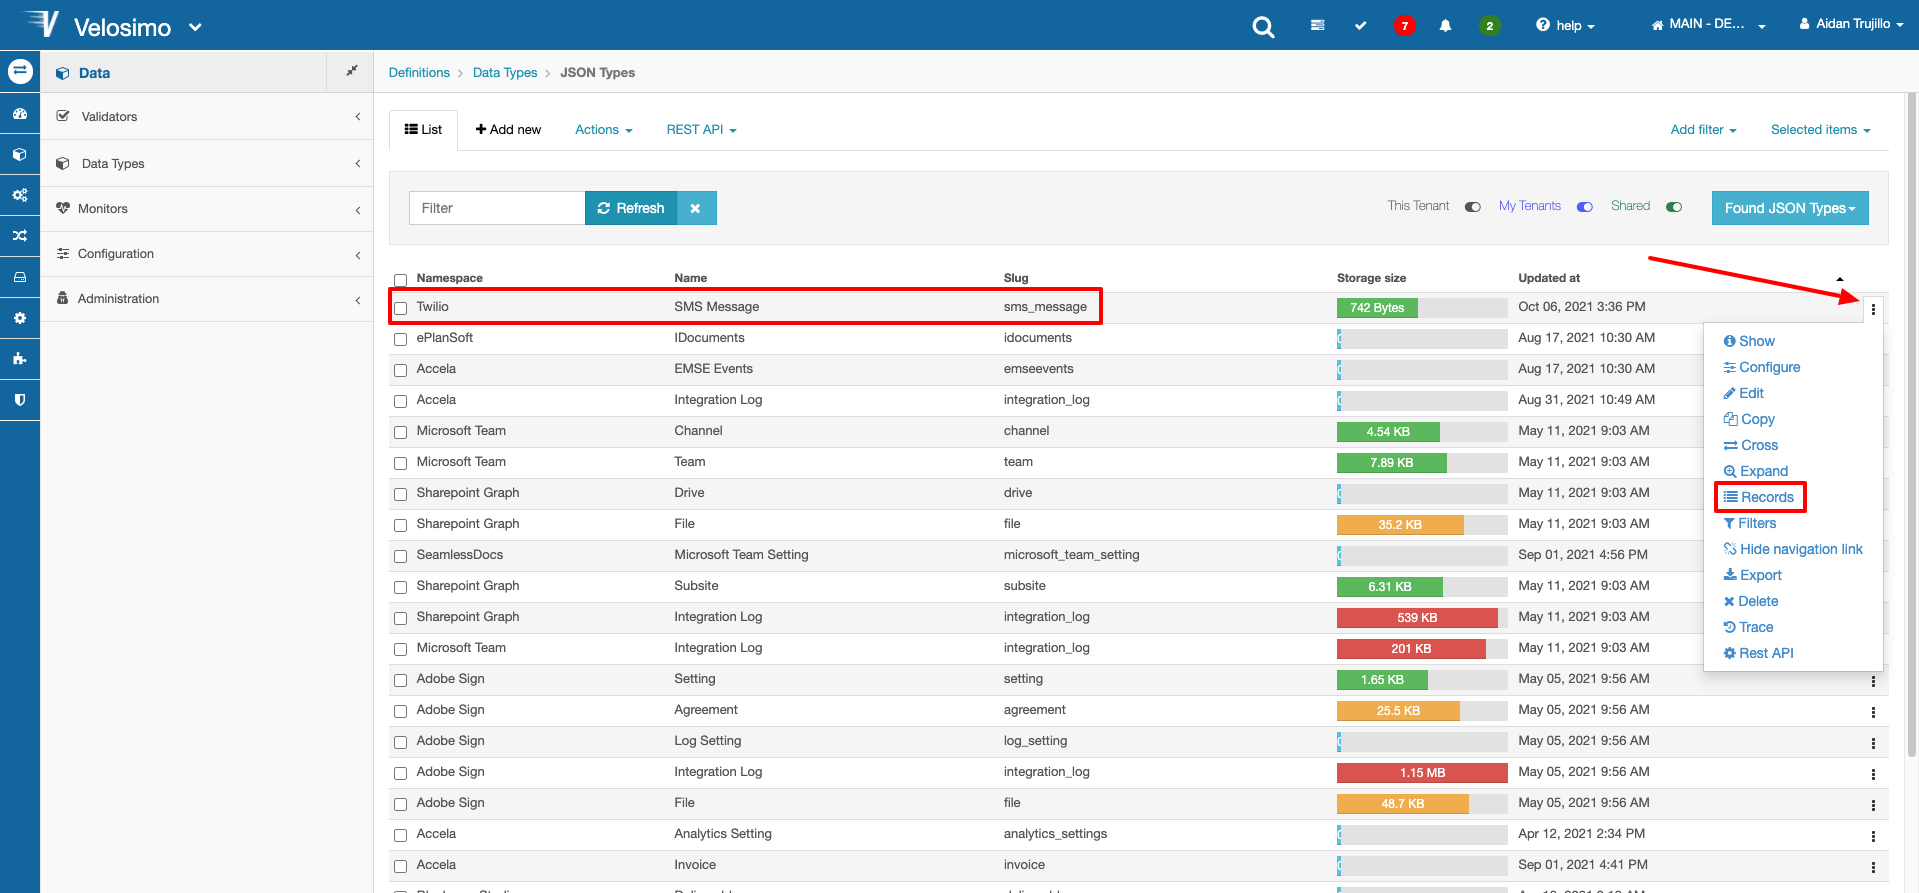
Click Add New at the top of the page.
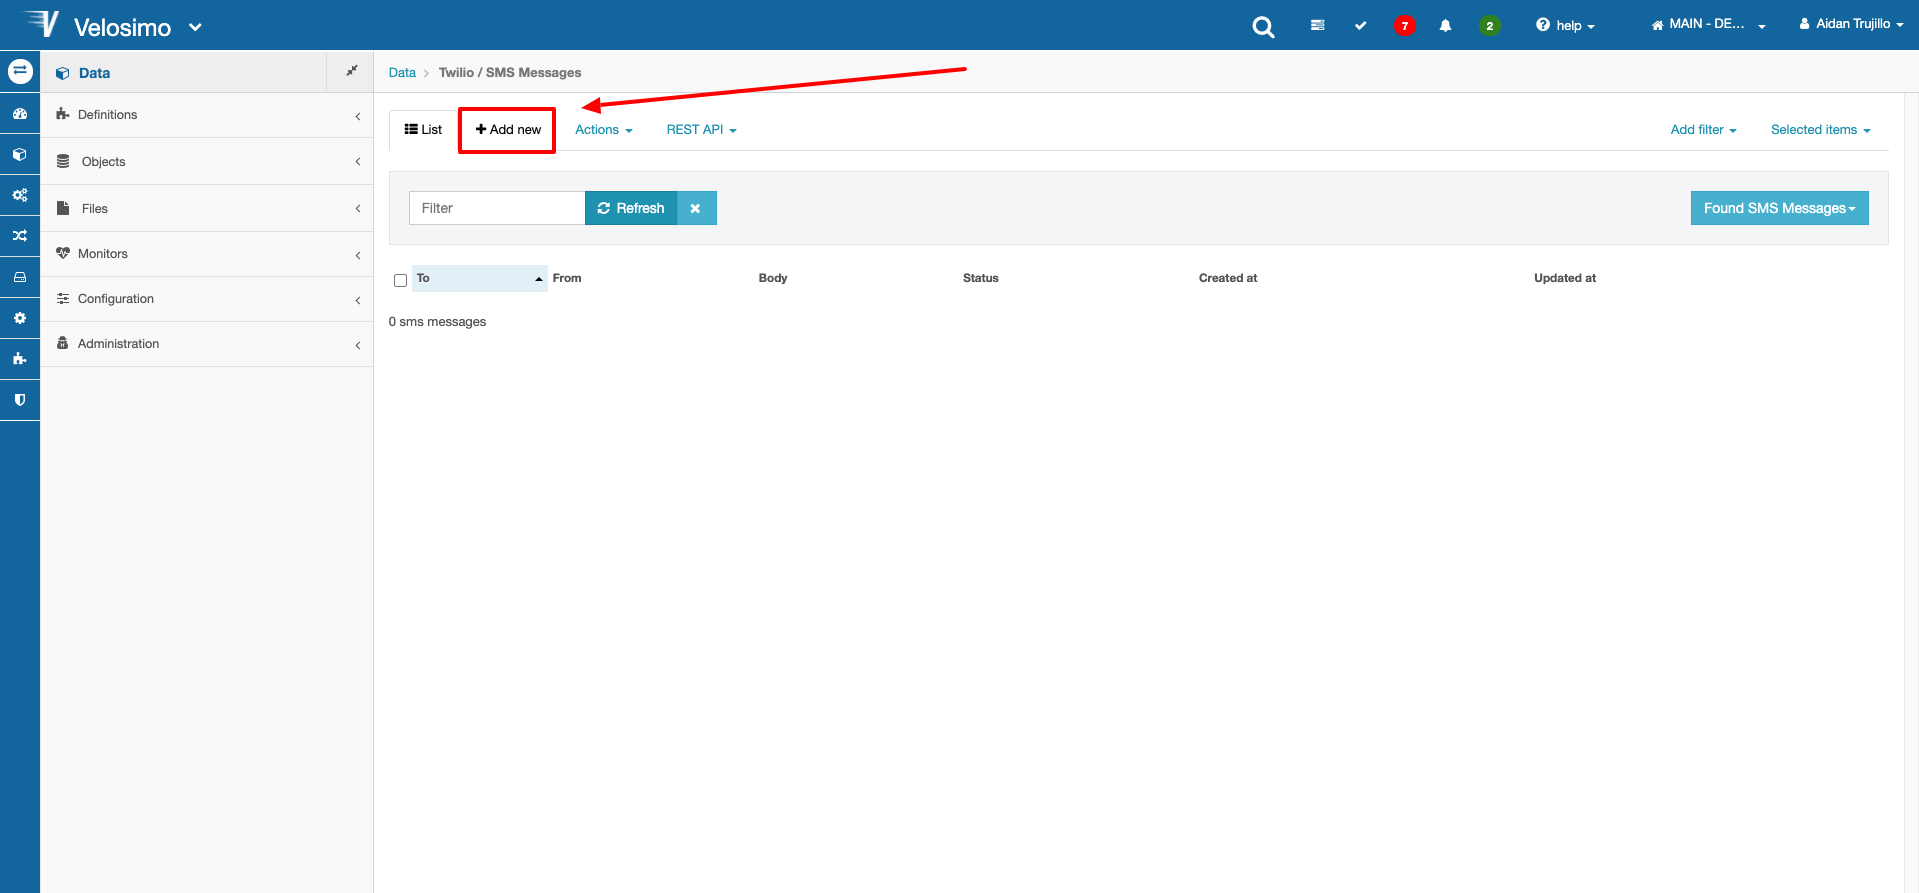
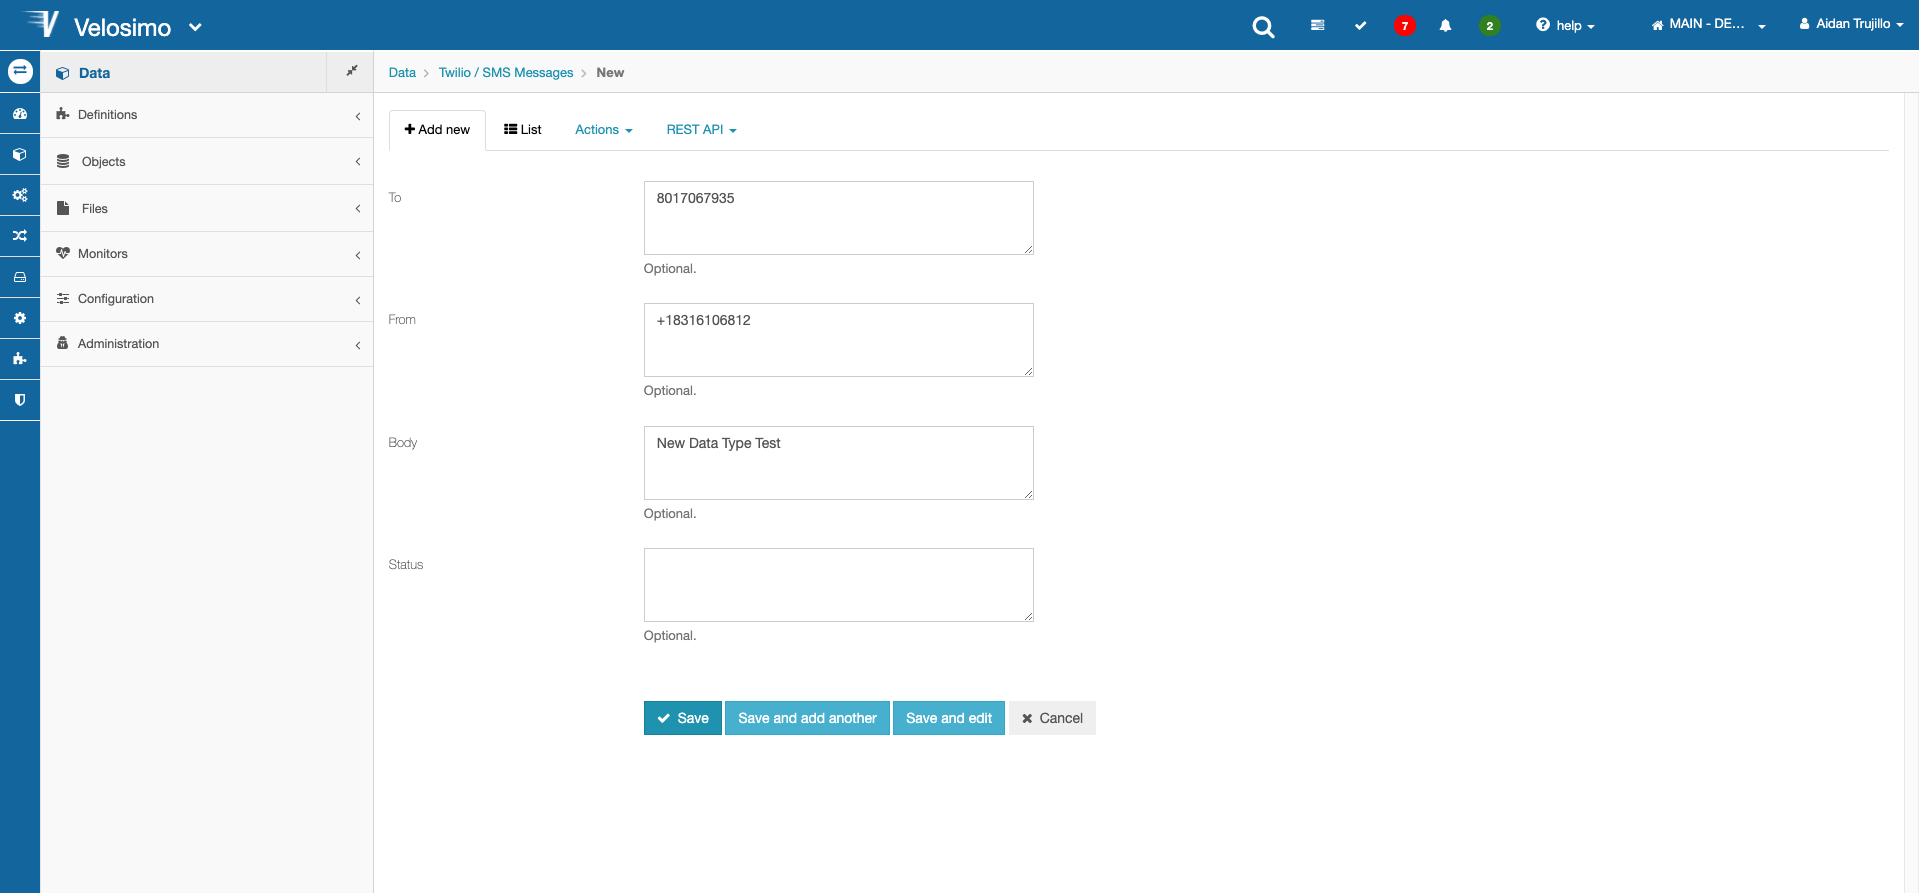
Now enter values into the forms and click save.
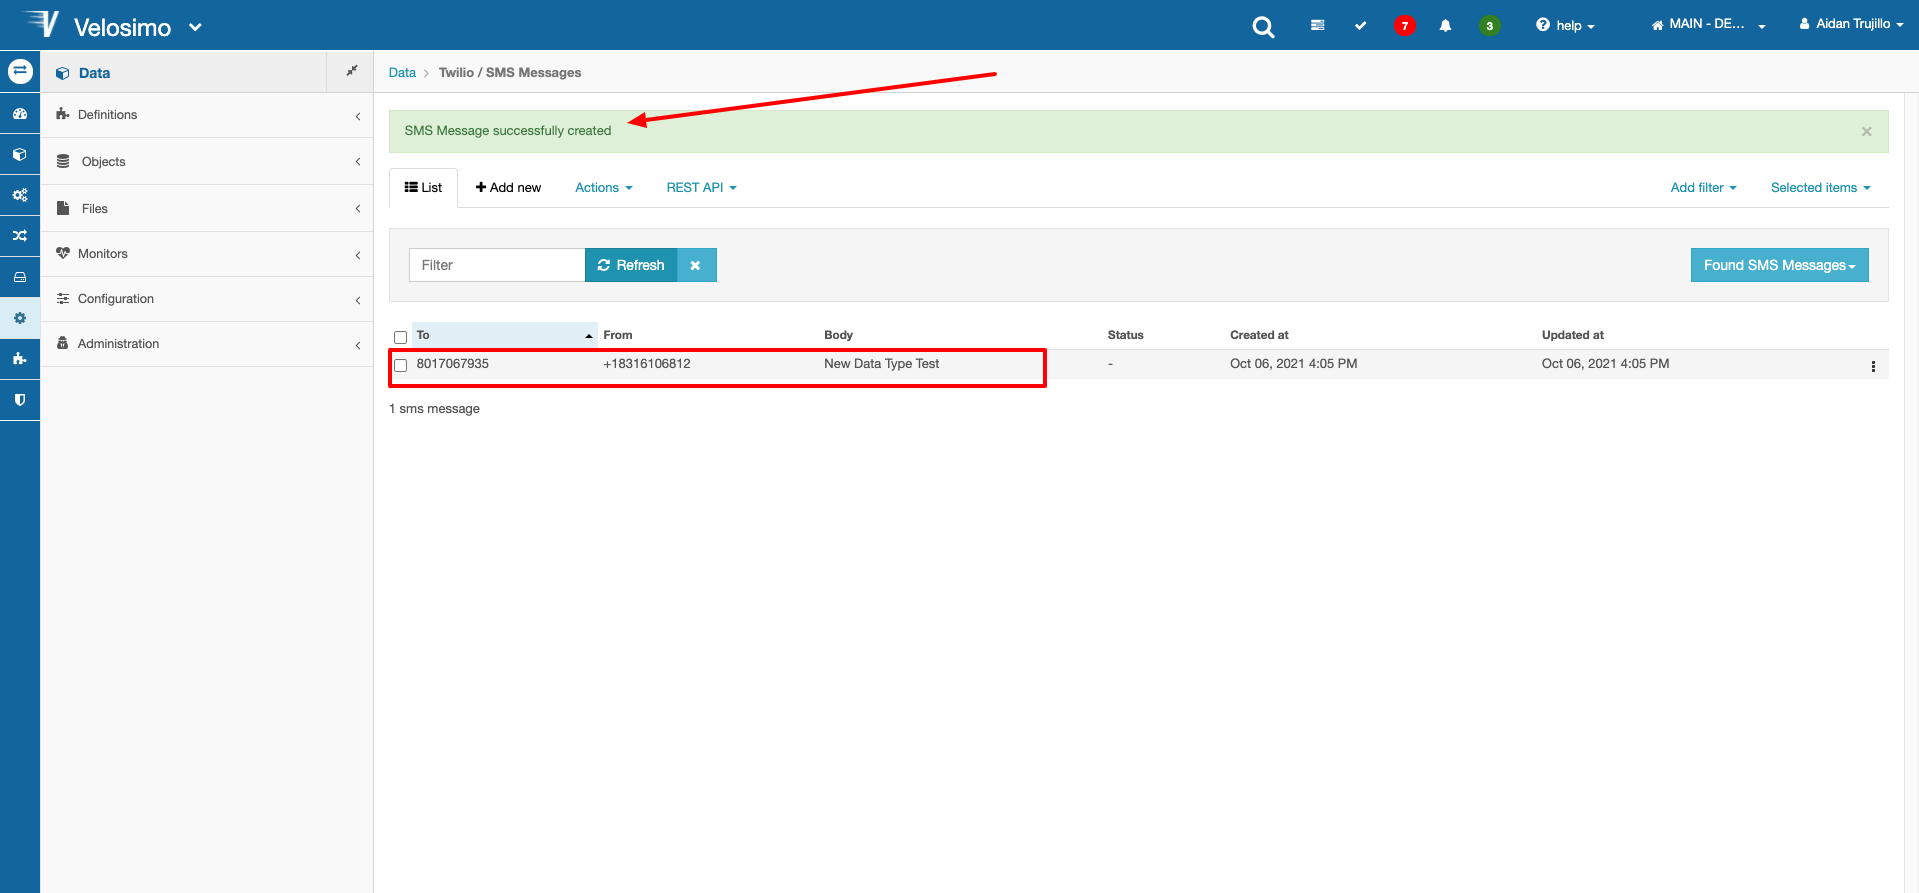
If creation of the data entry was successful, a status message will be displayed and the entry will be in the list.
Create New Event
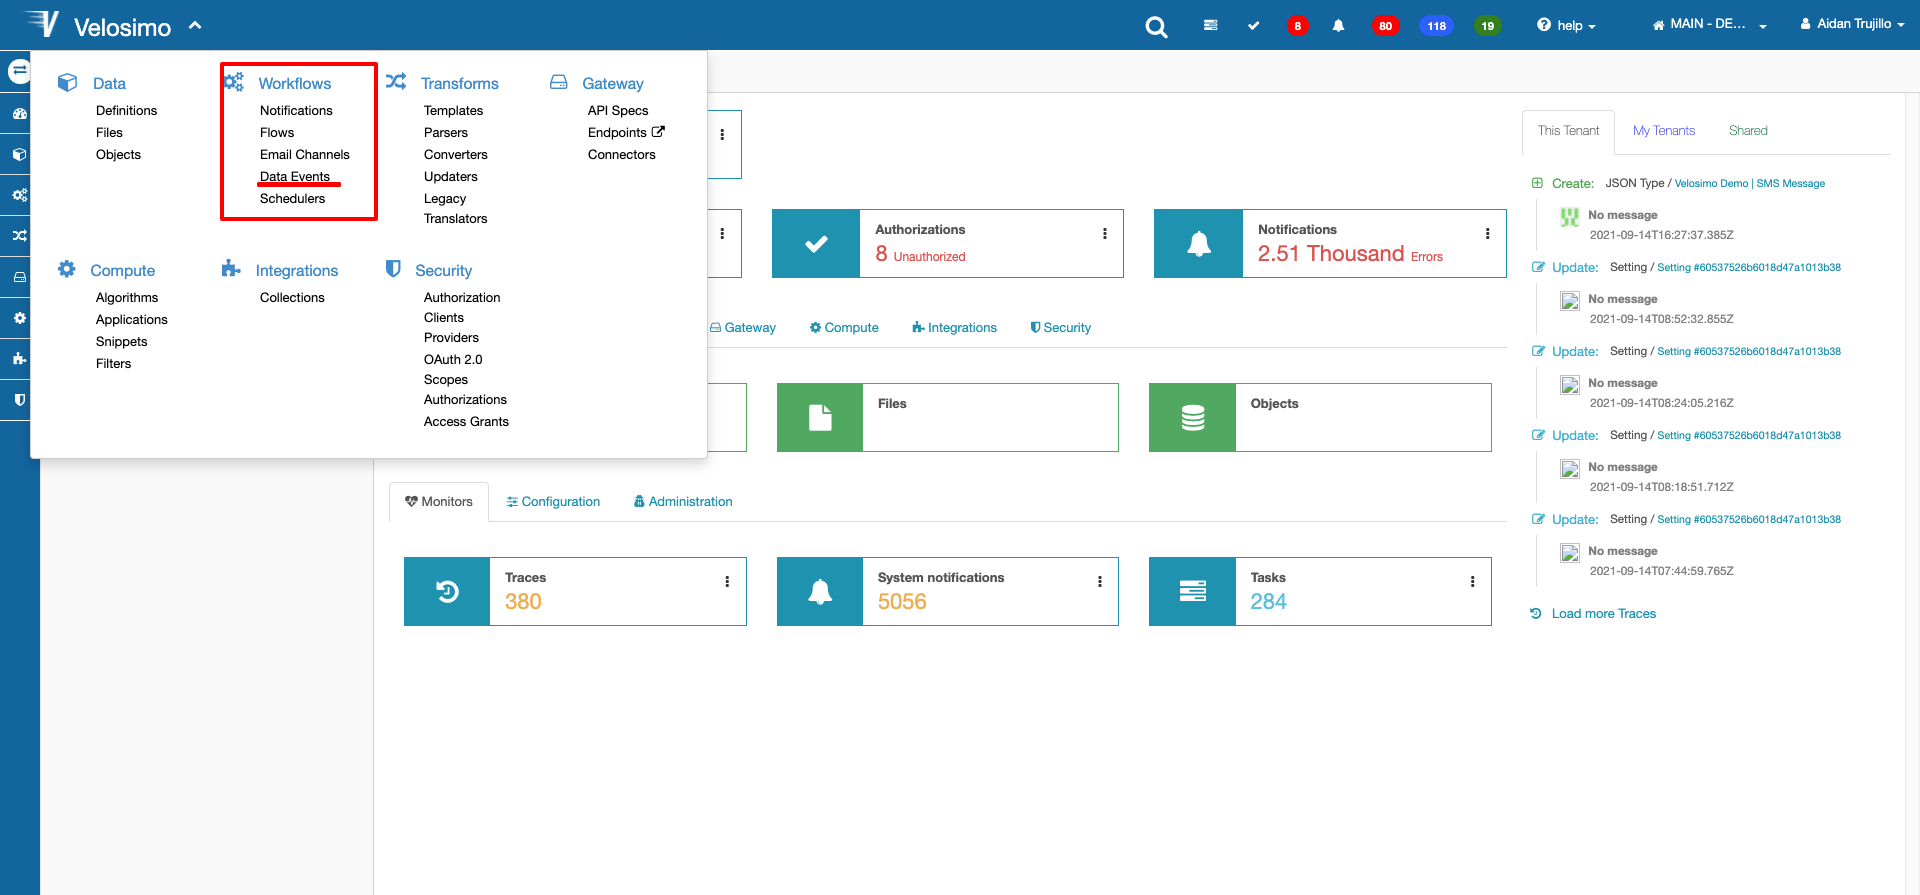
Navigate to Workflows -> Data Events on the Velosimo menu.
To learn more about Data Events. go here
Click Add New at the top of the page.
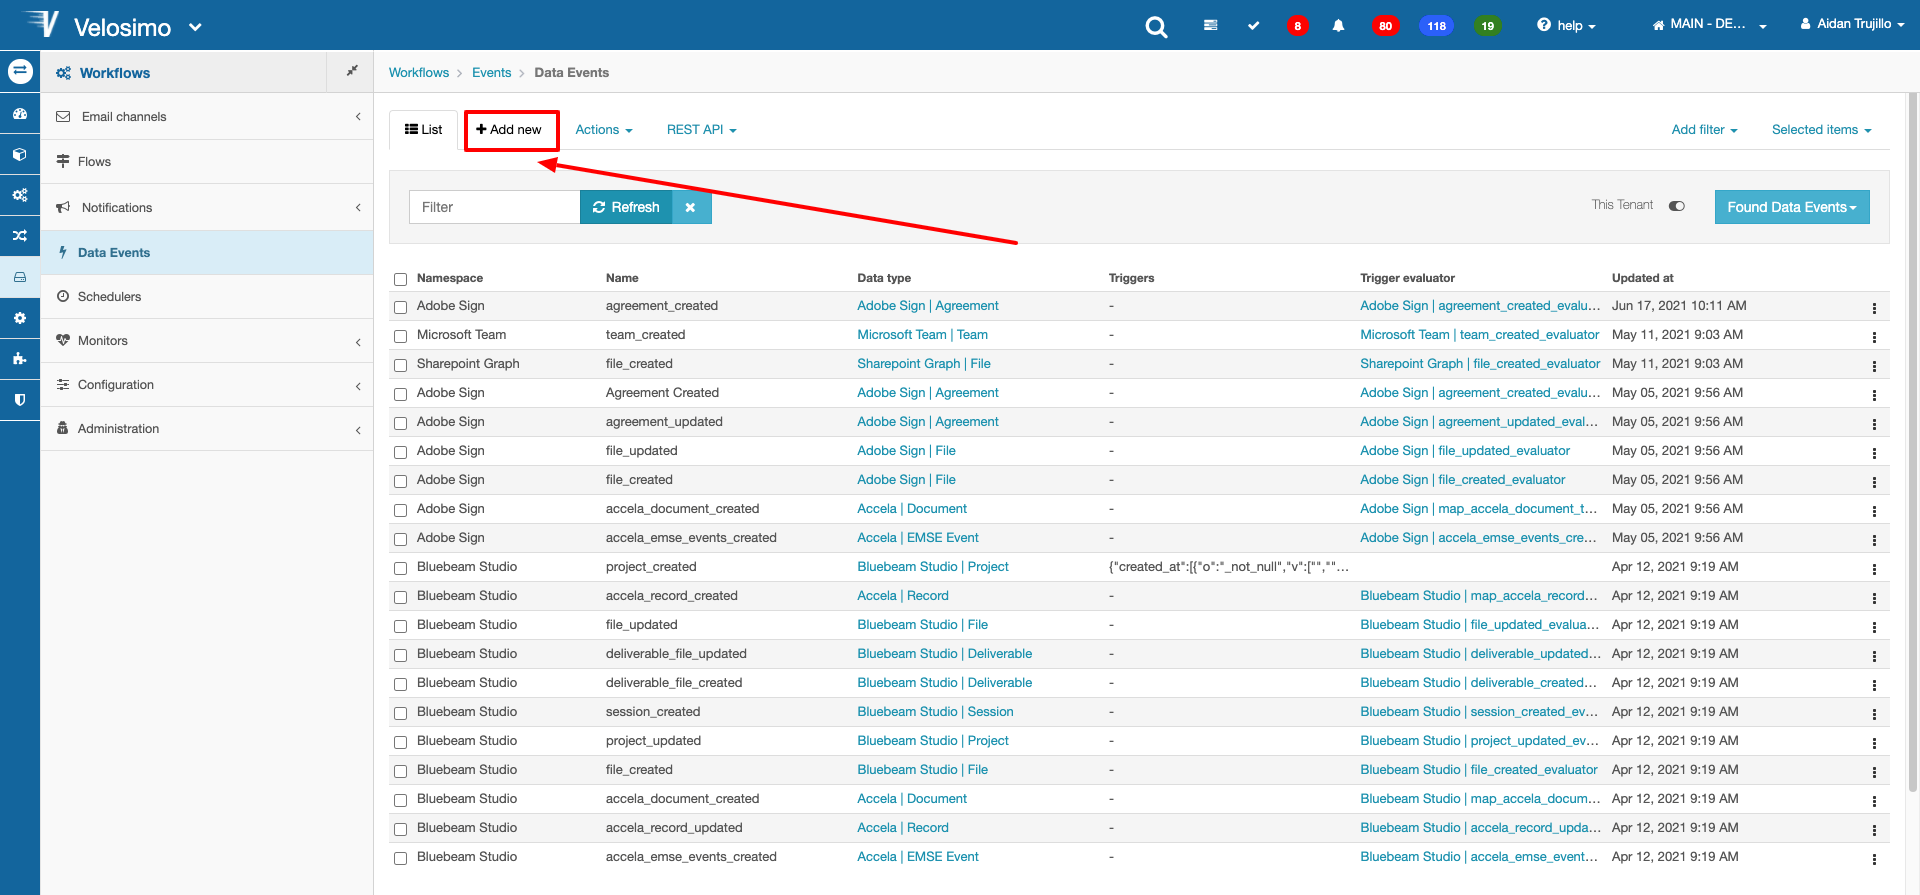
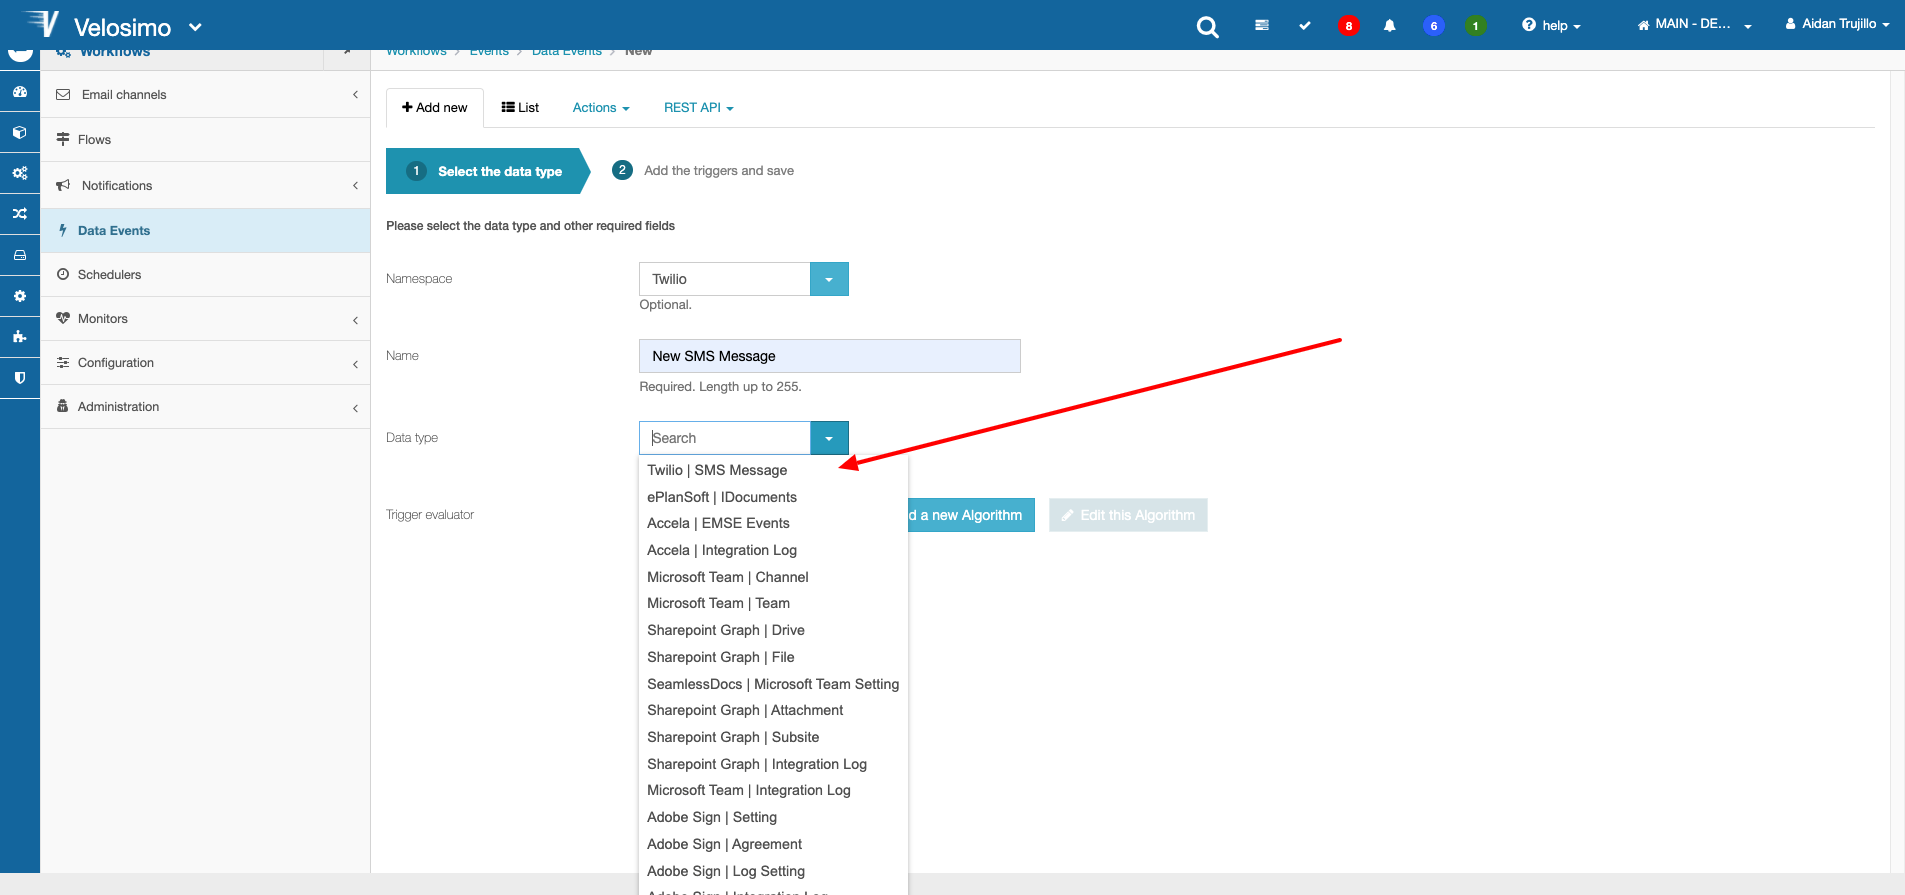
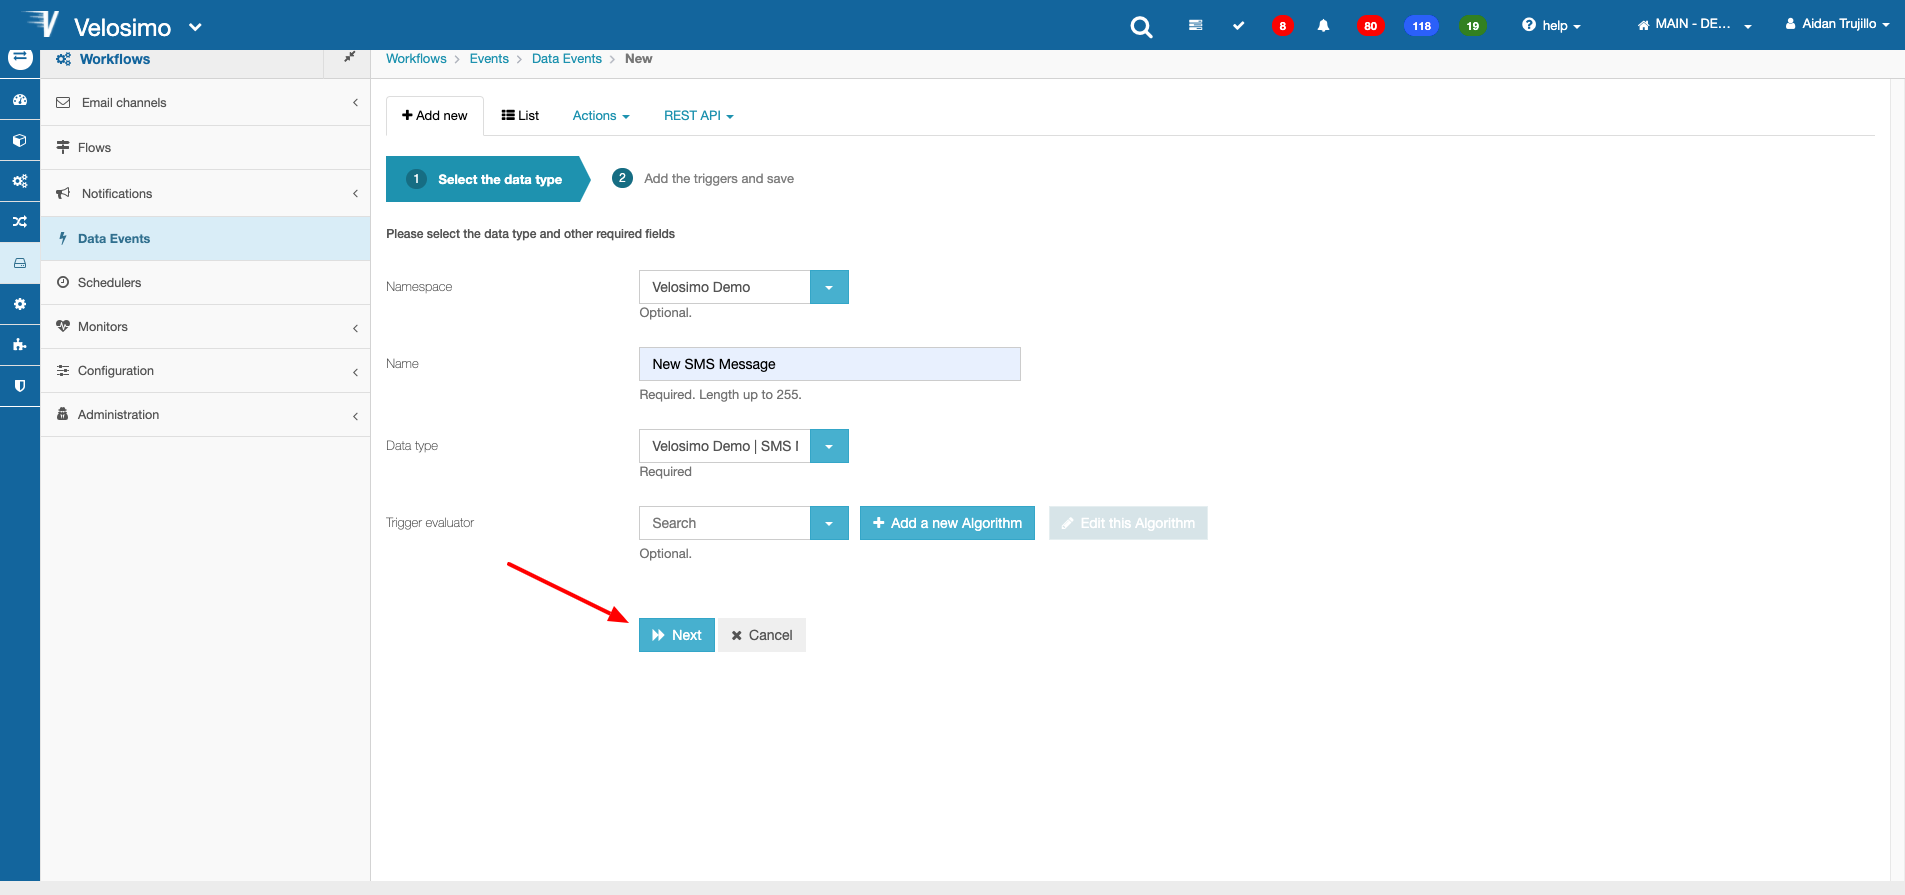
Enter a namespace, name, and select the Data Type you want to link.
Click next.
Next, define the Triggers. Think of this as the event listener that executes when the conditions are fulfilled. For this example we will be creating a Trigger that executes every time a new SMS Message data type record is created. Click Add to add trigger conditions. Click save once completed.
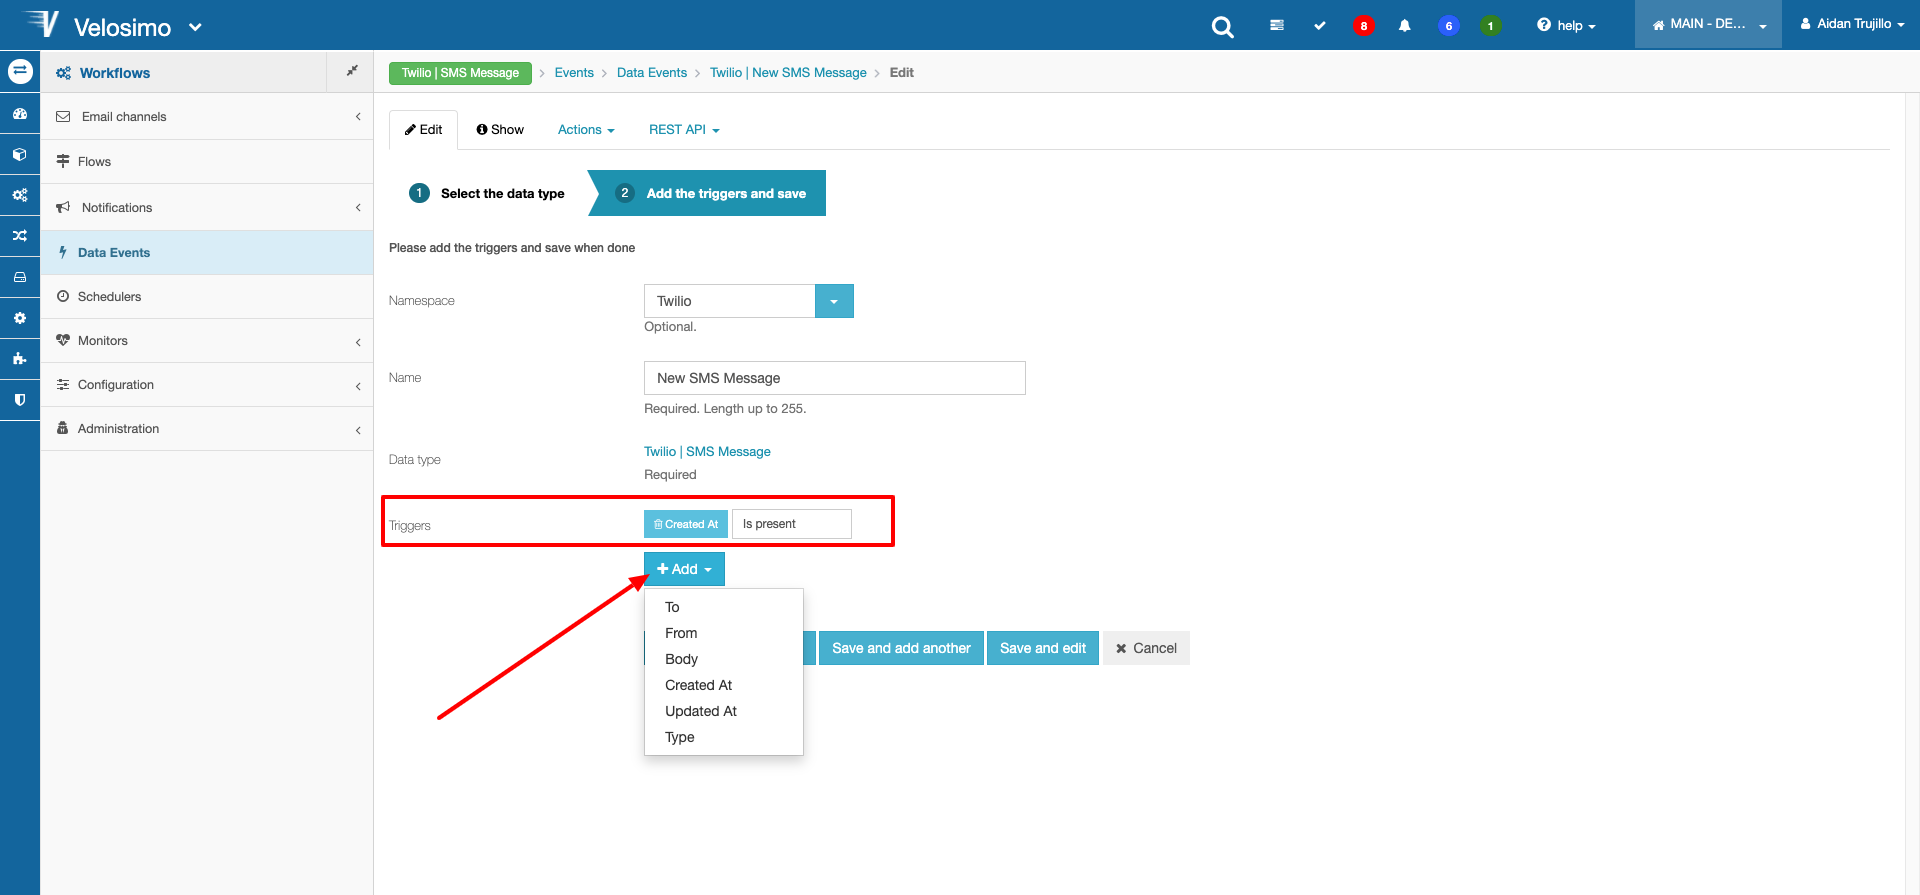
By selecting the Trigger "Created At" and setting its value to "Is present", we now have an event listener that will execute every time a new record for the data type SMS Message is created.
Create Flow
Navigate to Workflows -> Flows on the Velosimo platform.
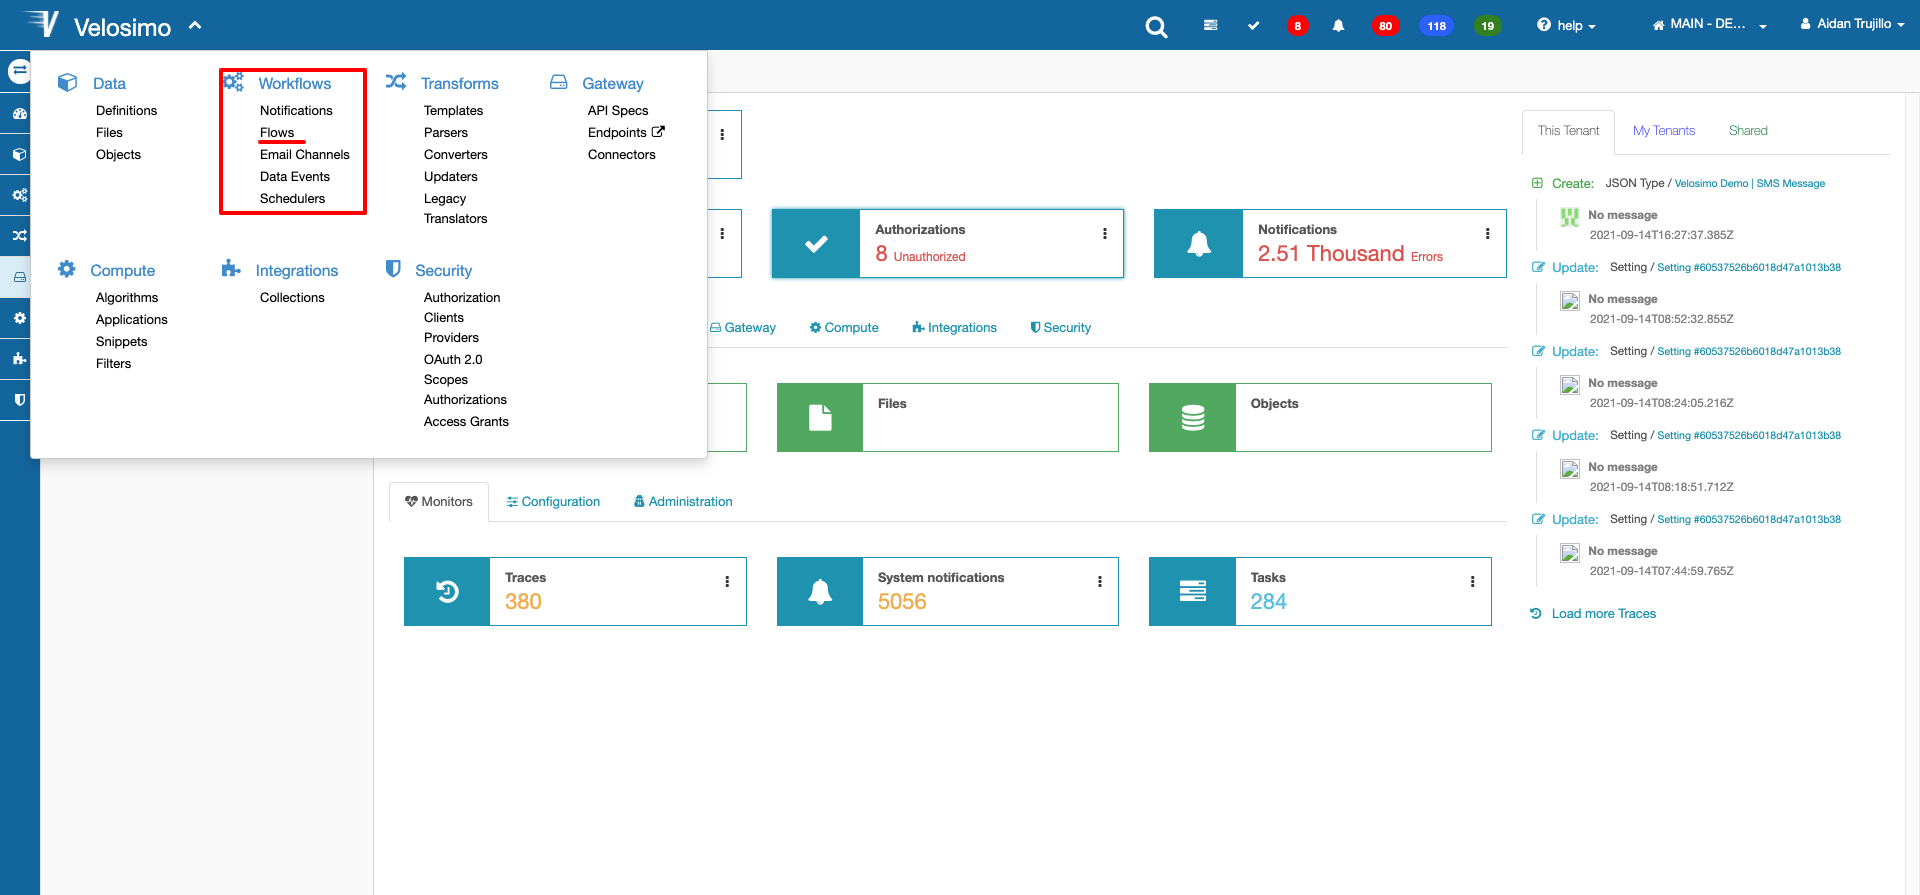
Click Add new at the top of the page.
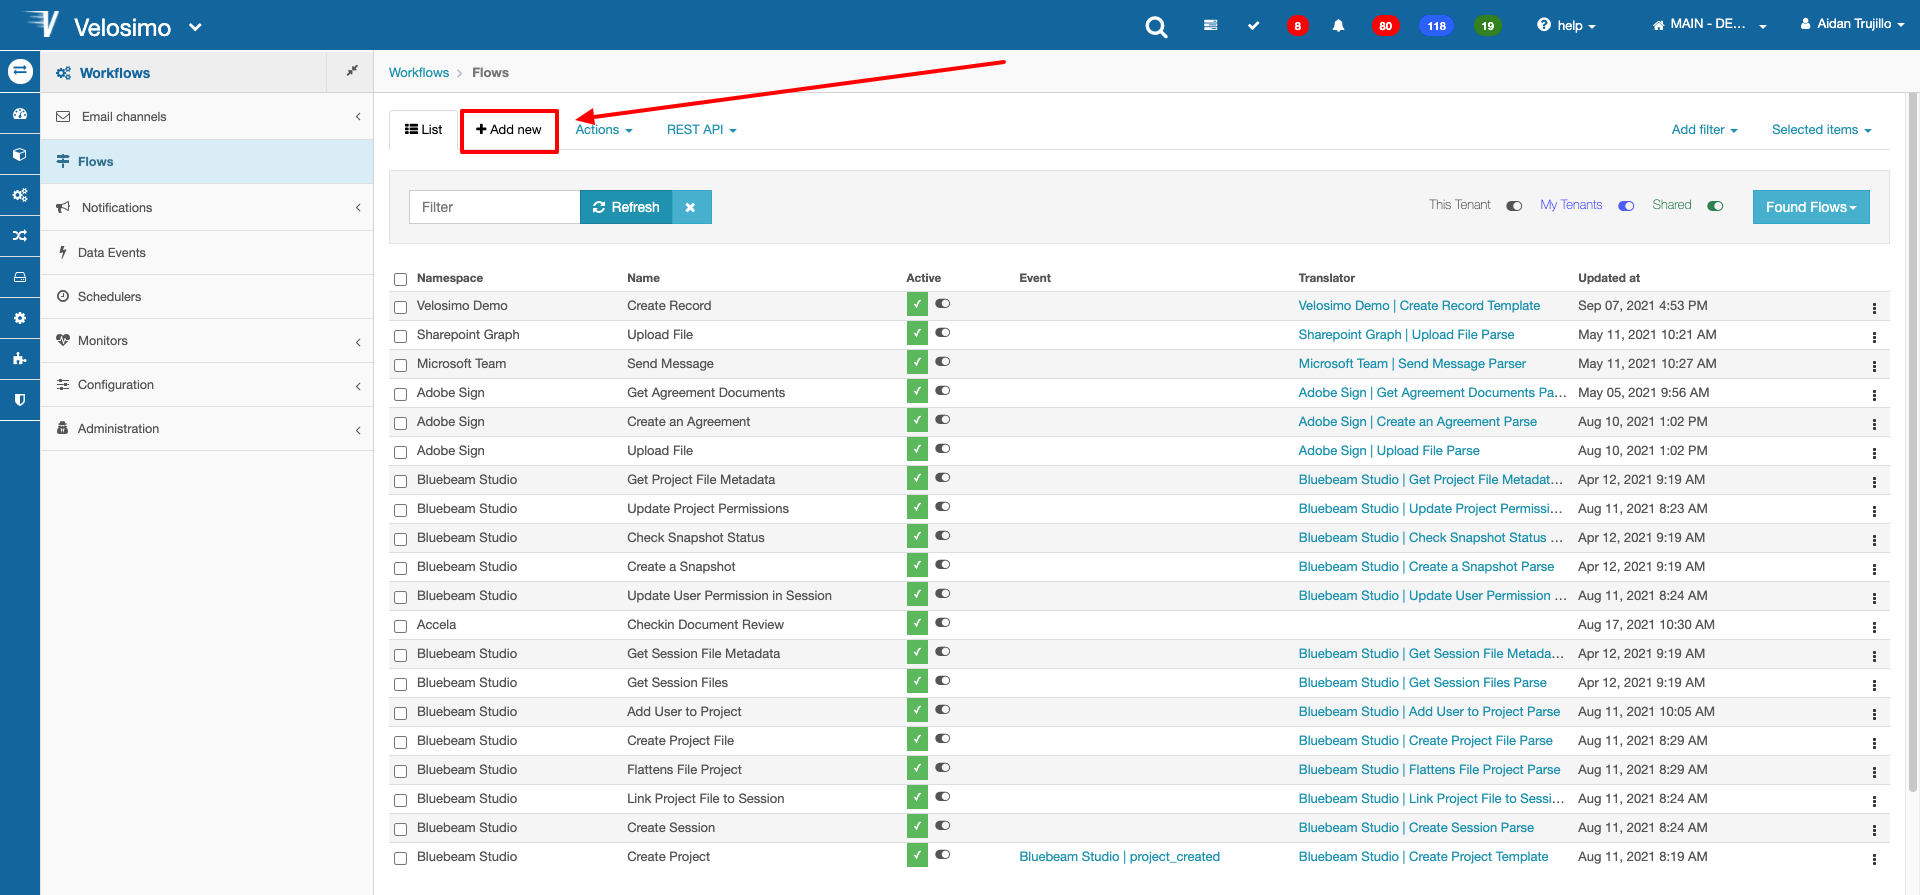
Enter a namespace and name.
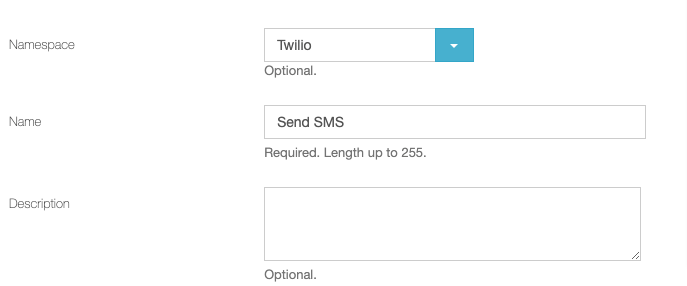
Next, for Event select the Data Event you want to link.
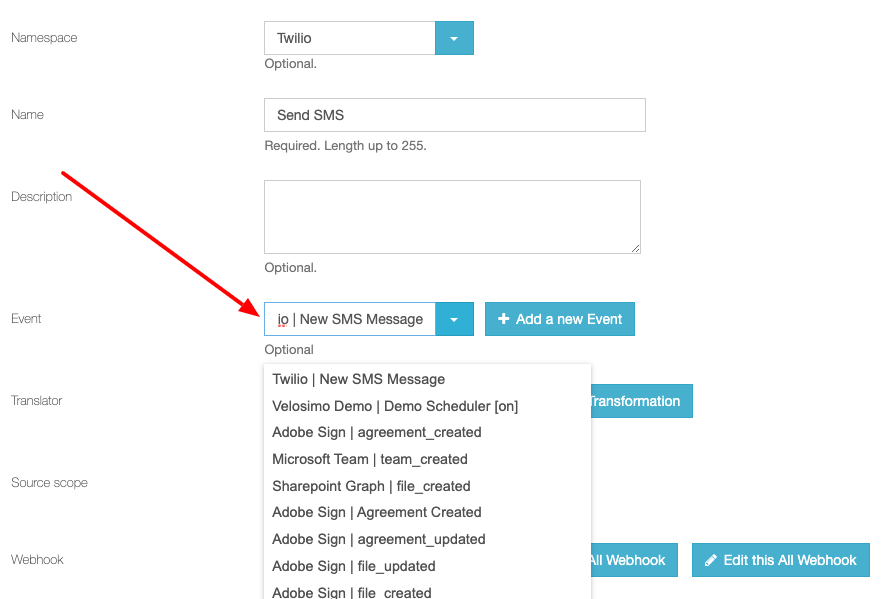
Translator/Template
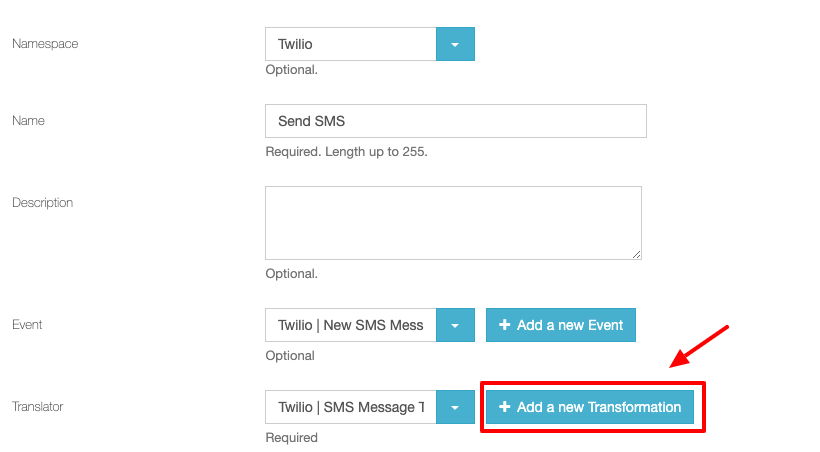
Translators facilitate the transfer of data inside the flow. Click Add a new Transformation to begin creating a new Translator.
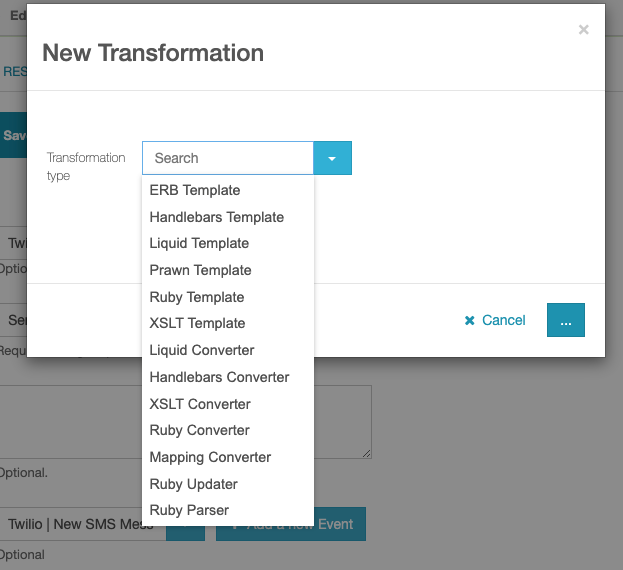
Select a Transformation type from the list. For this example a Ruby Template will be used. Once selected, click the button in the bottom right.
To learn more about Template transformers, go here
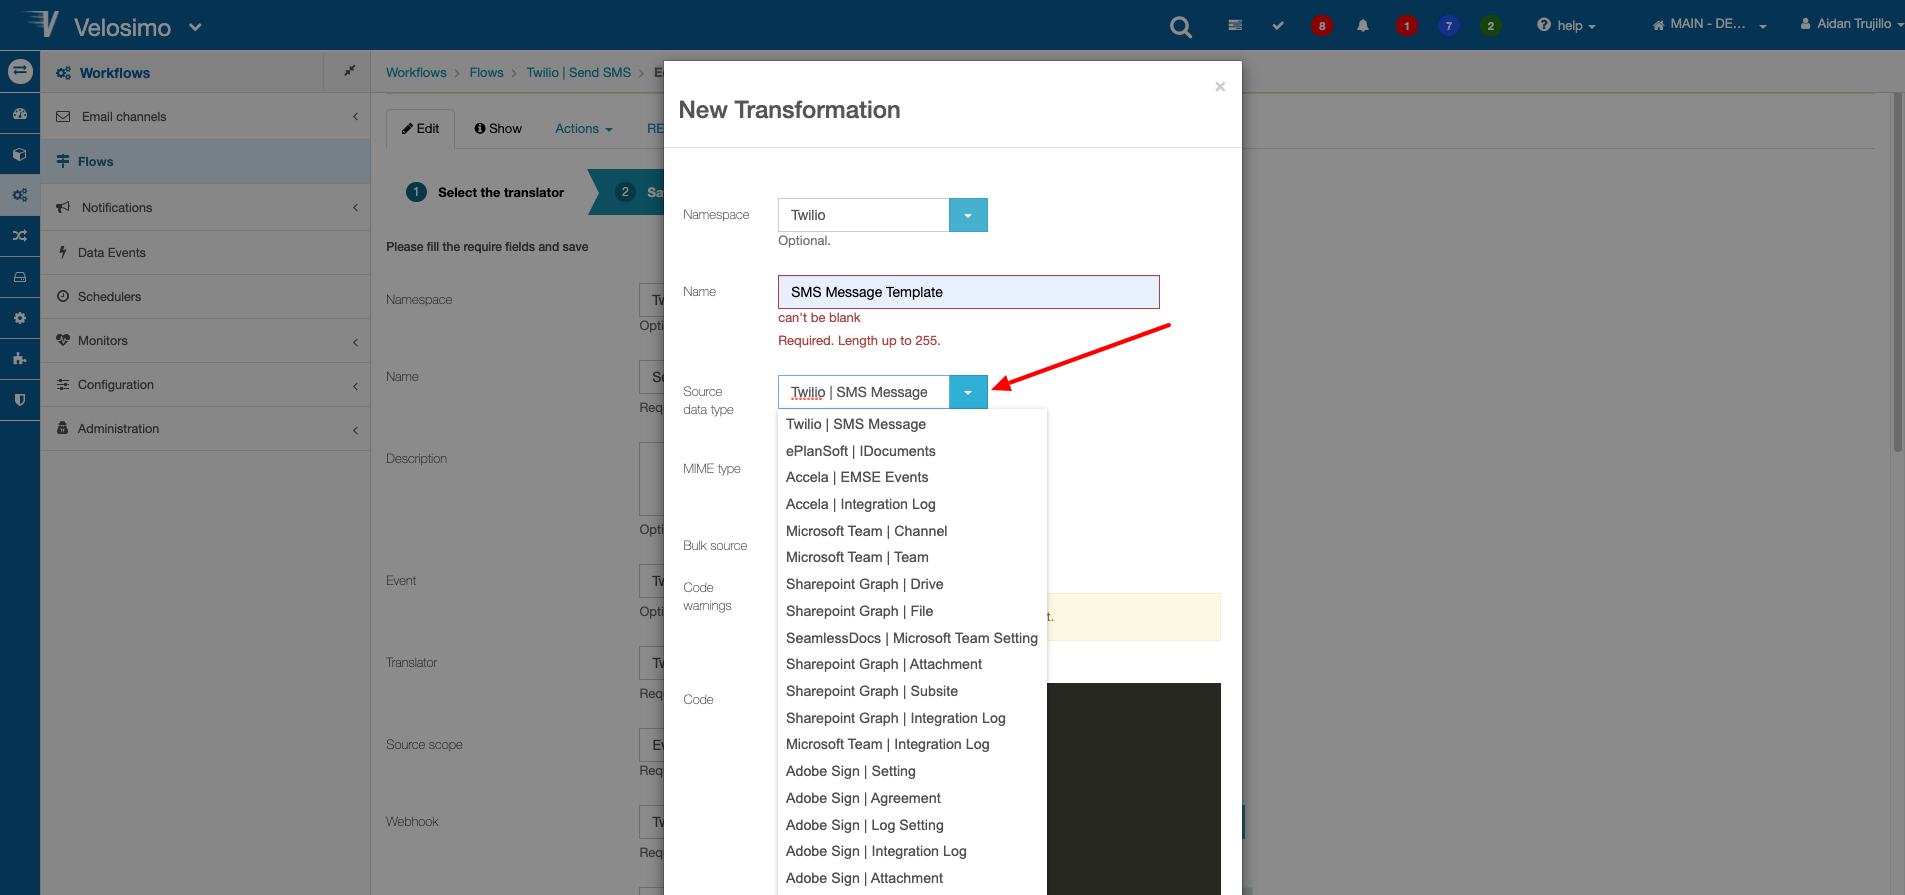
Then, enter a namespace and name, and select a data type for the Source Data Type. This allows you to directly reference the properties of the data type in the template code.
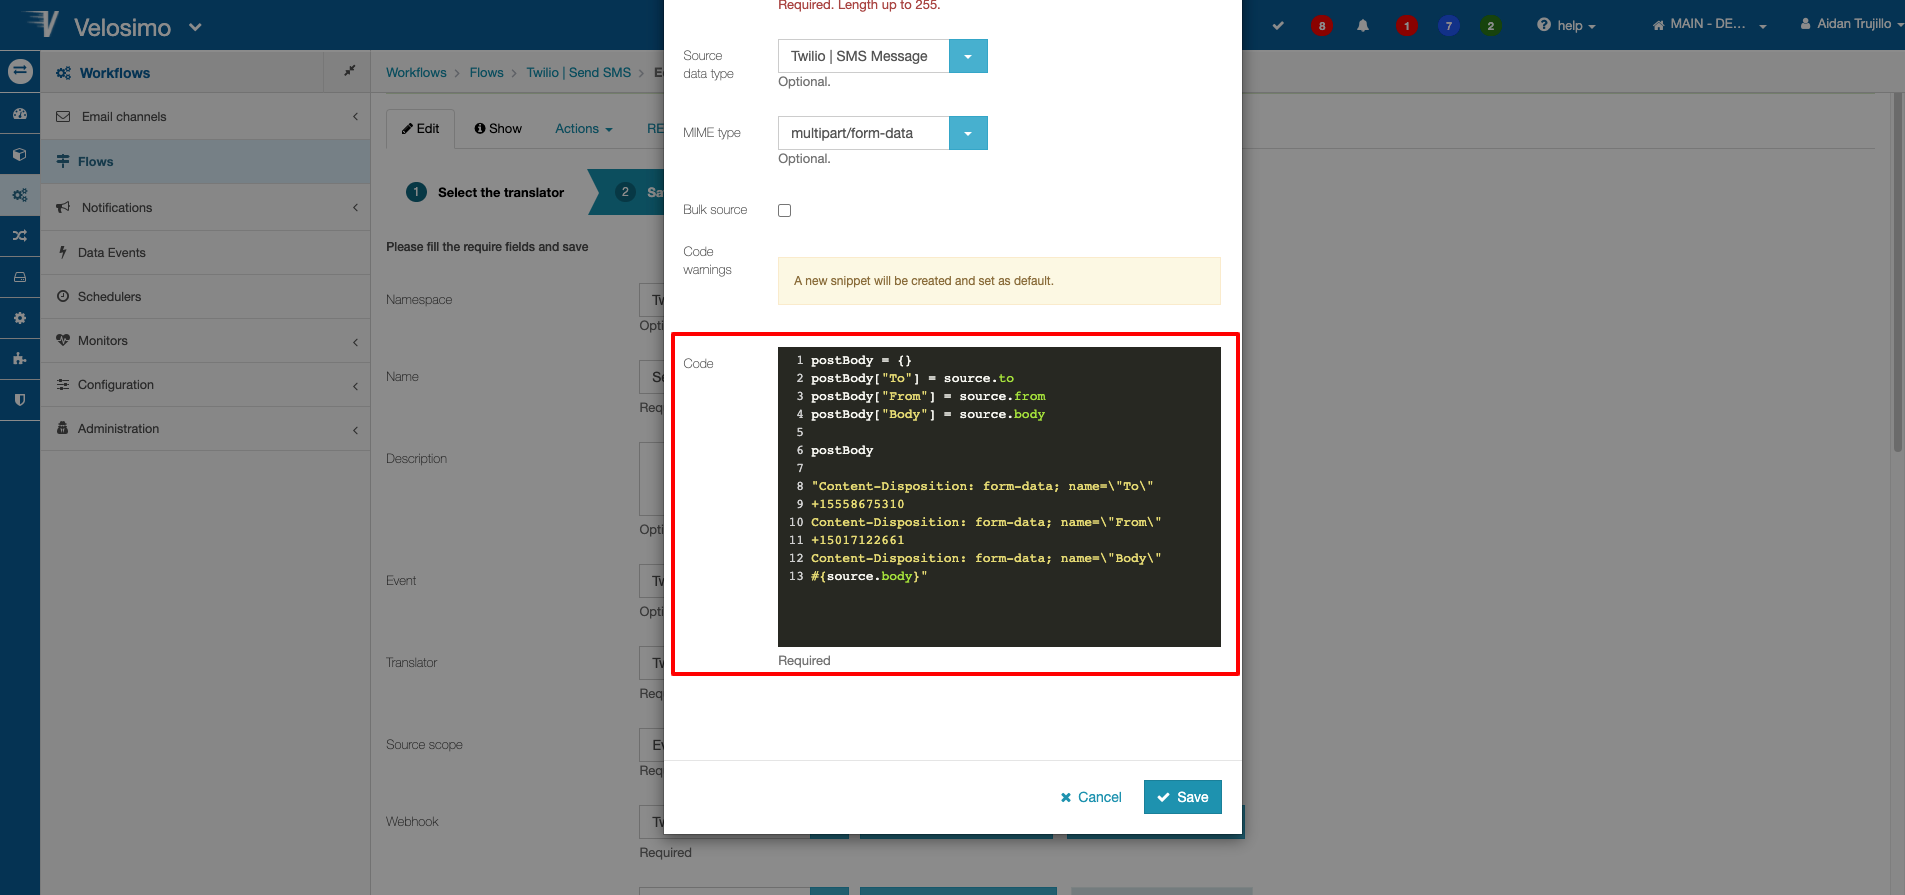
Next write the template code. If you defined the source data type, you can reference the property values from the data type using "source.____". Click "Save" once completed and then click Next to go to the next step of configuring the Flow.
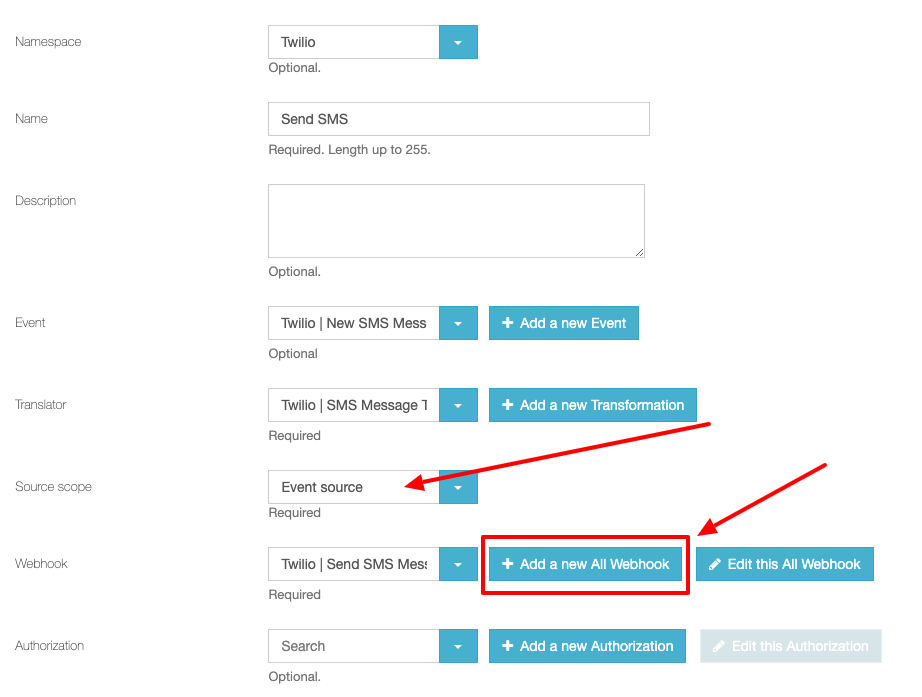
Set Source Scope to Event Source. Next, we must create a Resource for the Flow's Webhook.
Resource
Think of the Resource as the Flow's API. It can be configured to a local API on the Velosimo platform or it can be configured to an external API, such as the Twilio SMS Message API used in this tutorial.
Using the Velosimo menu, open Gateway -> Connectors in a new tab and keep the Flow tab open.
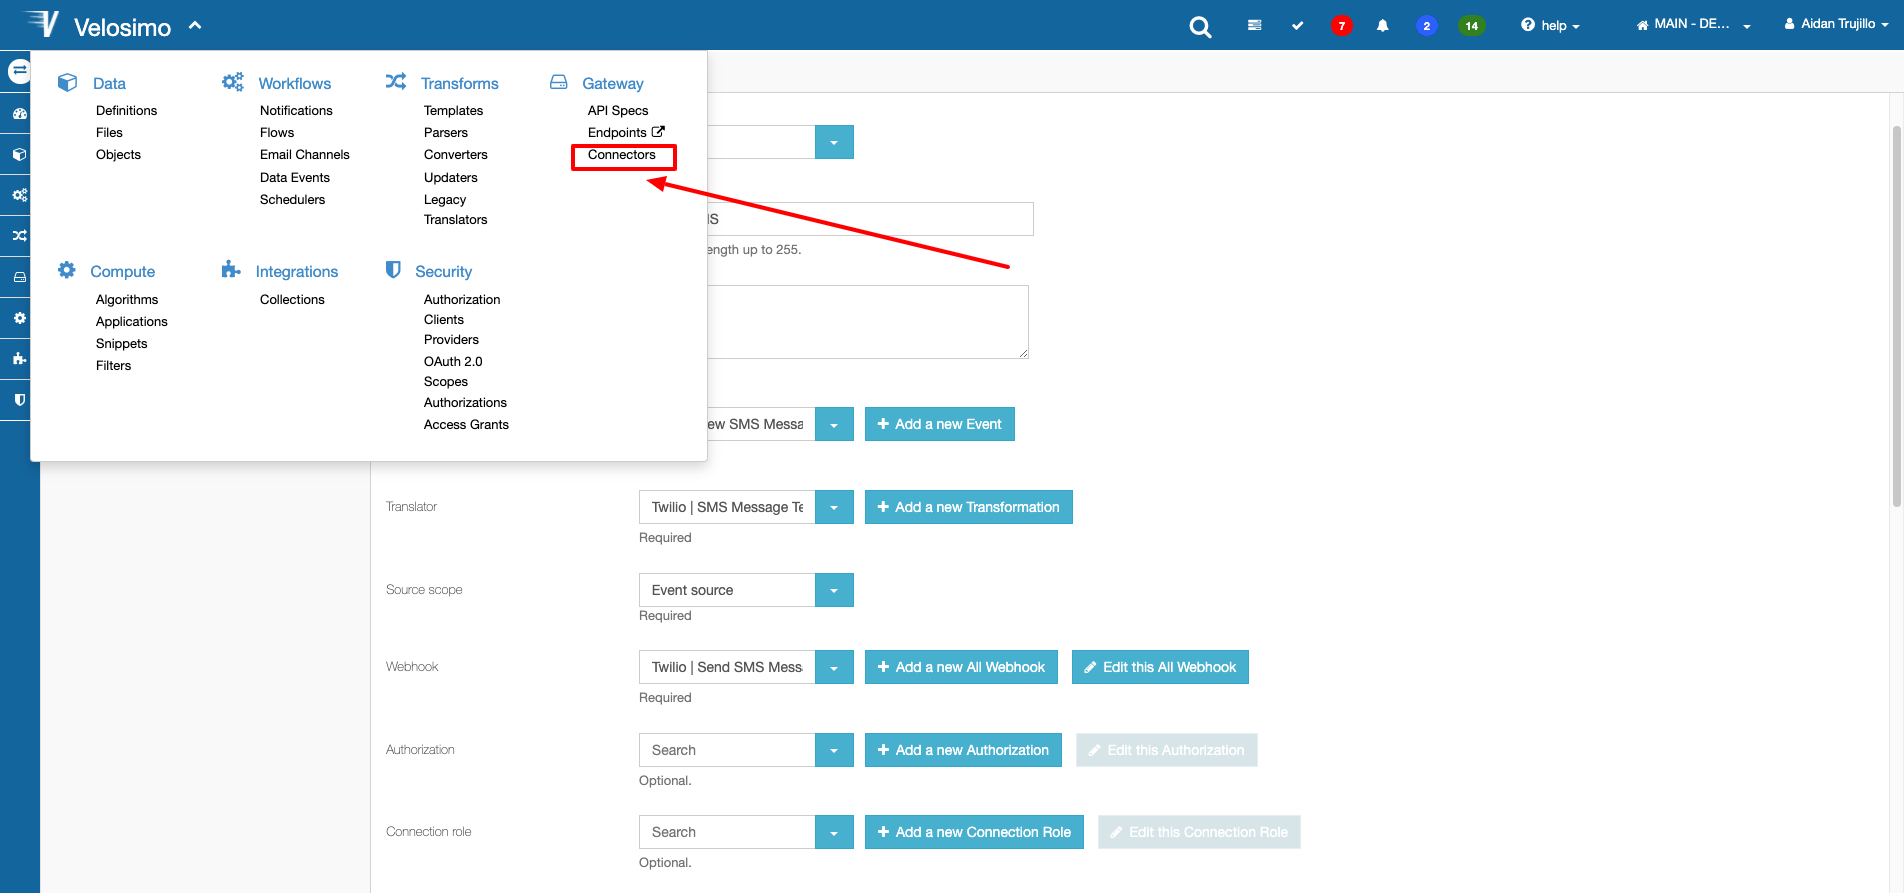
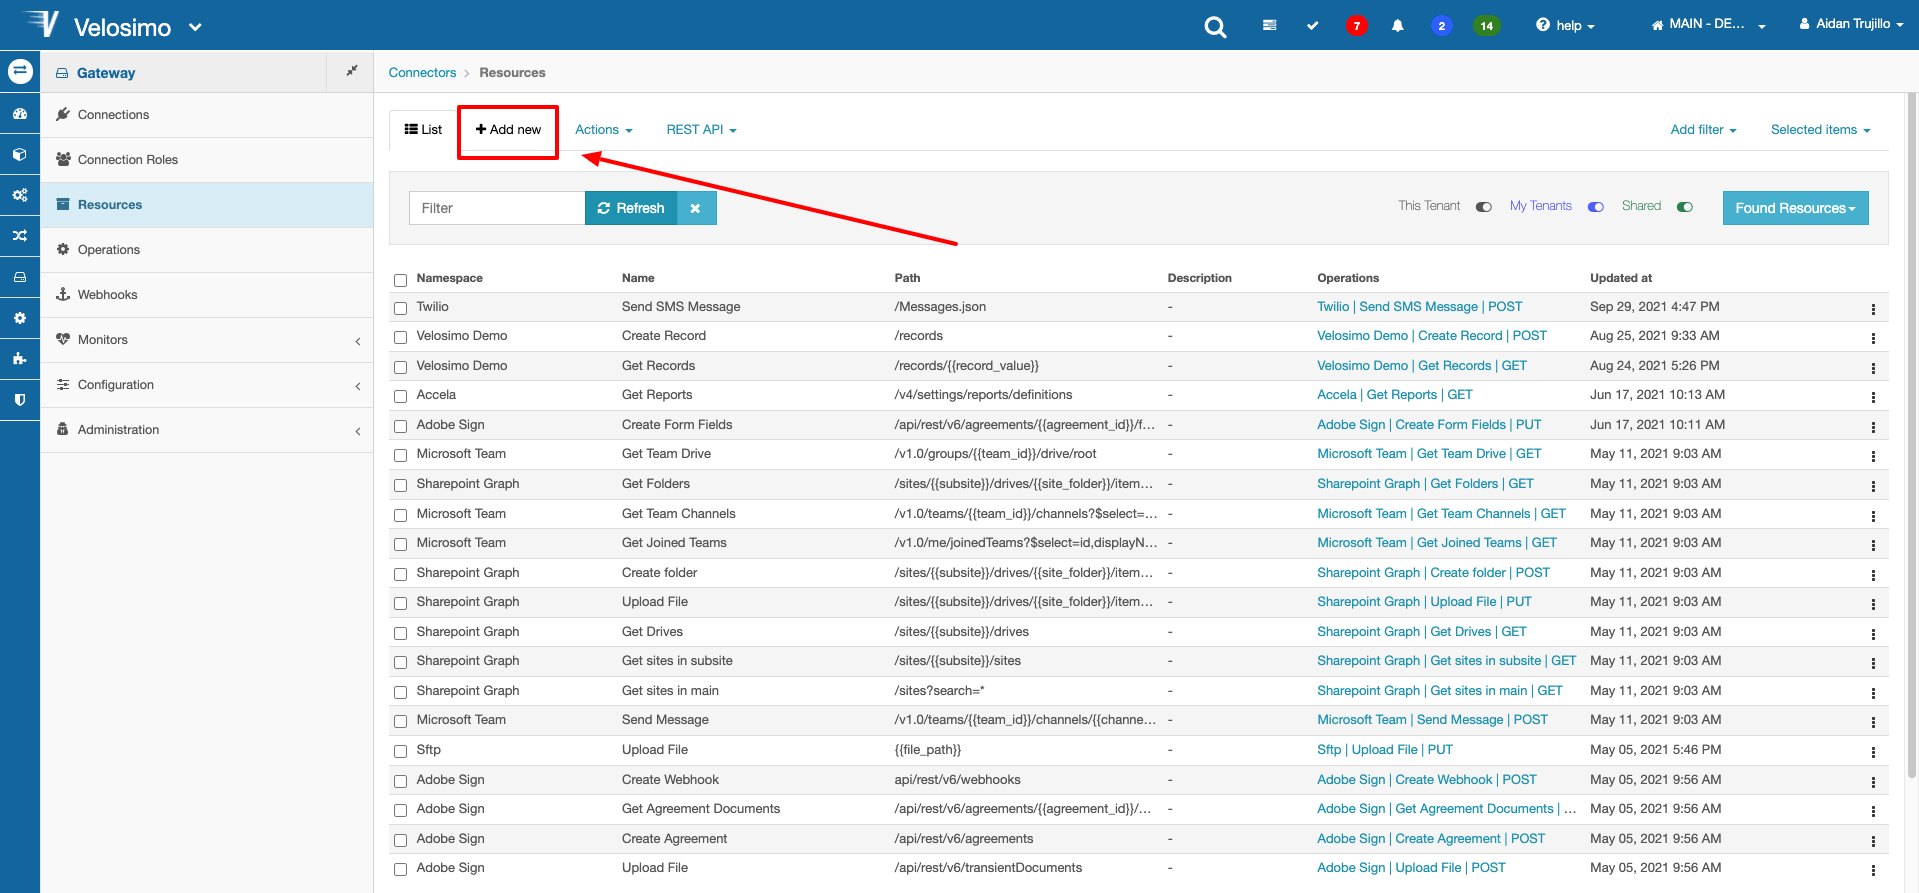
Click Add New at the top of the page.
Set the namespace and enter a name. Then enter the URL path for the API you are linking to the flow.
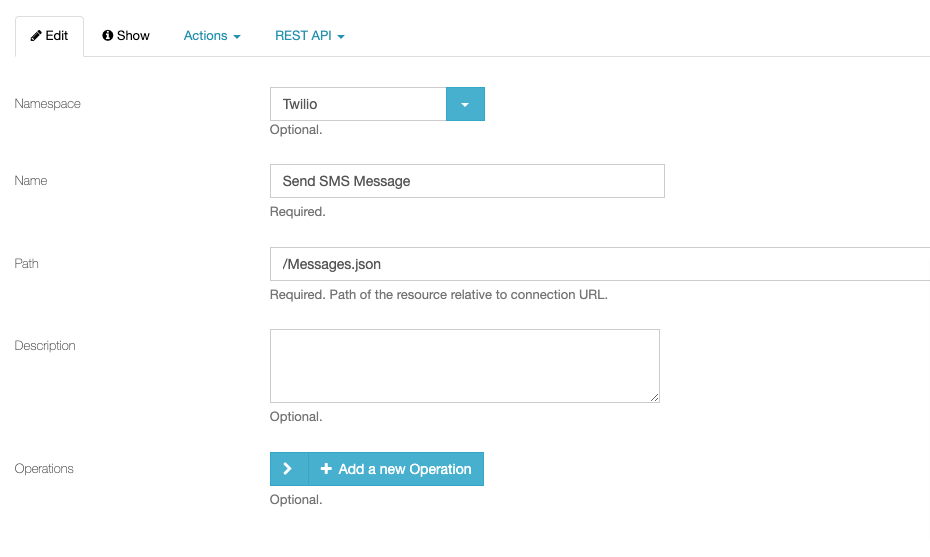
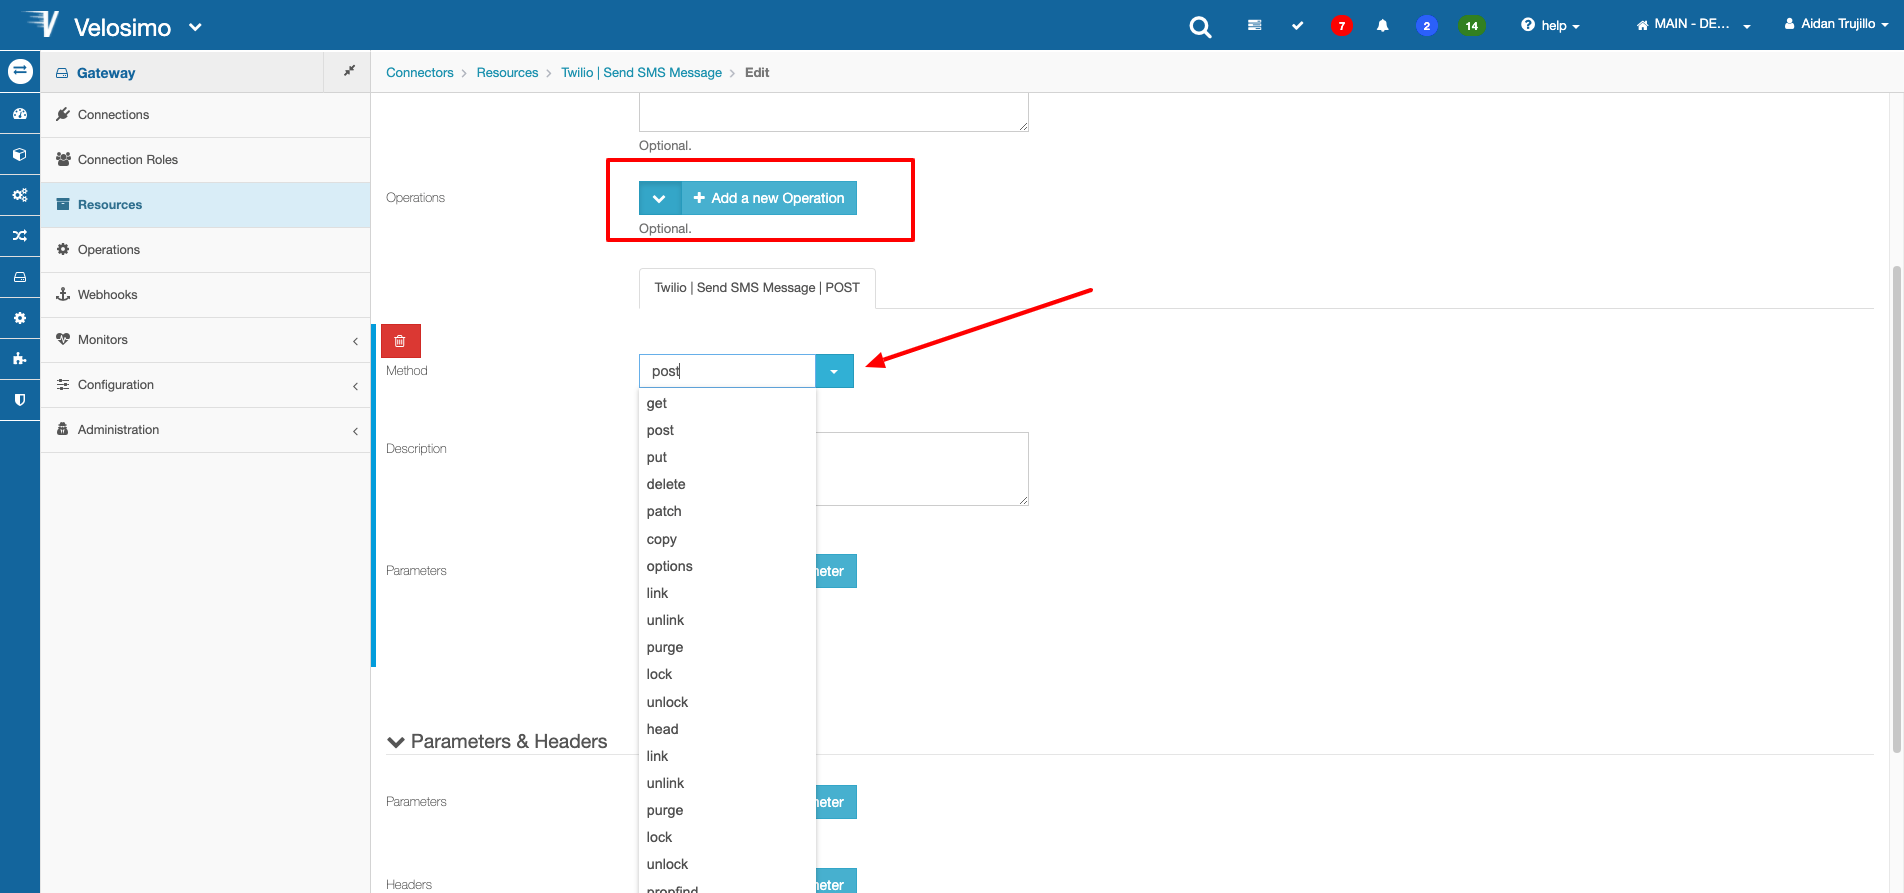
Click Add a New Operation, then select a REST method from the list. Once completed click save.
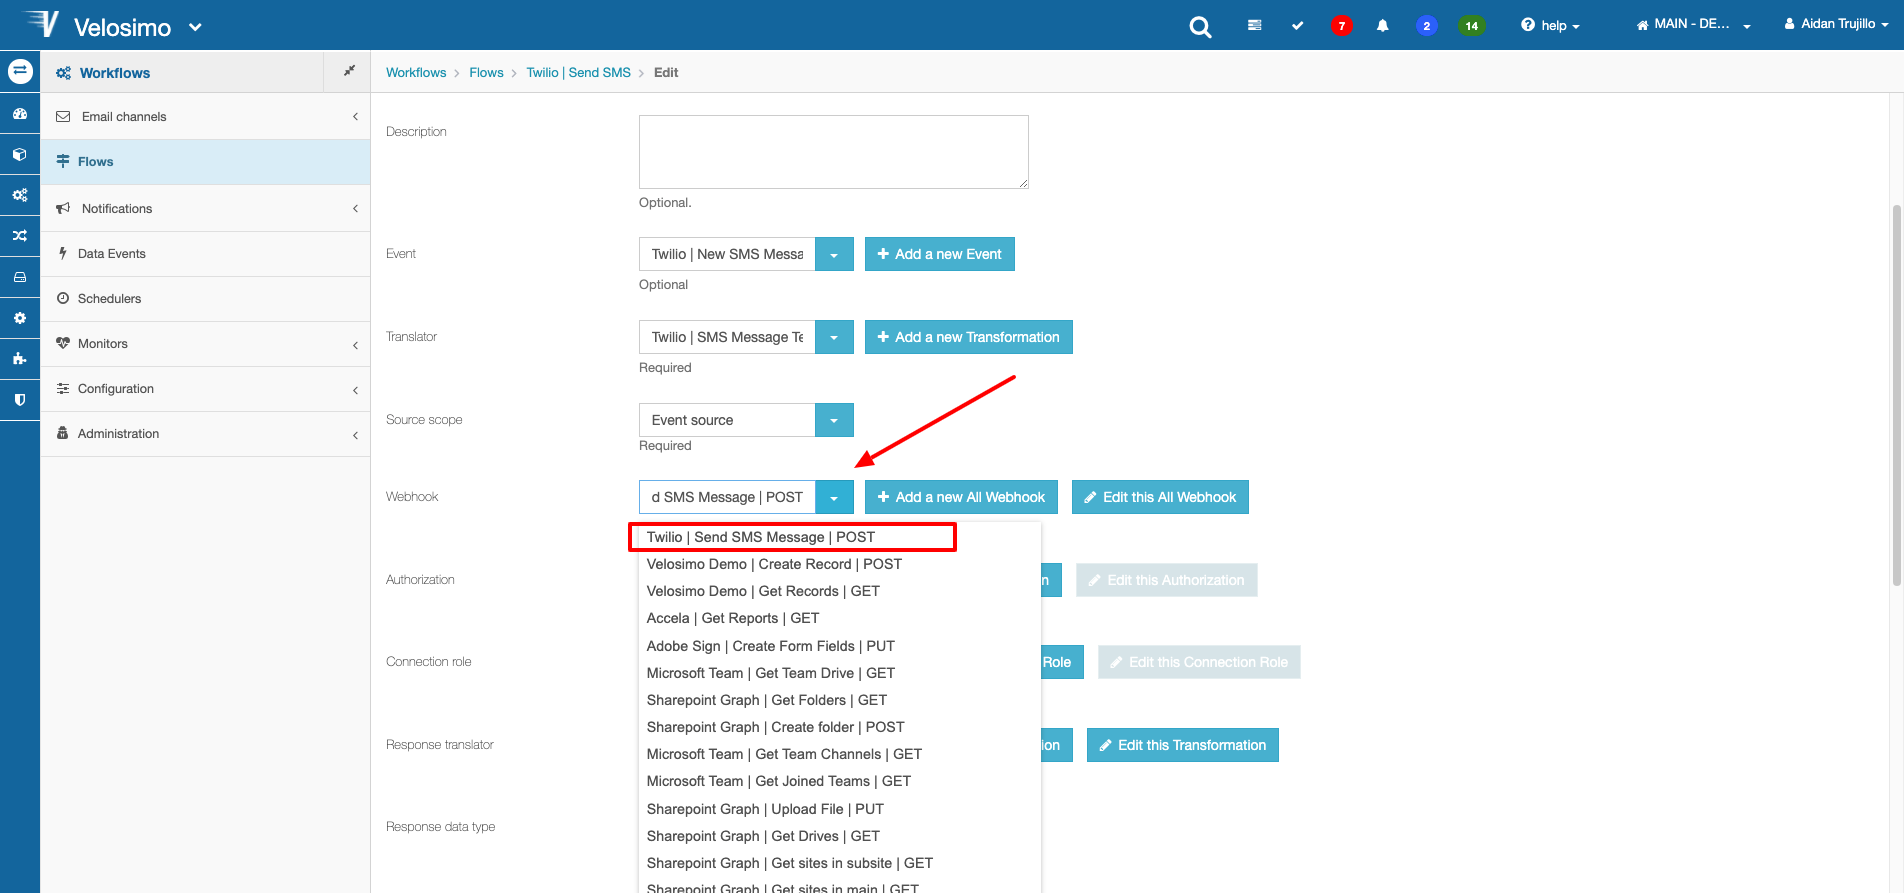
Now back to the Flow, select the Webhook menu and find the Resource you just created in the list.
Parser
The next step is to create a Parser for the response data. Parsers, along with Templates as seen before, are Translators/Transformers. To learn more about Translators/Transformers, go here
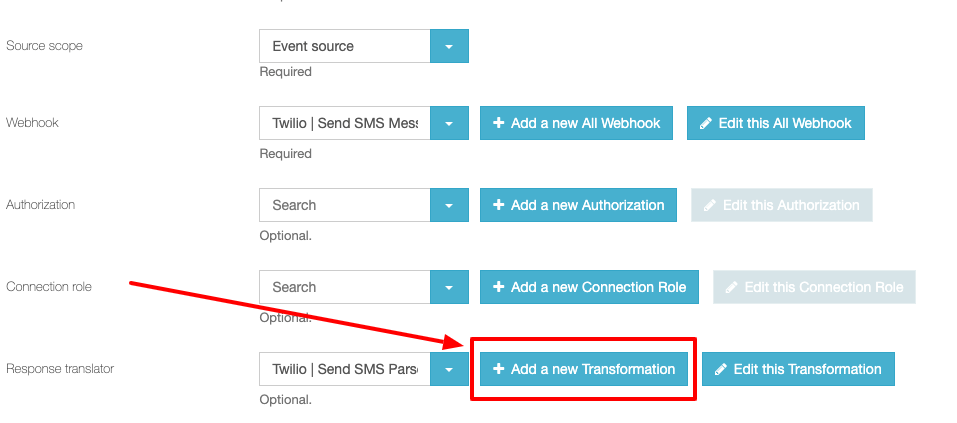
Click Add a new Transformation.
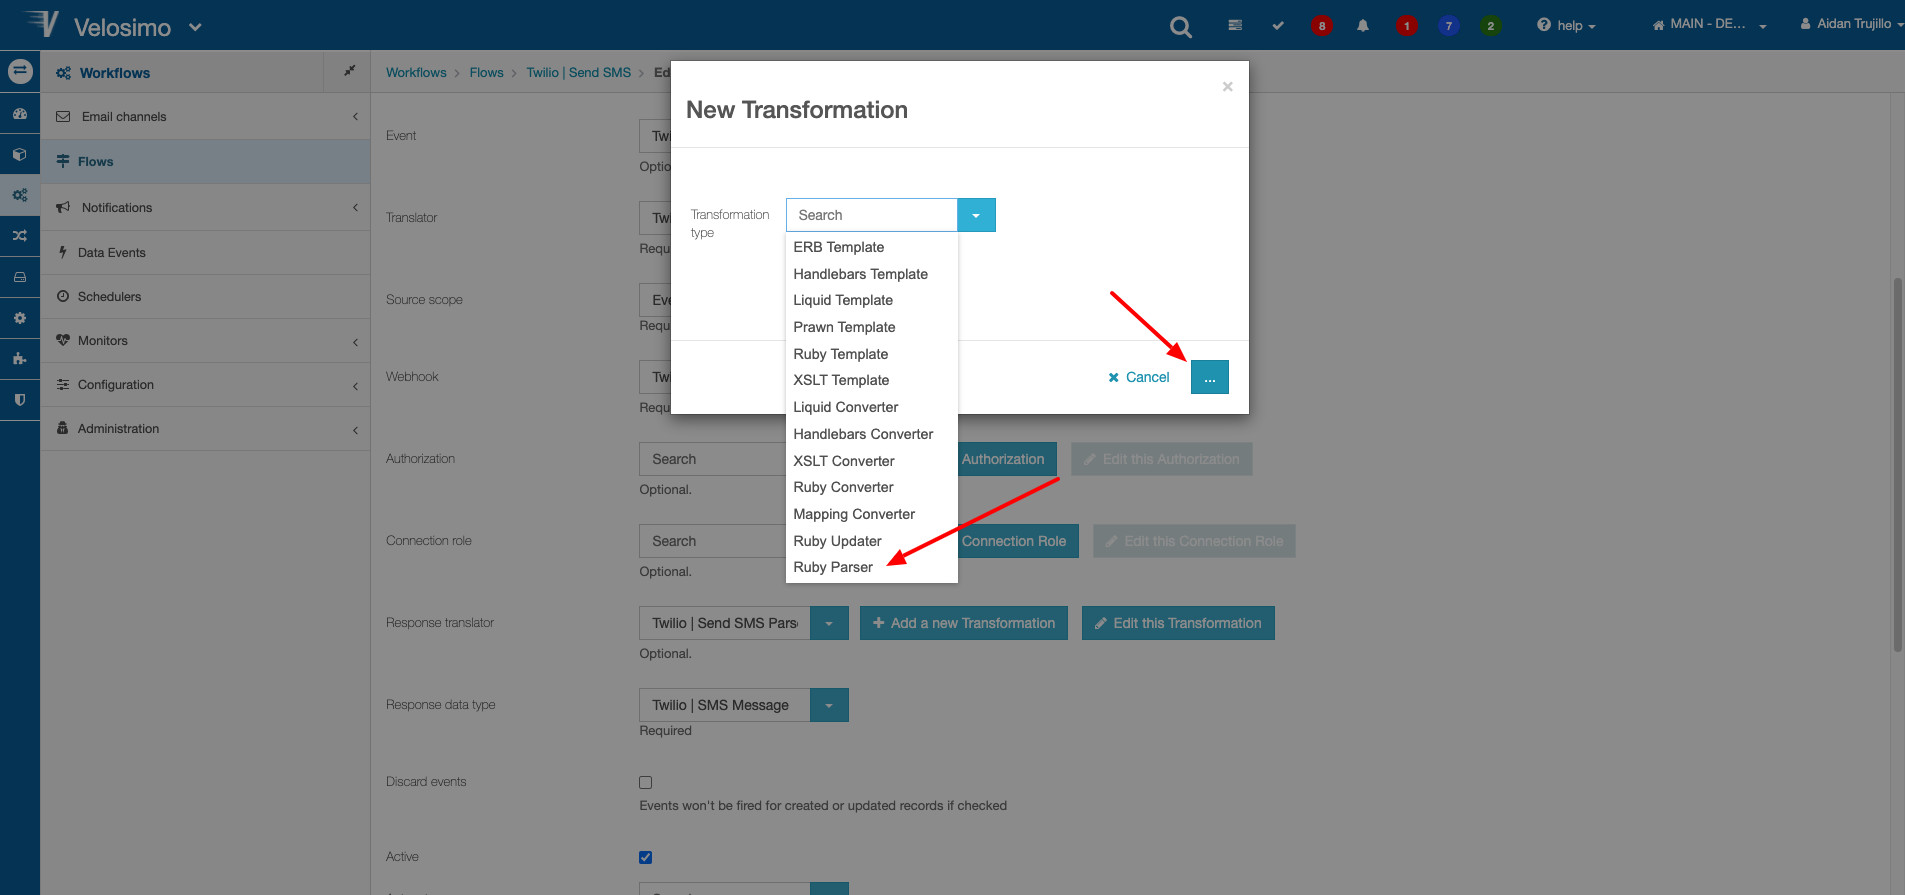
Click the drop-down and select a Parser transformer from the list then click the button in the bottom right to proceed.
To learn more about Parser transformers, go here
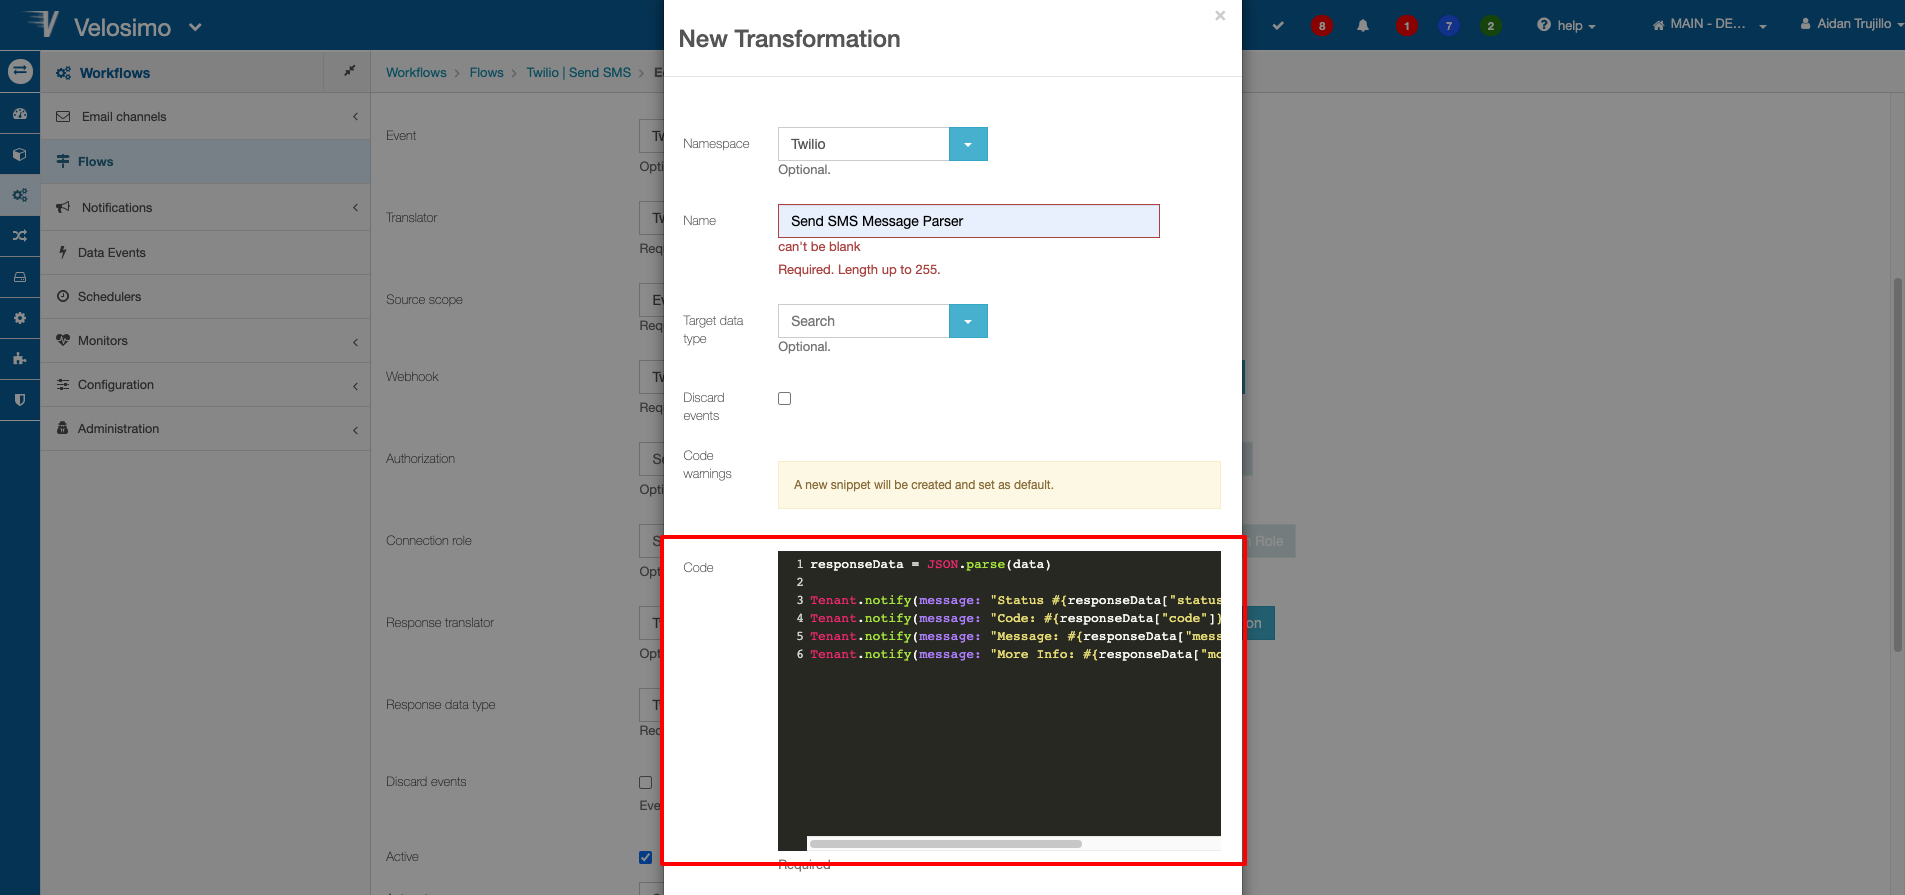
Enter a namespace and name, then configure how the parser works in the Code section. Click Save once completed.
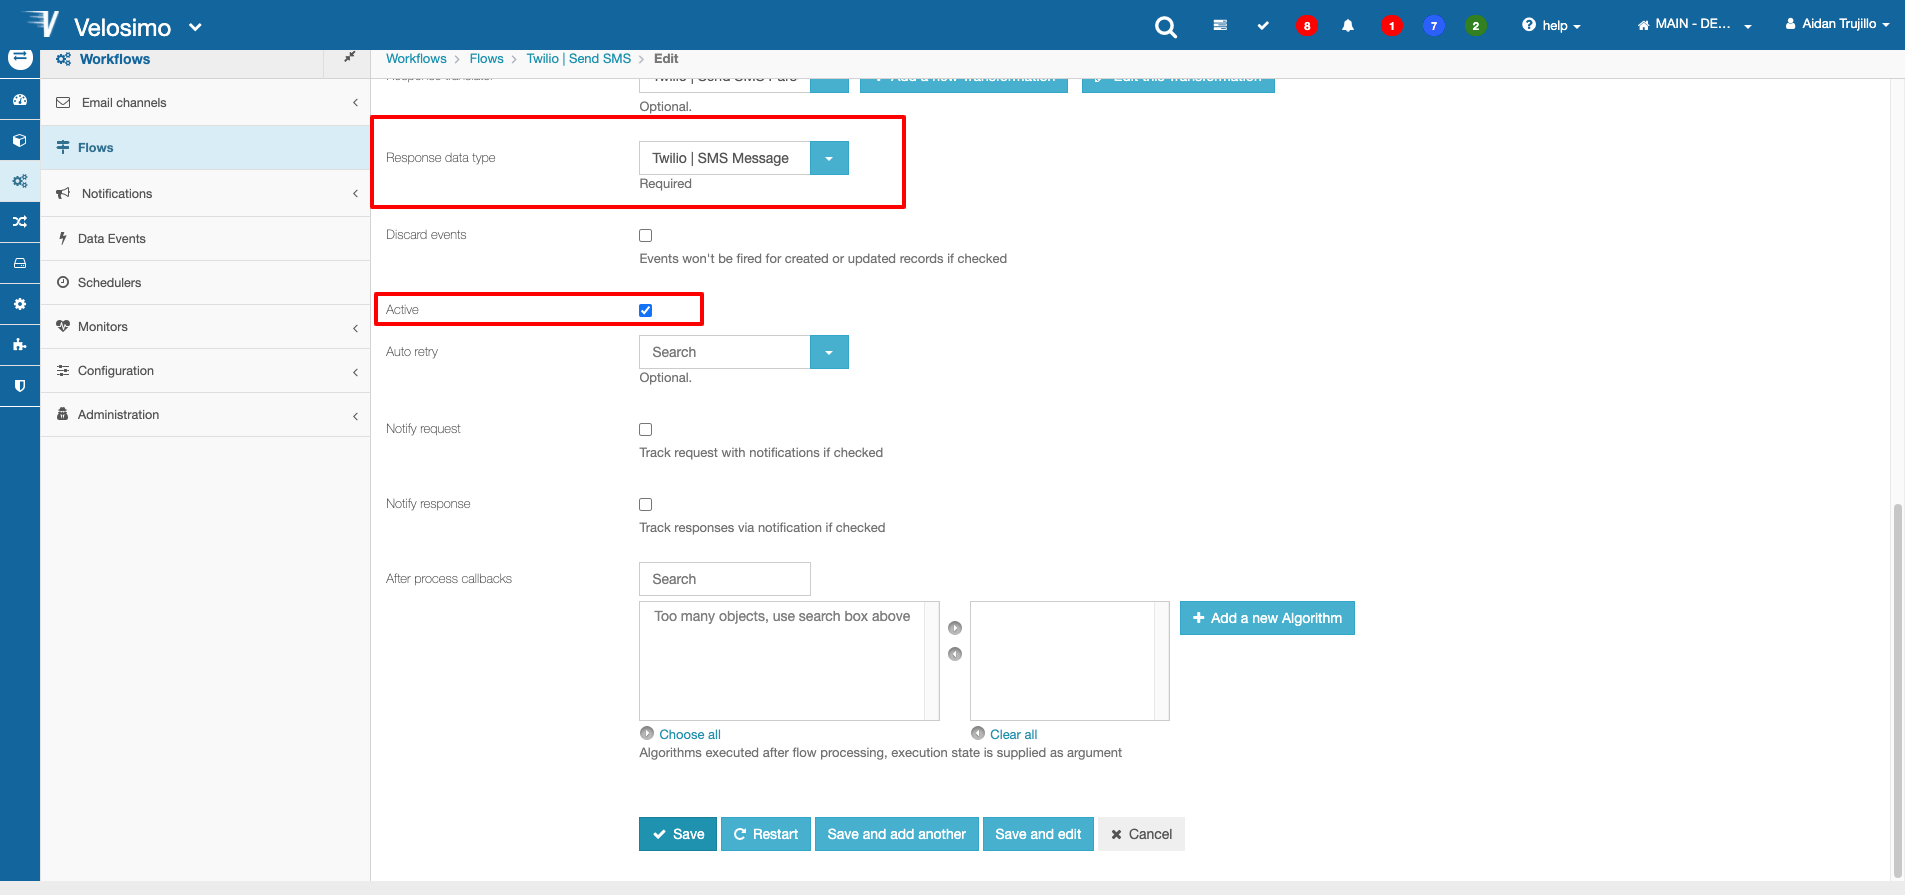
Set the Response data type to the same data type that was linked to the Template transformer in the previous section. The final step to configuring the flow is to check the Active checkbox. This will allow the flow to be used. Once completed click save.
Creating a Status Callback
Another feature of the Twilio API are status callbacks. Status callbacks let you access data about your SMS message's status. In this section we will demonstrate how to build an app on Velosimo that will receive the callback data and update the SMS Message data type record's status property.
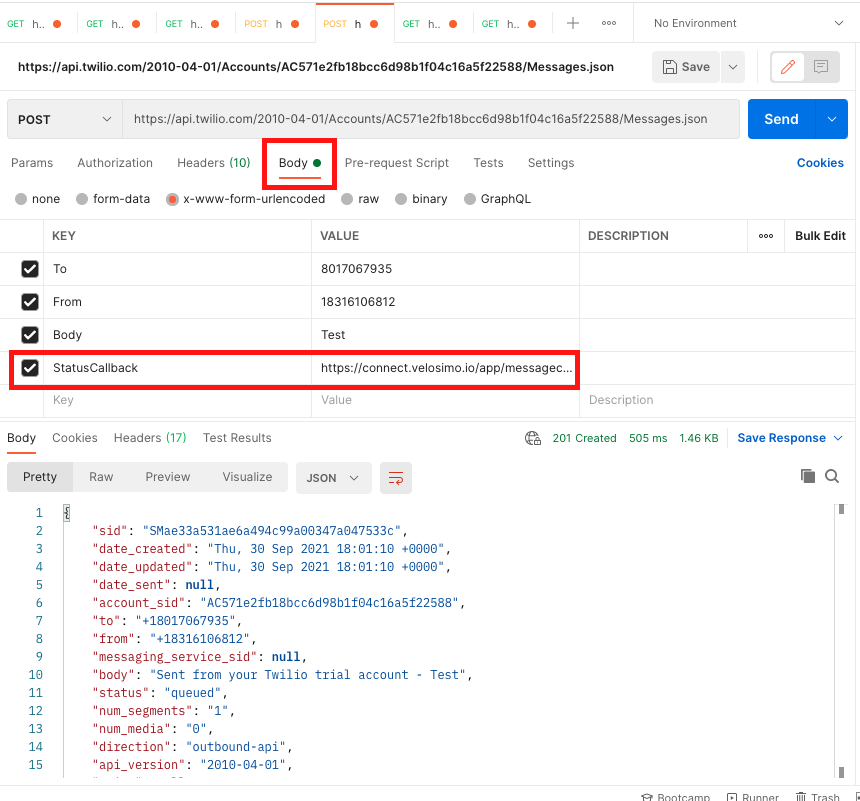
Twilio let's you define the callback URL inside the SMS message body parameters. The callback URL will be the URL you configure for the Velosimo app later on. For example, in our Postman request this is how you would send a callback URL through the message body.
Creating the App
Navigate to Compute -> Applications on the Velosimo menu.
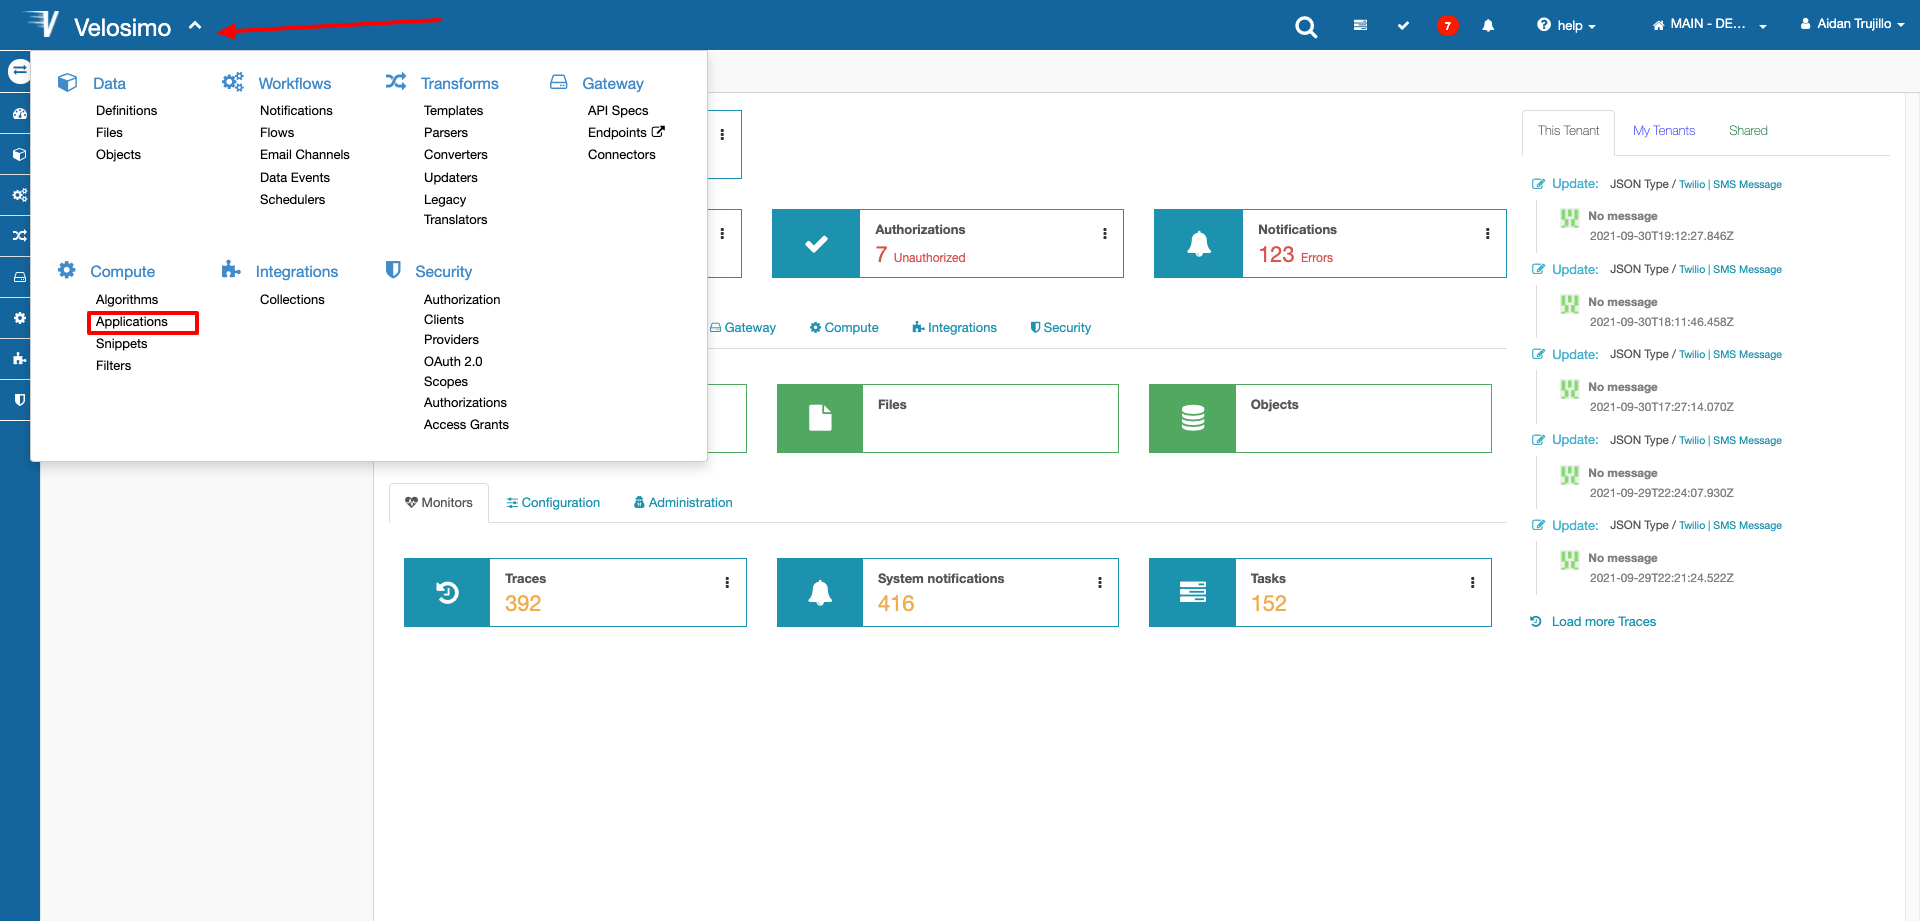
Click Add New at the top of the page
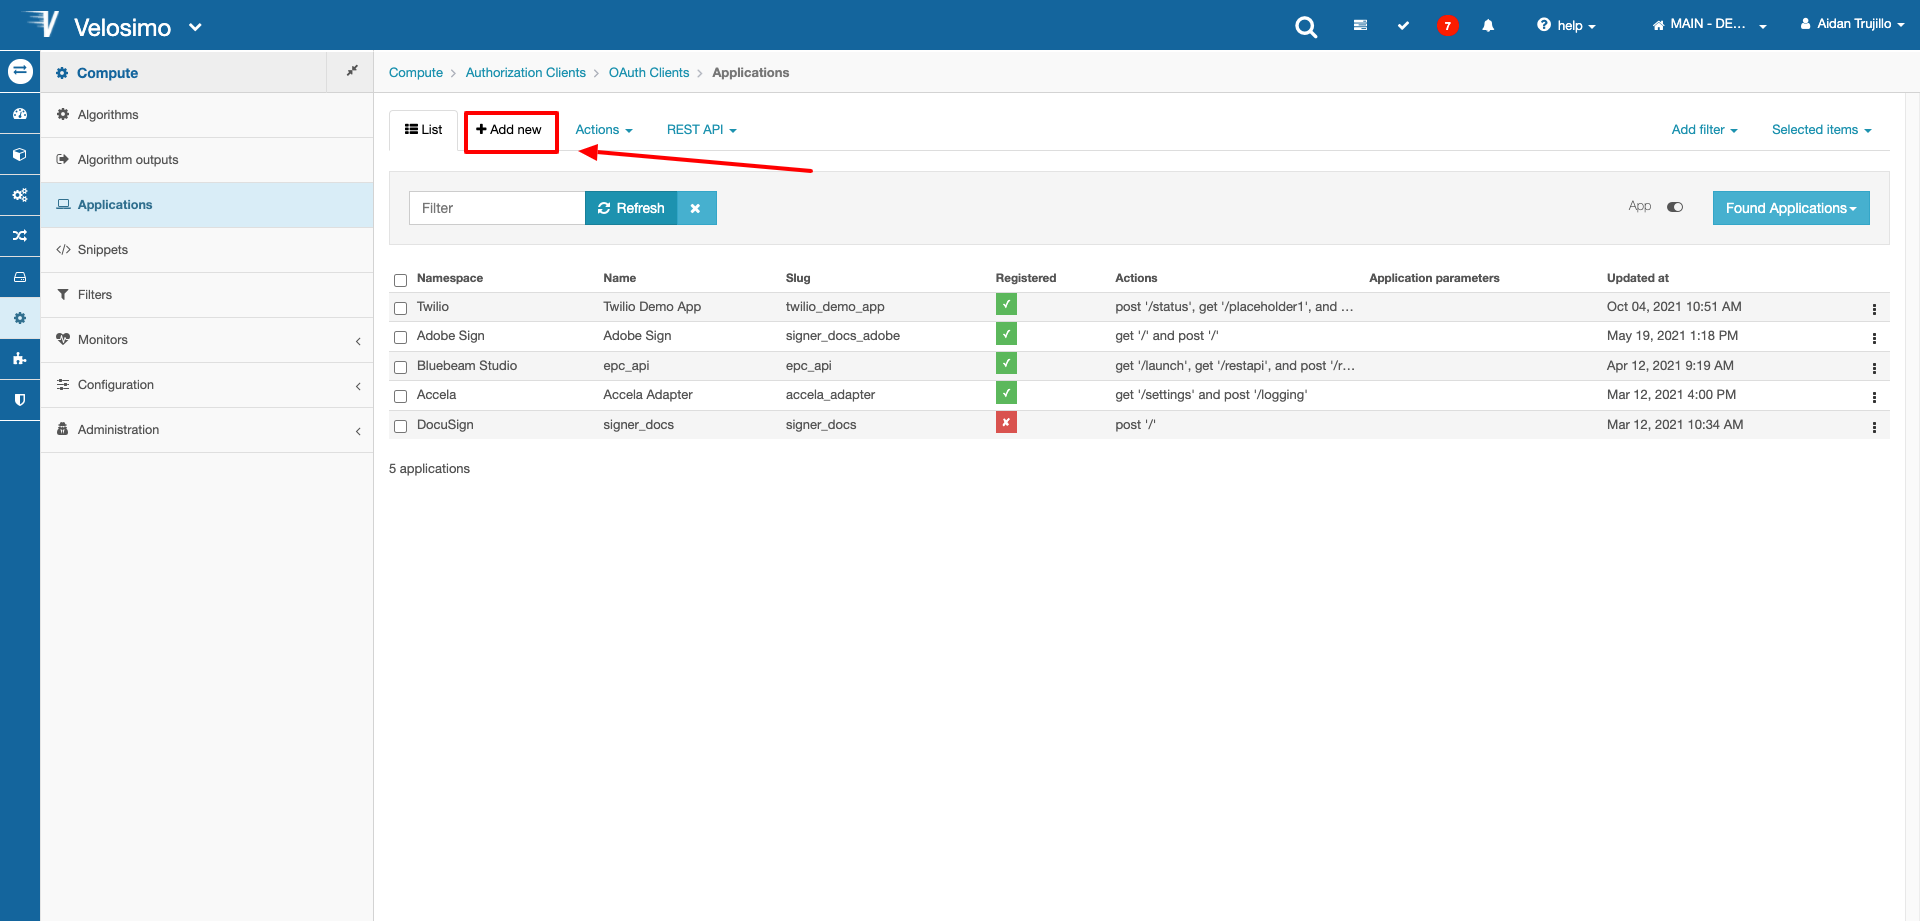
Define the namespace, name, and slug.
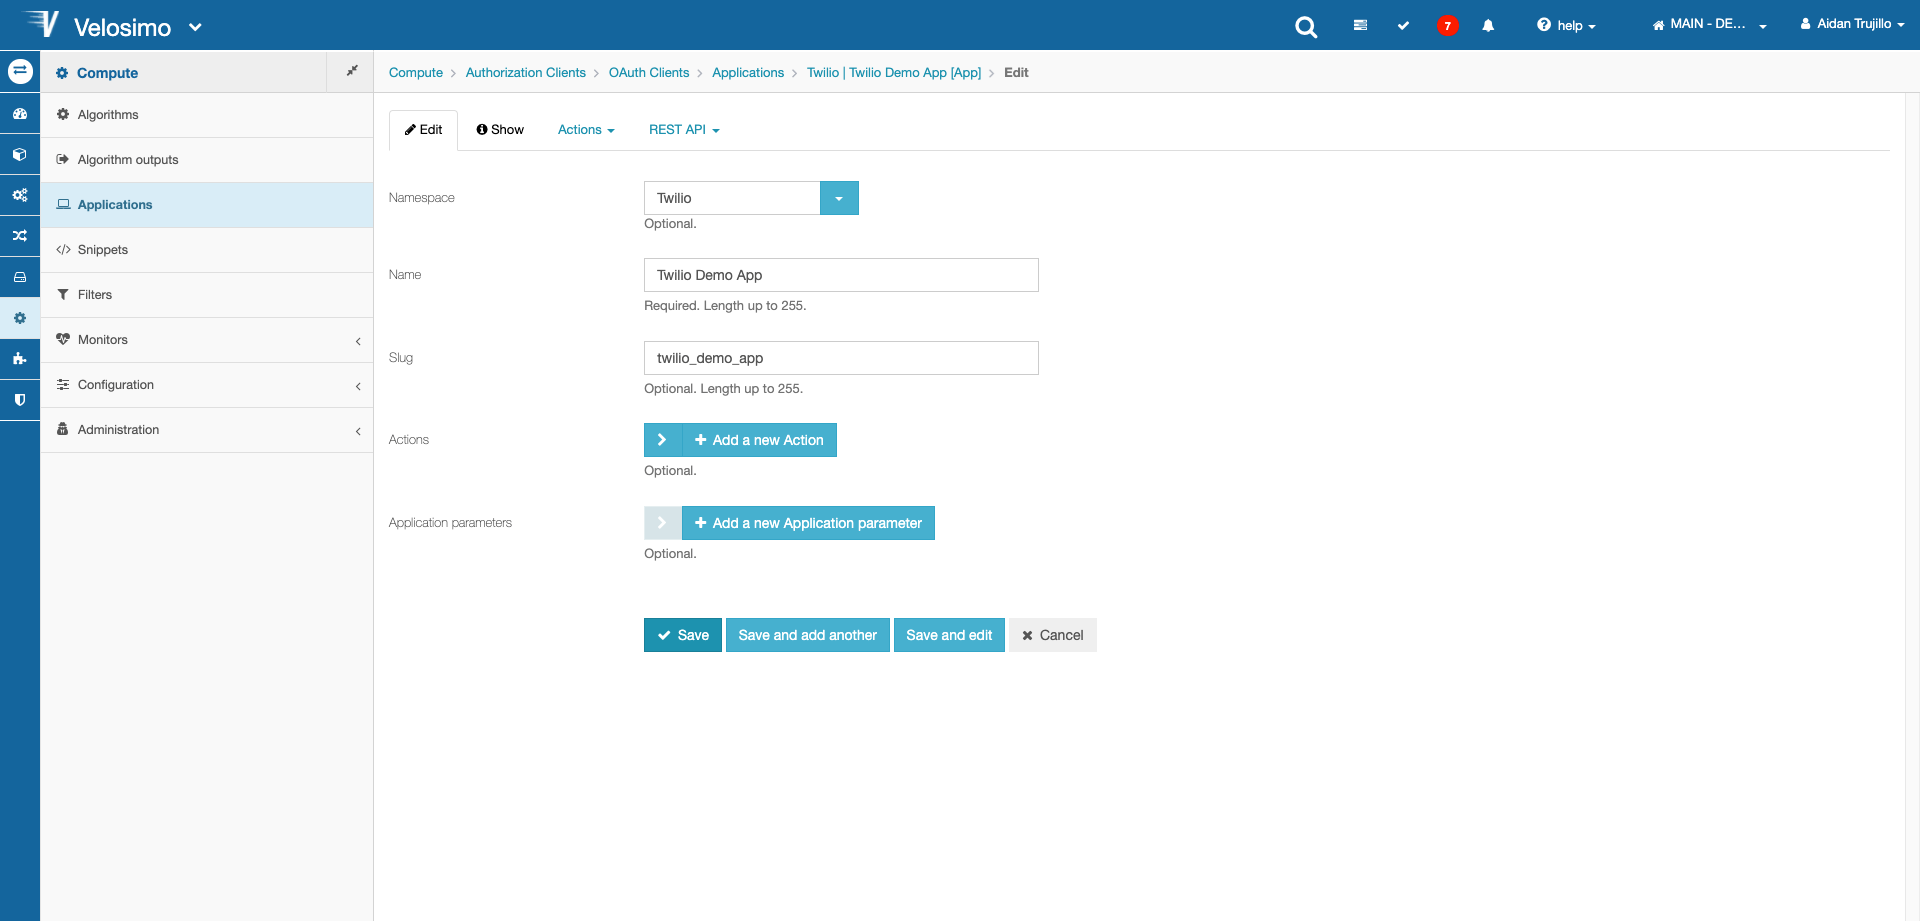
Next, click Add a new Action. Since the Twilio API sends a POST request to your callback URL, set the Action method to POST. Then define the path for your action. This will be apart of the URL you provide to the callback.
Currently there is a bug on the Velosimo platform that does not allow you to add new Actions once the app has been created. Since we will be creating more Actions later on in this tutorial, create some placeholder actions aswell.
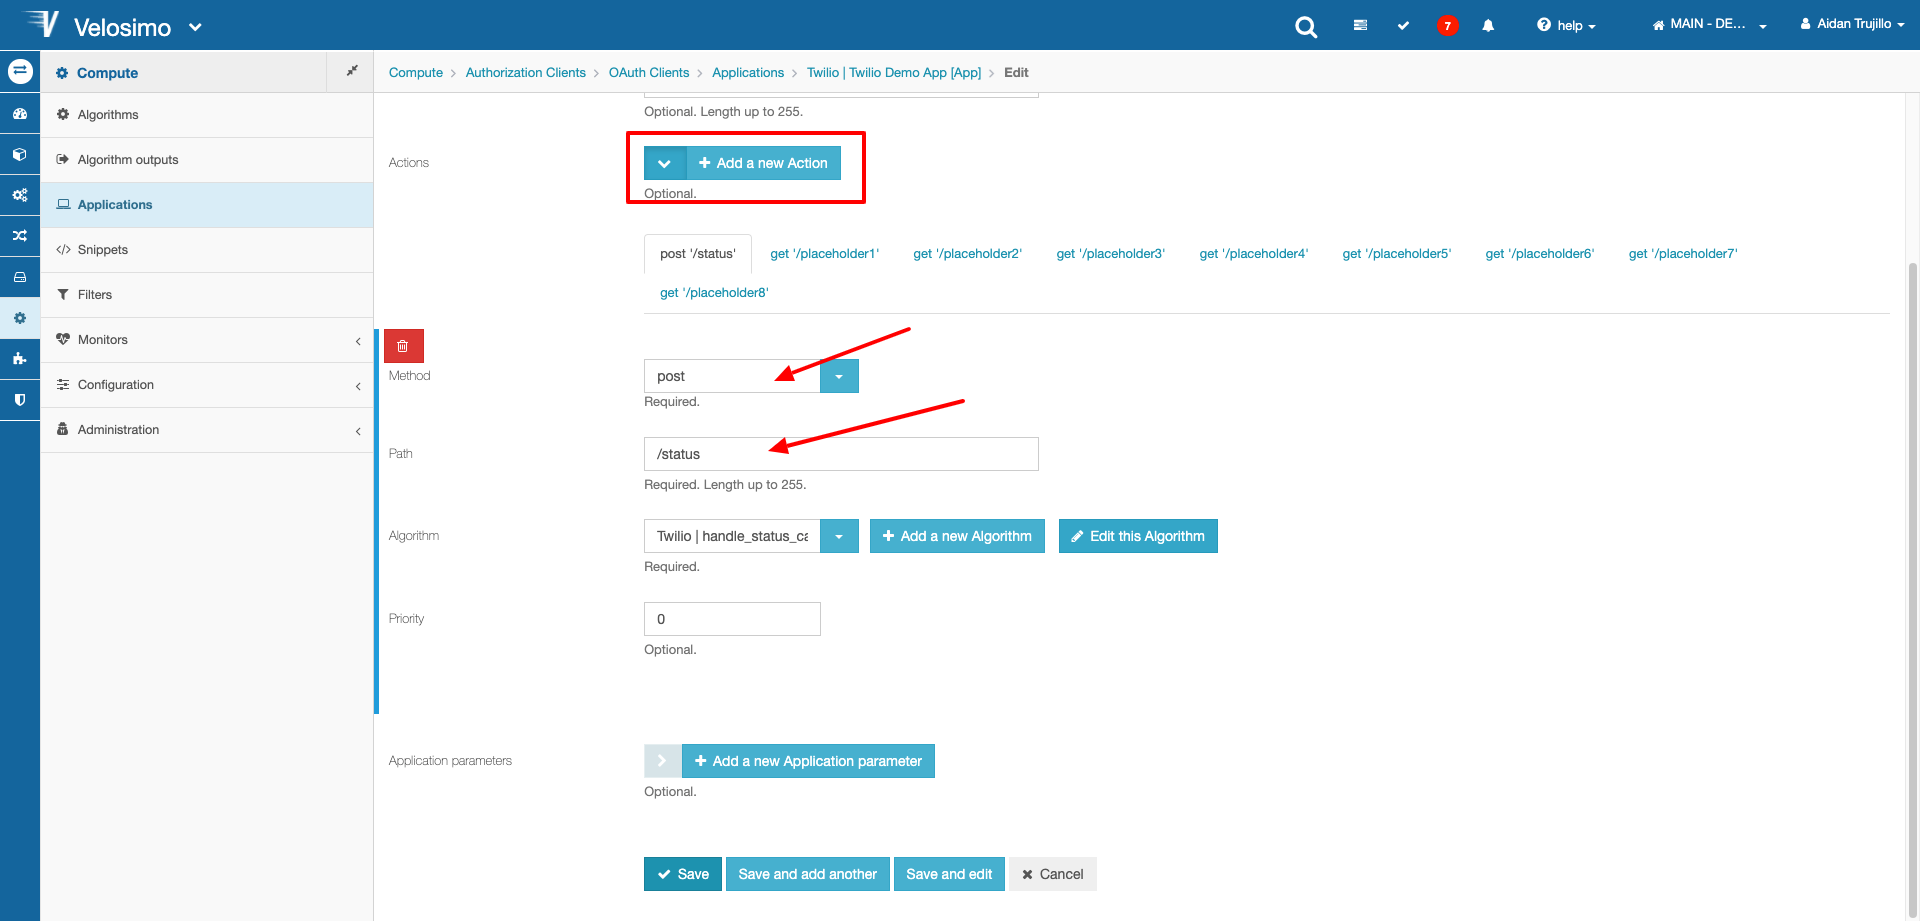
Add a few placeholder actions and define the REST method to a GET then define the placeholder path. Since we won't be using these endpoints until they are fully configured later on, it does not matter what algorithm we define for the action since it will never be called. For now we will leave it blank until we create our algorithm.
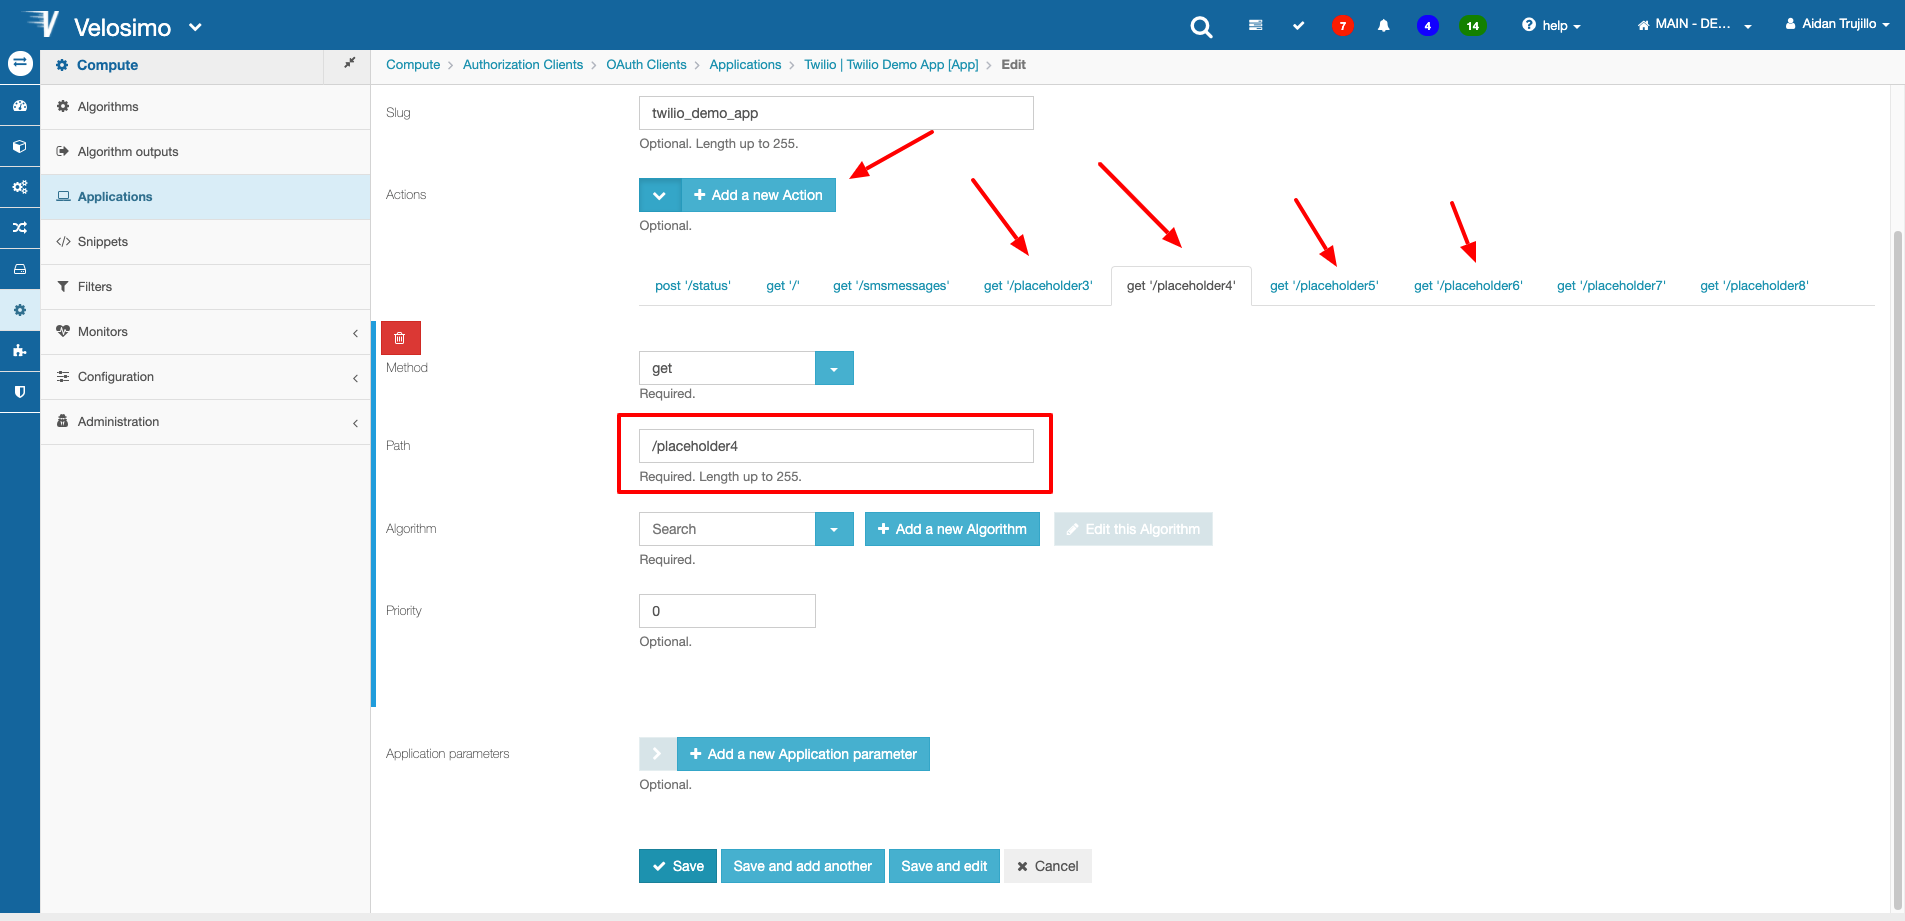
The next step is to create the algorithm that actually handles the data, but first, we need to tweak our SMS Message data type and flow template to accommodate the new callback data. For now, click "Add a new Algorithm".
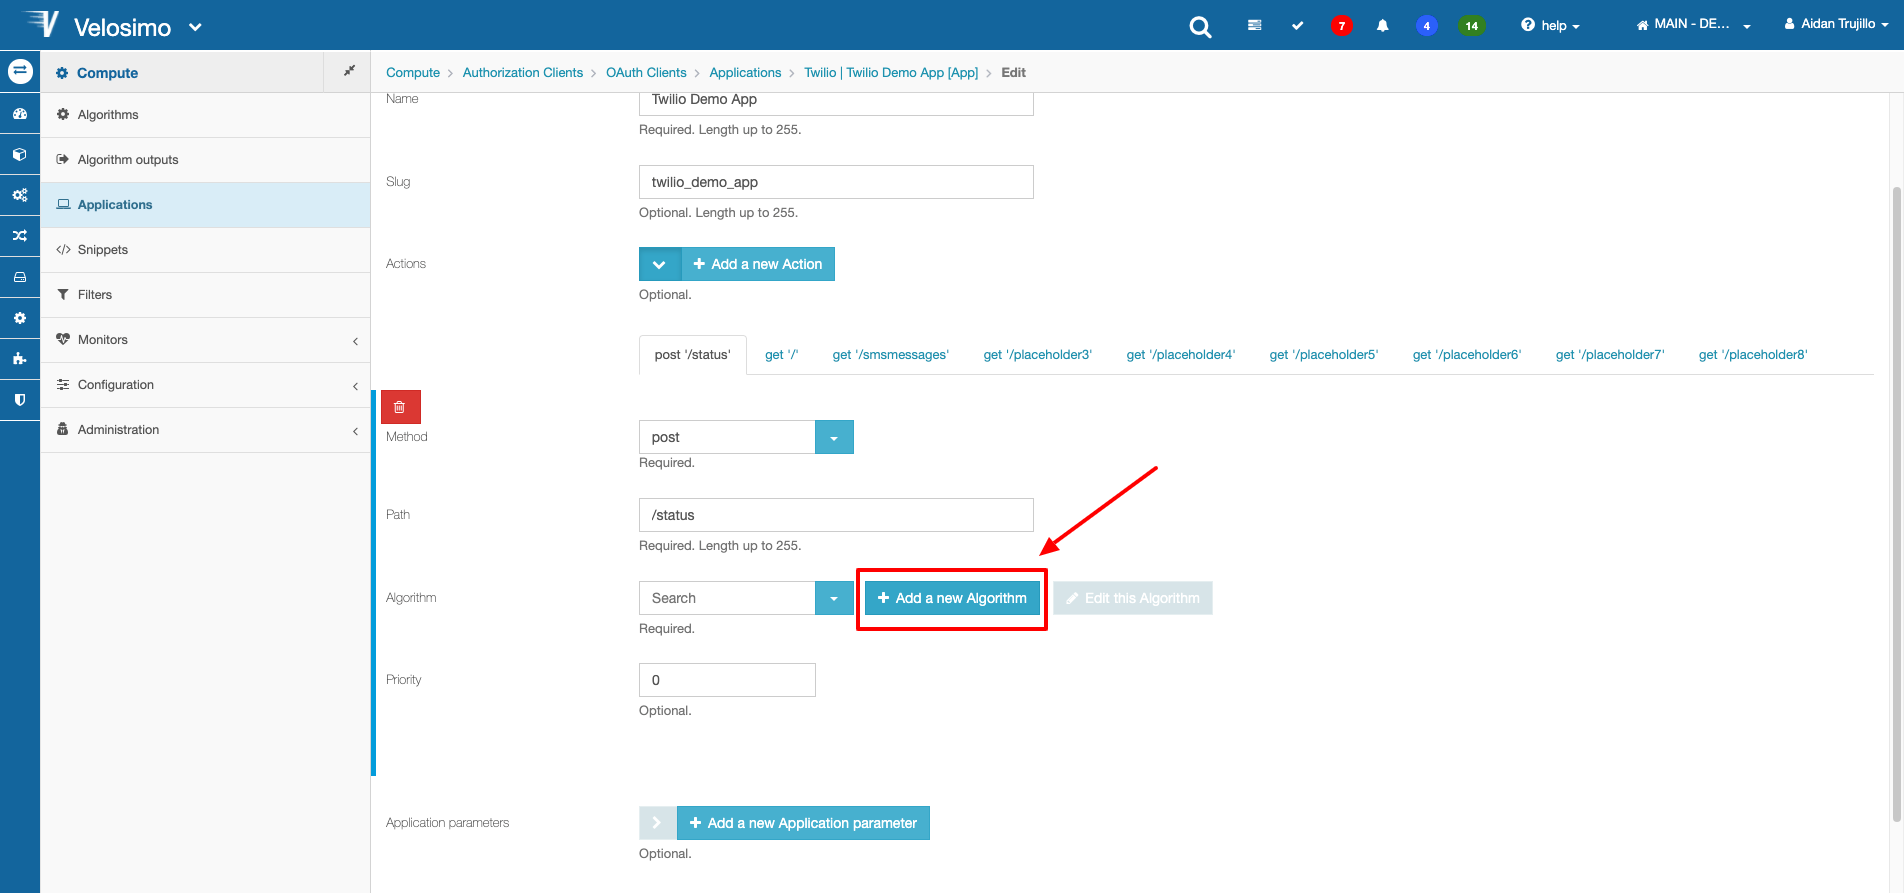
Then enter a namespace and name and save it.
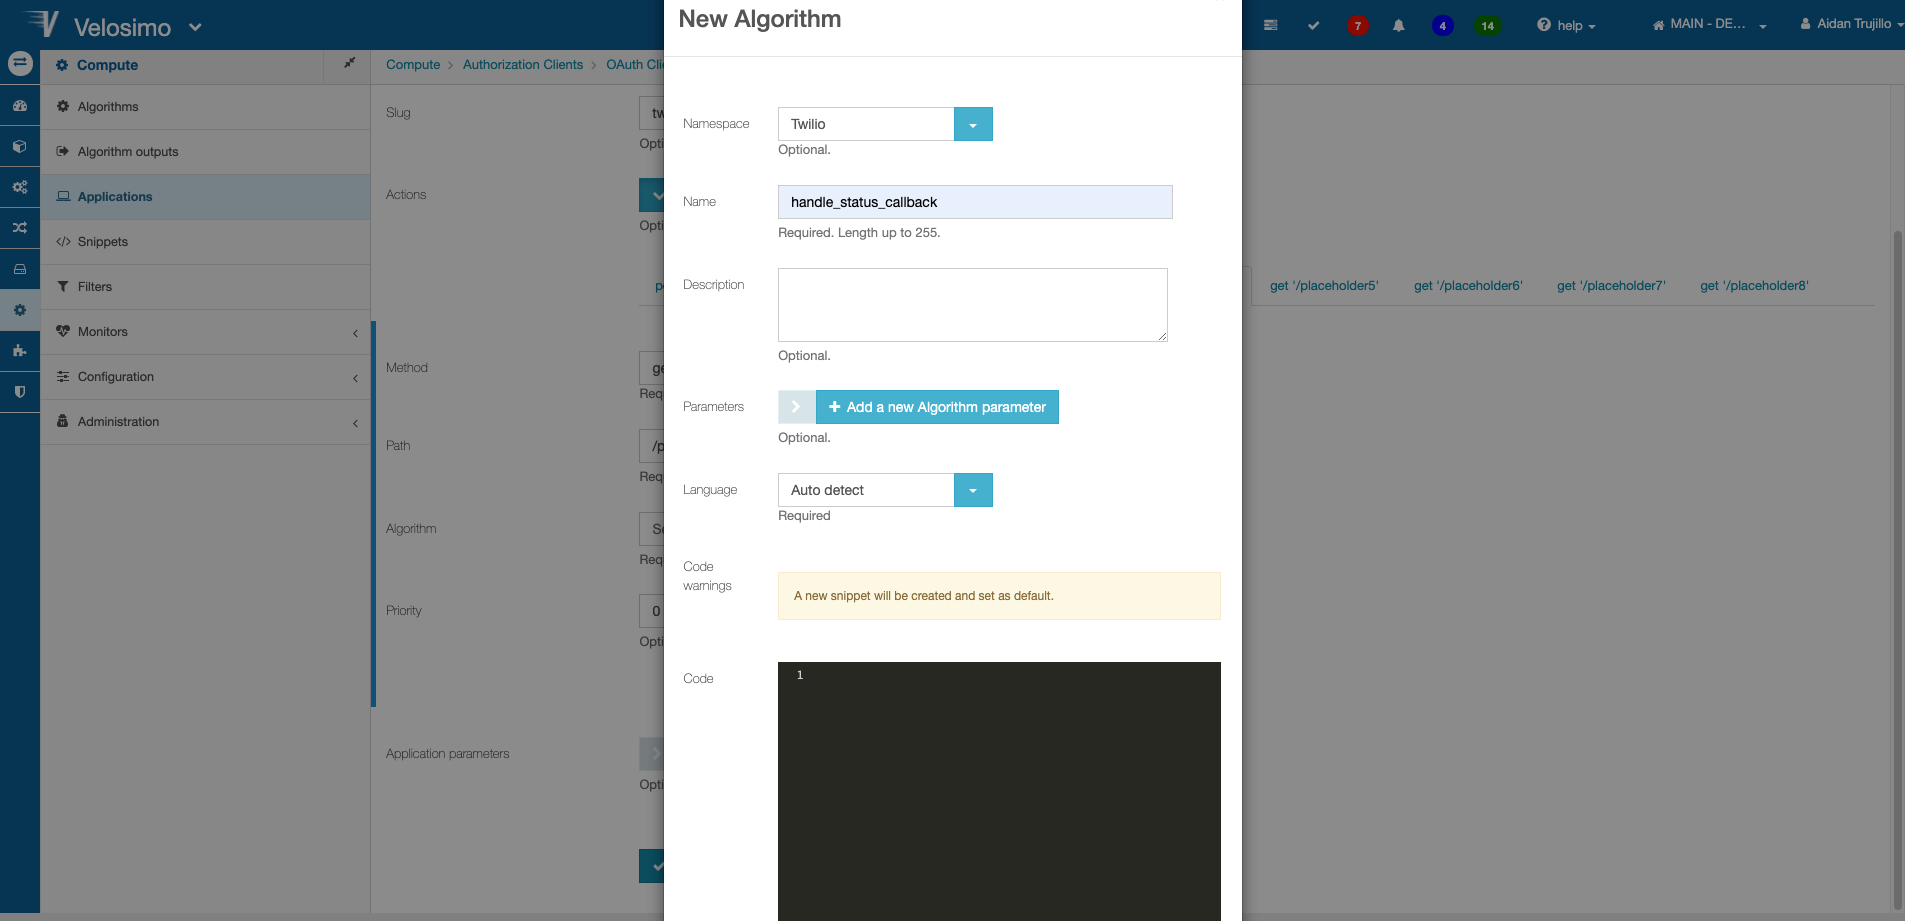
Now set the newly created algorithm to the Action. Since the algorithm is a required parameter to create an action, we must also temporarily set the algorithm on the placeholder actions so we can save the app.
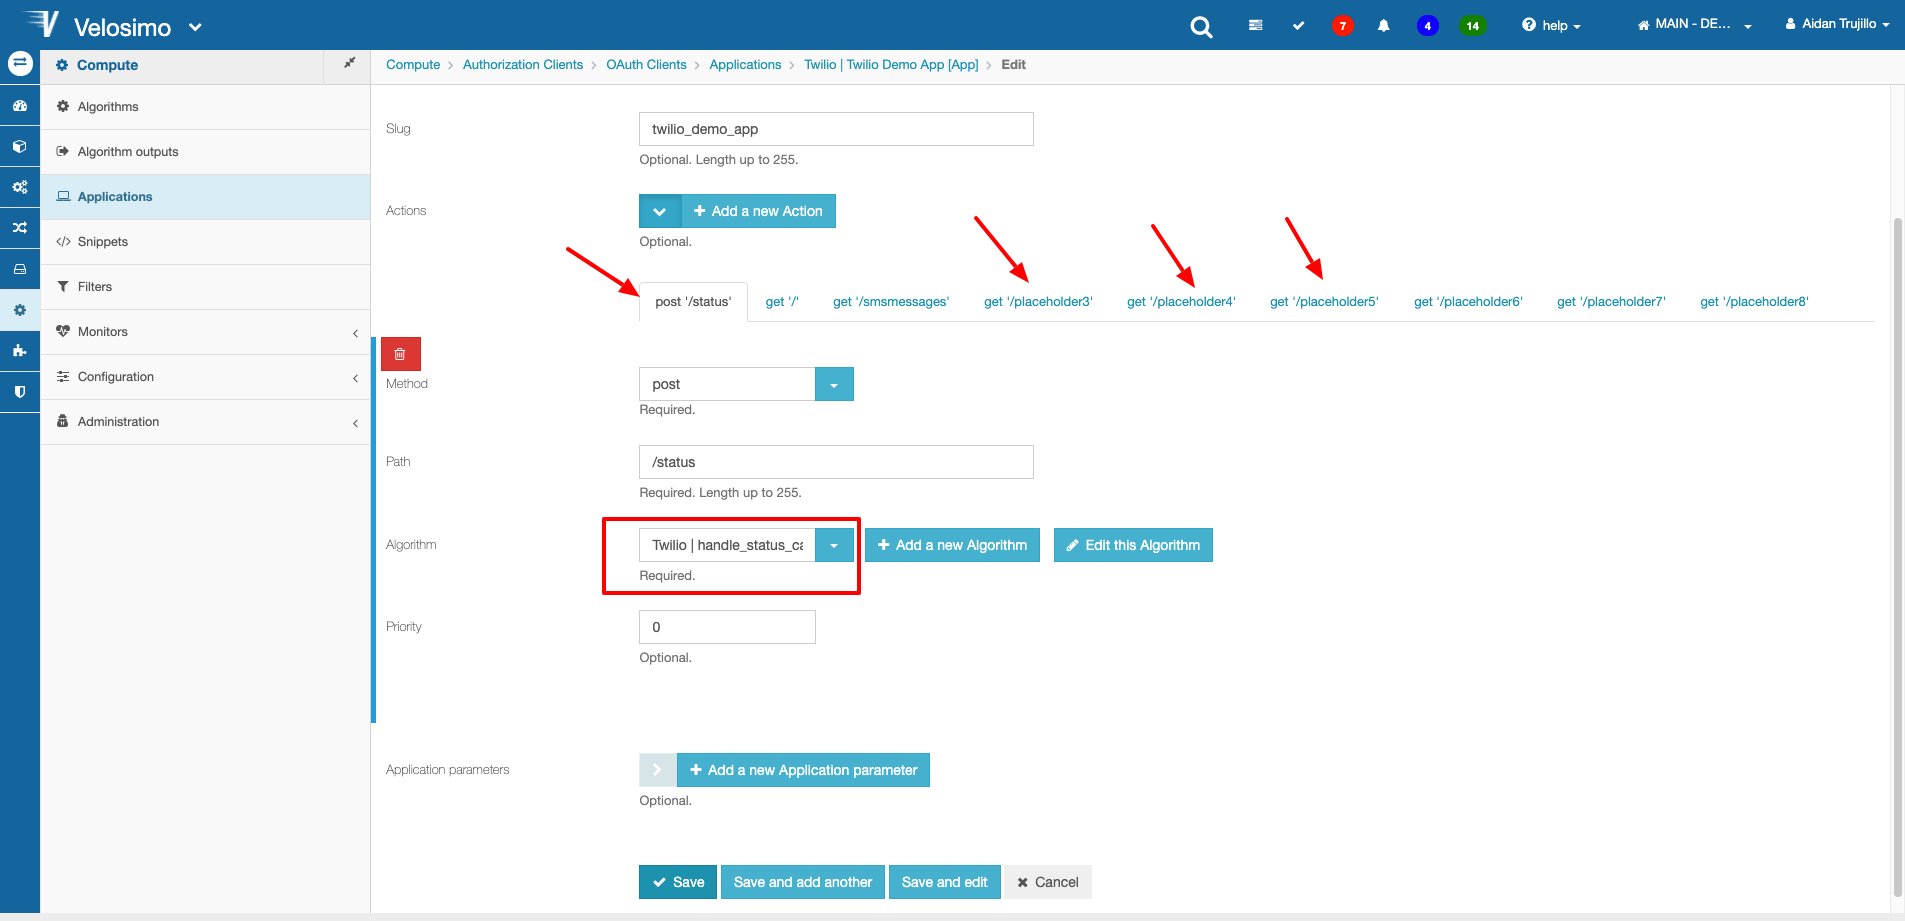
Save the app.
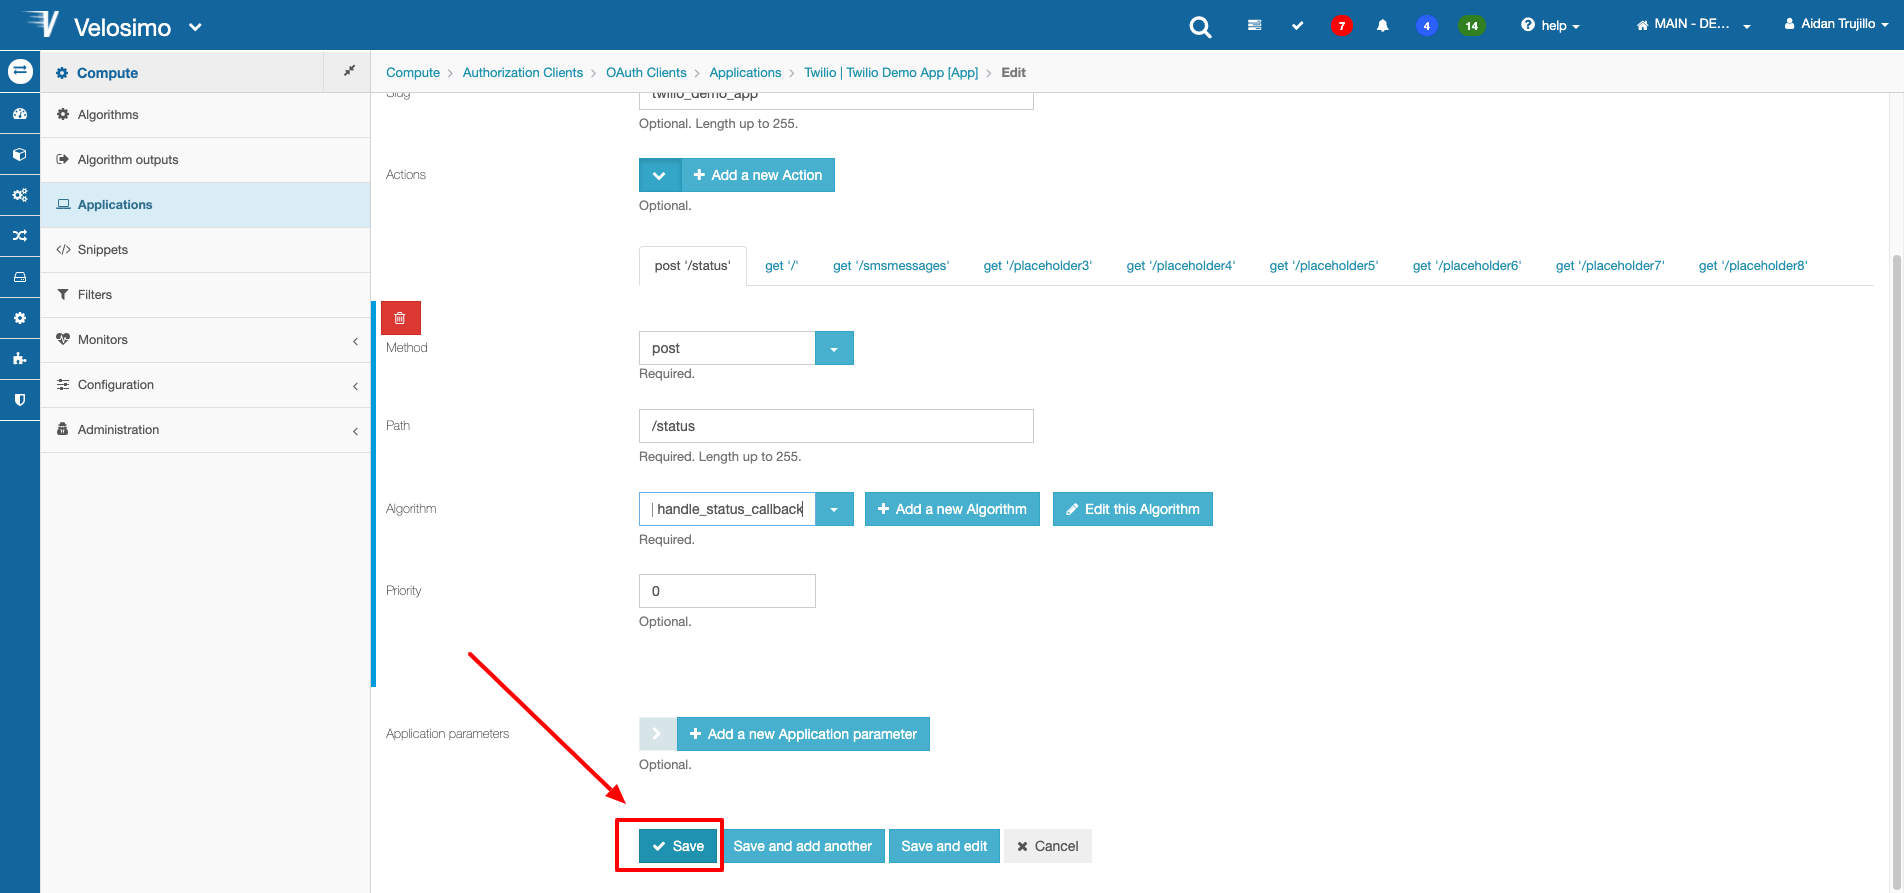
Now we must update the Authorization settings for the app. Select the action menu on the app and click Configure.
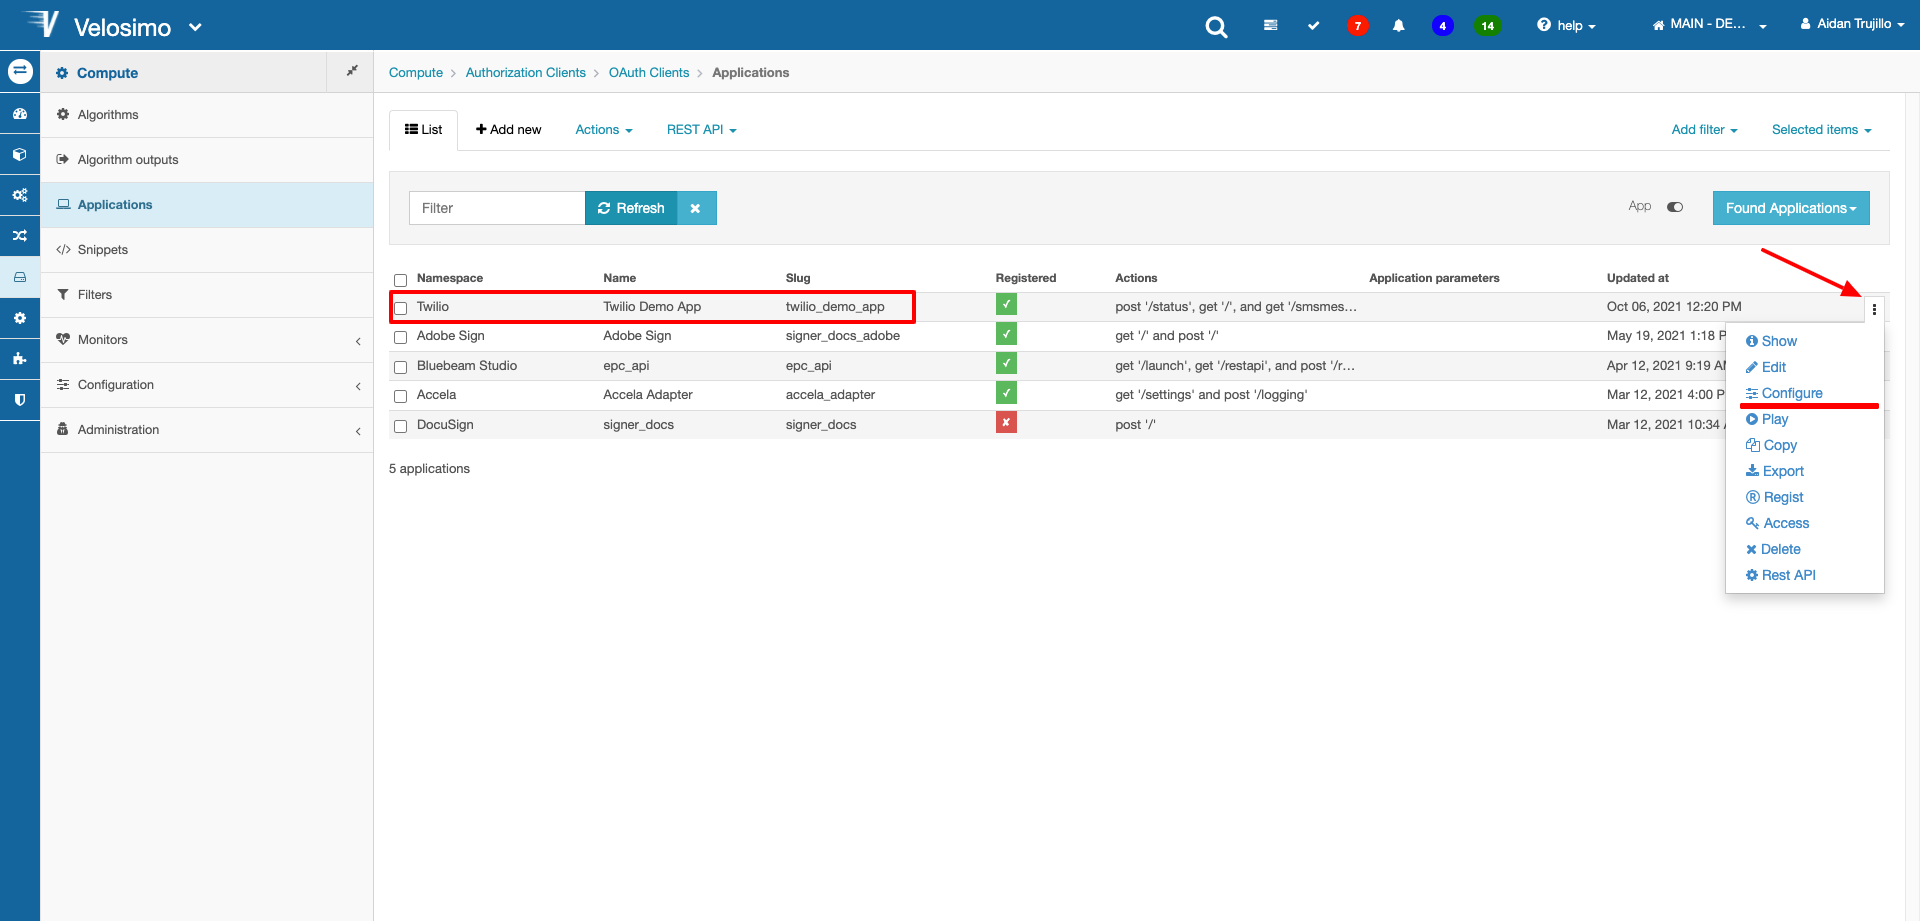
Set the authorization method from User Credentials to Application ID. If the application is set to User Credentials, it will require the Tenant Access Key and Token to be passed to the URL, which is information we do not want to be accessible for security reasons. By setting it to Application ID, the authentication will get the Tenant info for the app from passing the app slug to the URL. Click save once completed.
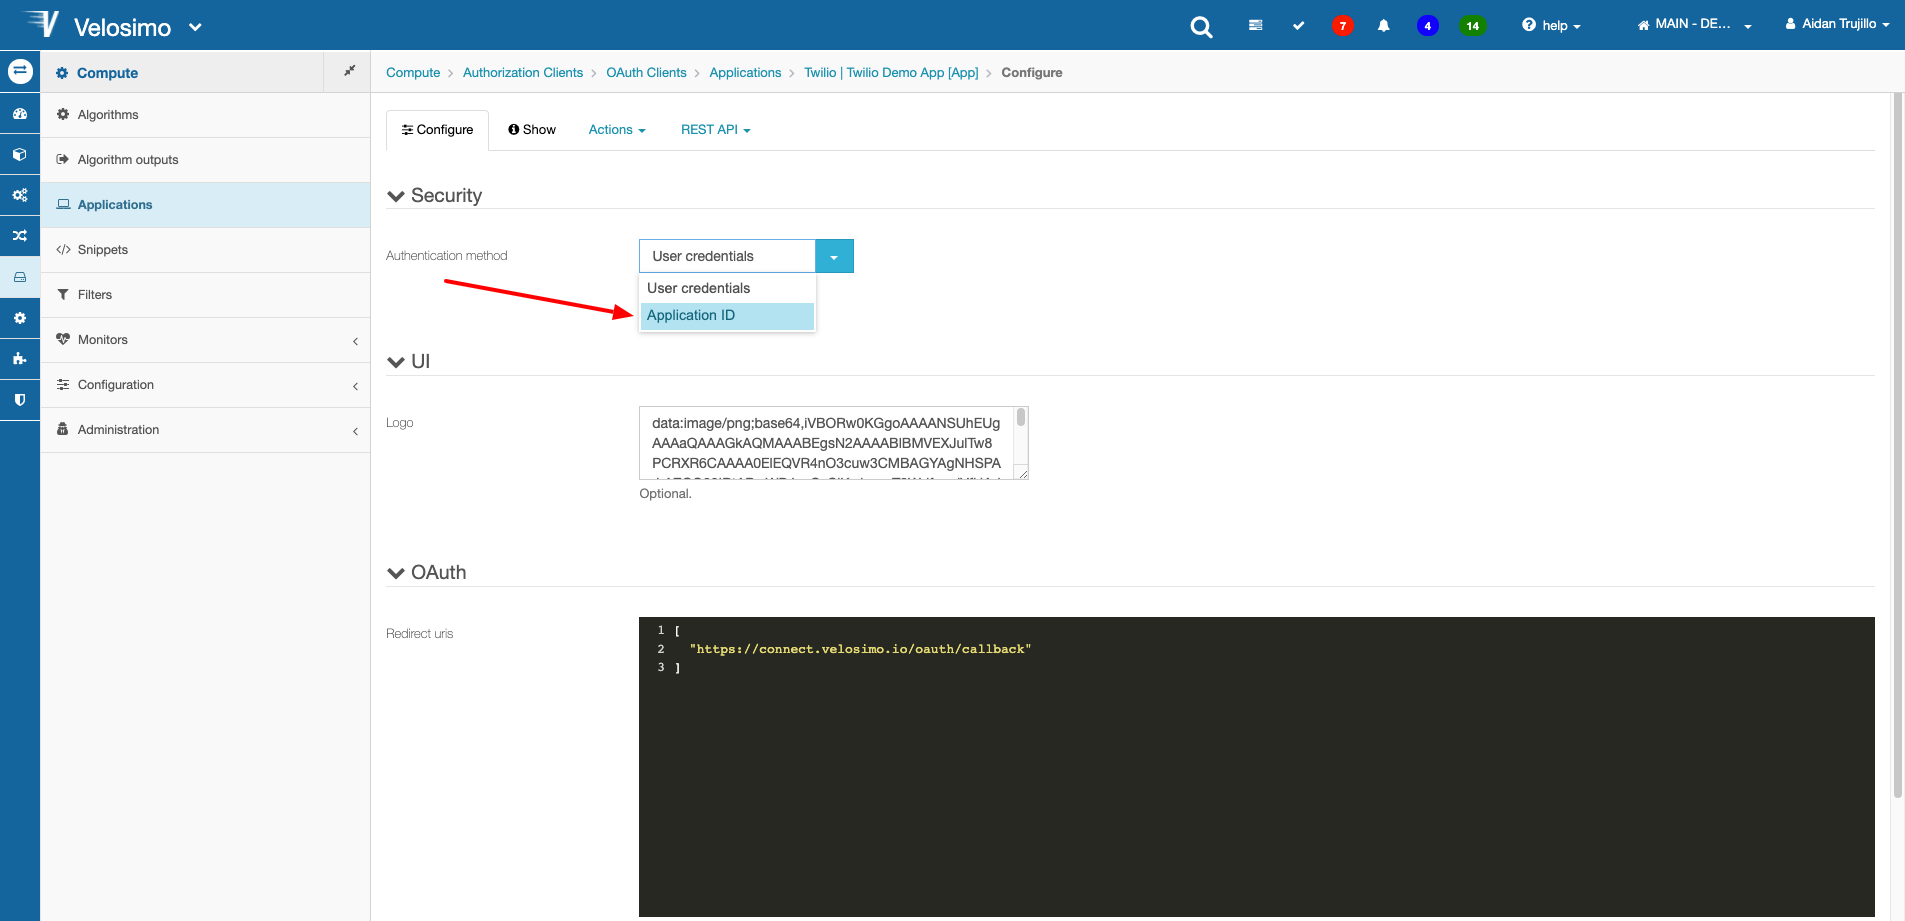
Before going any further, we must register the app. Registered Velosimo app's can be used externally from the platform, while unregistered apps can only be used locally on the platform. Select the Action menu on the your app and select Regist.
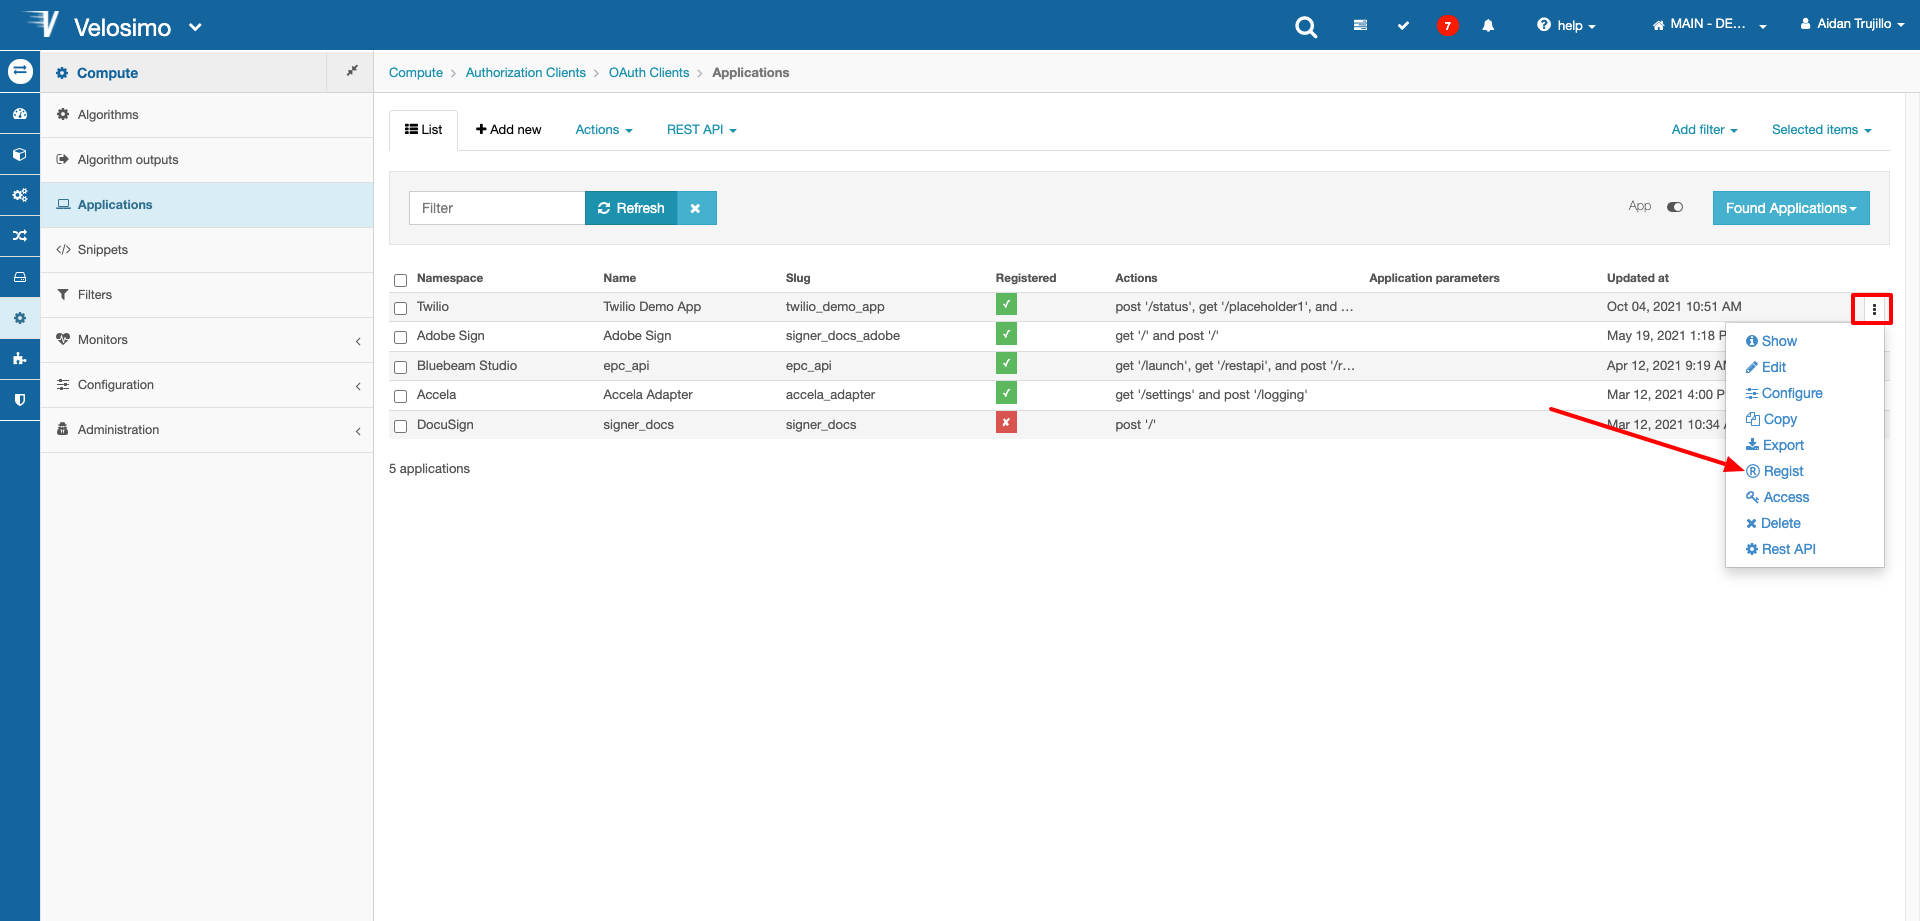
Create the URL name for your app in the Slug input. Set the Oauth name to the same one and click Regist.
Once the app is registered you have your callback URL. It should look something like this:
https://connect.velosimo.io/app/{{regist_name}}/{{action_path}}
Before we can create our actual algorithm, we must tweak our Flow to accommodate the new data that will be processed from the callback.
Updating the Data Type Schema
Since we are building an algorithm that will update the status of the SMS Message that is created when our flow executes, we must create a new property in our data type schema called Status. Navigate back to Data -> Definitions -> JSON Types with the Velosimo menu and update the data type.
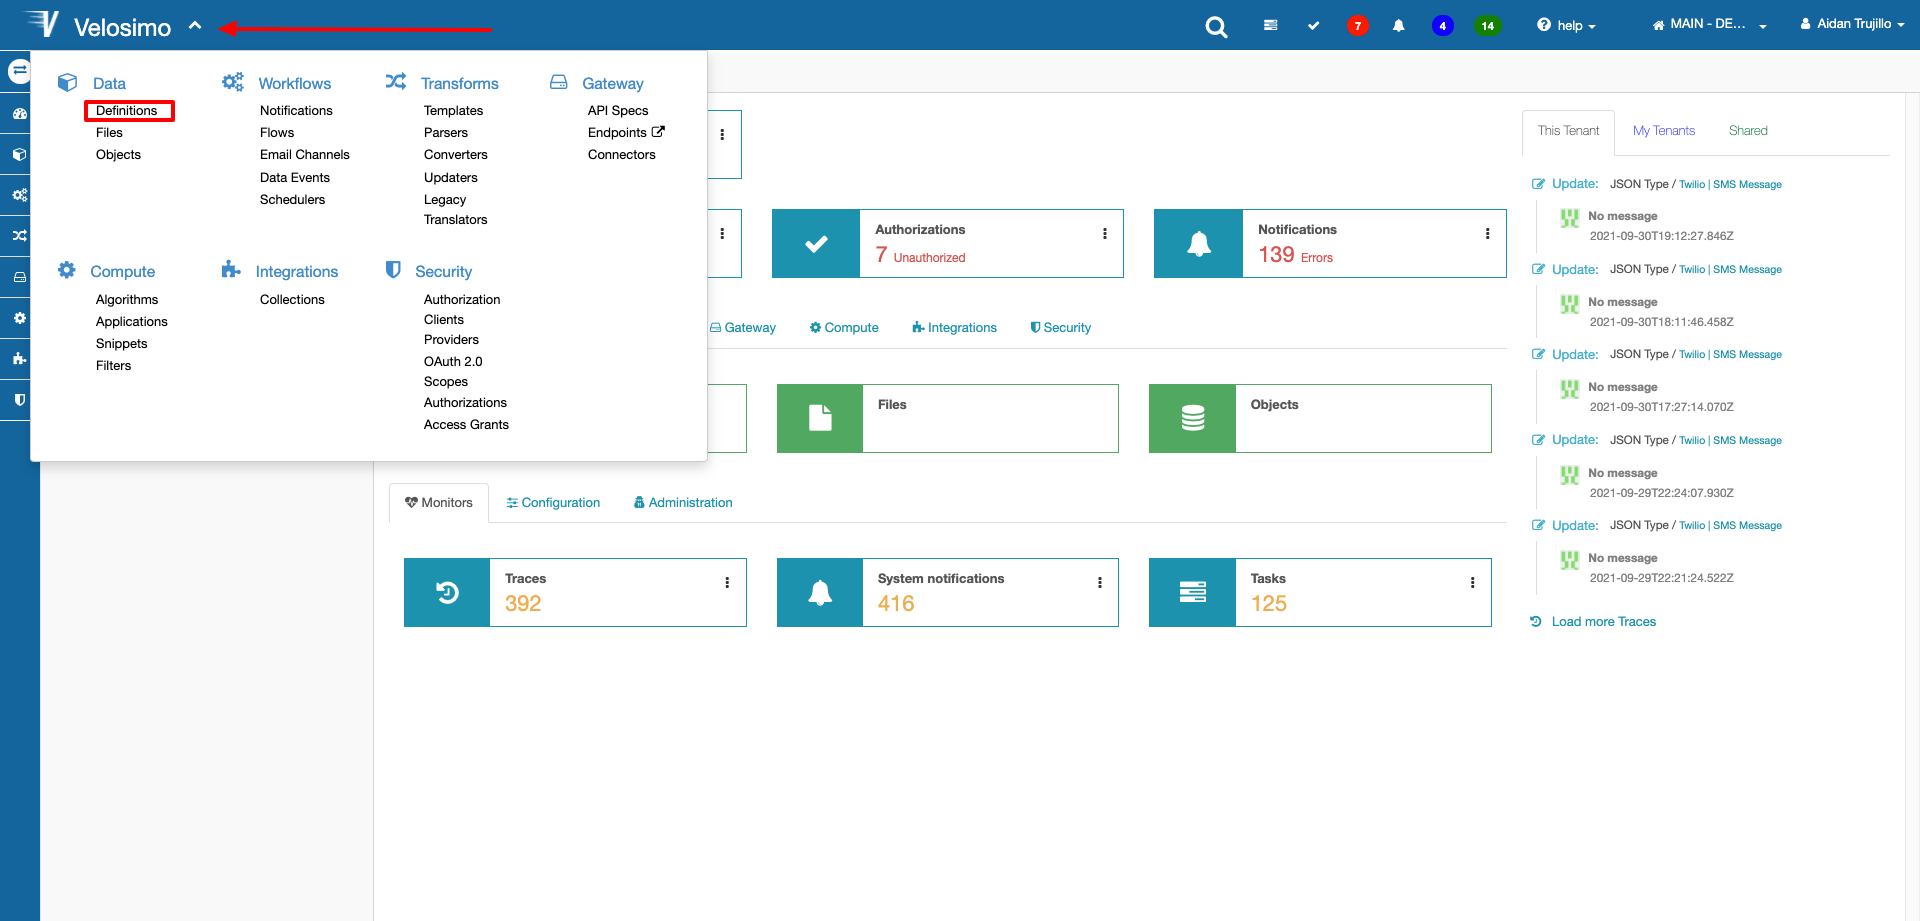
Select the action menu on the data type and click Edit.
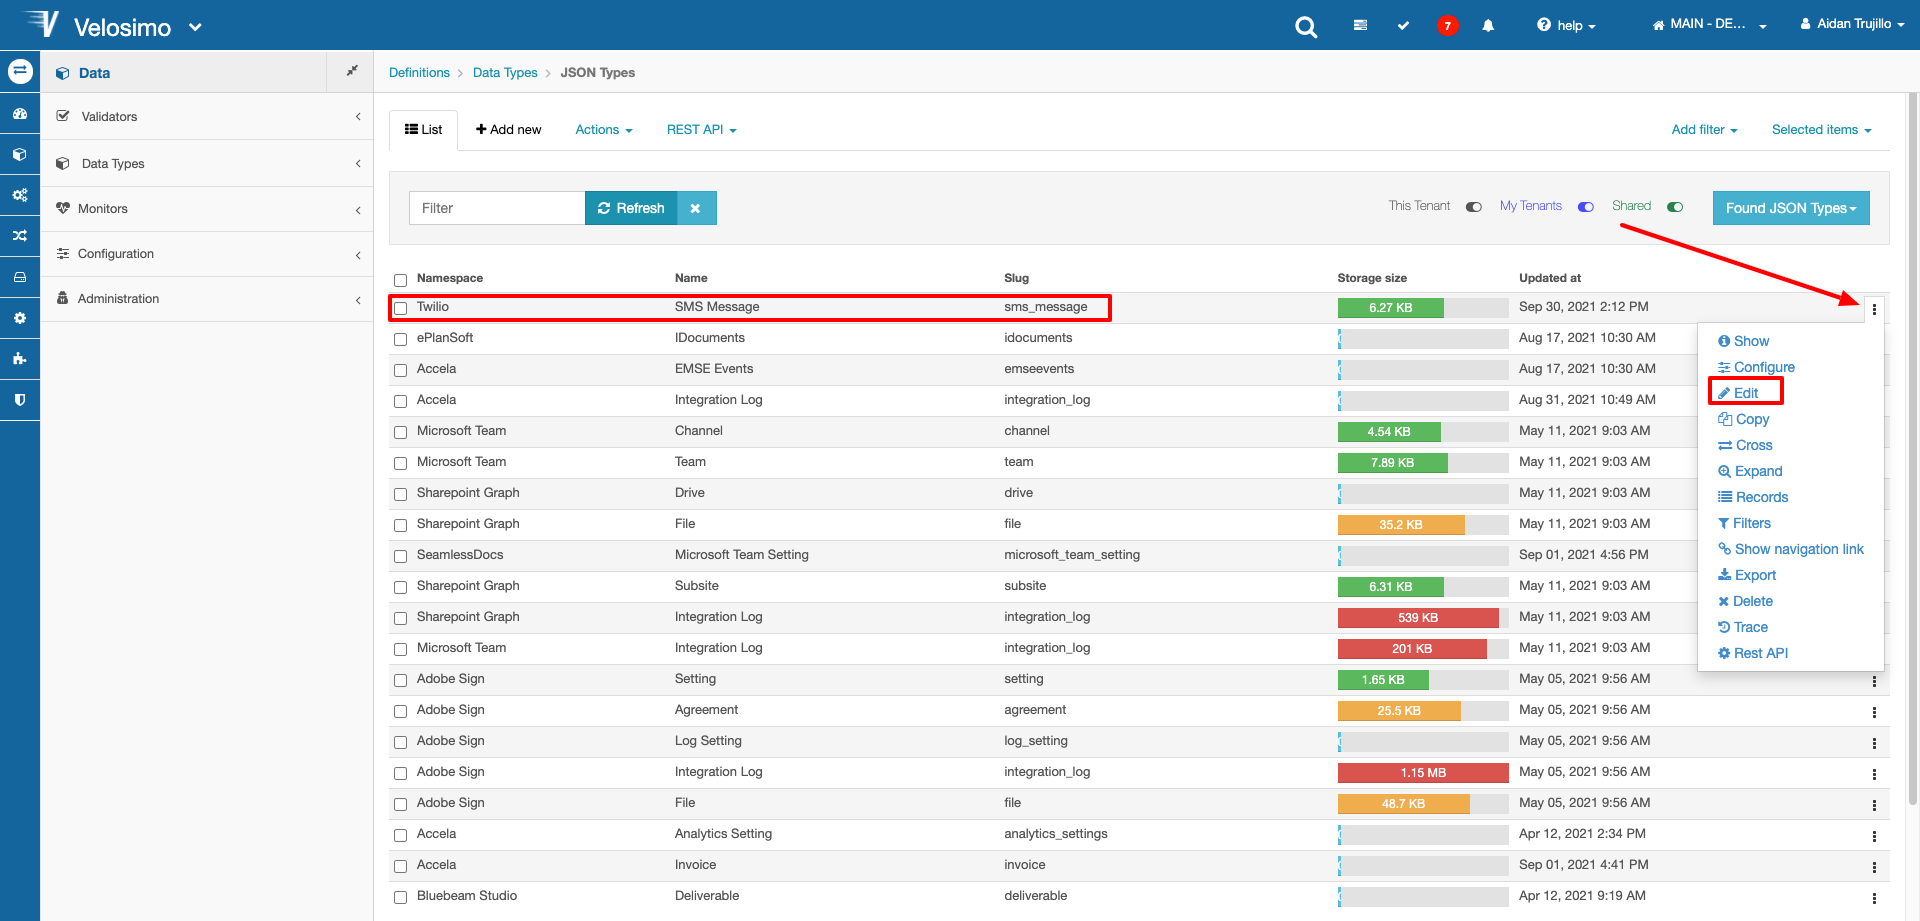
In JSON format, add the new status property and set it's type to string and click Save.
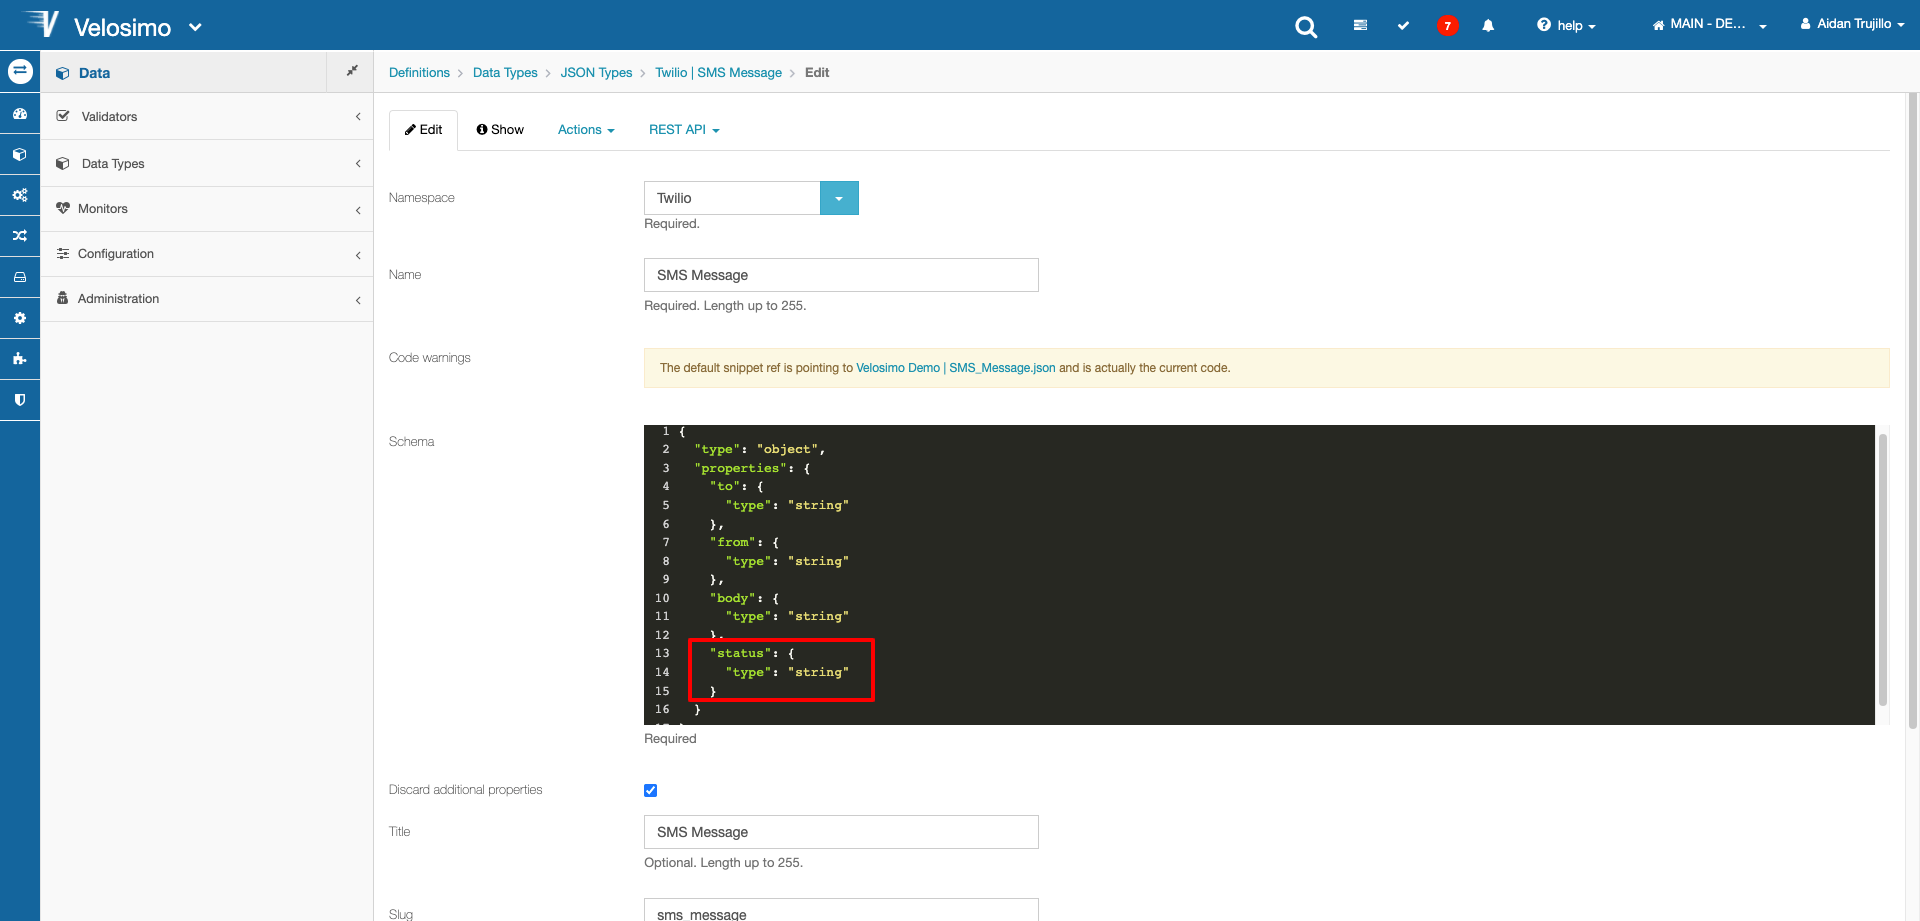
Updating the Flow Template
Next we must update our flow template's body parameters to send the callback URL to Twilio's API.
Navigate to Transforms -> Templates and select your template to edit.
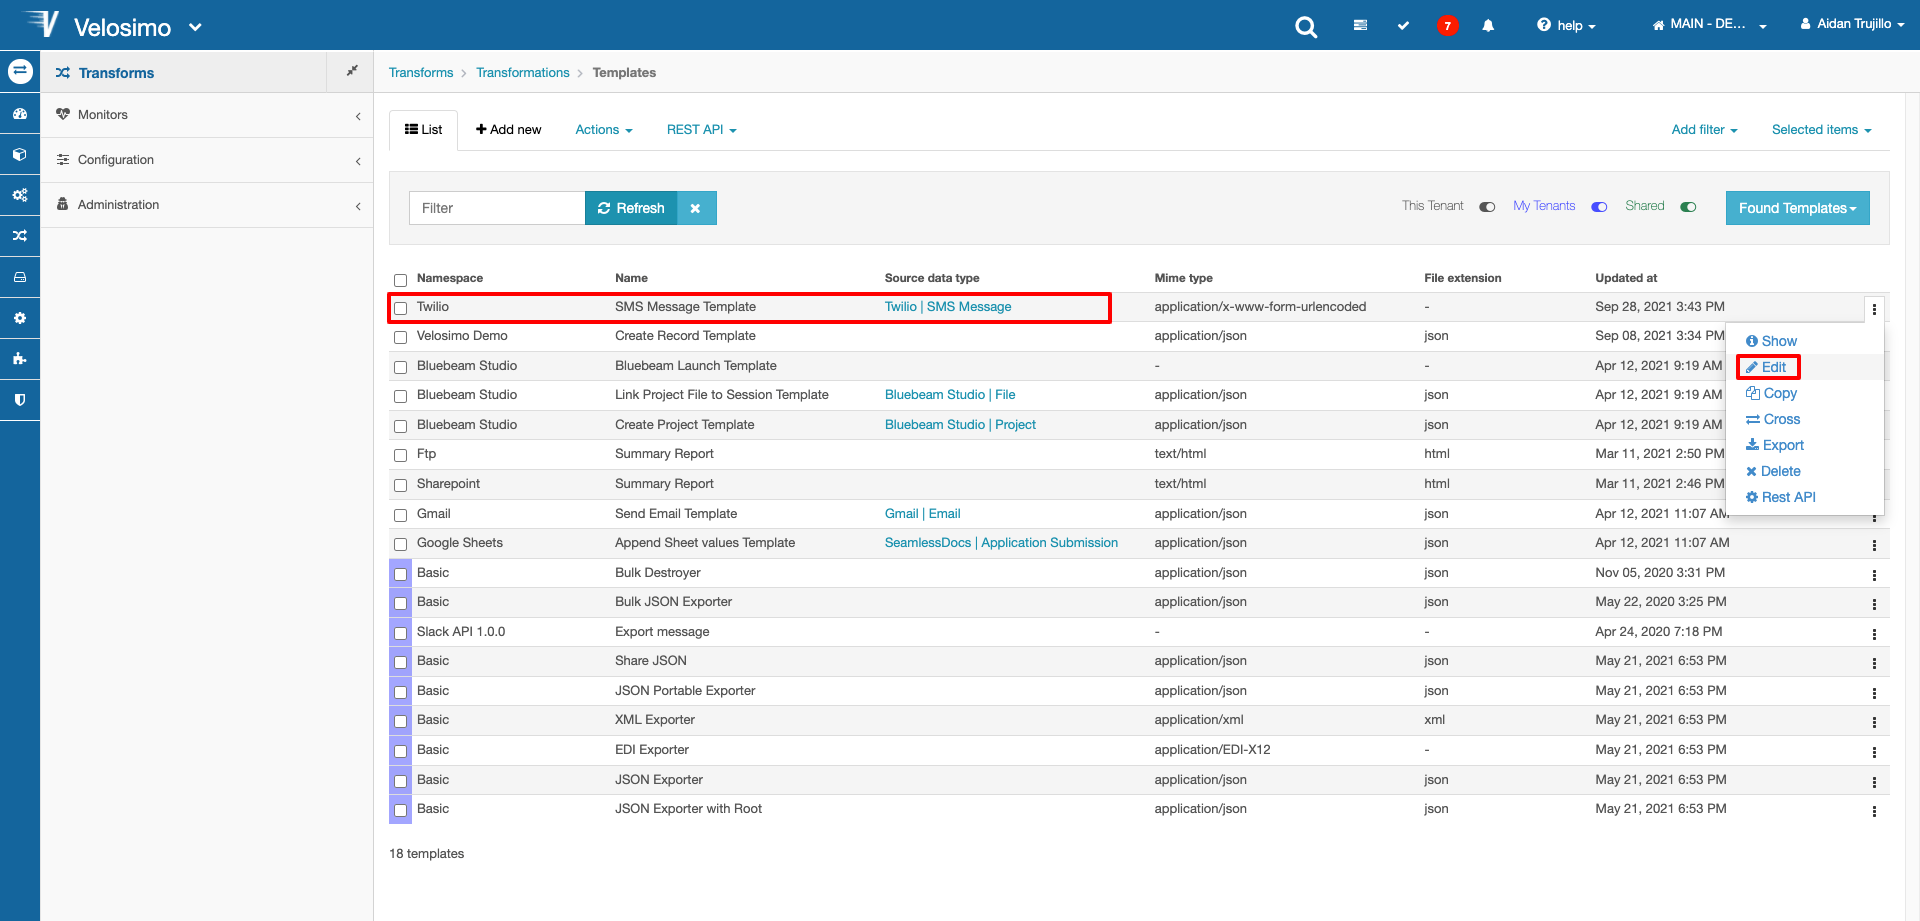
First, add a new property to the postBody object called StatusCallback. The syntax is important because Twilio will only recognize the parameter if it is StatusCallback exactly.
postBody = {}
postBody["StatusCallback"] = "callbackURL"
Set the value of the new property to your callback URL. Remember, it's the Velosimo subdomain site that the app was created on, followed by the Regist name of your app, and the algorithm action path.
https://connect.velosimo.io/app/messagecallback/status
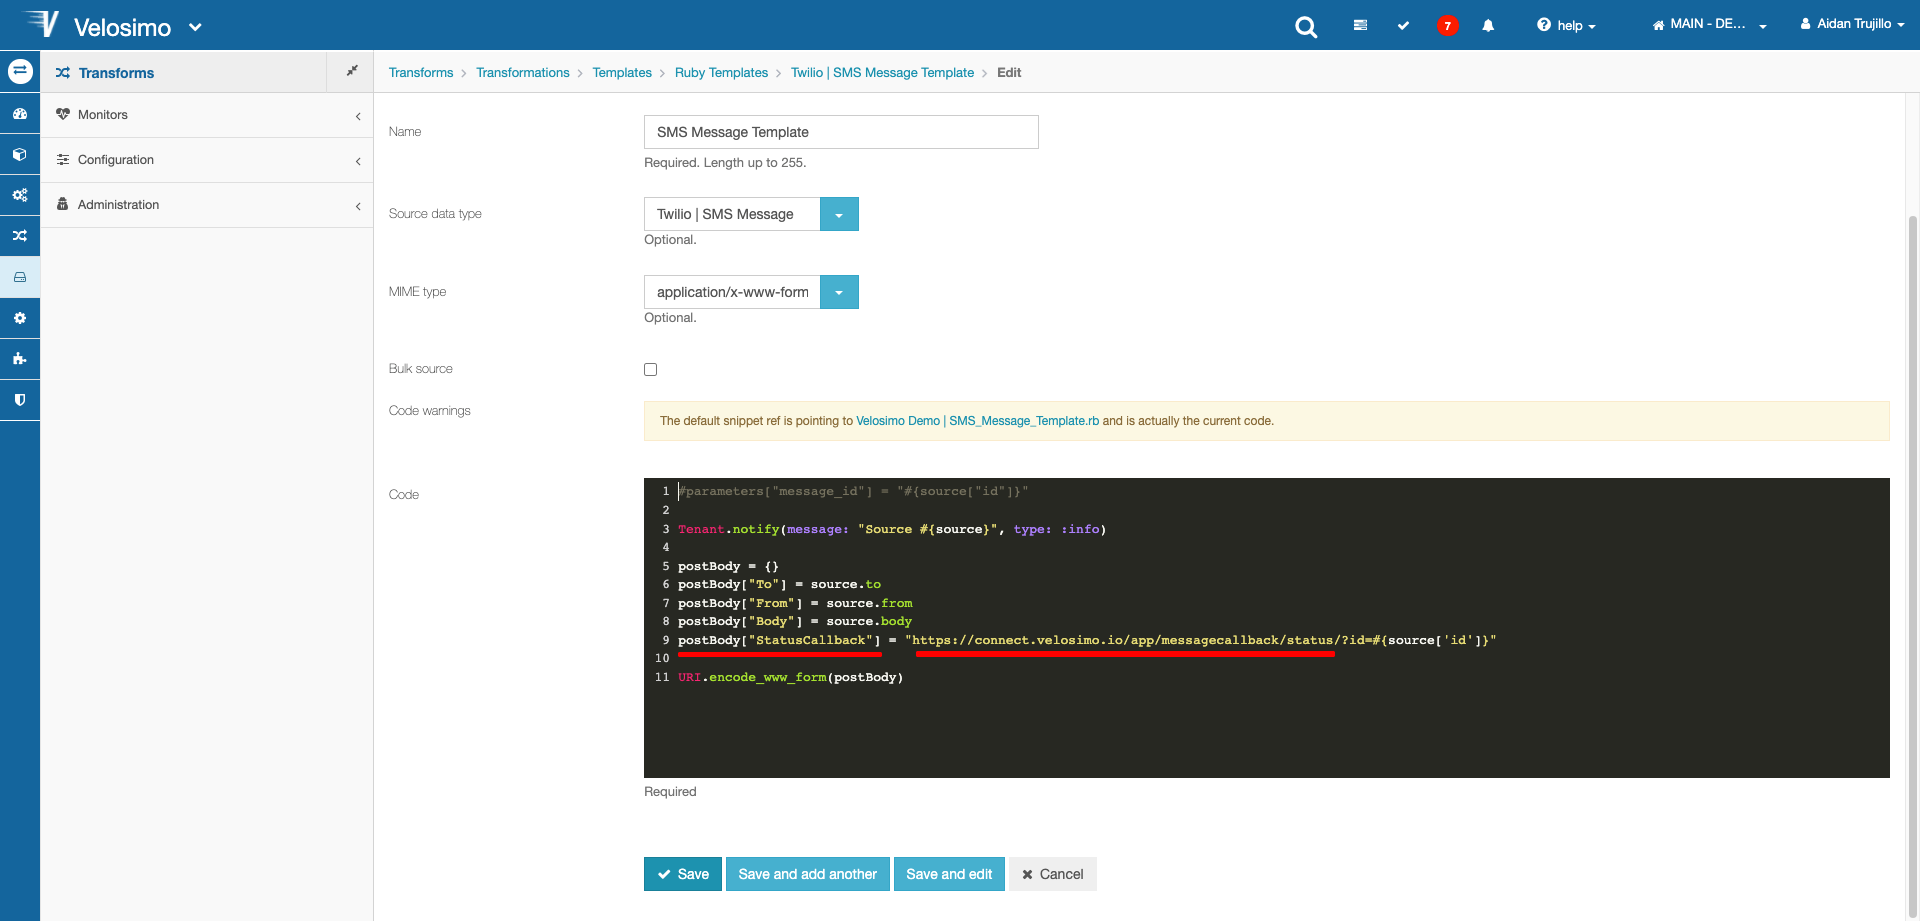
Since we want to update a specific record, we will need to pass its ID to the callback URL. Add a query at the end of the URL called id and set its value to #{source['id']}. This variable is how we can access the ID of the record created with the flow.

Now that we have updated the data type and flow template to handle our new data, we can create the algorithm which will receive the Status Callback data and use it to update our flow's SMS Message record.
Creating the Algorithm
Navigate to Compute -> Algorithms on the Velosimo menu.
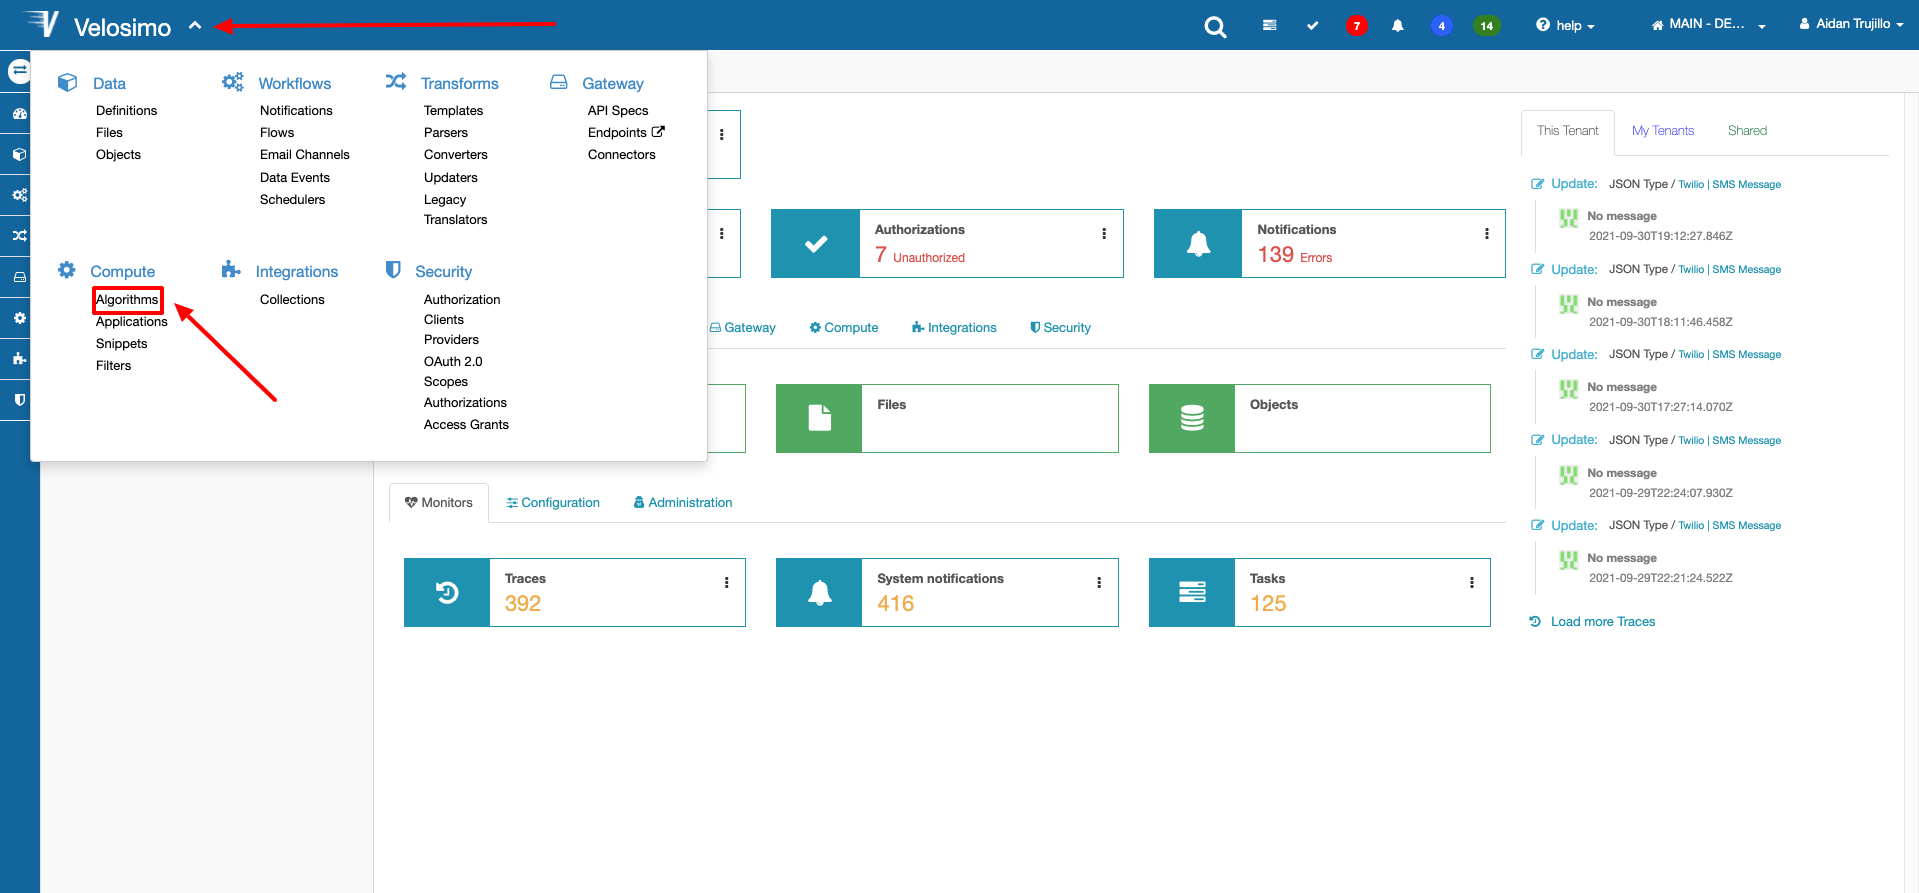
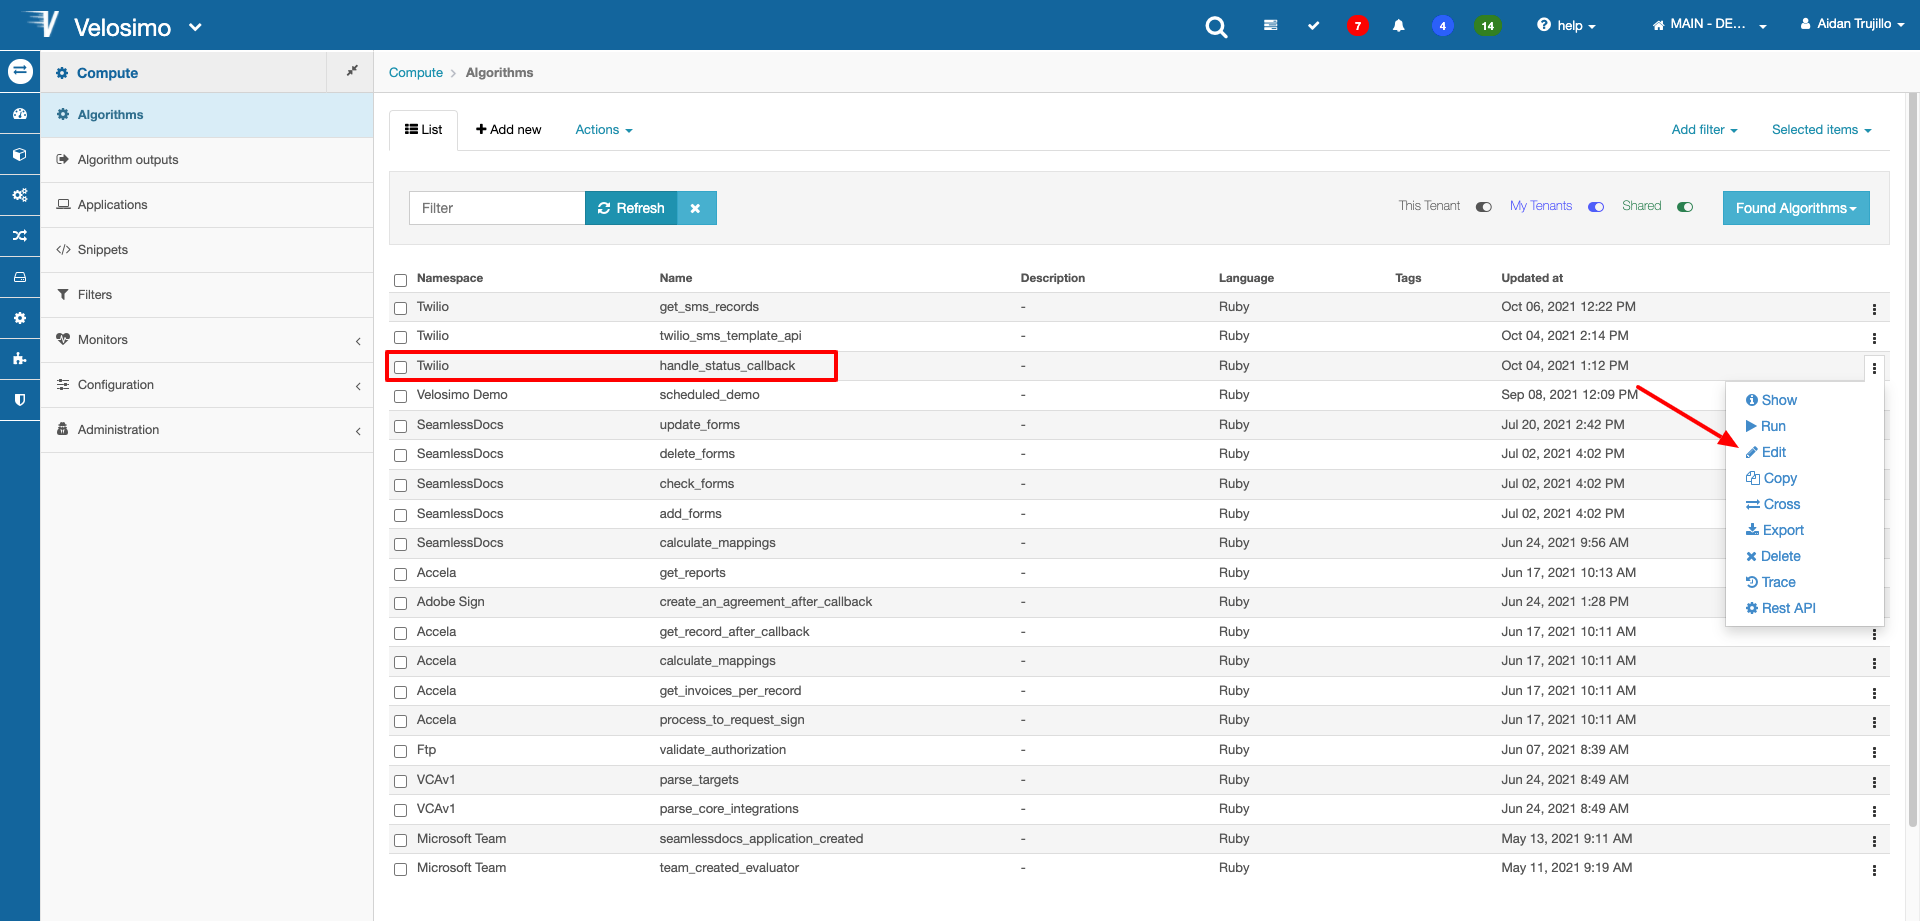
Locate the empty algorithm created for the app earlier. Select the action menu and click Edit.
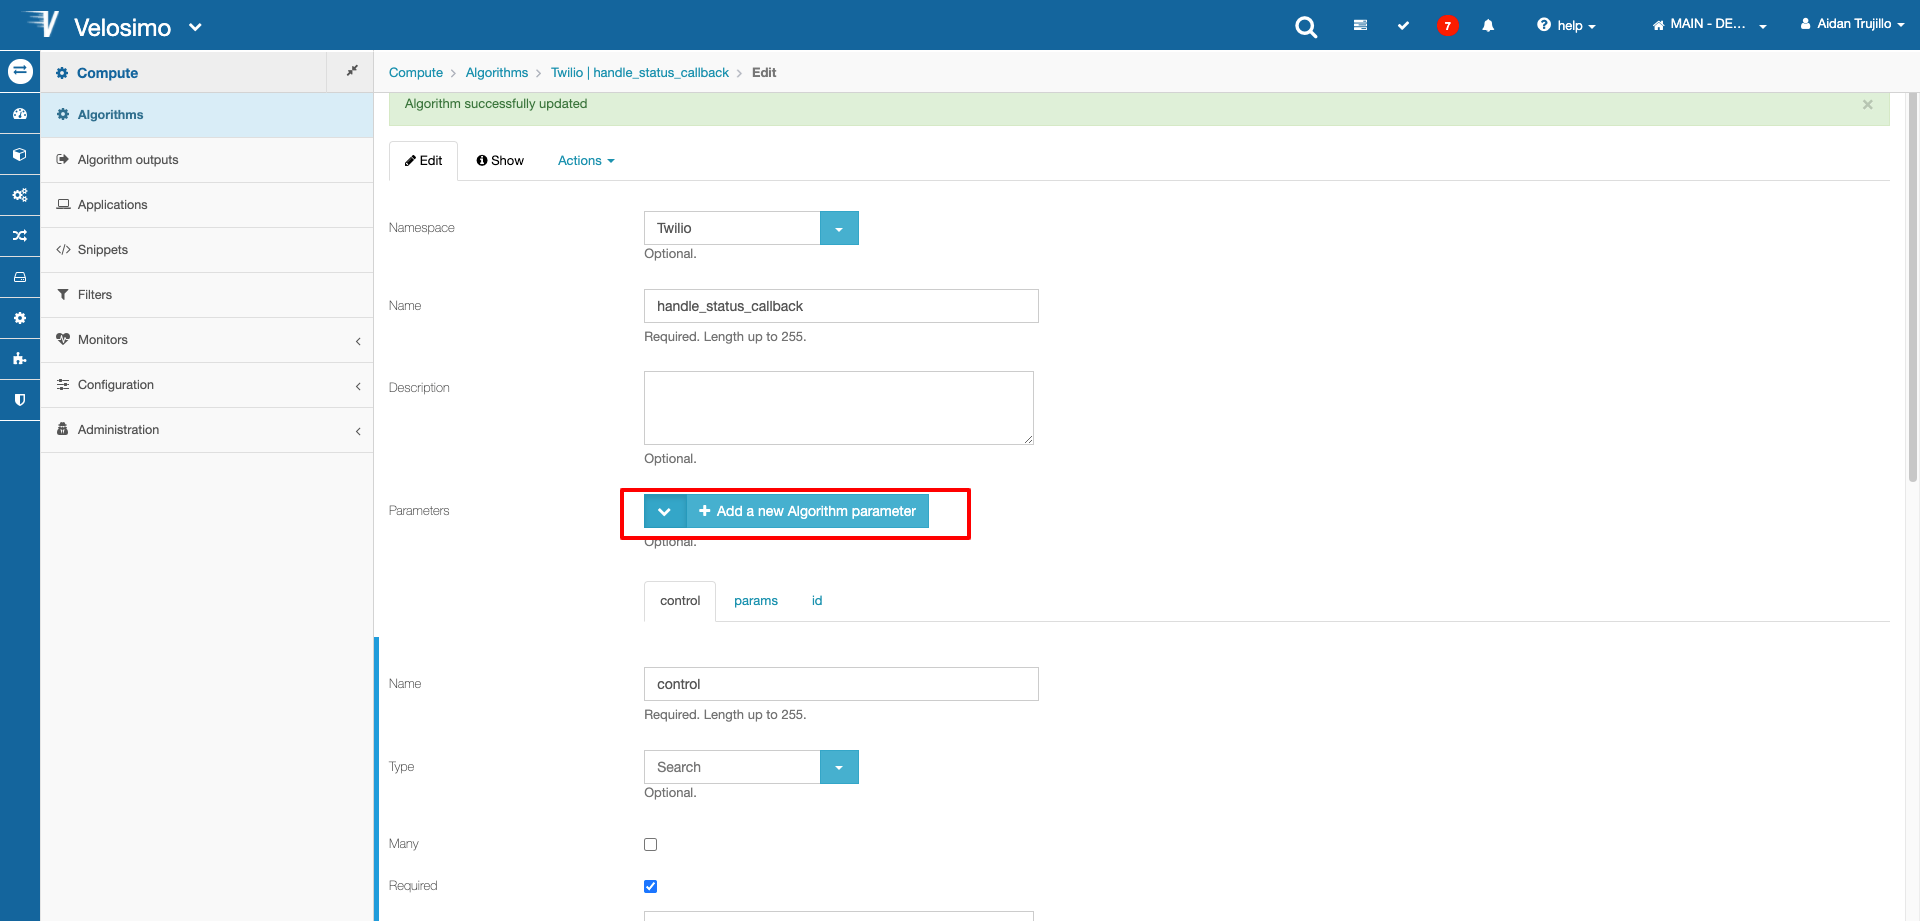
Click Add a new Algorithm parameter and add these three parameters: "control, params, id" in that exact order.
Next is to create the code that will update the record. Let's break this down line by line:
statusData = params["MessageStatus"]
recordId = params["id"]

twilio_np = Cenit.namespace('Twilio')
sms_dt = twilio_np.data_type('SMS Message')

record = sms_dt.where(id: recordId).first
record["status"] = statusData
record.save-
Line 1 accesses the status data being passed in from the Status Callback body data.
-
Line 2 accesses the record ID being passed to the callback URL through params.
-
Line 4 retrieves the namespace we are working in and defines it to a variable.
-
Line 5 retrieves the data type with the name SMS Message associated to the Twilio namespace and defines it to a variable.
-
Line 7 uses the sms_dmt variable to find a SMS Message record with a matching ID to the one passed in from params
-
Line 8 accesses the "status" property of the record and defines its value to the statusData variable which contains the data for the status of the message.
-
Line 9 saves the changes and updates the record.
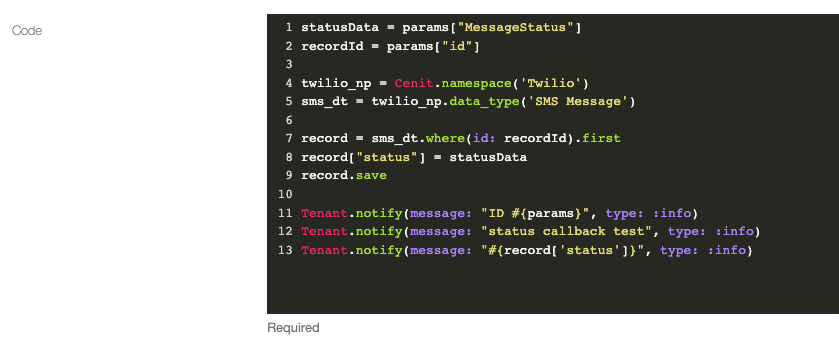
Once complete, click save and the algorithm will update. Since we have already set the algorithm in the app it will update there too.
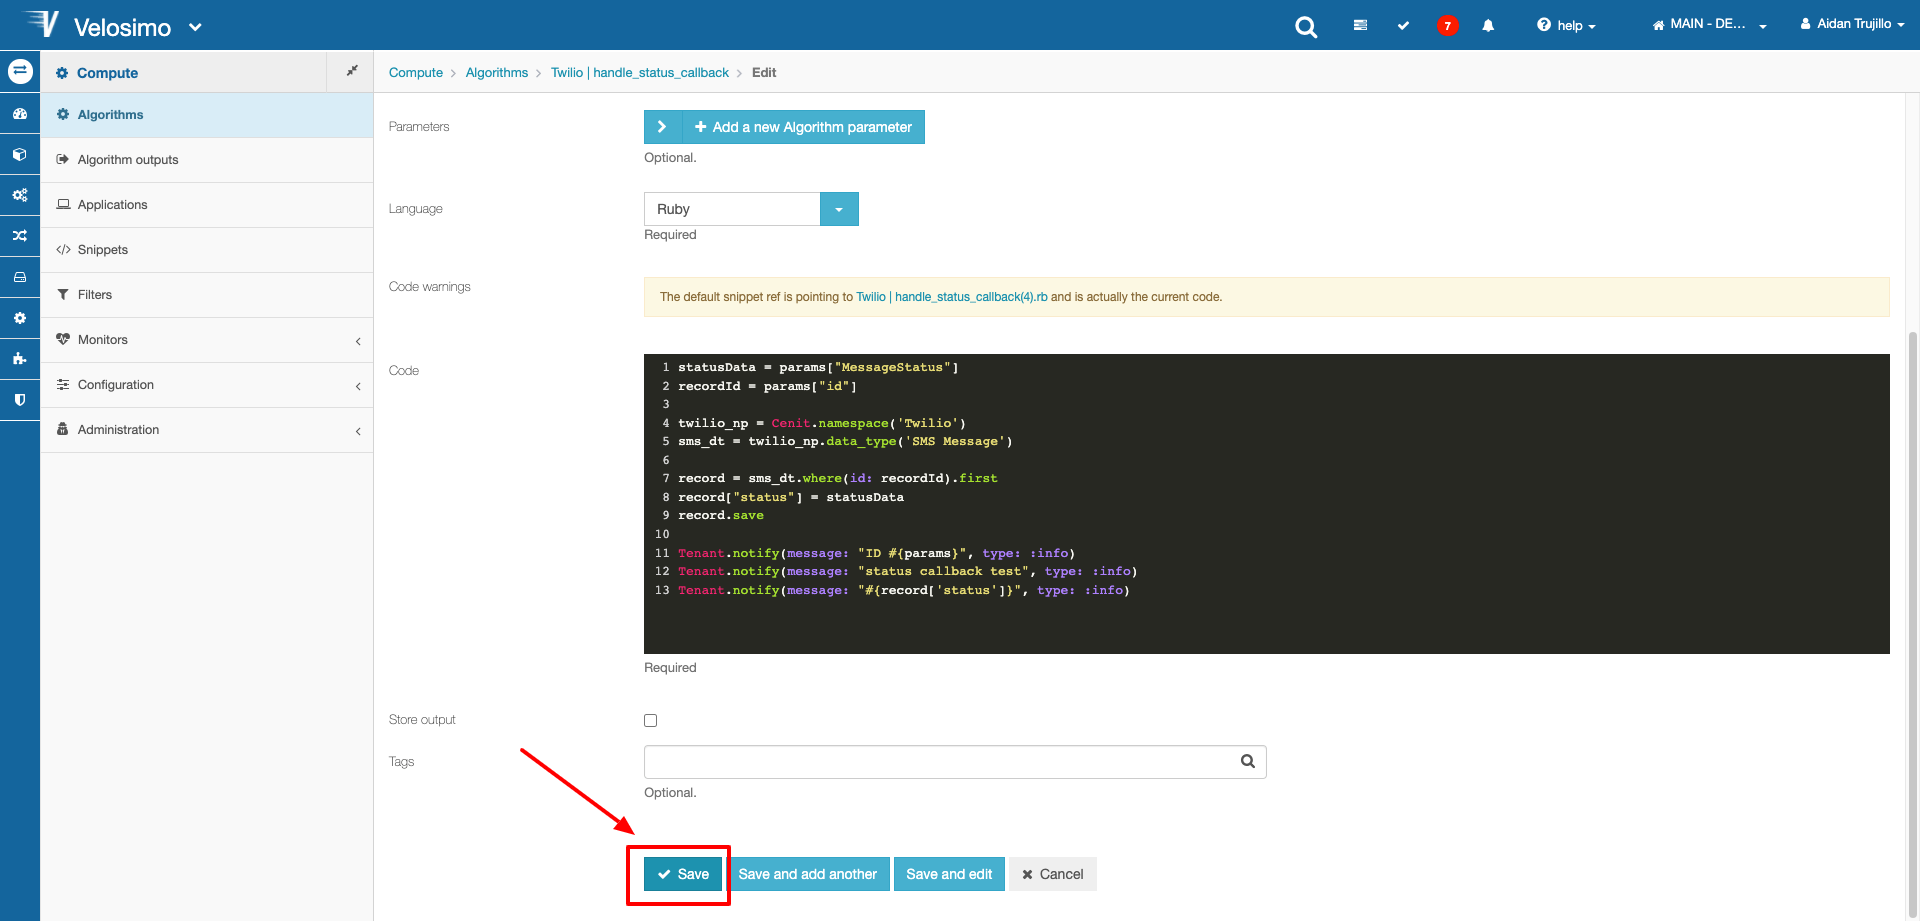
Once the algorithm is complete, the Status Callback URL provided in the Flow template body will call this algorithm with the record's id and execute the code. Now let's test it out!
Testing the SMS Message
Since we setup our flow to execute whenever a new record of the SMS Message data type is created, the first step is to create a new record.
Navigate to Data -> Definitions -> JSON Types and select the Action menu on the data type and select Records.
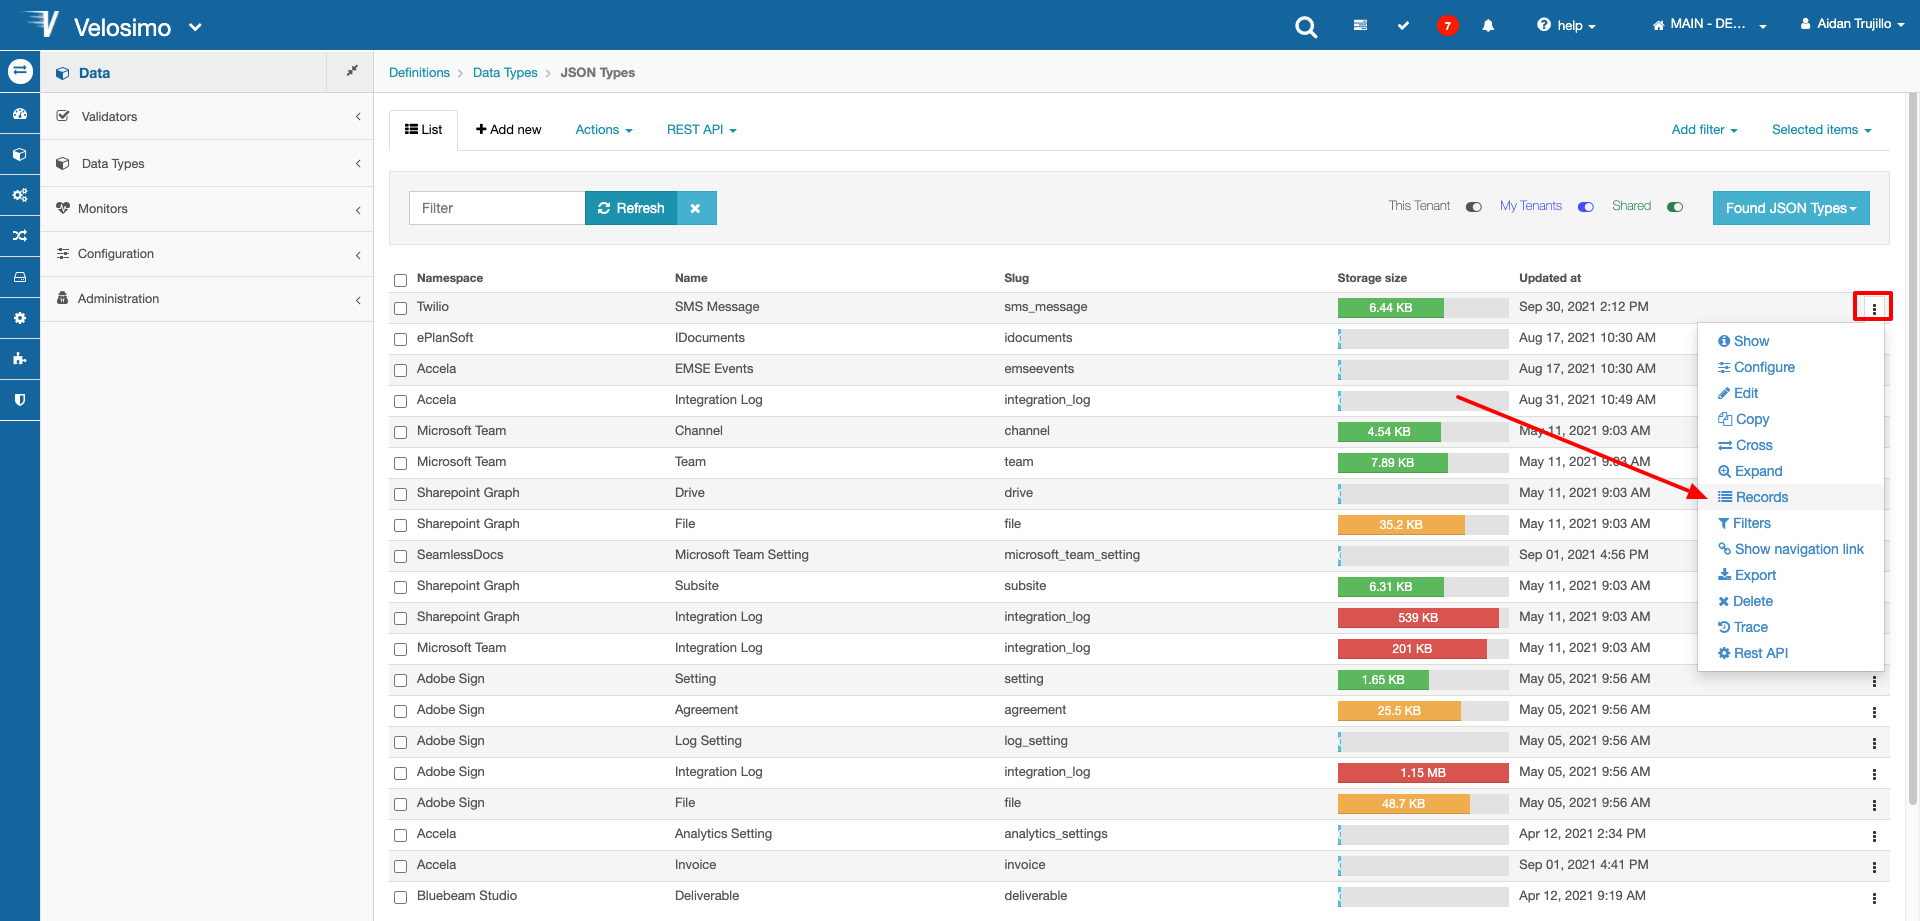
Click Add New at the top of the page.
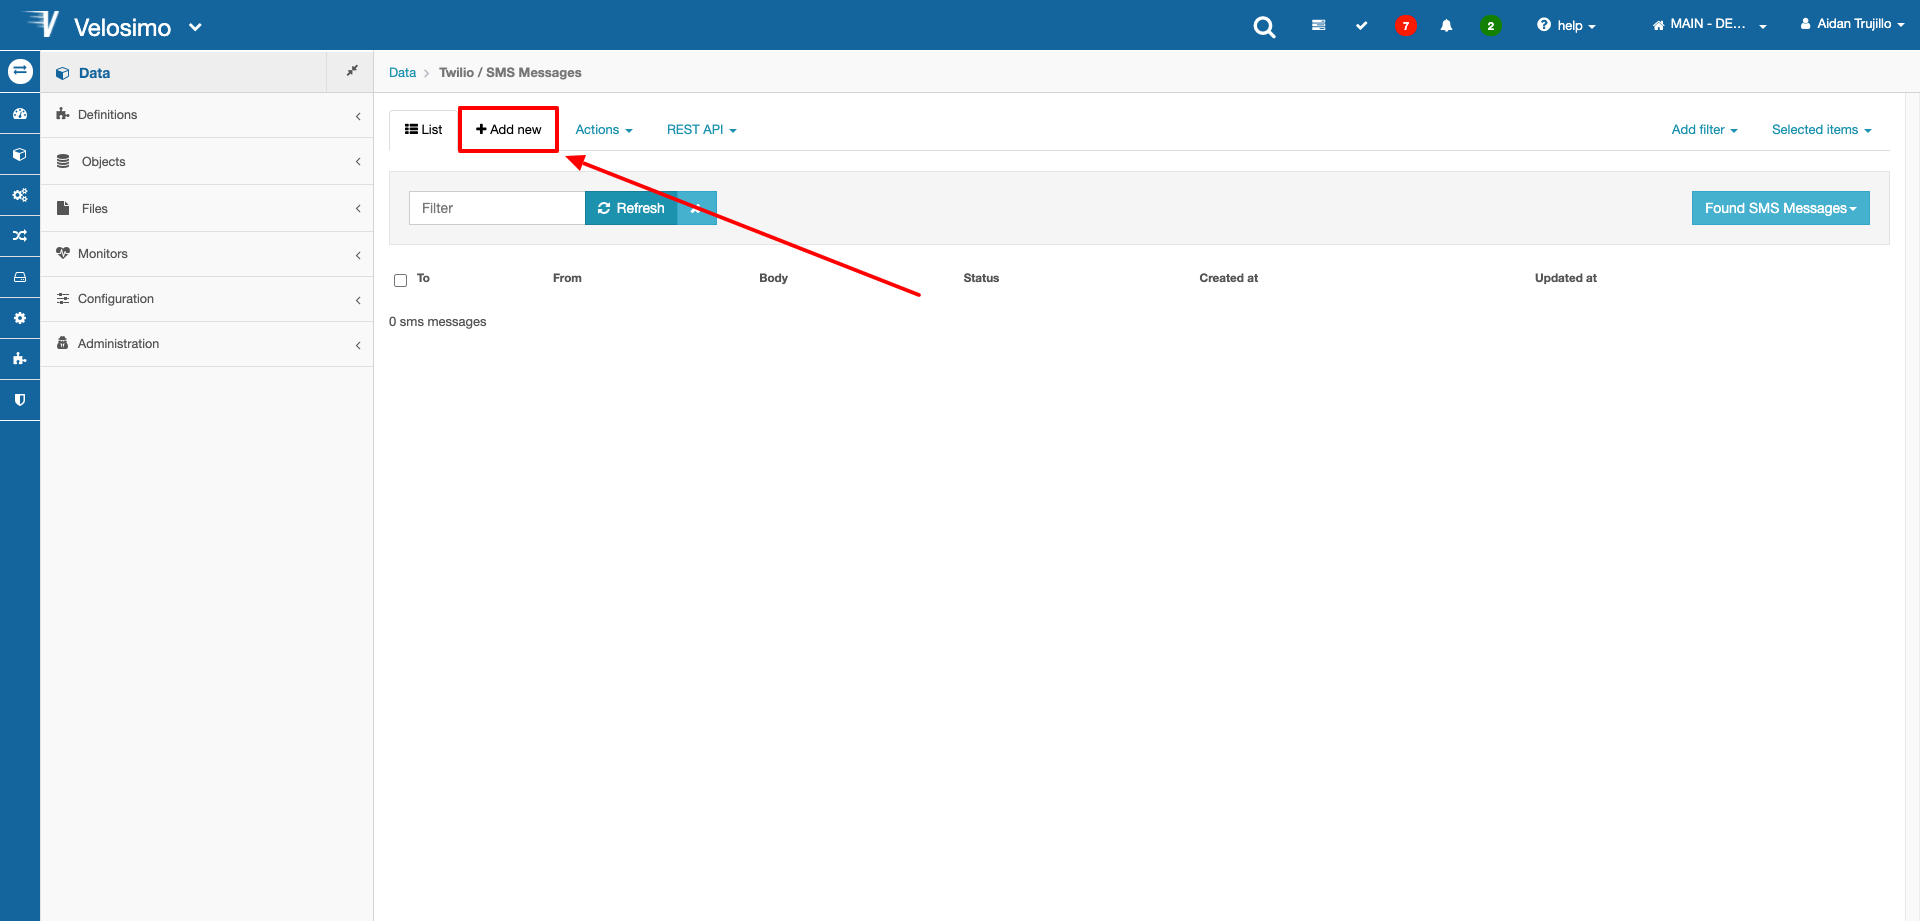
Set the To parameter to the phone number registered with Twilio, and set From to the Twilio number for your account. The From phone number can be accessed in your User Console at https://www.twilio.com/
Set the body to what message you want to receive through SMS. Leave Status empty and click Save.
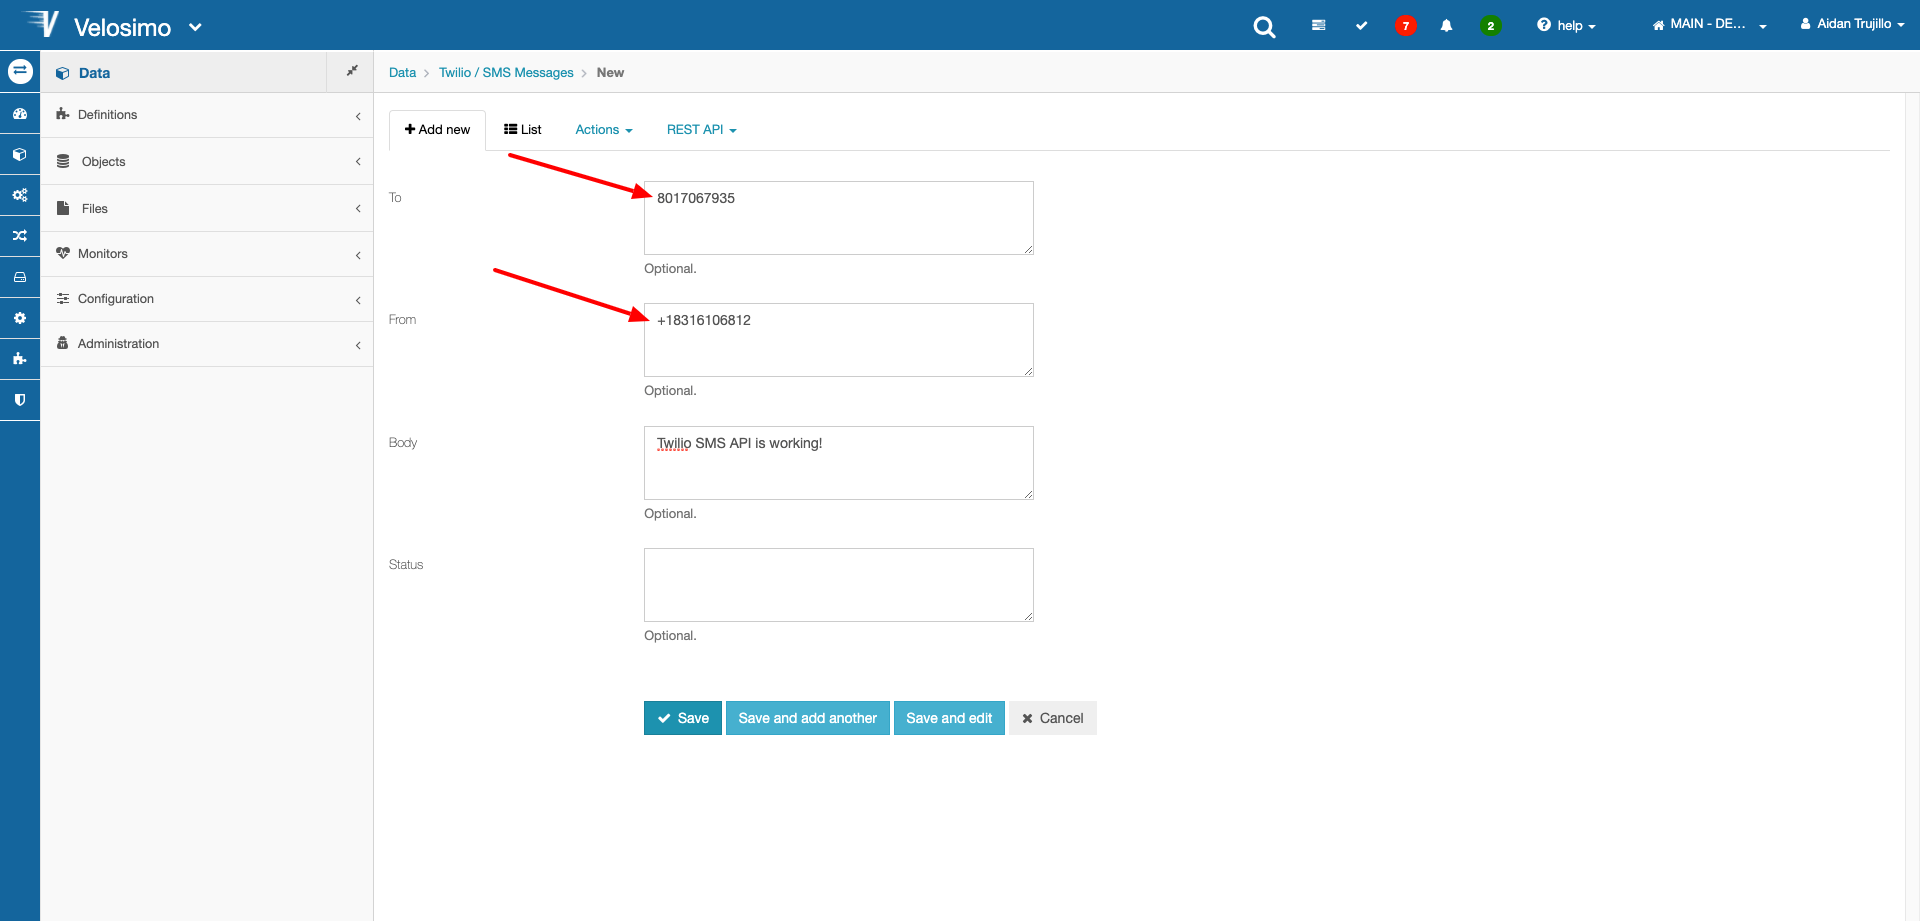
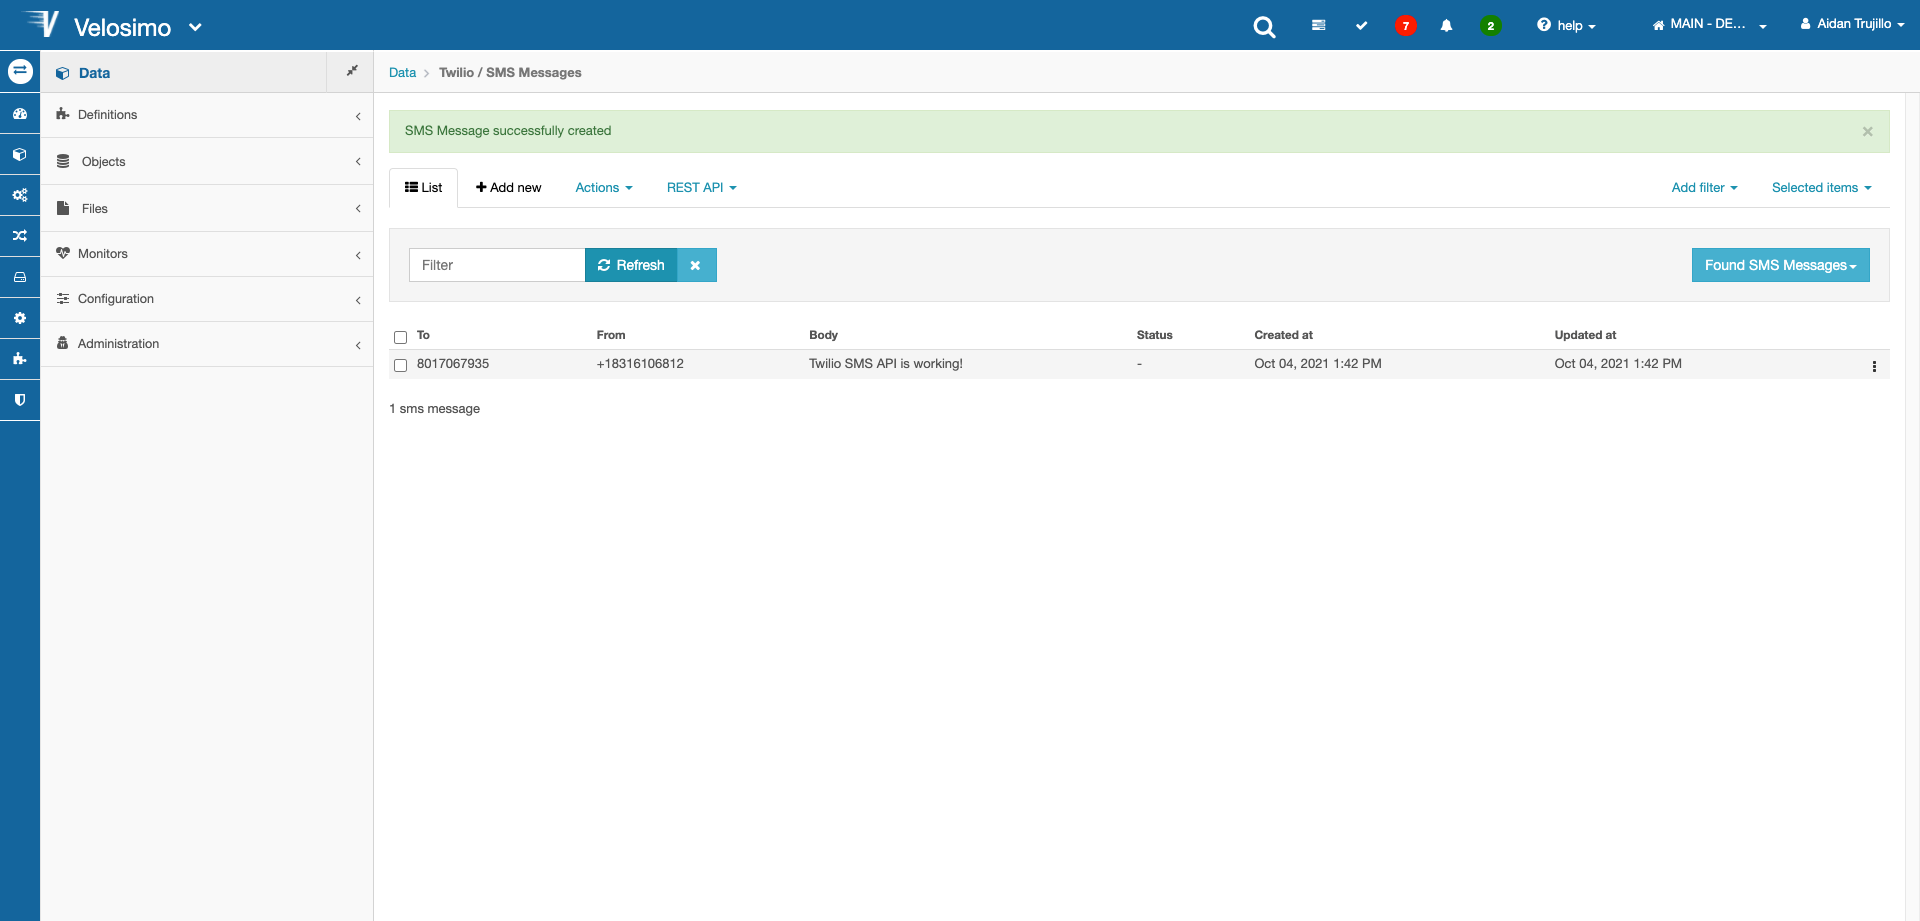
Now a new SMS Message has been created and you should have received a text on your phone. The status will remain empty until the Status Callback is completed. To verify this, check the flow executions for your flow.
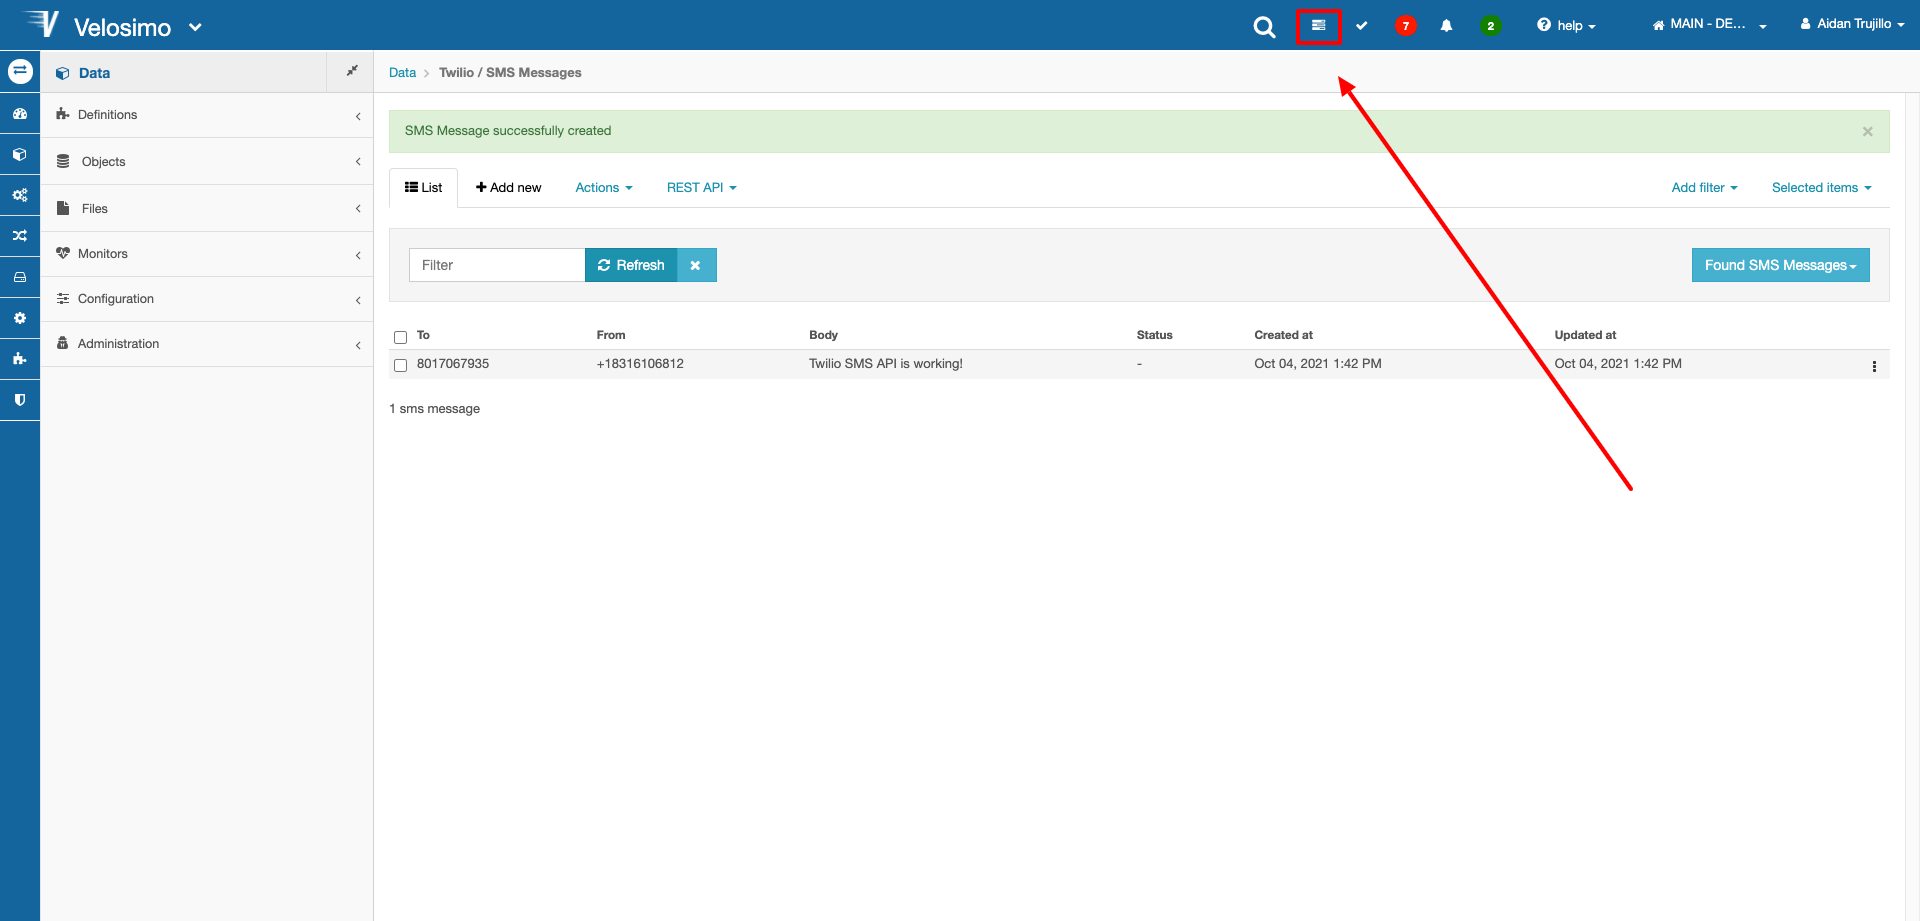
Click the second logo on the Nav-Bar at the top of the screen to see the flow executions.
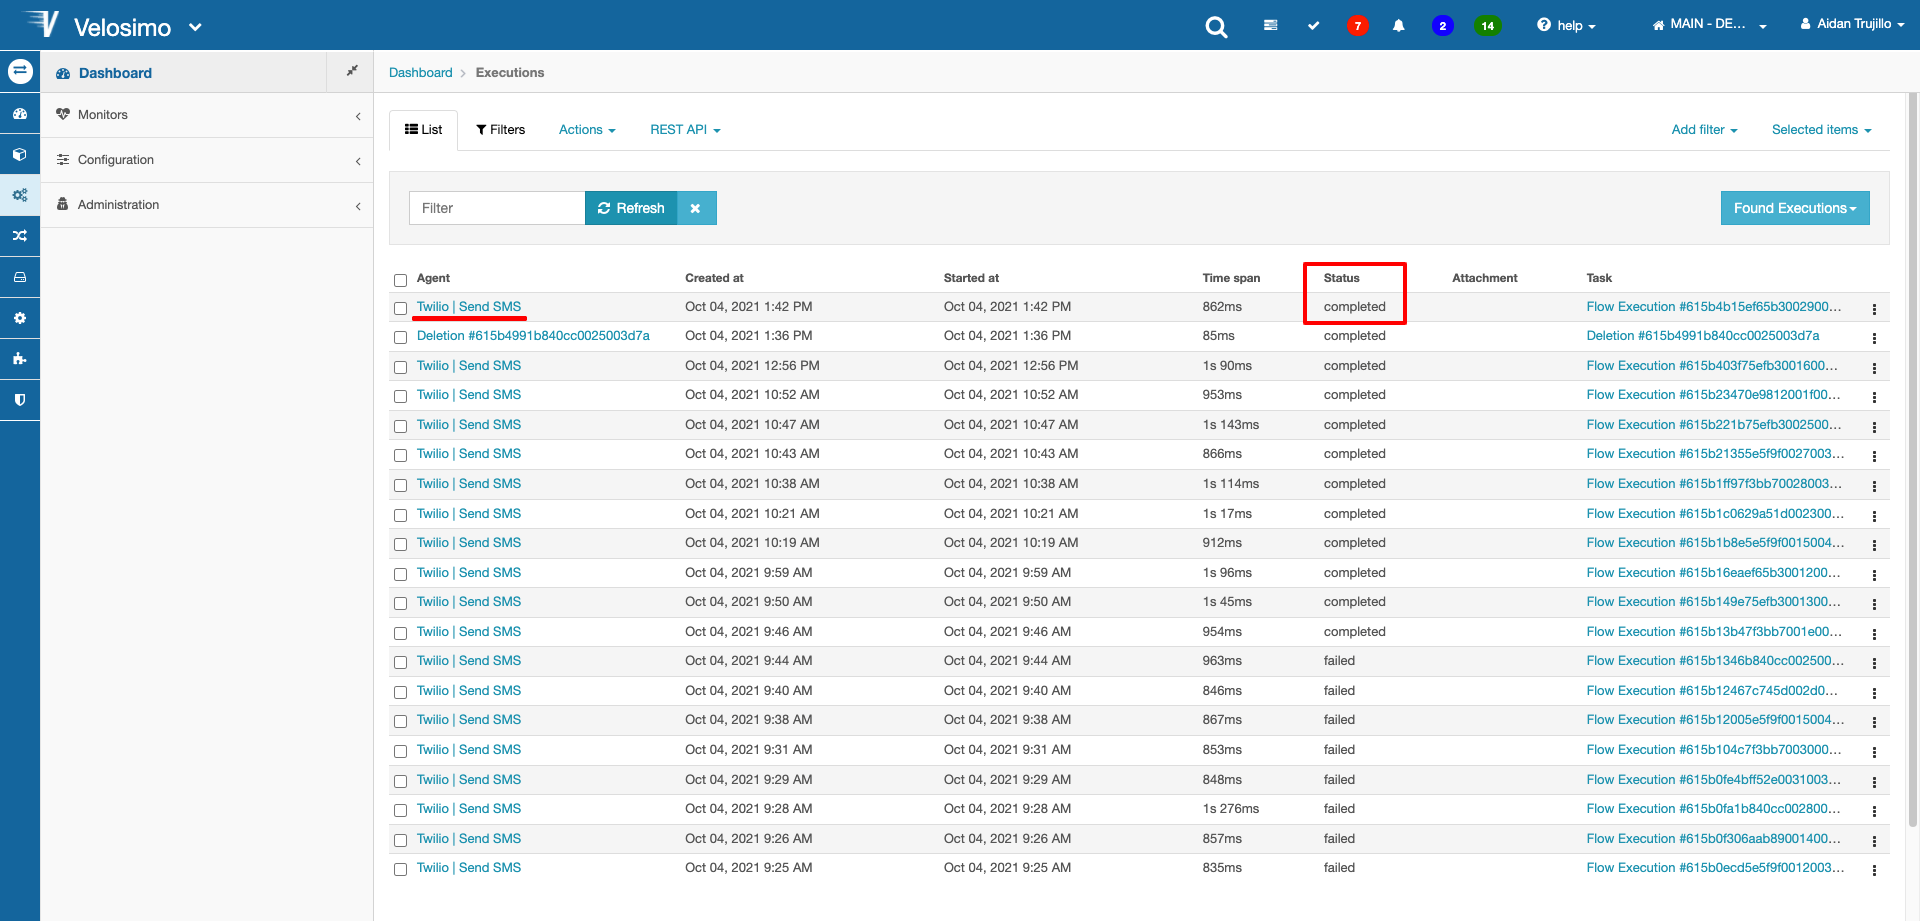
Here we see that our flow did execute and was successful. Now go back to your SMS Message records and refresh the page.
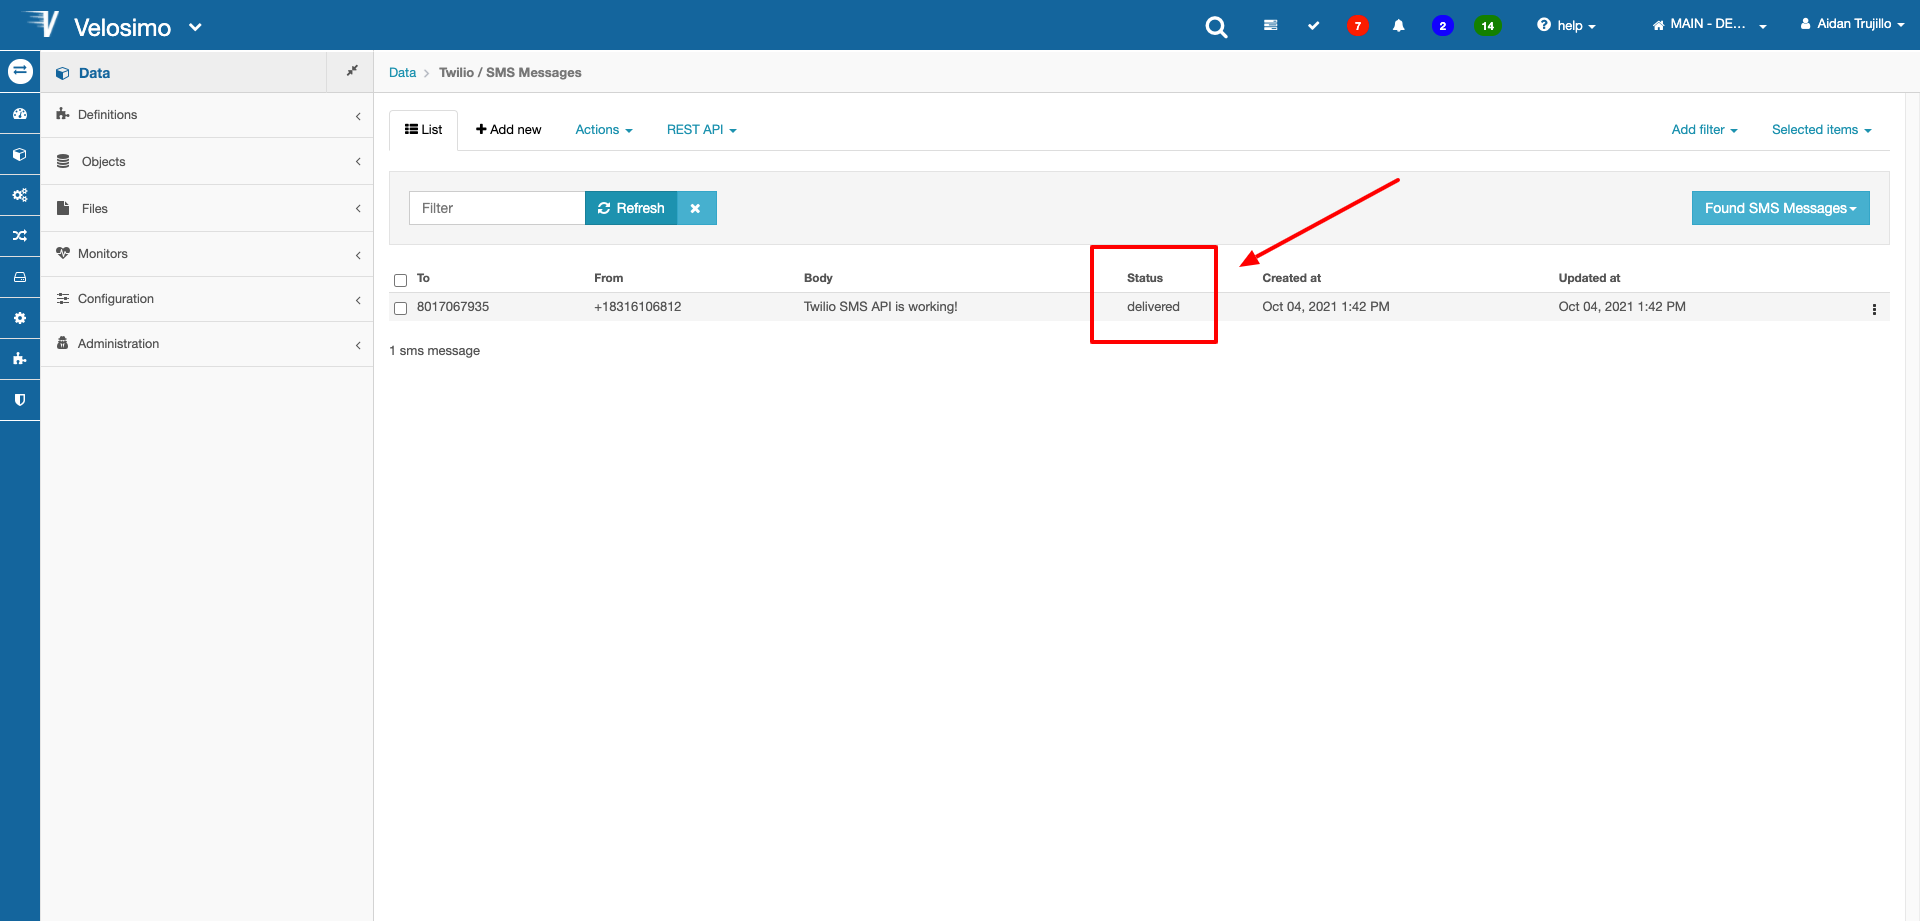
Once the records refresh, we can see that the Status Callback was successful and our SMS message now has a status of "delivered". For a list of different status messages that can be received through the callback, go here
Creating a Webpage
In this section we will go over how to create a Webpage on the Velosimo platform that displays records from the Twilio SMS Message data type using our App.
First, we need to create an HTML template. Navigate to Transforms -> Templates on the Velosimo menu.
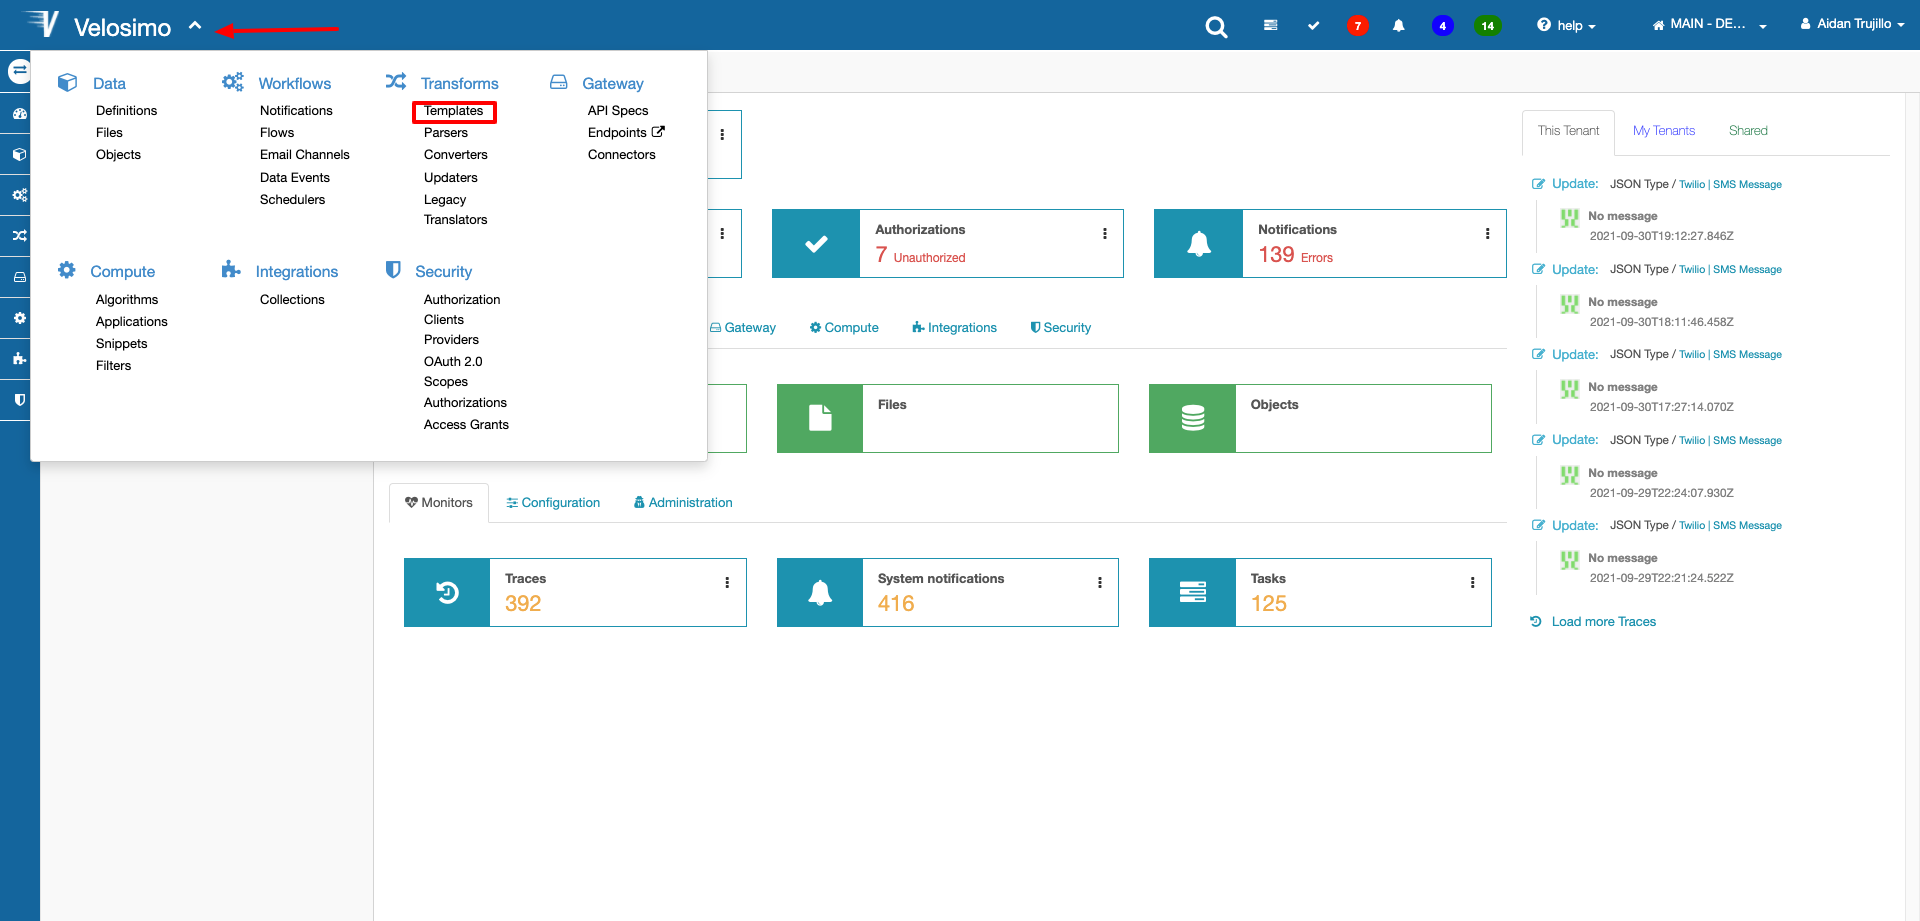
Click Add New at the top of the page.
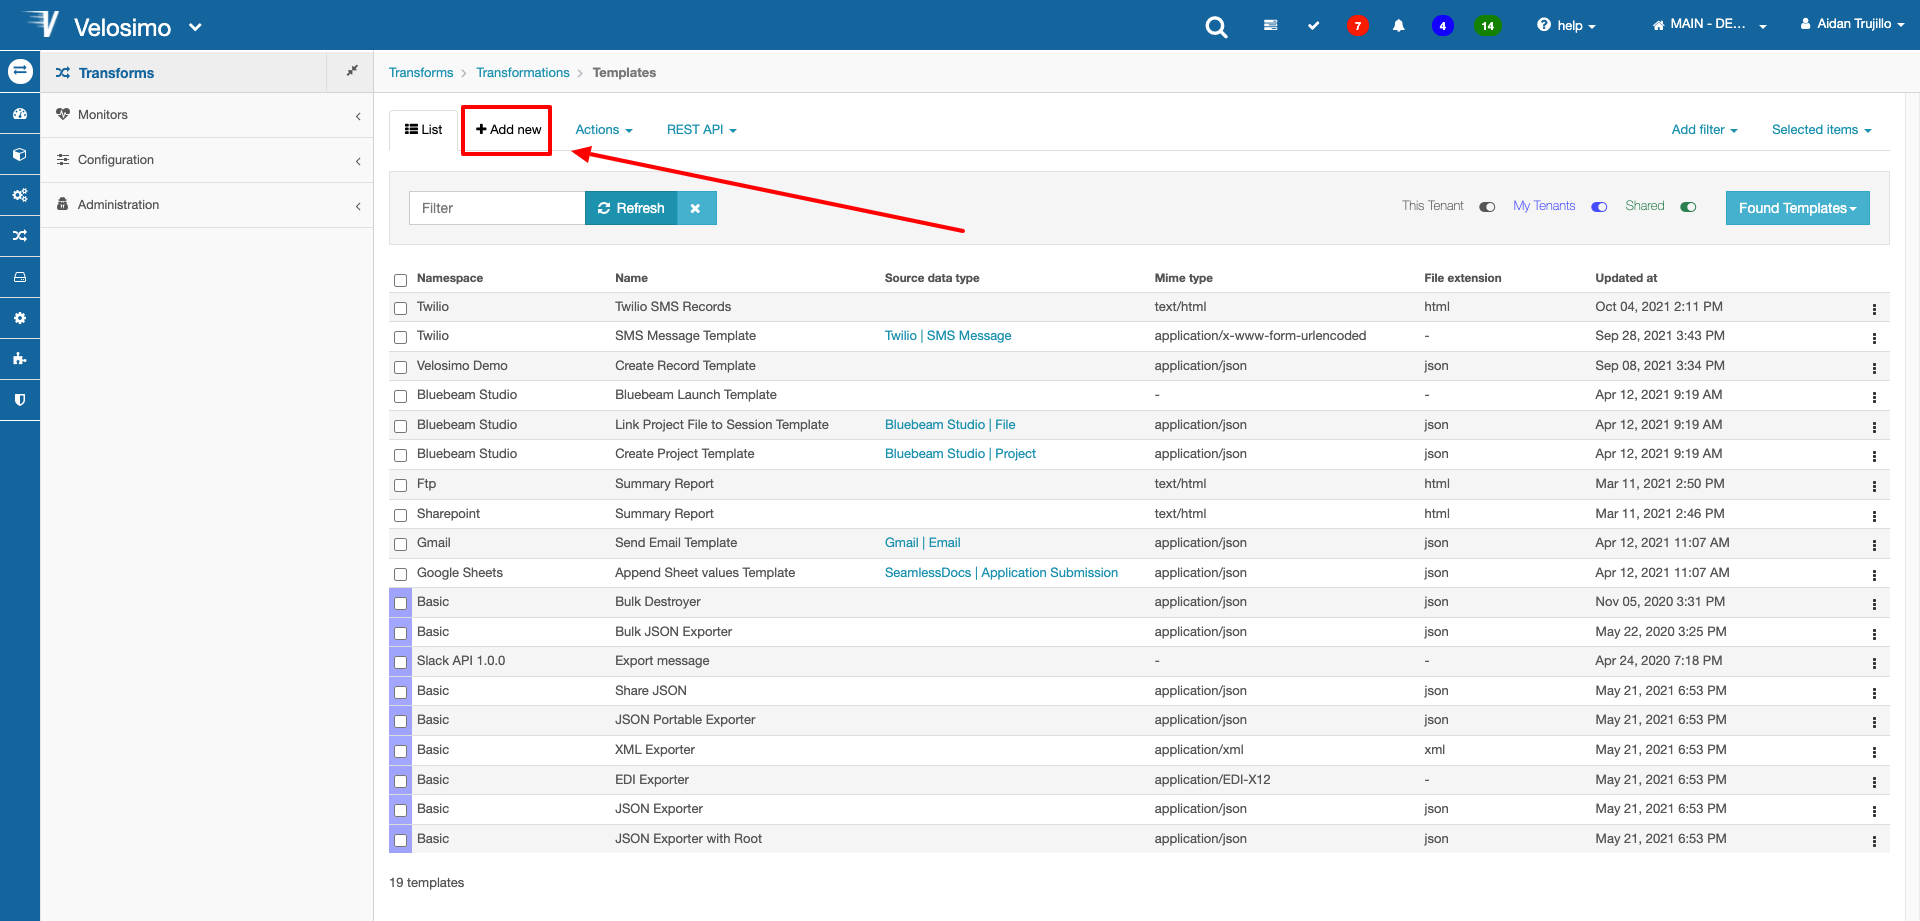
Select ERB Template from the drop-down menu and click next.
Enter a namespace and name, then set MIME type to text/html. Click next.
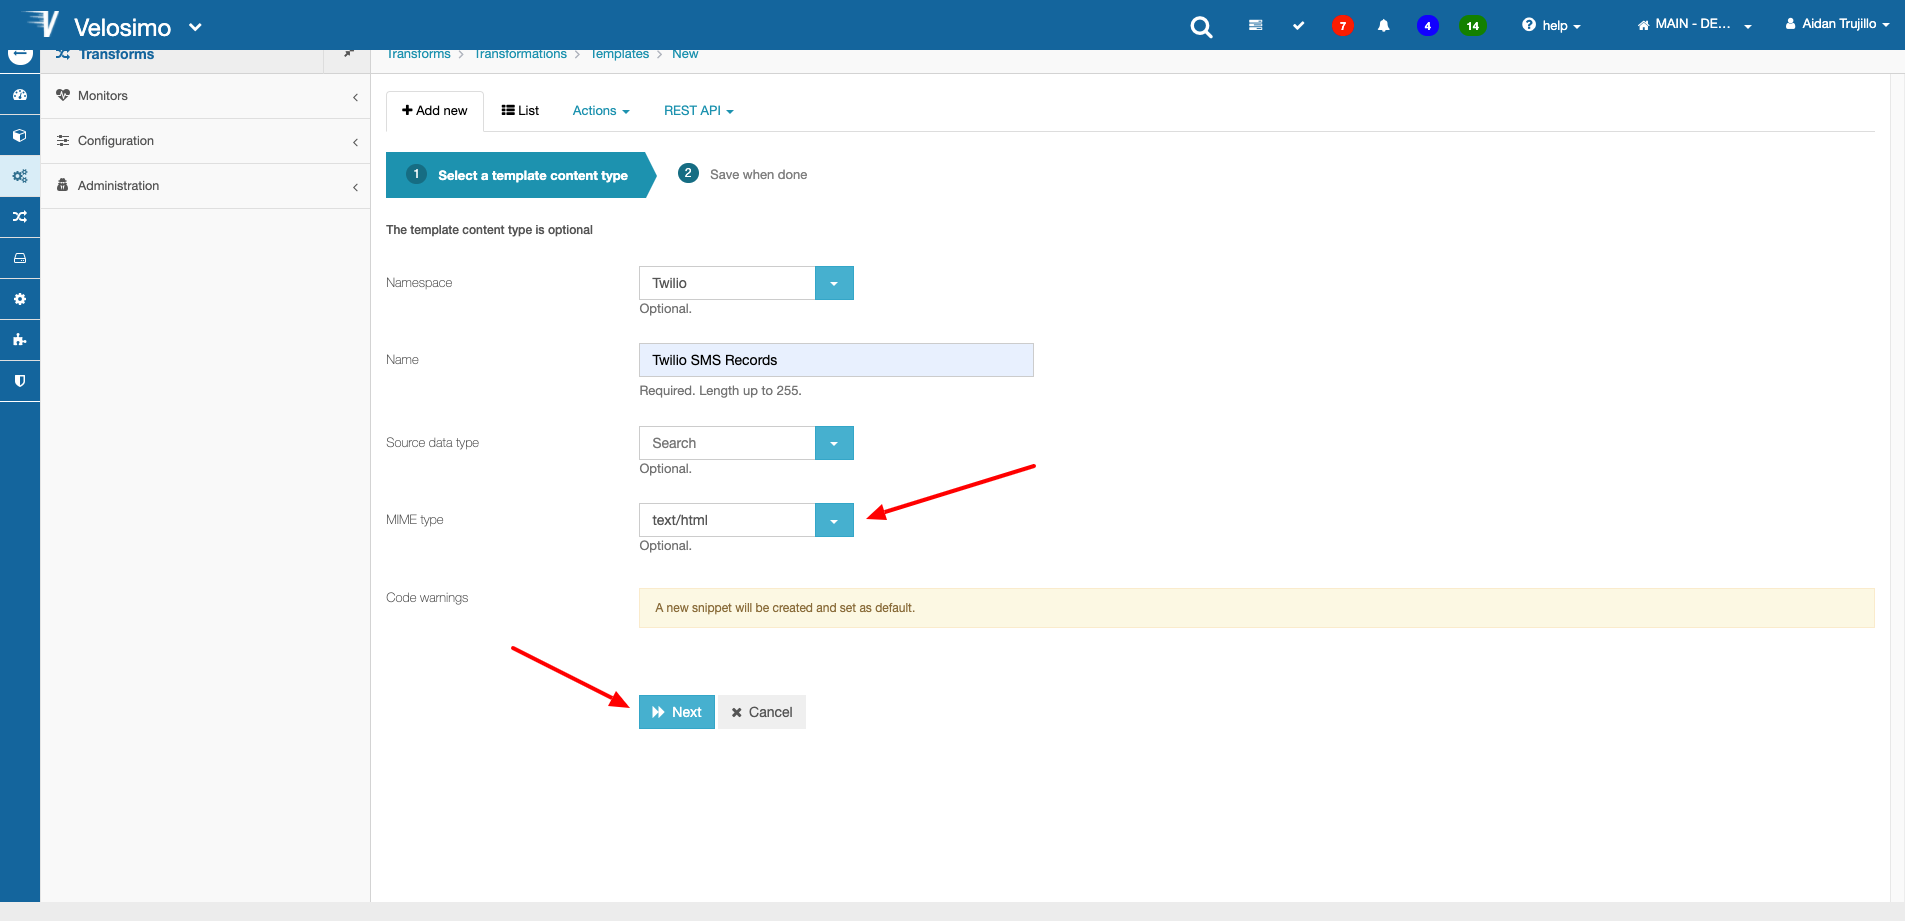
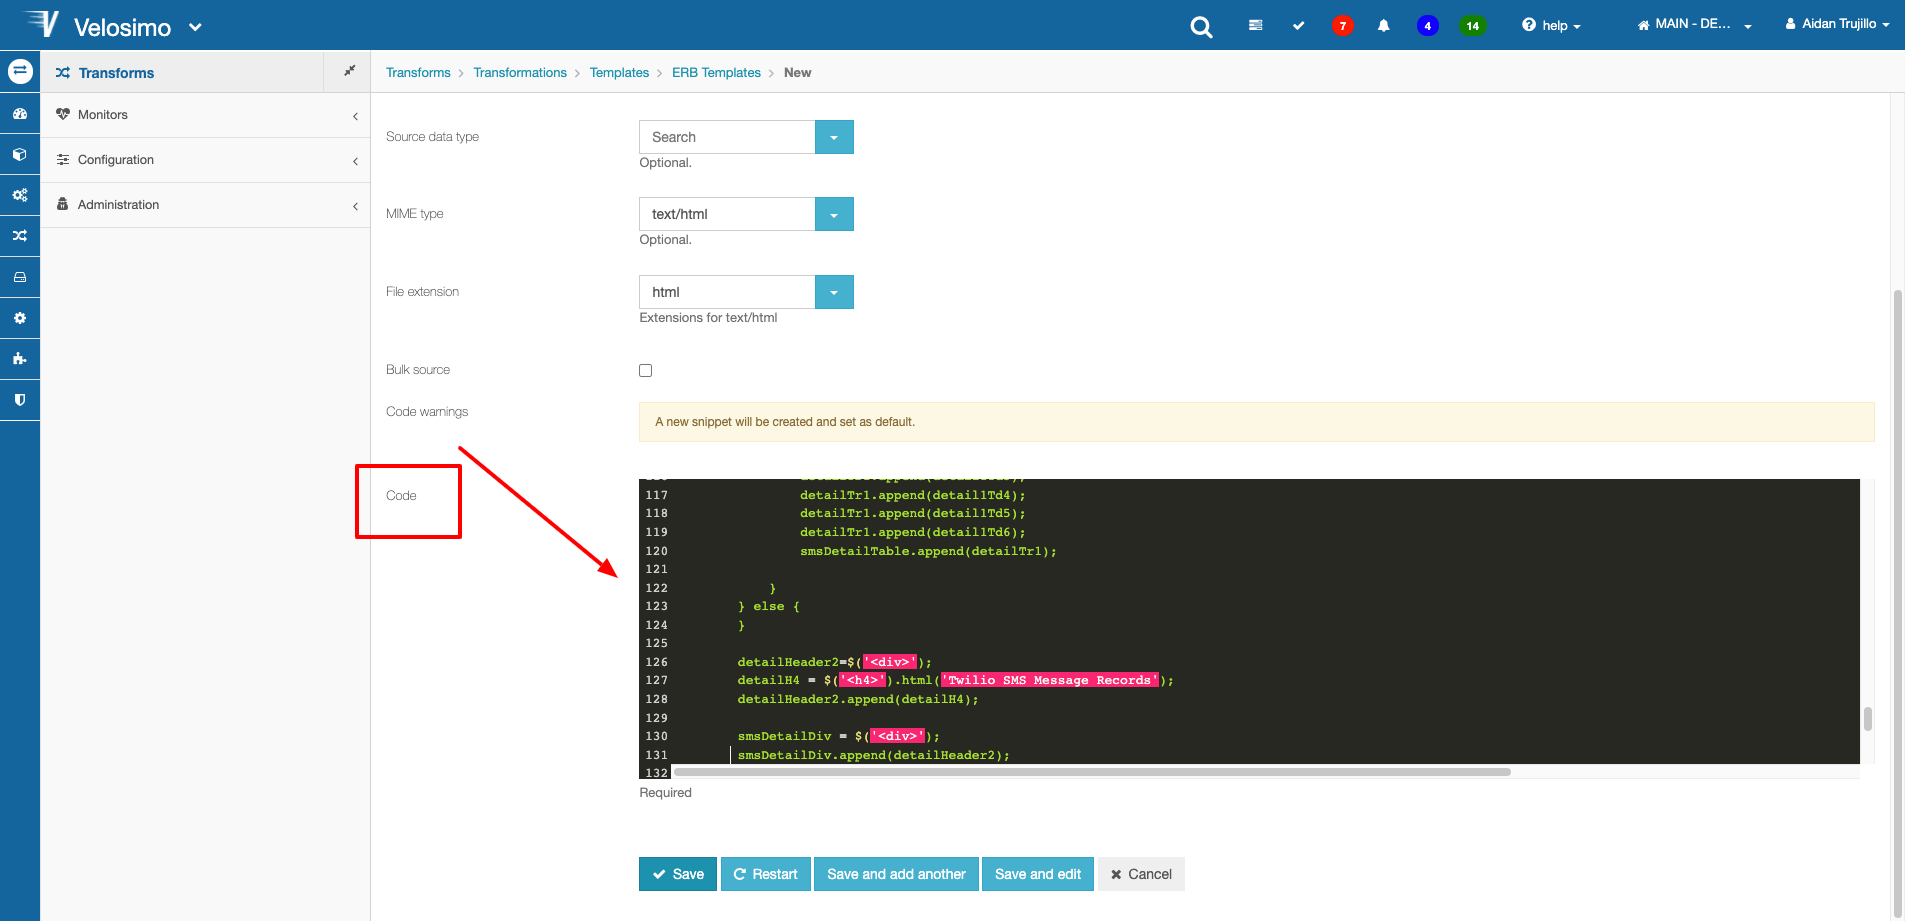
The next step is to create the template HTML code. Let's open this code in the code editor and take a closer look at what's happening.
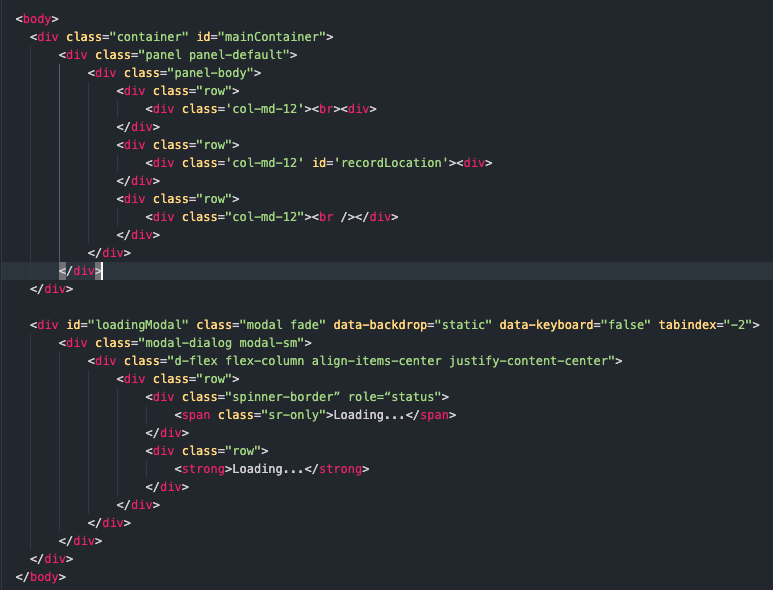
In our head tag, we have the dependencies for the latest version of Bootstrap and JQuery being brought in.

In the body tag we are using Bootstrap class elements to create a layout. Here we have created a main container that separates the page into three row sections. The first row and last row are being used for spacing purposes, while the second row is where we plan to display our data. We have given the div an ID to identify it later on.
Outside of the main container is a loading screen modal created with Bootstrap class elements and properties. Since we only want this to display when certain conditions are met we do not want it inside of the main container.
Before we go into the script of the template, there are a few things we must do with our app to make the Webpage work. Save the template before continuing. Remember to copy and paste your code into the Velosimo template code section if you created it in a separate code editor.
Navigate back to your app in Compute -> Applications and select it to Edit.
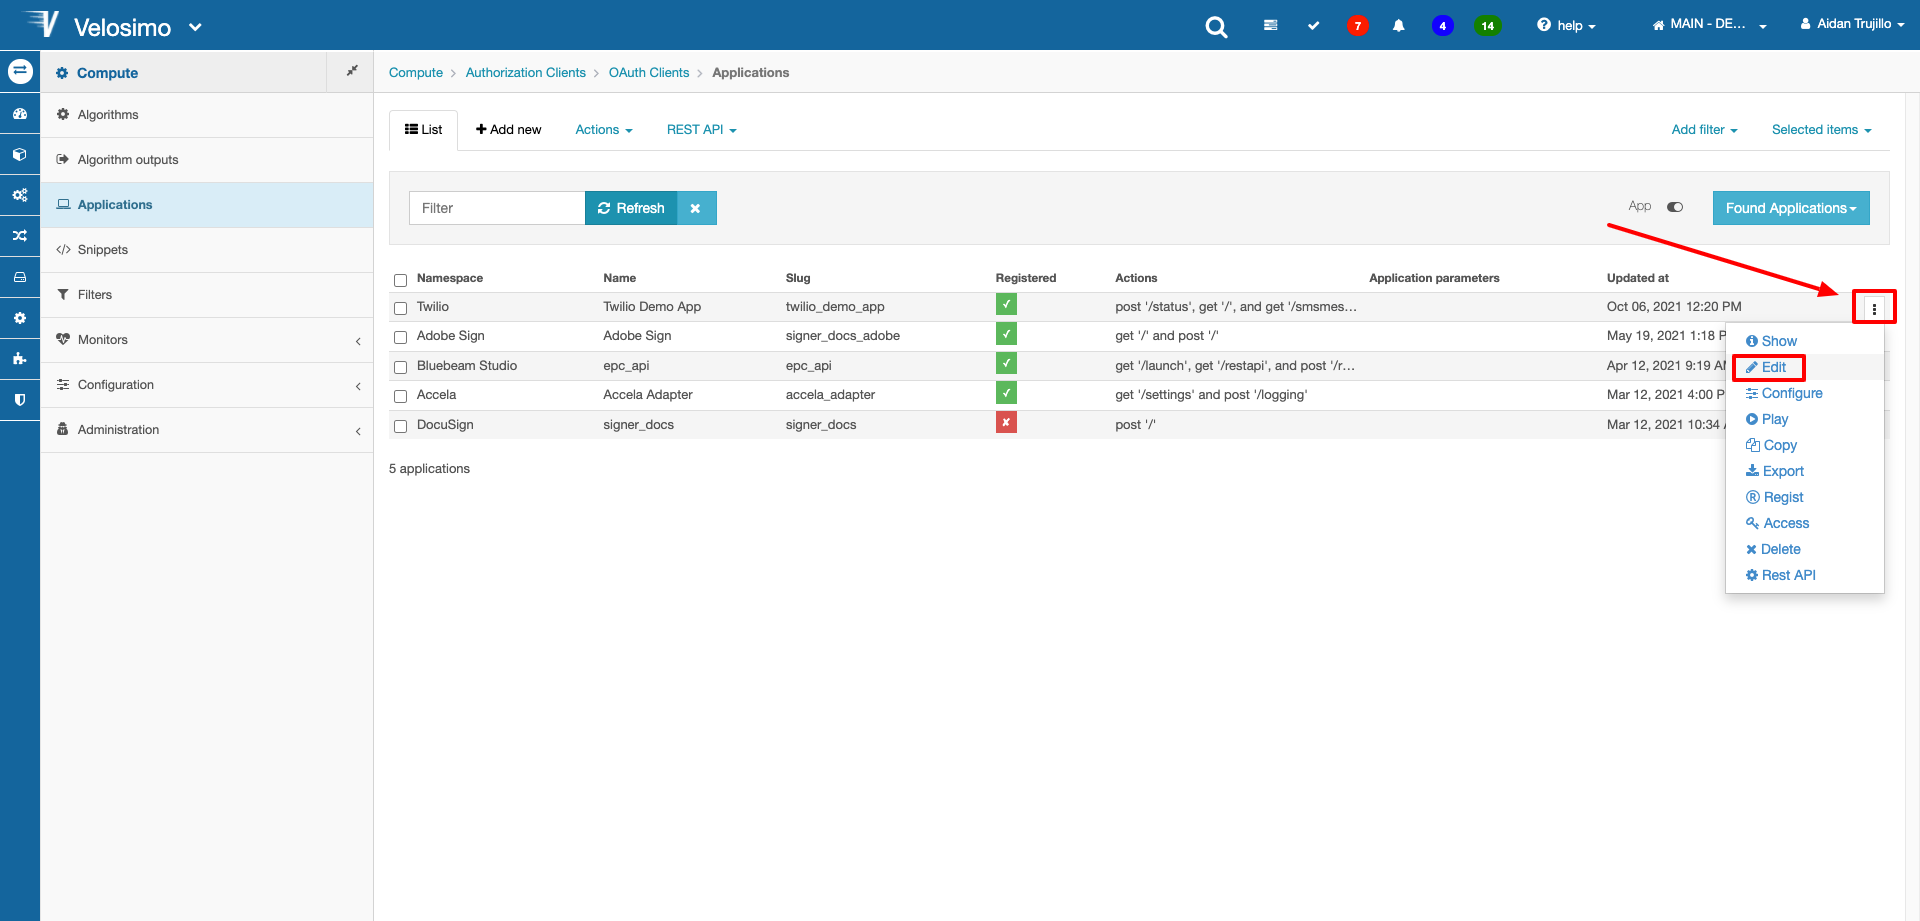
Select one of the placeholder actions and set the Method to get. Then set the path to just "/". This will be our action which handles the Webpage code.
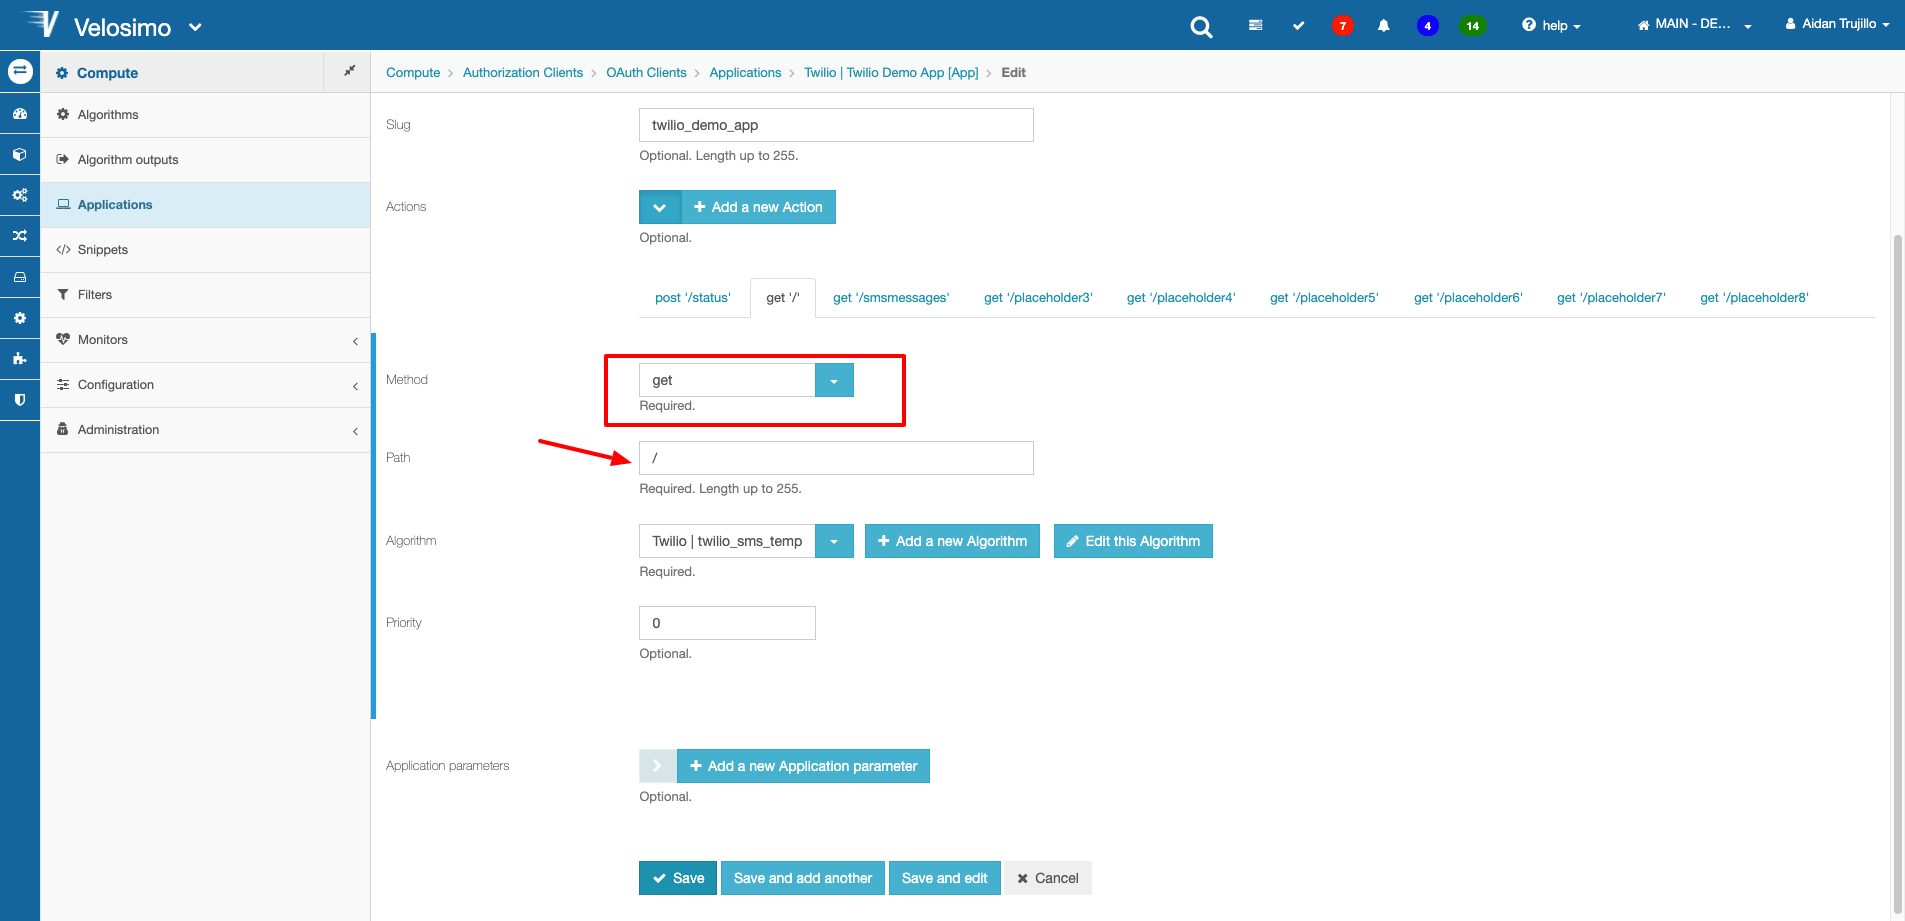
Next, click Add a new Algorithm. We need to build an algorithm that will call and run our template code.
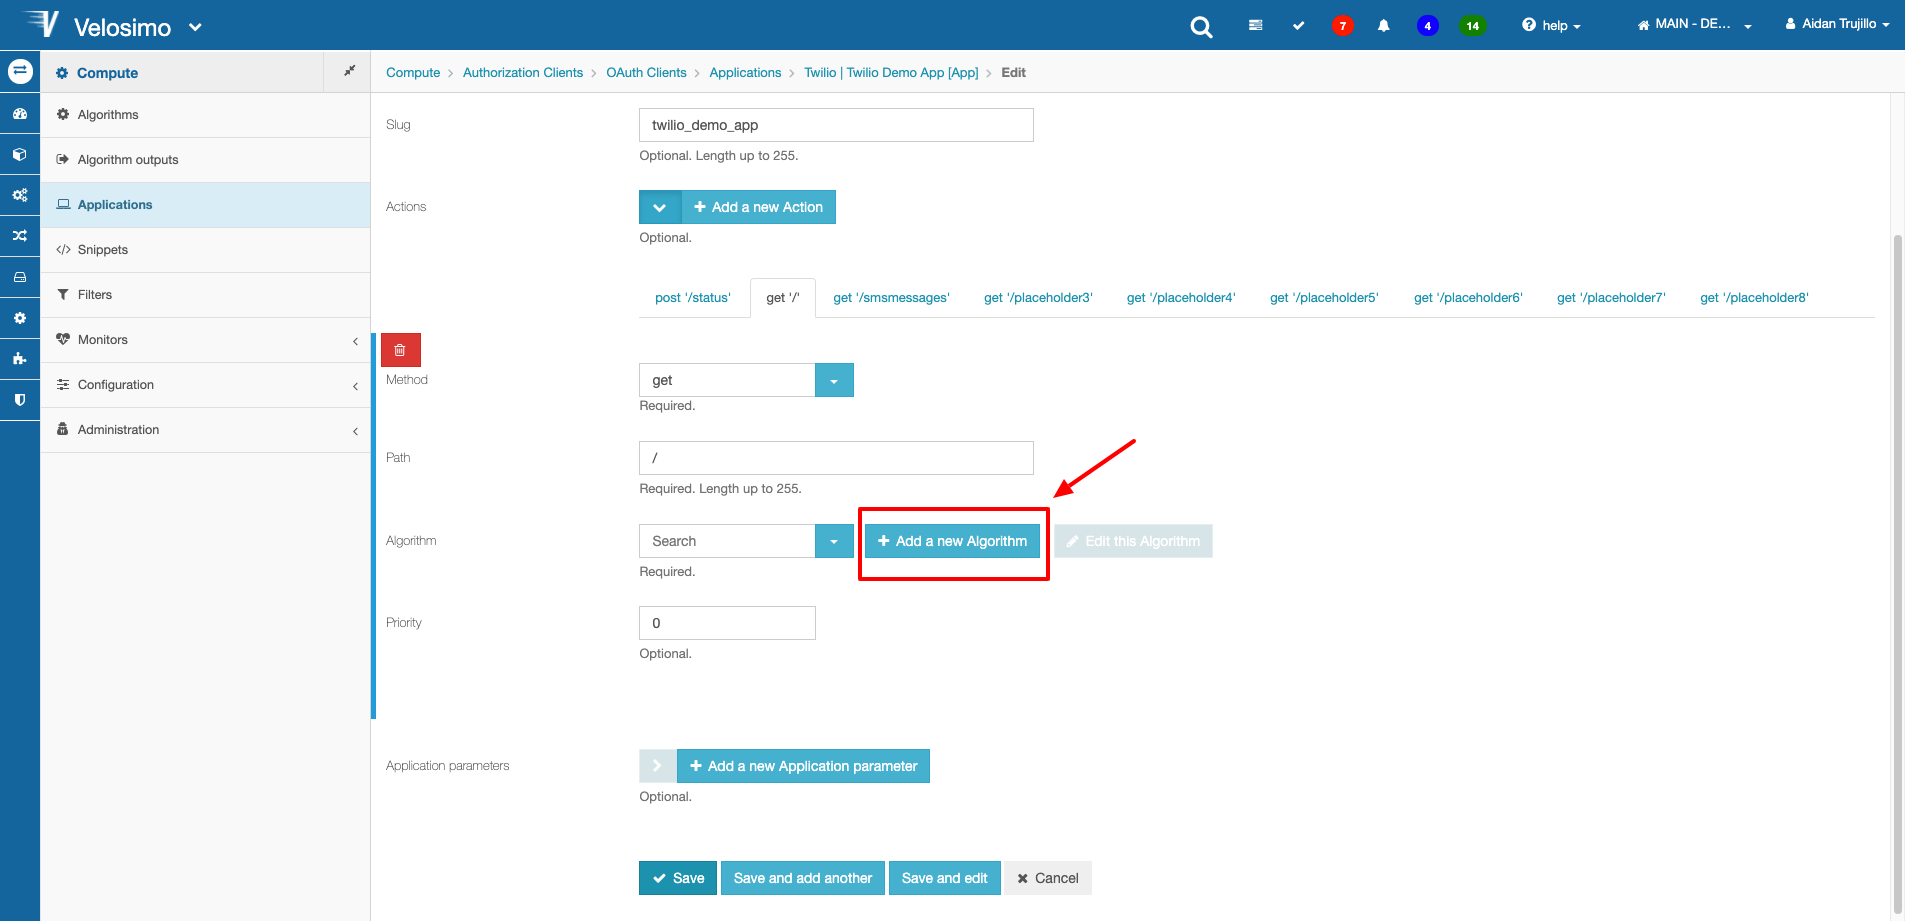
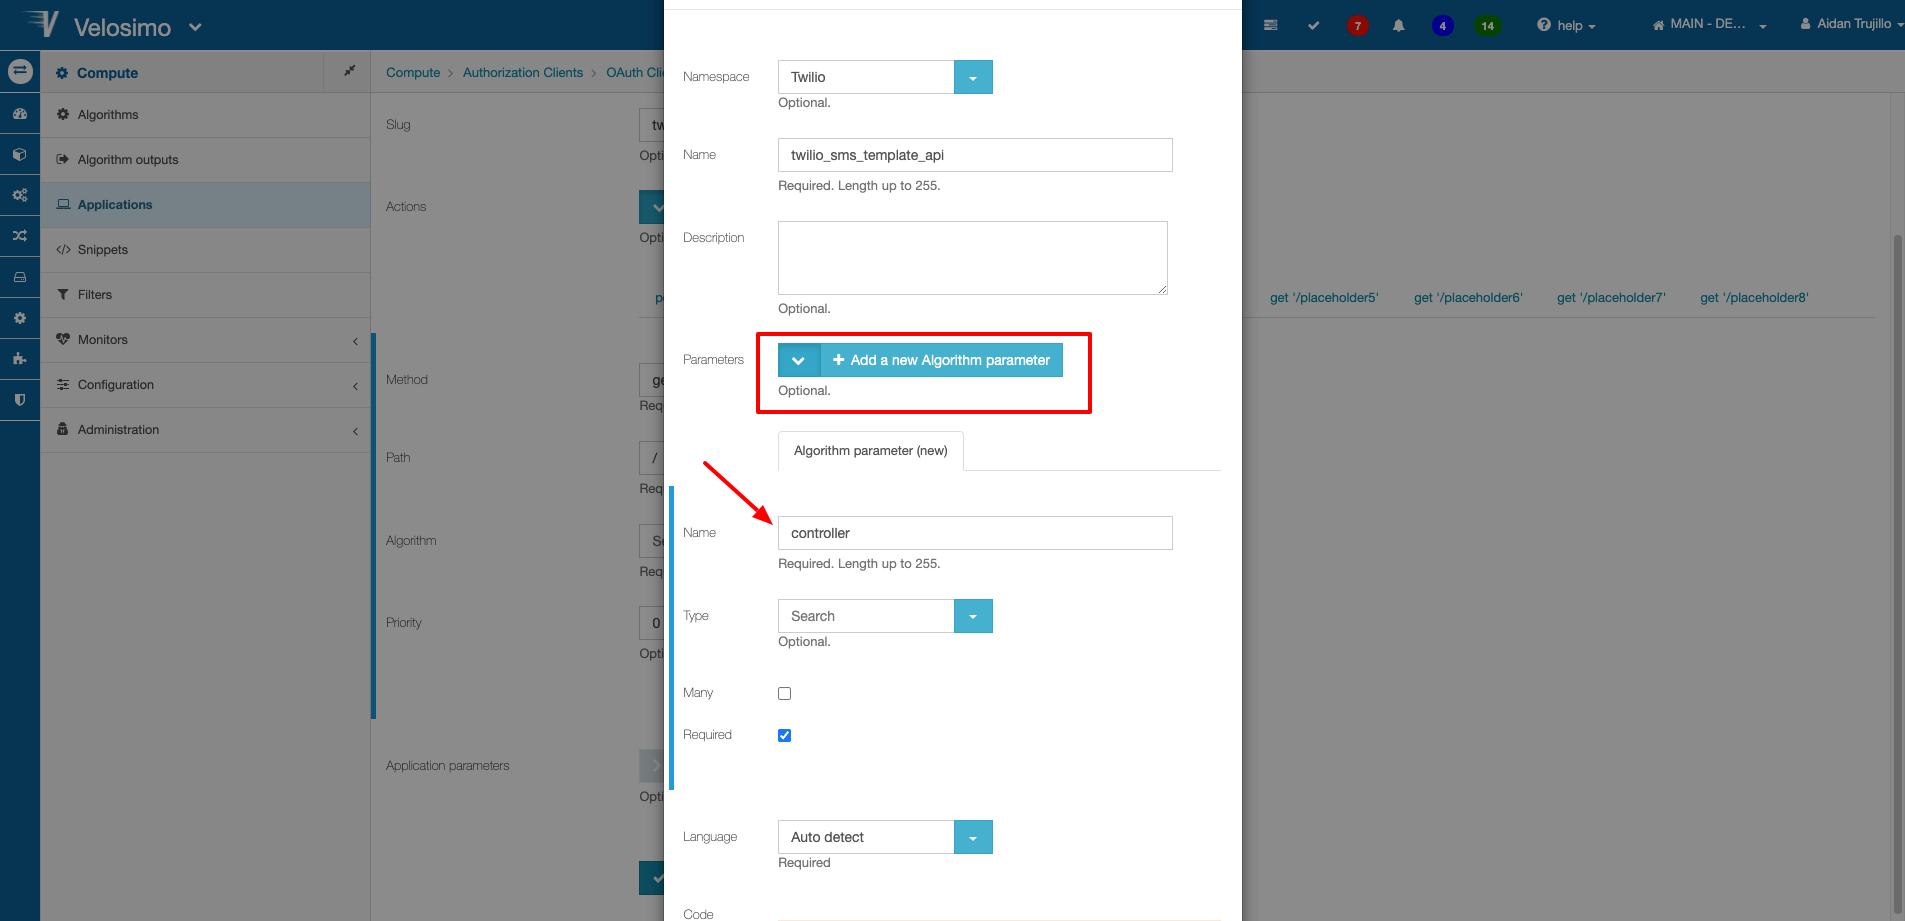
Enter a namespace and name, then add the Algorithm parameter: controller.
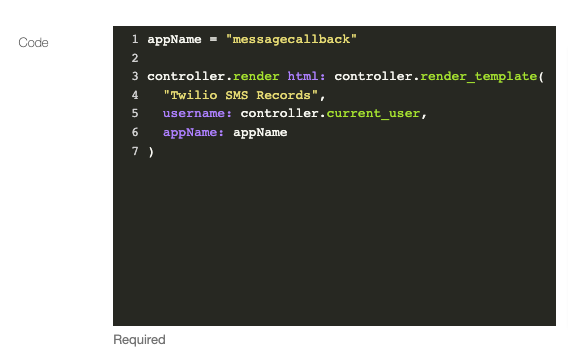
In the code block we only need a few simple lines.
Line 1: Define a variable called appName and set it's value to the Regist name of your app.
Line 3-7: Use the controller parameter to call and render your template code. You must pass in the name of the template, a property called username which uses the controller parameter to get your Velosimo user info, and an appName property set to the appName variable created in Line 1. We will be accessing the appName value through the template later on.
Click Save once completed.
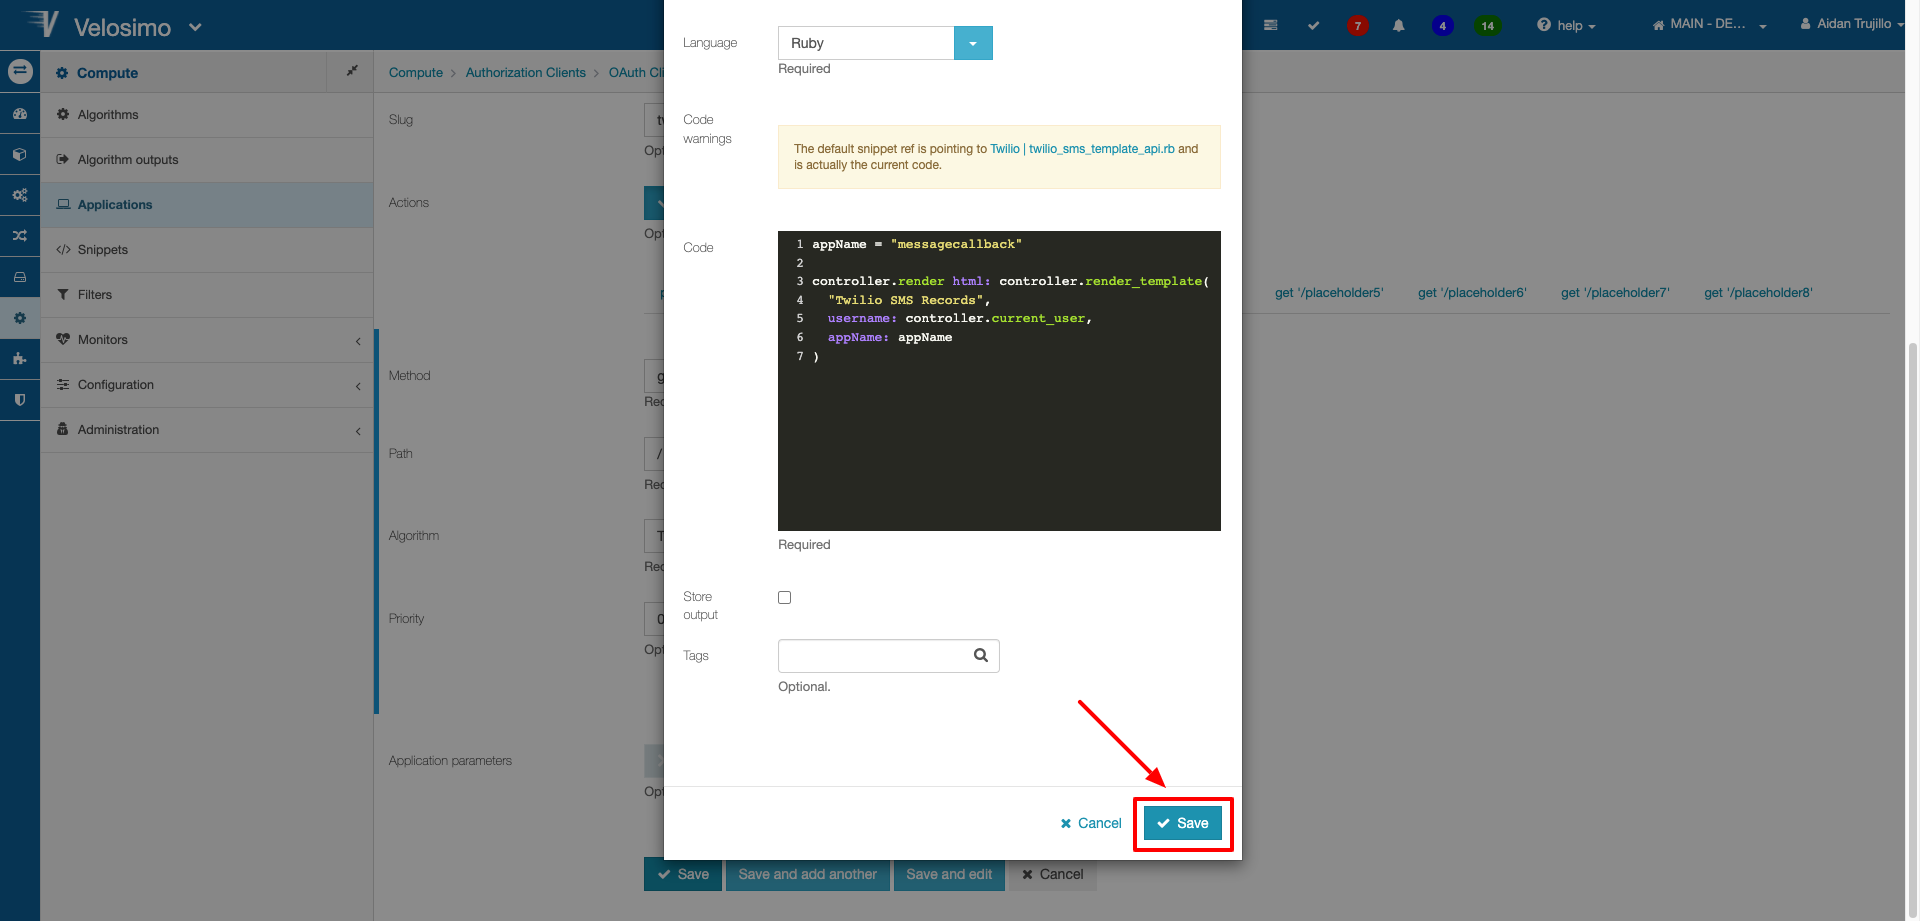
Now set the action algorithm to the one that was just created.
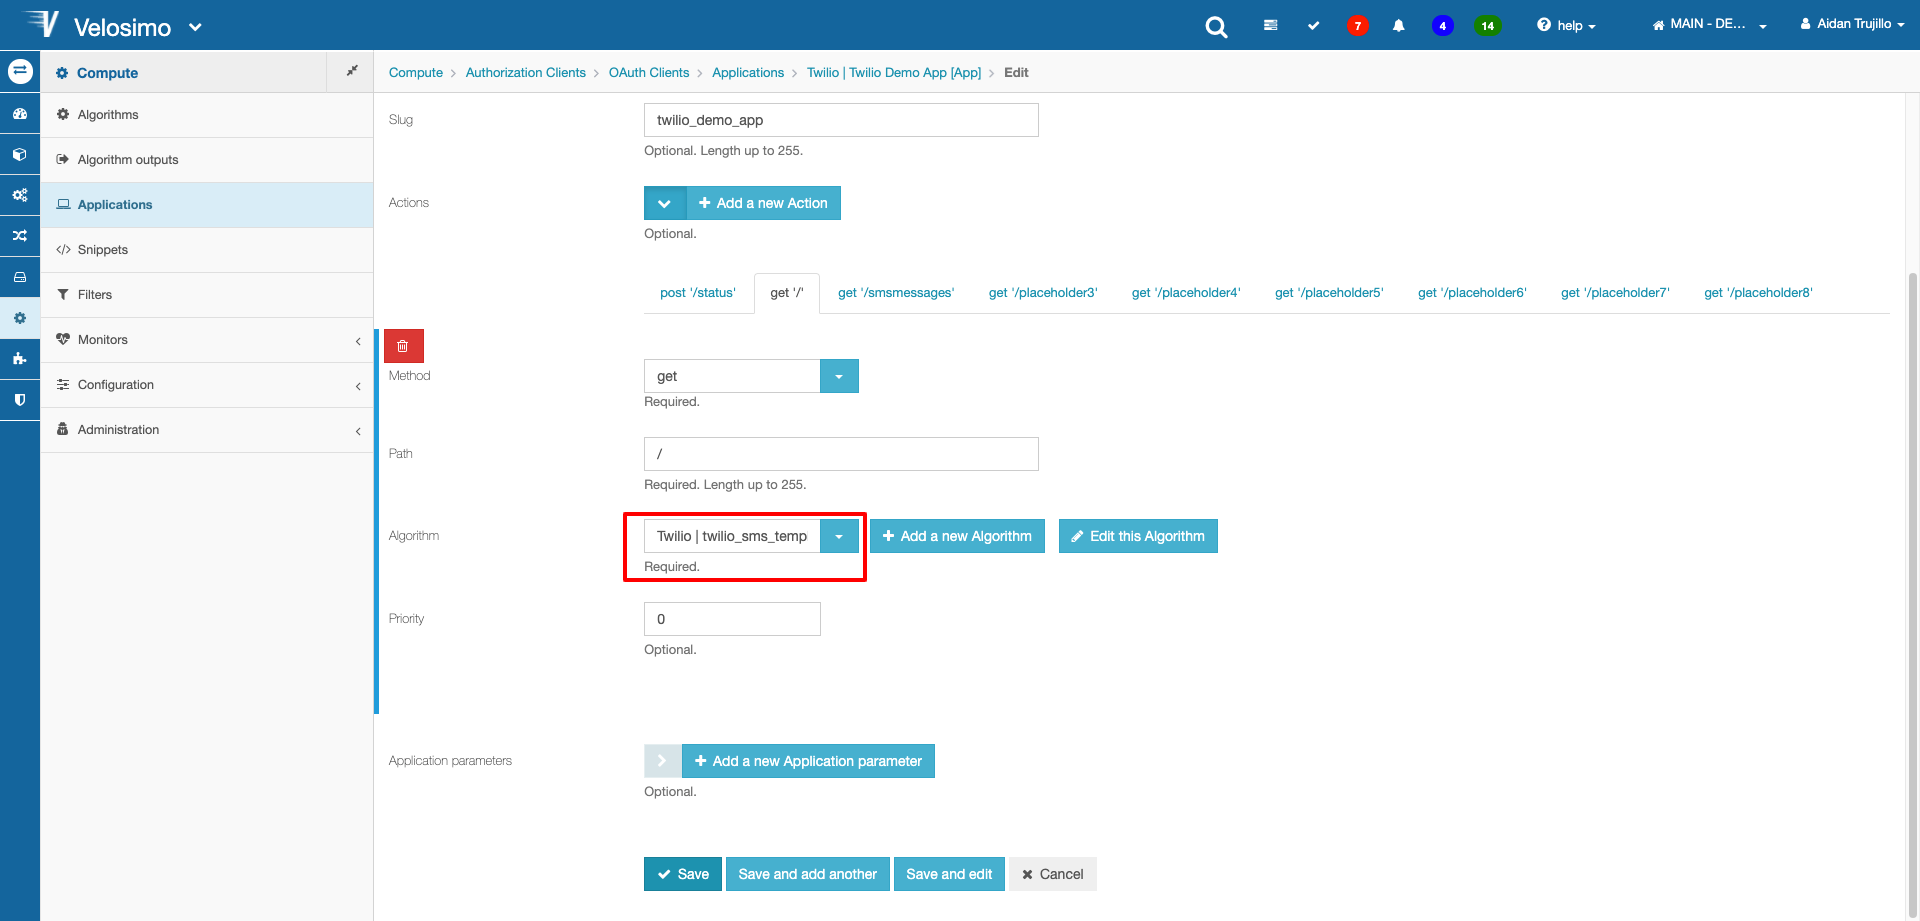
Now this will be the URL to view the Webpage:
https://connect.velosimo.io/app/messagecallback/Now that we have a URL to our webpage, we need to populate it with data. We need to create another algorithm to retrieve all the records for our data type, then we will use the algorithm endpoint in our Webpage template to retrieve and display the data.
Select another placeholder action to edit. Keep the Method as a GET, and this time change the path to /smsmessages
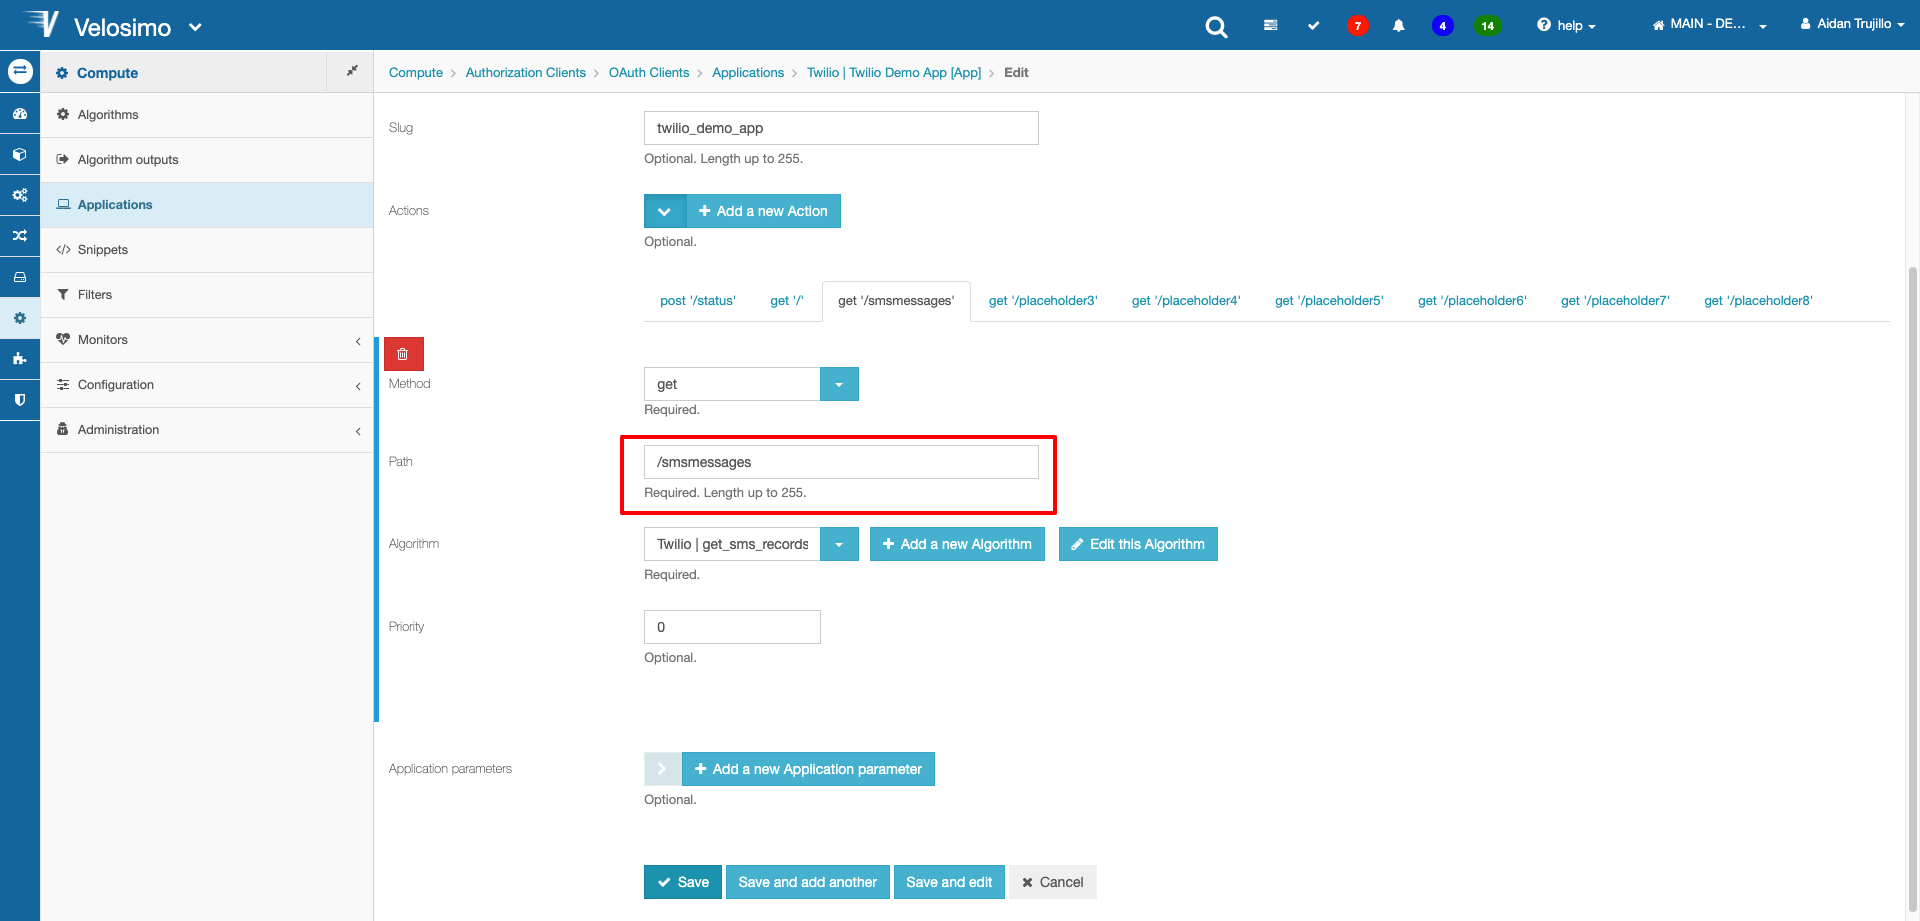
Click Add a New Algorithm.
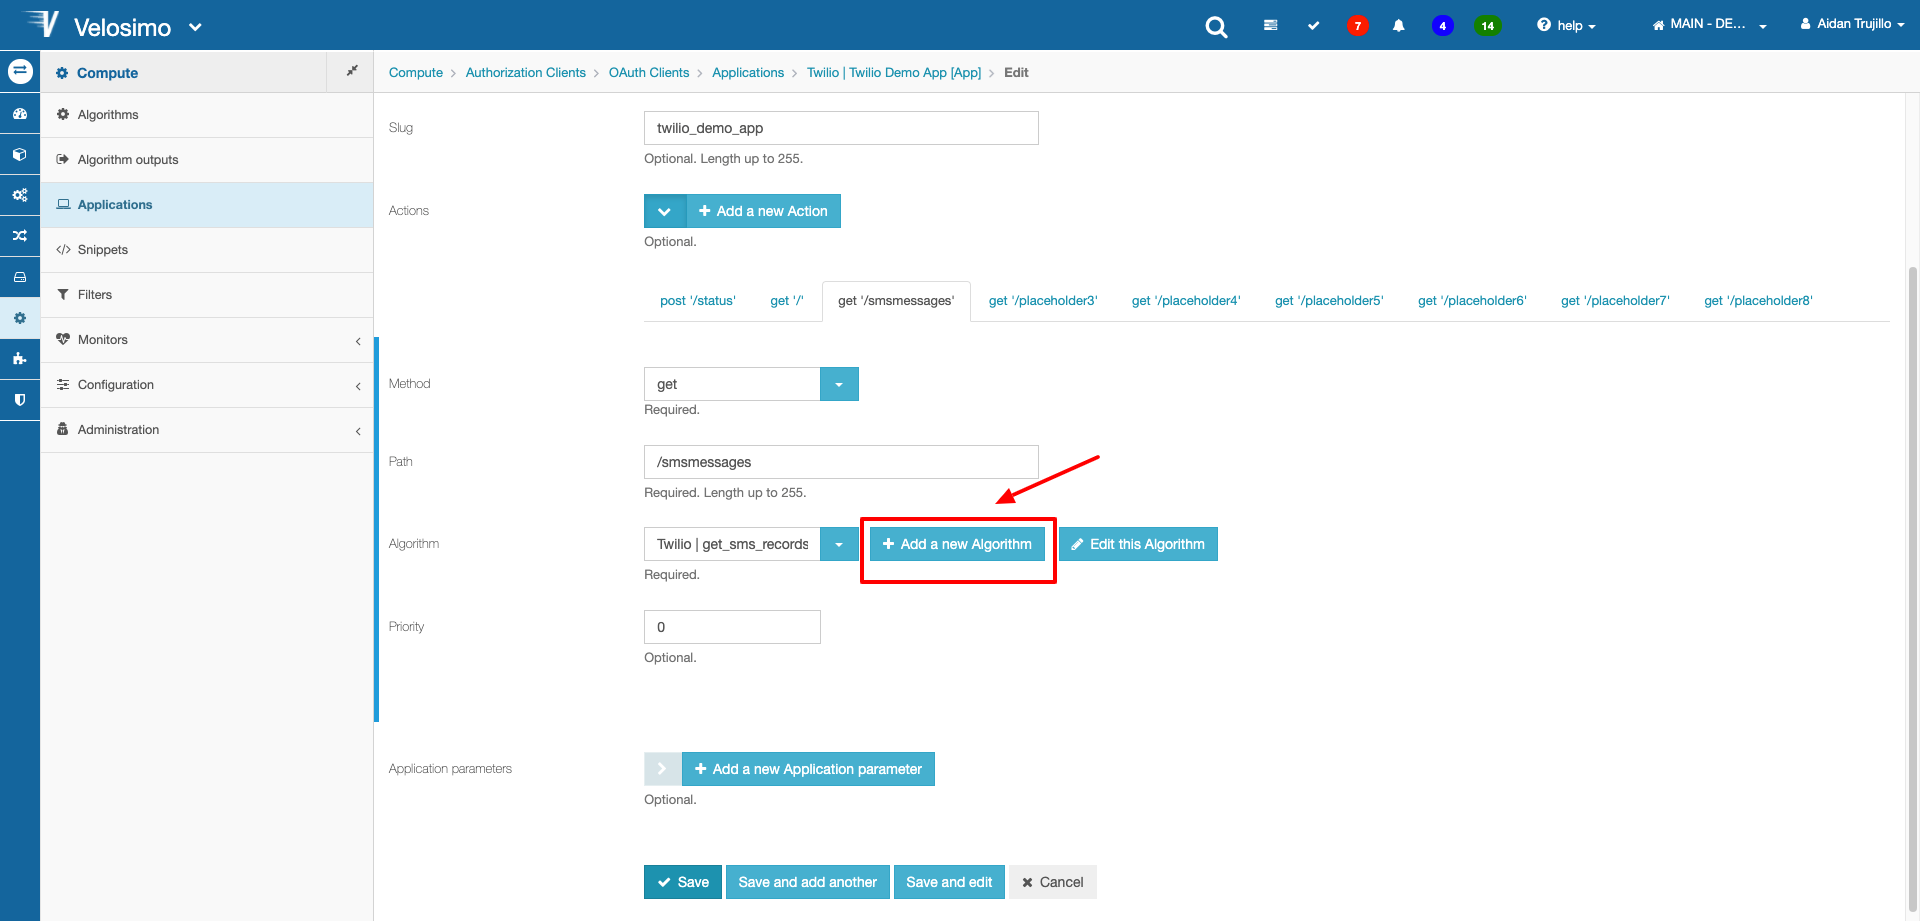
Enter a namespace and name, then add an algorithm parameter called: controller.
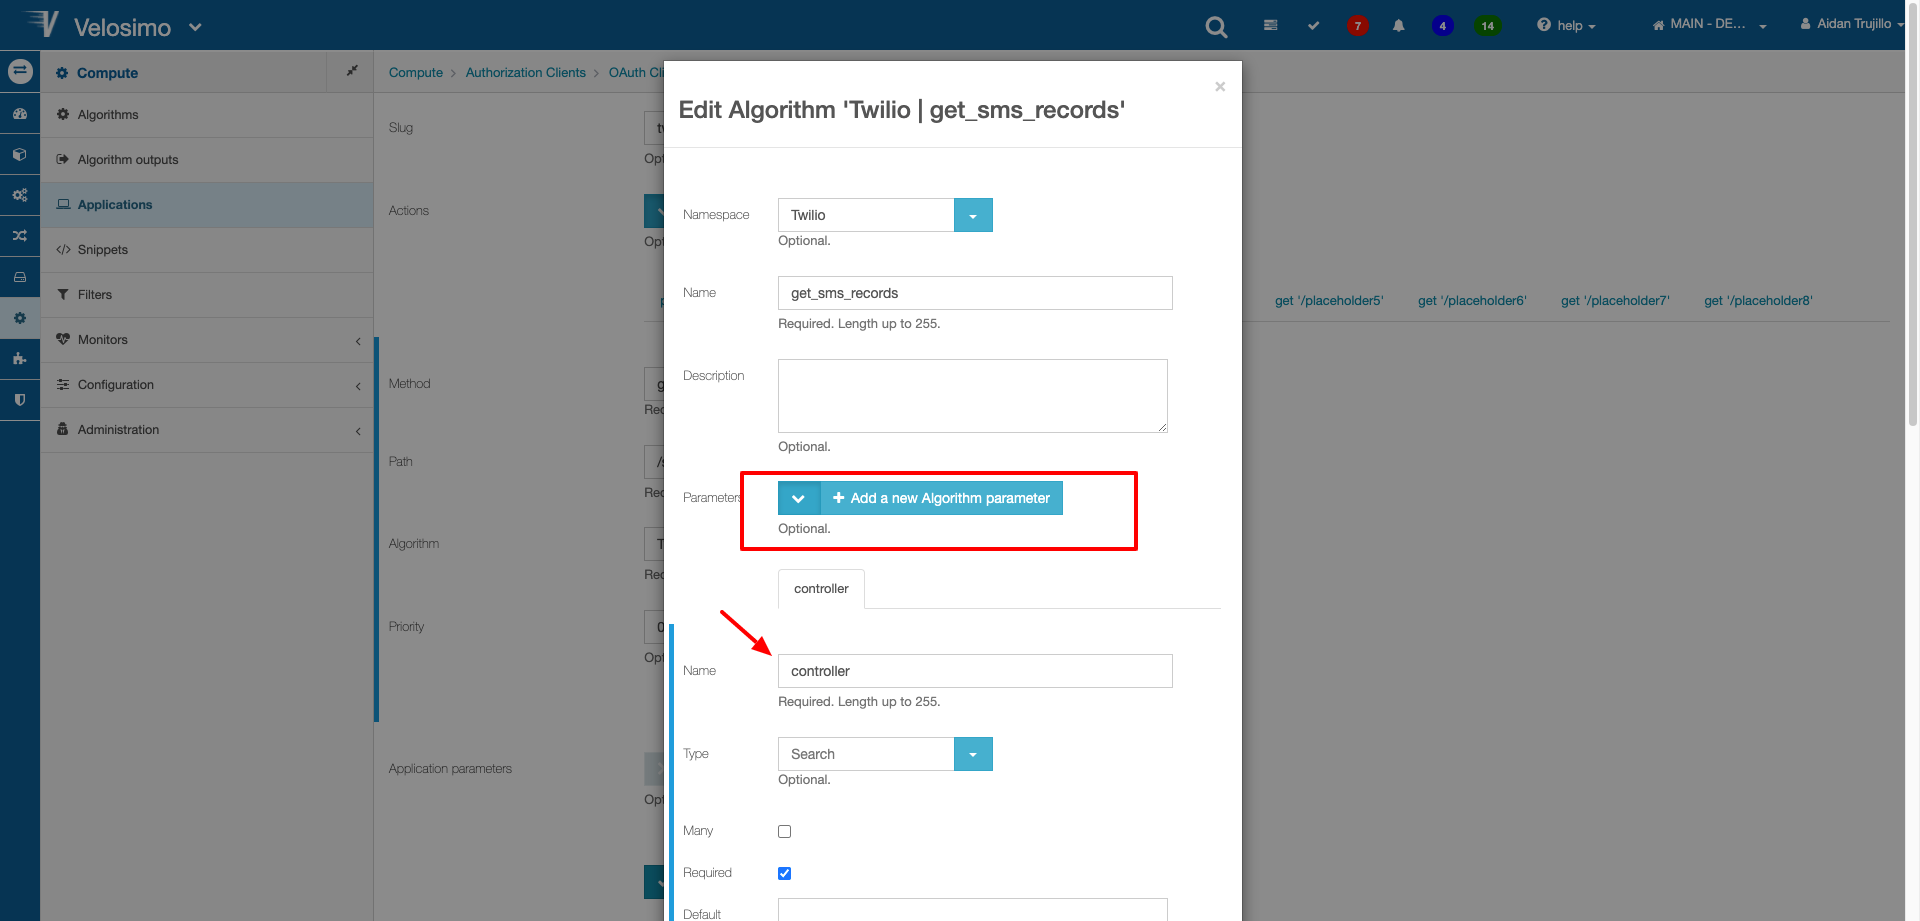
Enter this into the code block. Let's break it down line by line.
Line 1: A bug on Velosimo requires this line to make the controller param work.
Line 2: Retrieves the data type called SMS Message associated with the Twilio namespace and defines it to a variable called smsMsgsDT
Line 3: Retrieves all entries/records of the data type using the smsMsgsDT variable, and defines it to a new variable called smsMsgs.
Line 5: Defines the smsLogs object.
Line 6: Creates a new property within smsLogs called status with a value of success.
Line 7: Creates a new property within smsLogs called messages with the value of the smsMsgs variable.
Line 9: Required controller code to change the content to JSON.
Line 10: Using the Ruby method to_json to convert the smsLogs object to JSON data. This data will be passed through the API when the algorithm endpoint is called.
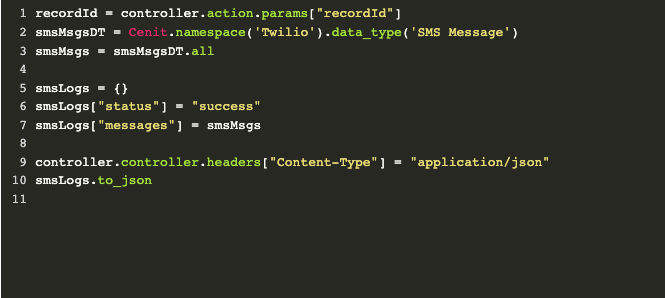
Click save once completed.
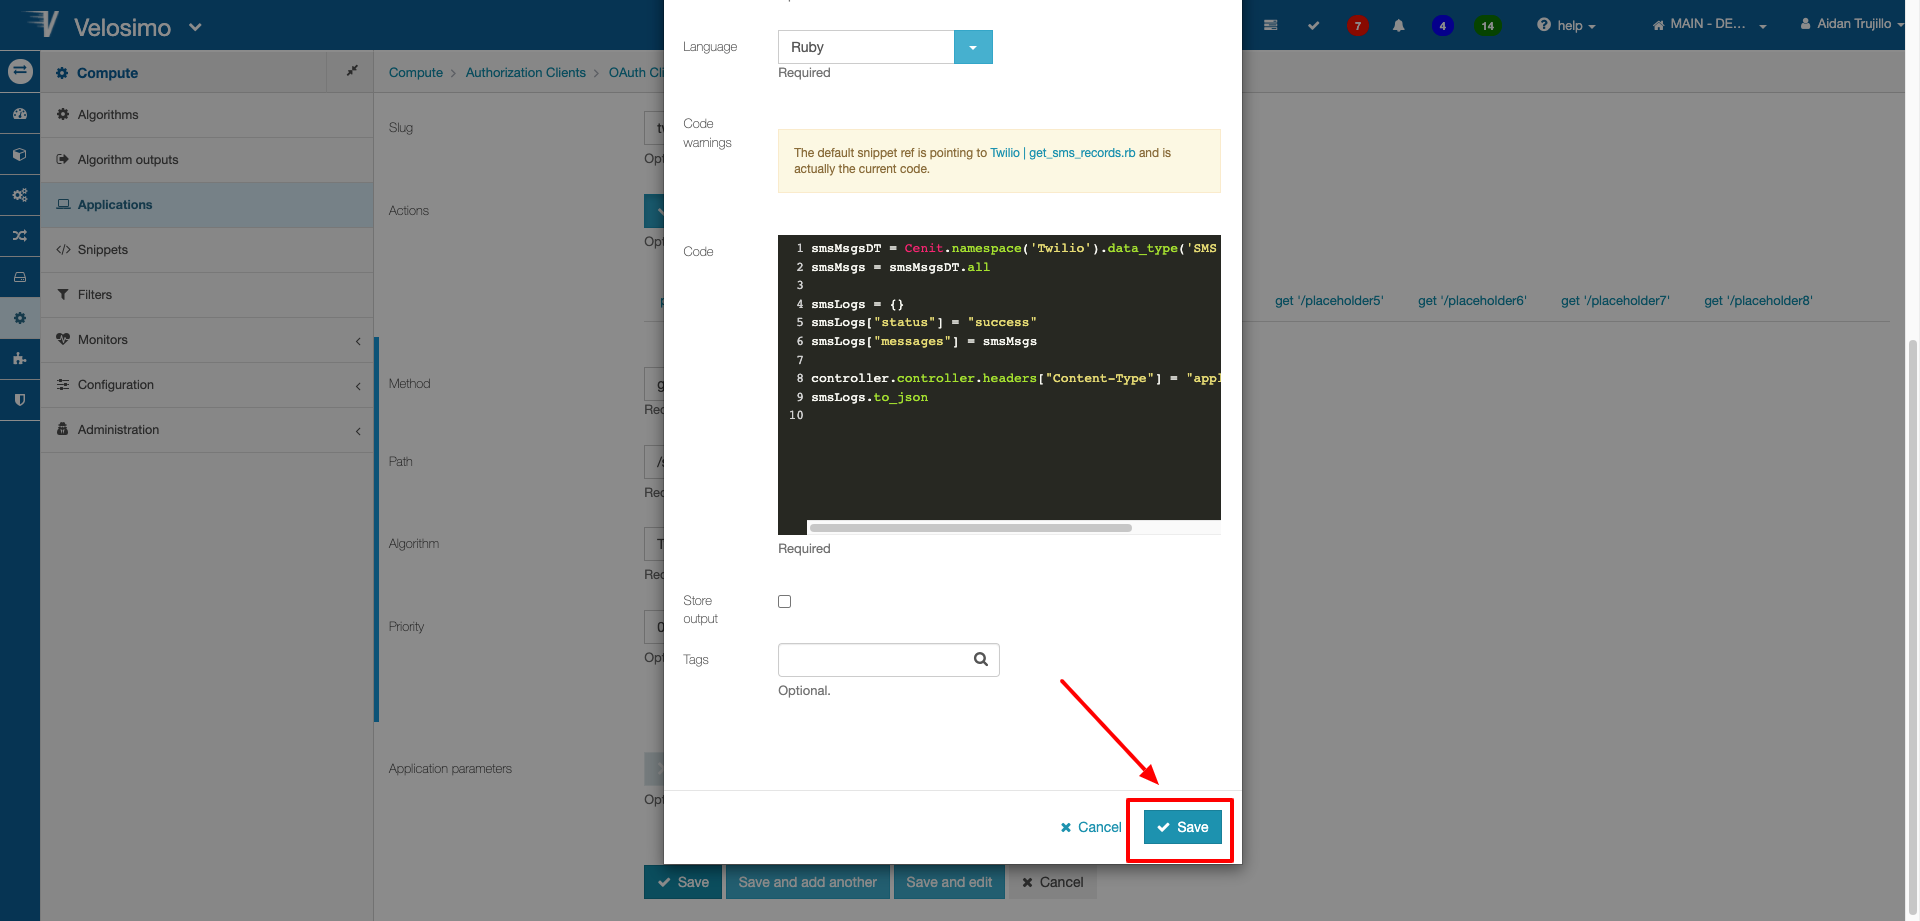
Set the action algorithm to the newly created algorithm. Save the app once finished.
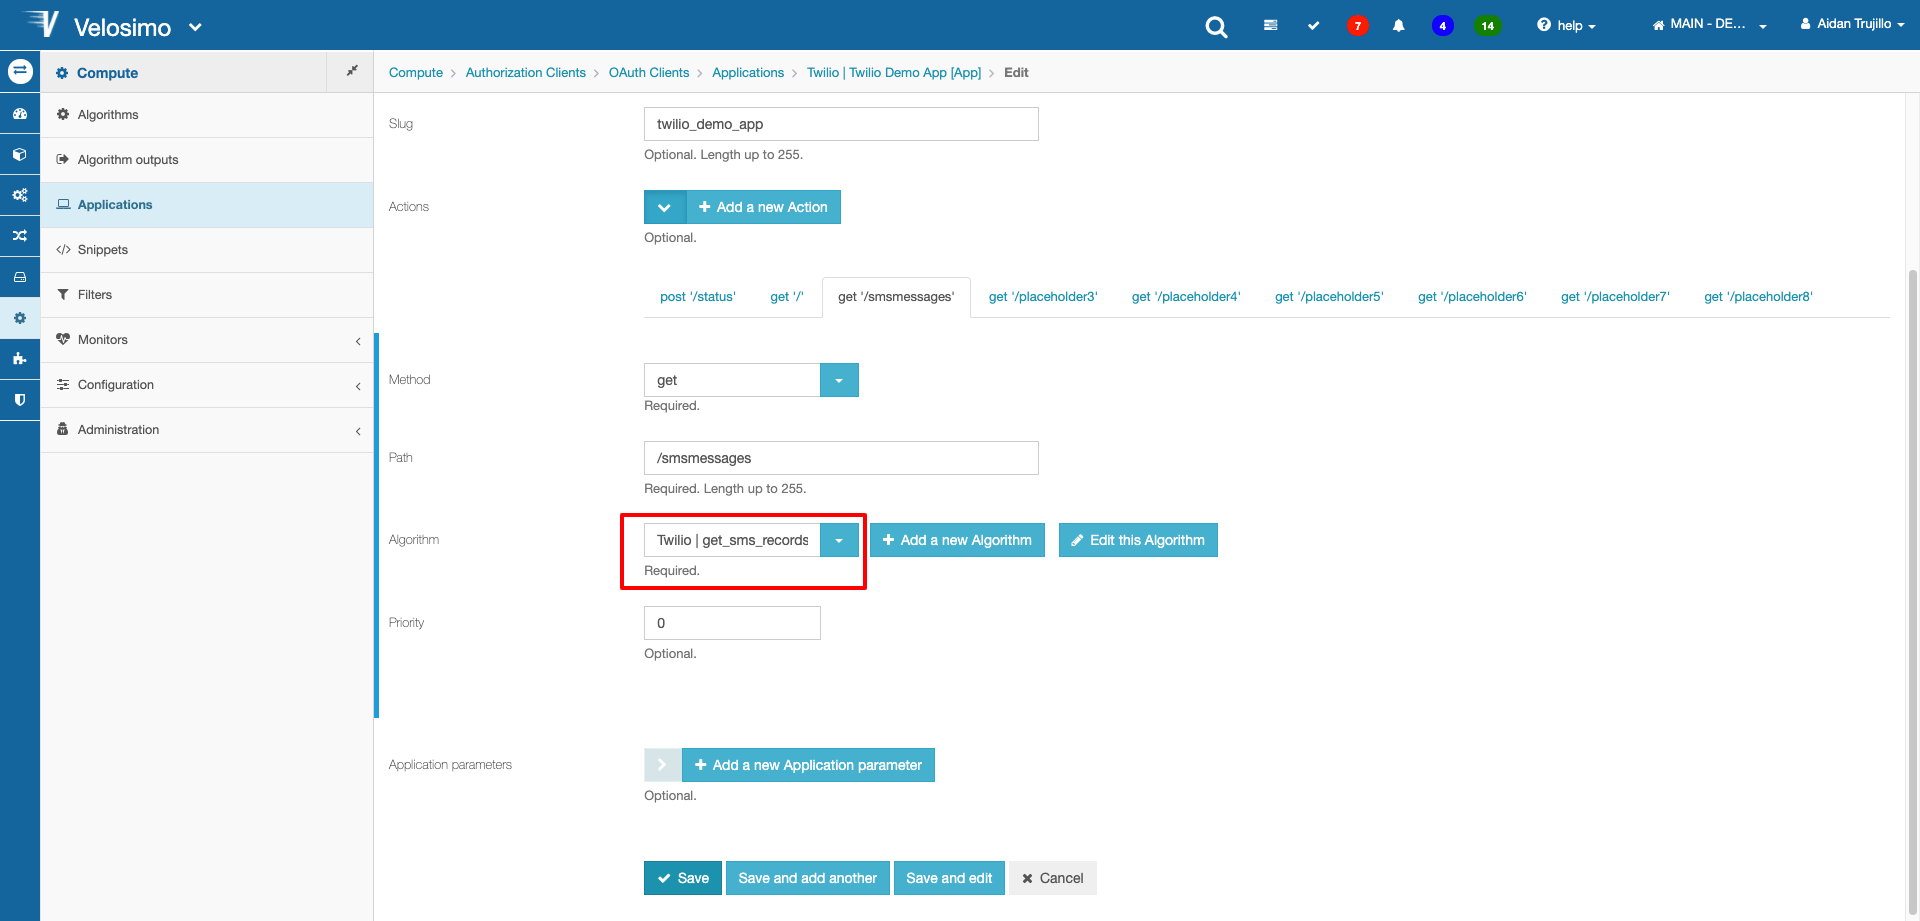
Now that we have built an algorithm to call and render the Webpage and algorithm to retrieve the data to populate the Webpage with, we need to create two functions inside the Webpage template that retrieve and show the data.
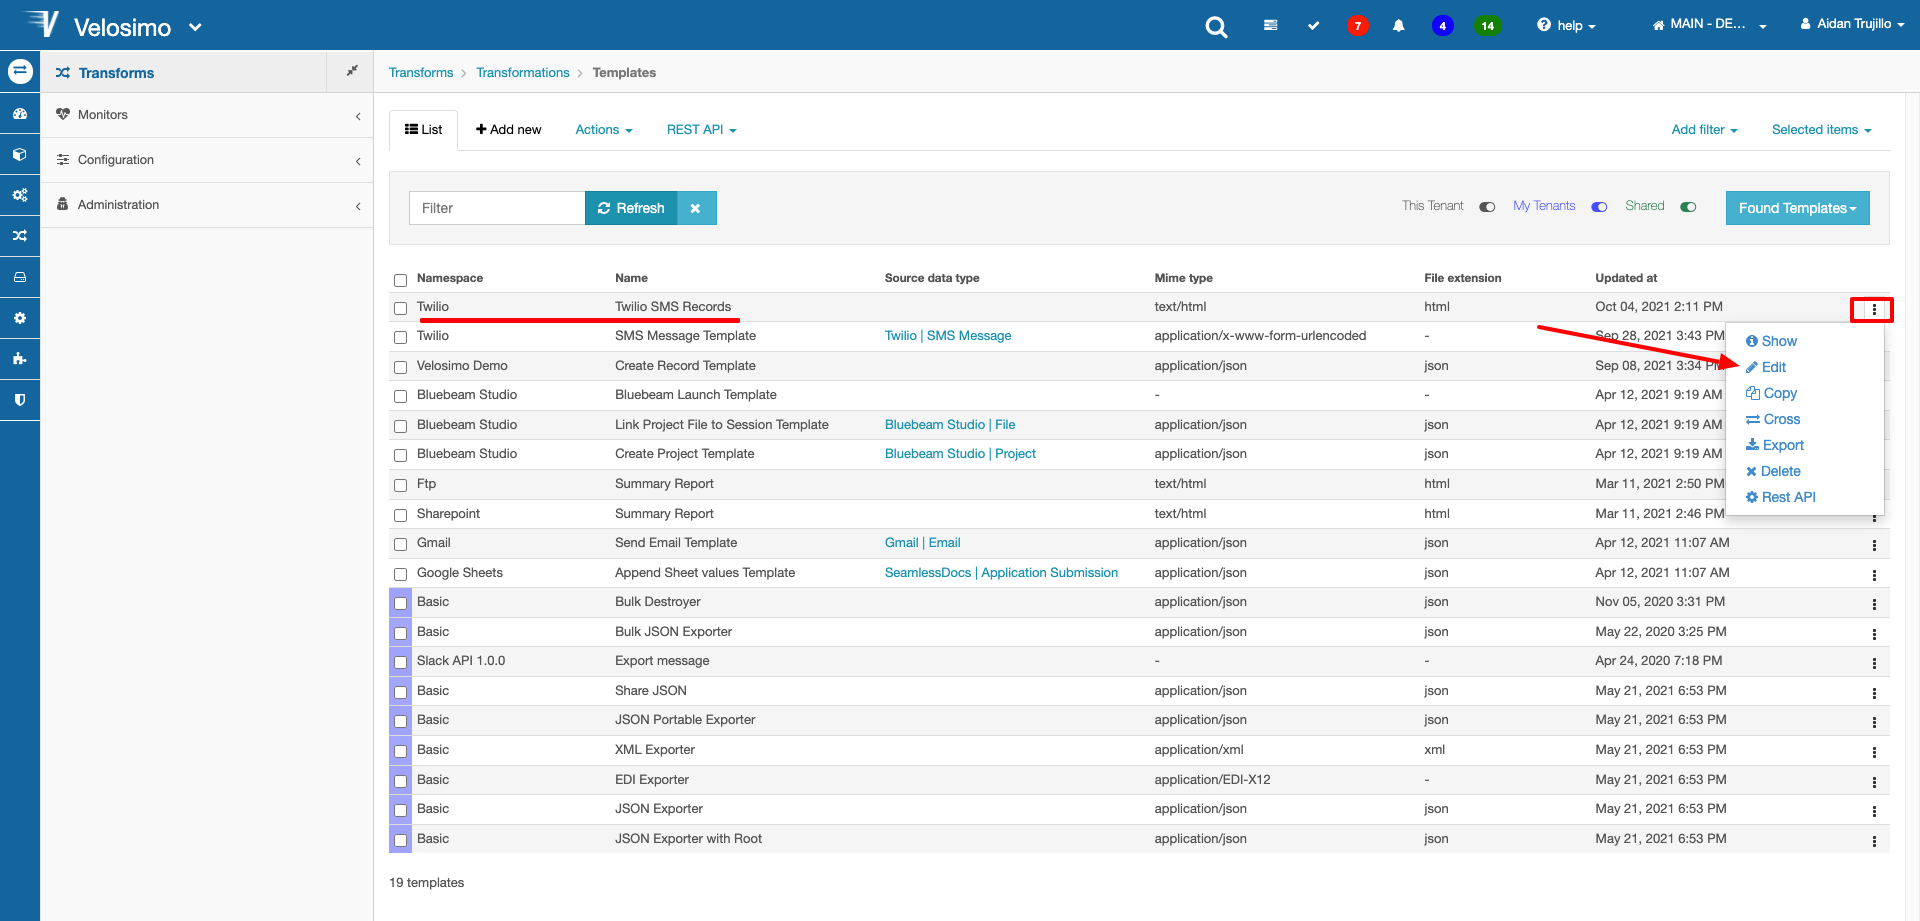
Navigate back to Transforms -> Templates and find the Webpage template.
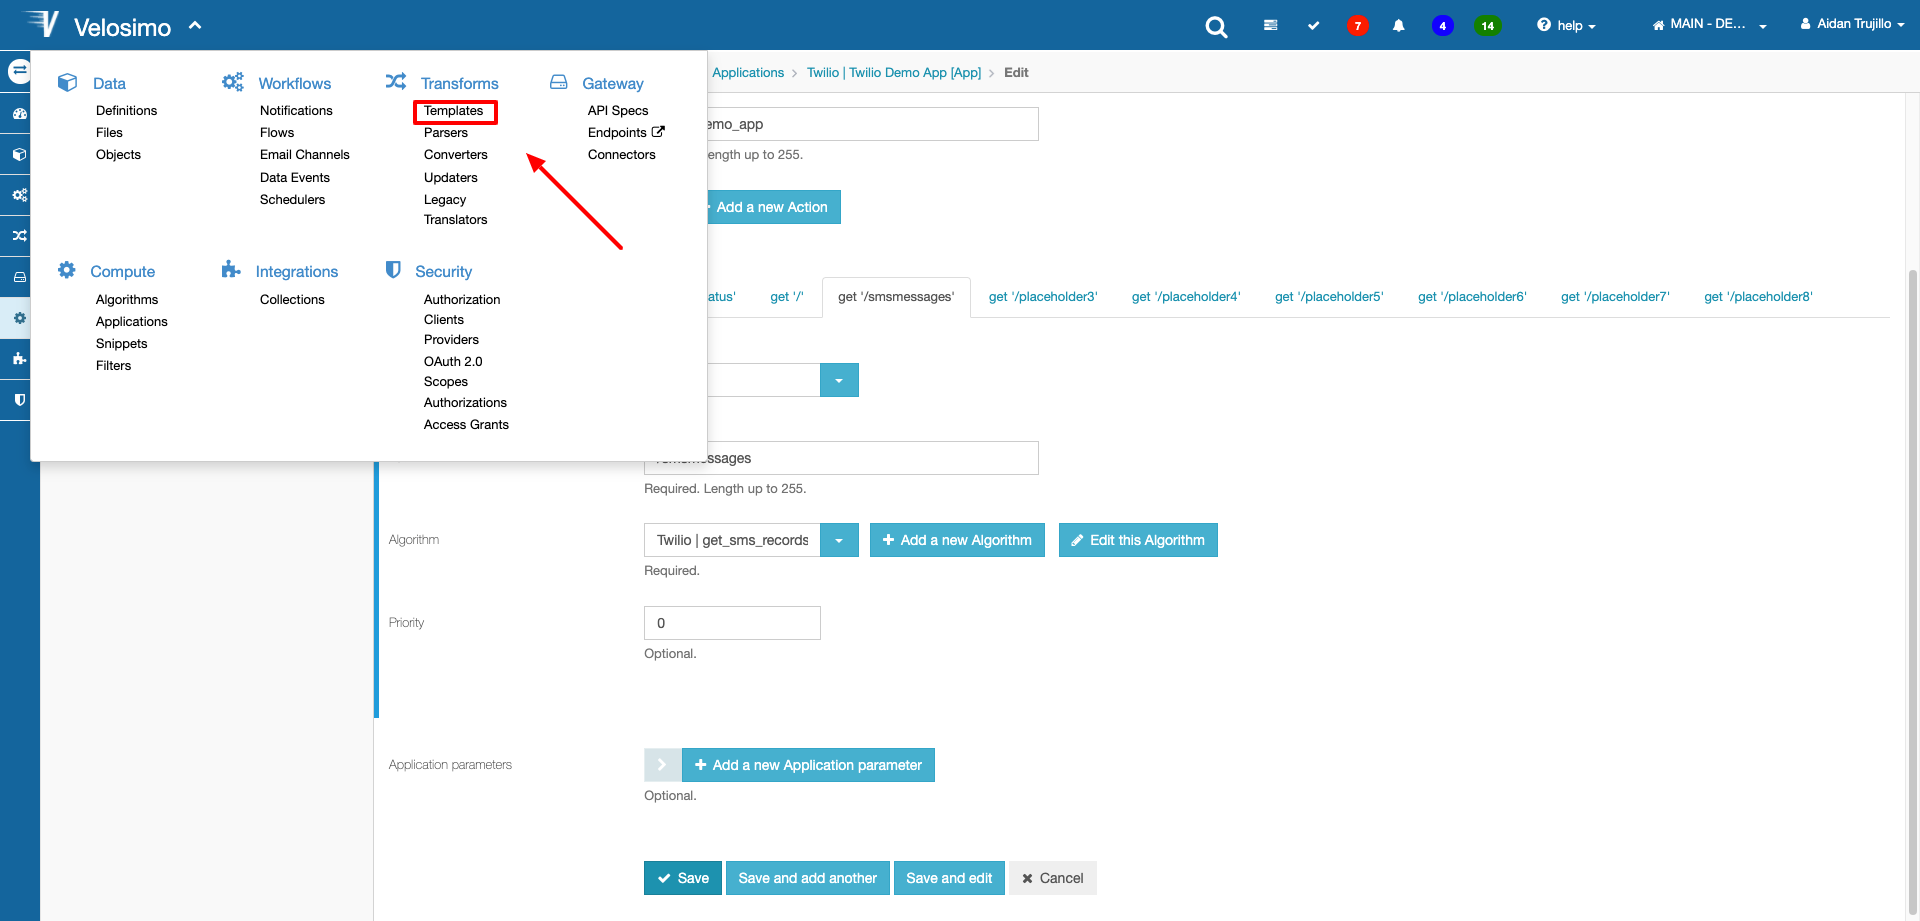
Select the action menu and click Edit. If you are editing the template code in a separate code editor open that too.
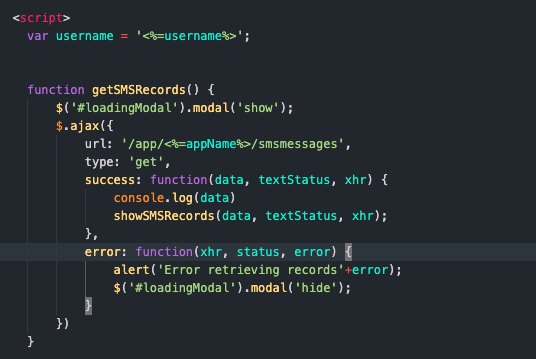
In the script tag, define a new function to which will retrieve the data type records.
The first line of this function uses JQuery to call the ID of the loading modal and show it.
Next, an Ajax call is being defined. The URL being passed is the endpoint to our algorithm which retrieves the record entries. You can use the <%=appName%> variable to retrieve the appName from the global variables passed into the template. If the Ajax call is successful it will execute the function showSMSRecords and pass the API data to it. If it fails, an error message will display.
Now that we can retrieve our data type entries we must build the function which displays it. The showSMSRecords function will be called when the Ajax call in the getSMSRecords is successful.
In this function we are using a combination of JQuery and Bootstrap. JQuery is being used to create a data table and Bootstrap is being used to style it. The function creates a first row in the table which displays the SMS Message property names. Then, the API data being passed into the function from getSMSRecords is looped over. For every data entry, a new row will be created with the data associated to that entry.
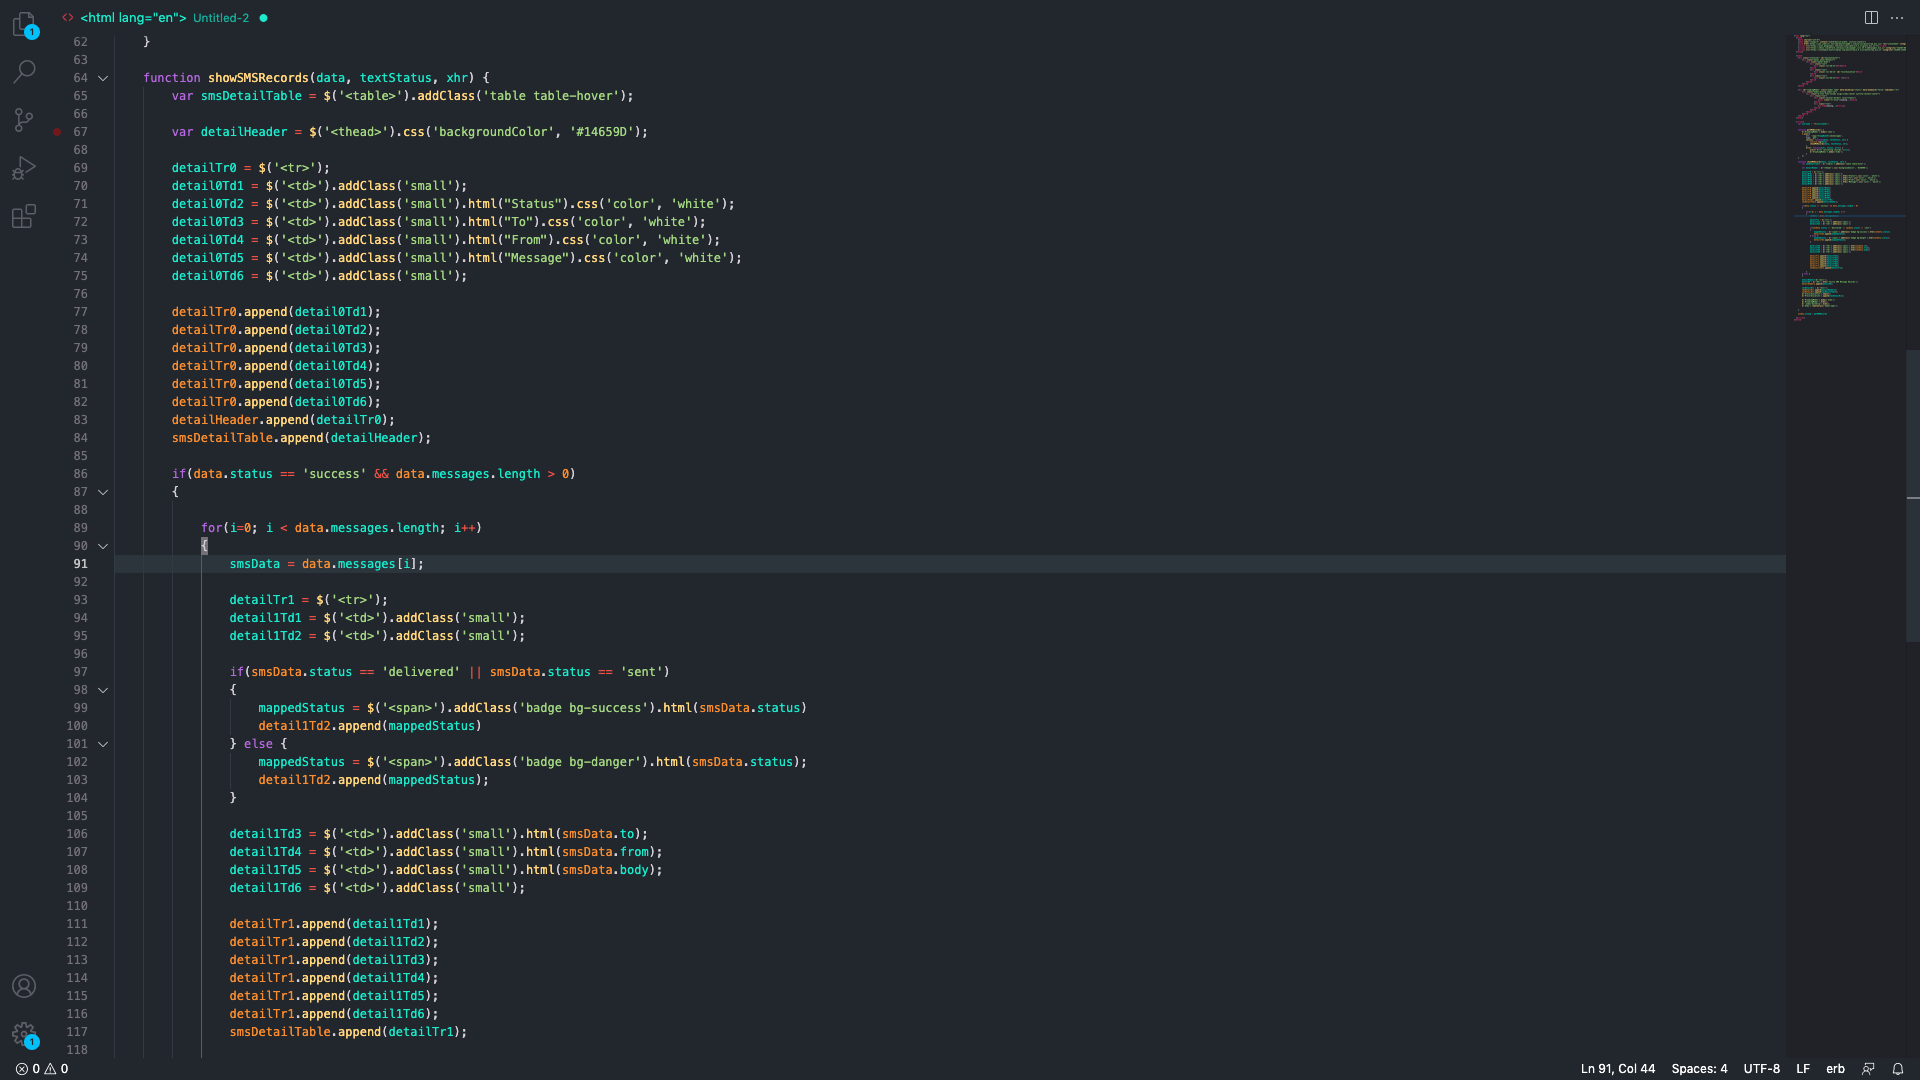
In the previous steps of this section, we created a div in the template html with an ID of recordLocation. Once the loop is finished the table and its rows are appended with JQuery to a div, which itself is then appended to our recordLocation div and will display the newly created data table. Since we are using JQuery to run our loading modal at the beginning of the API call, we must use JQuery to hide the loading modal once the table data has been created.
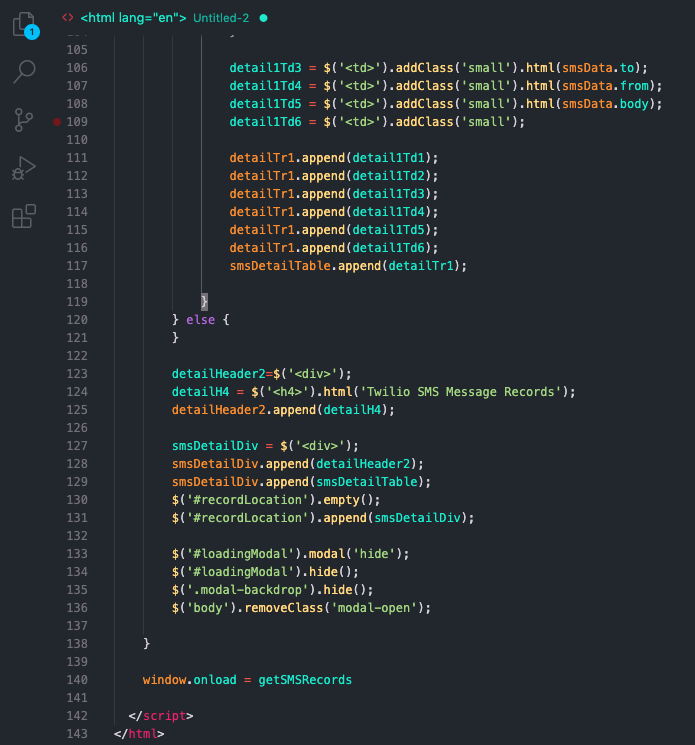
Add this line at the end of the script tag. This will execute the function which retrieves the data records as soon as the window loads.

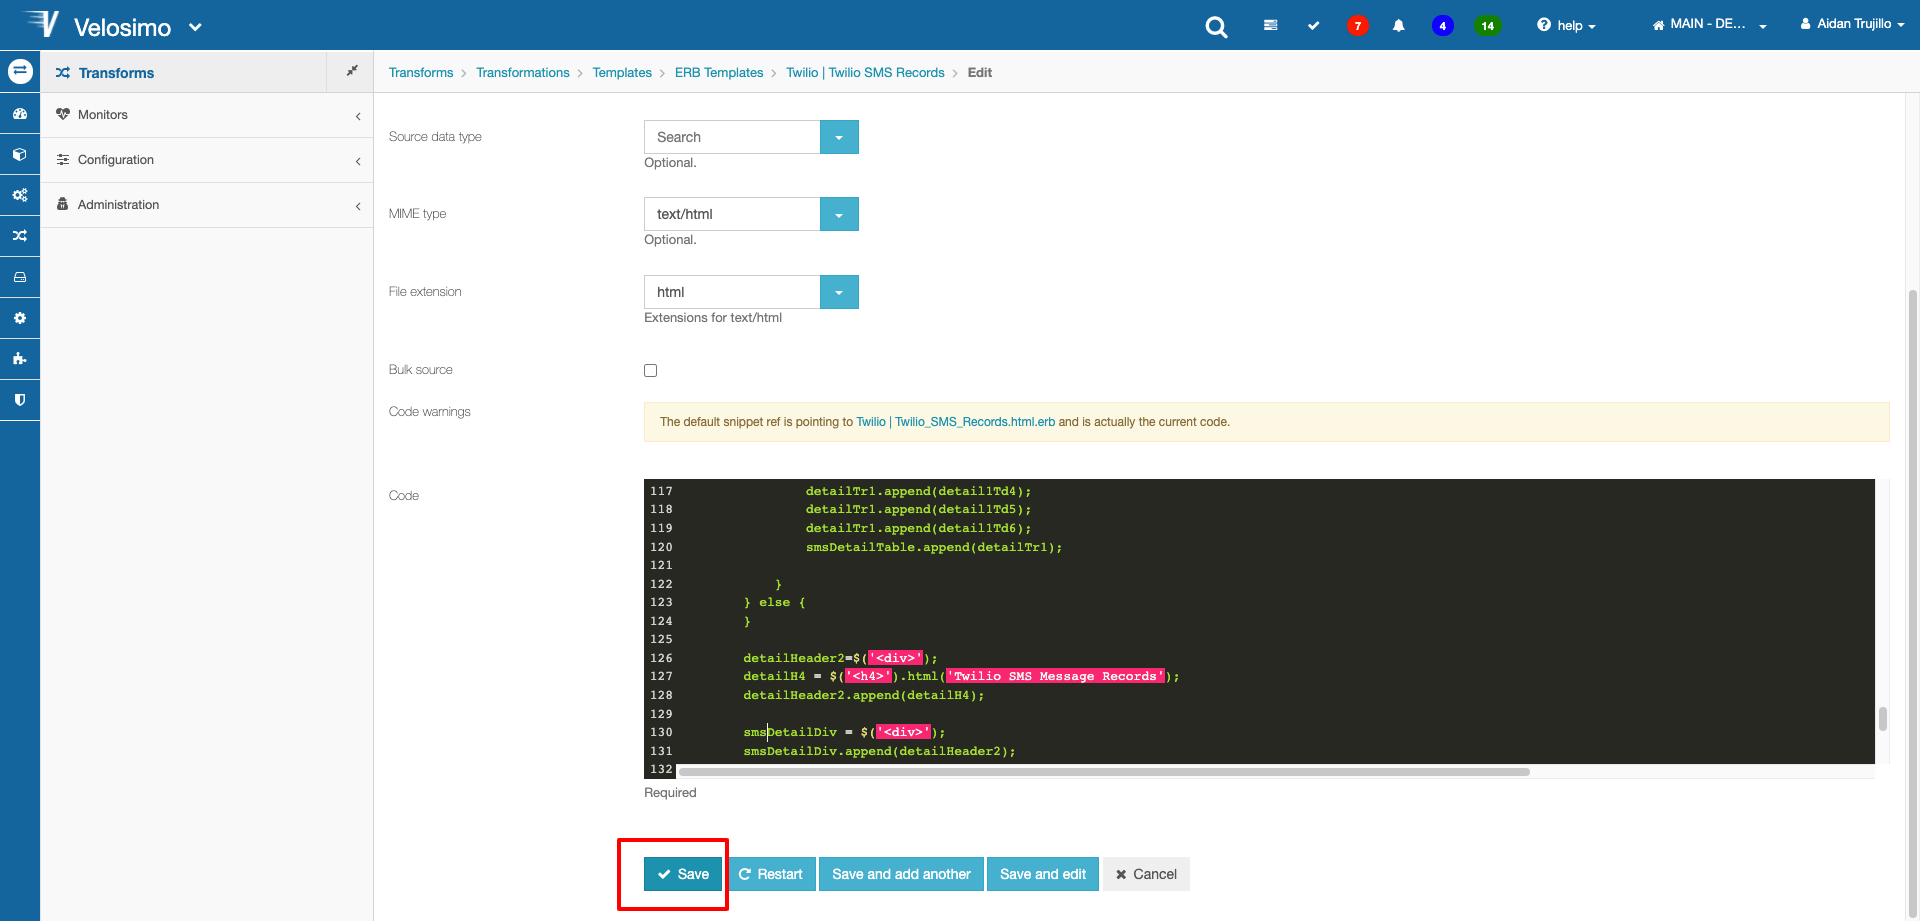
Now save the template. Remember to copy and paste your code into the code block if you used a separate code editor.
Using the Webpage
Now that our template is set up to retrieve the data records let's test it out.
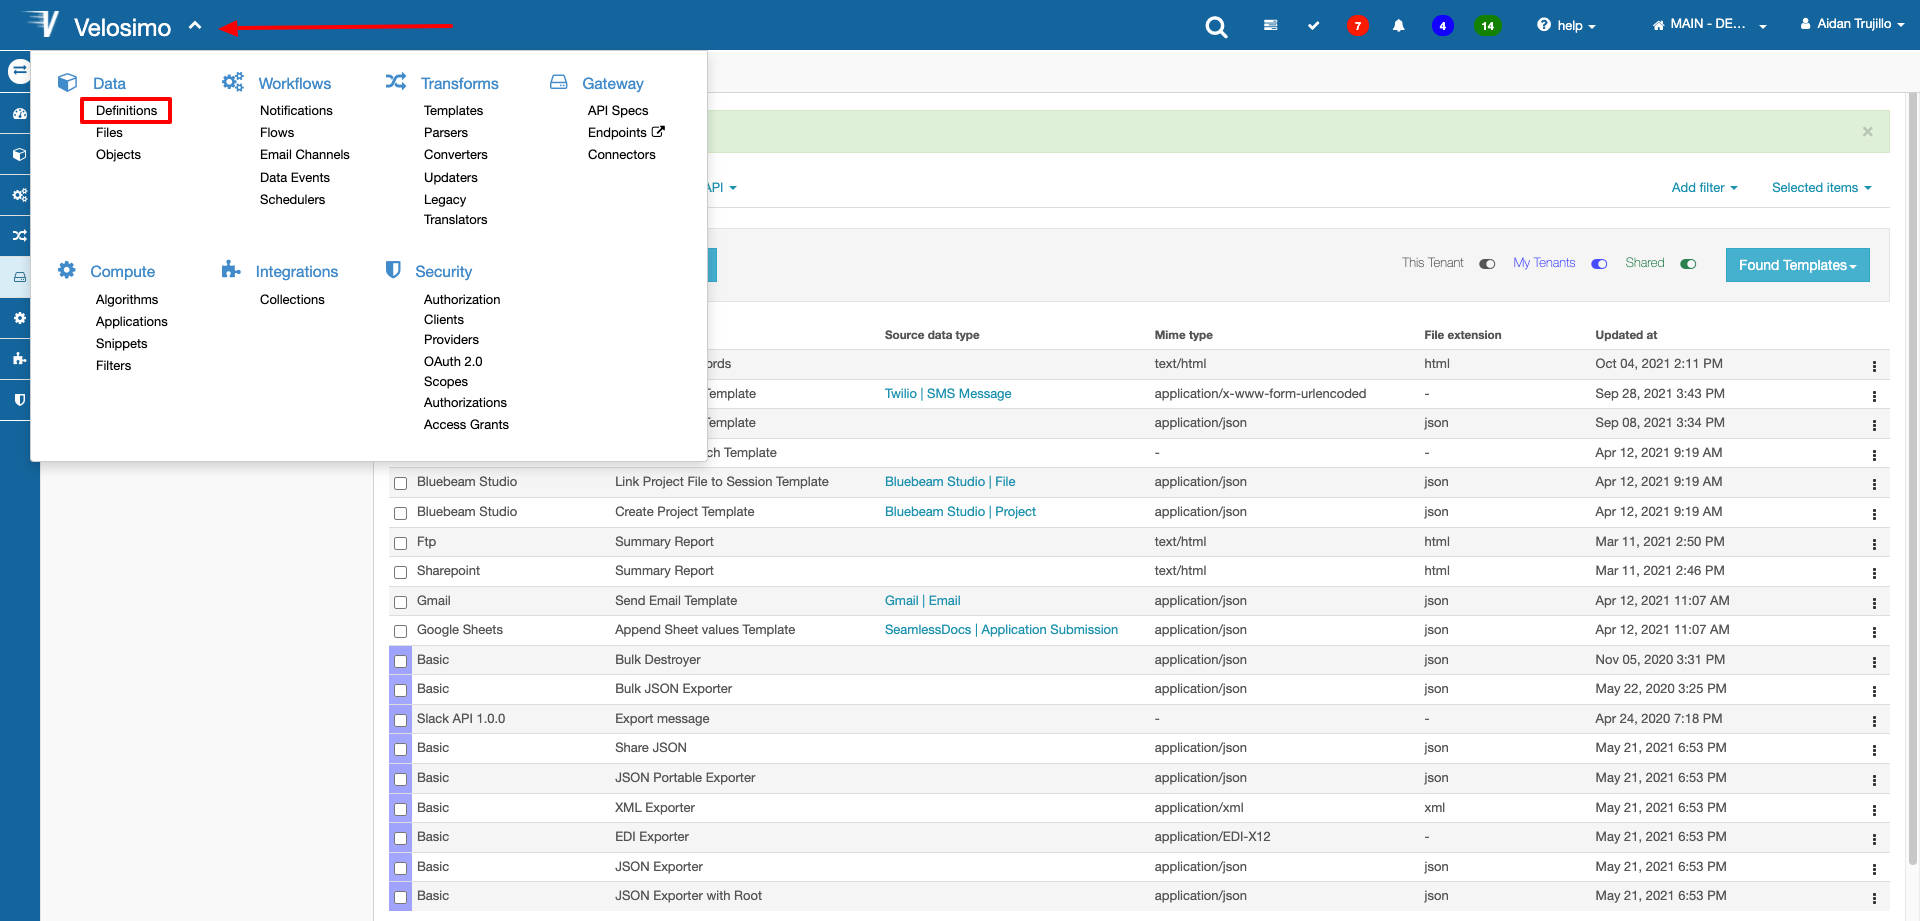
Navigate to Data -> Definitions -> JSON Types on the Velosimo menu and find your data type.
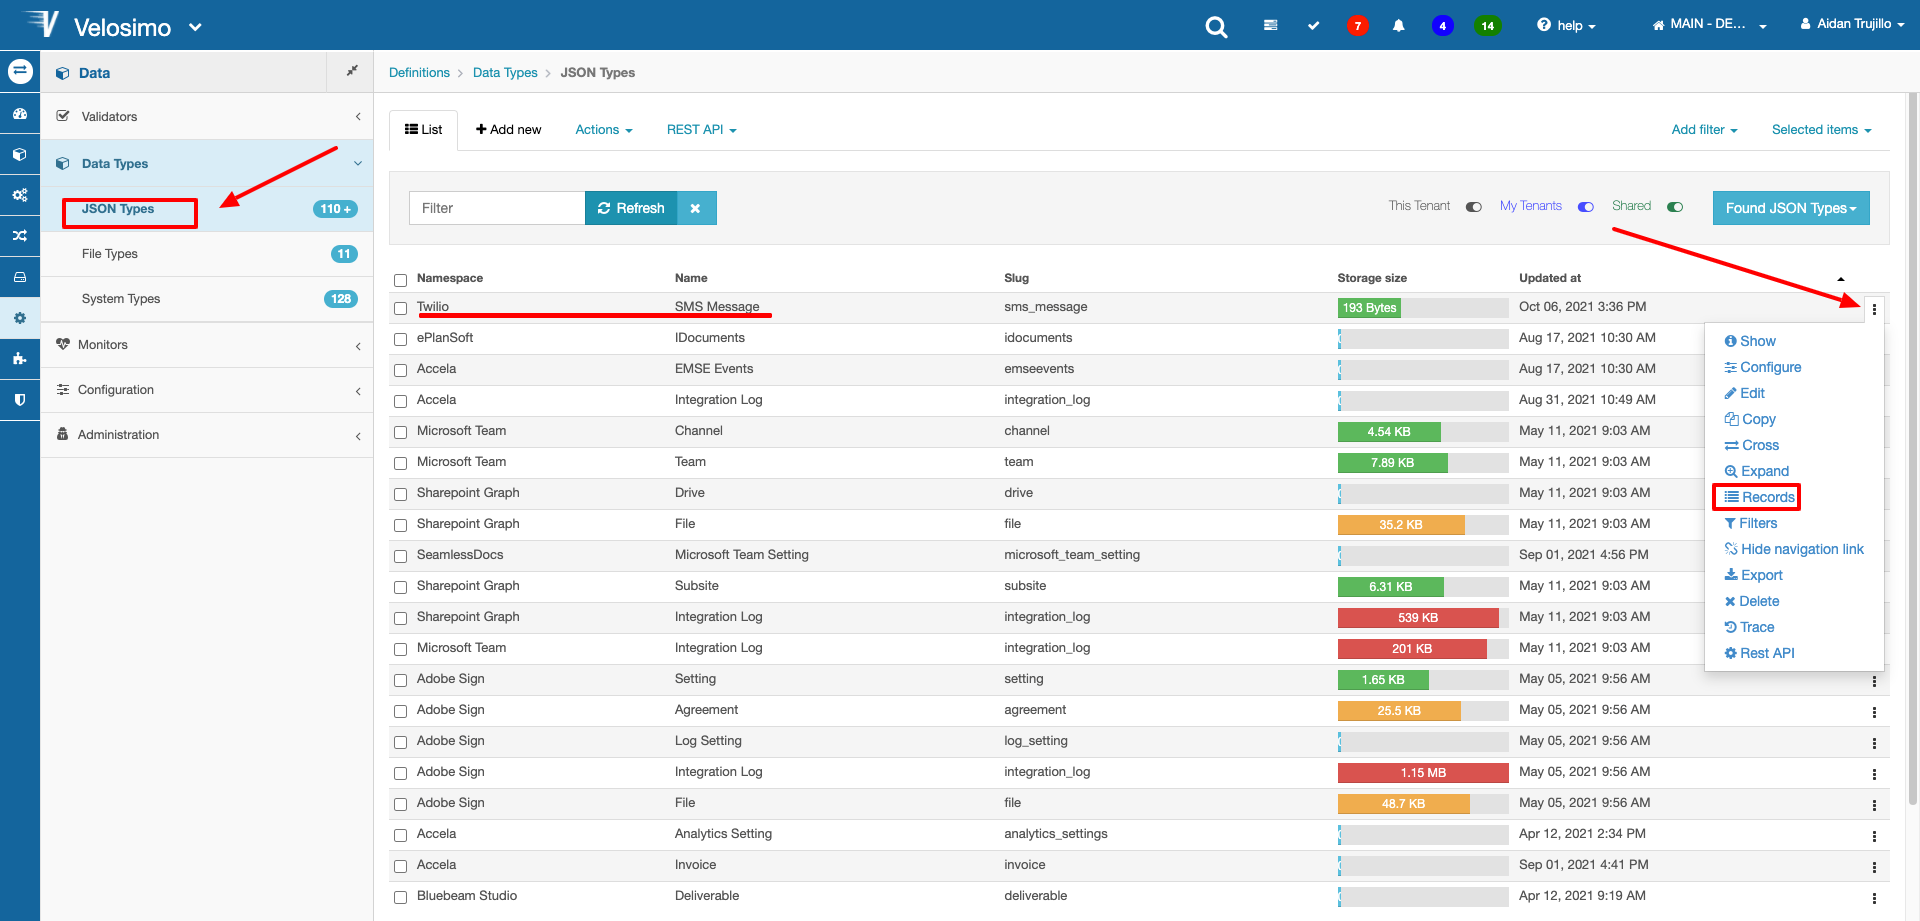
Select the Action menu and click Records.
Click Add New at the top of the page.
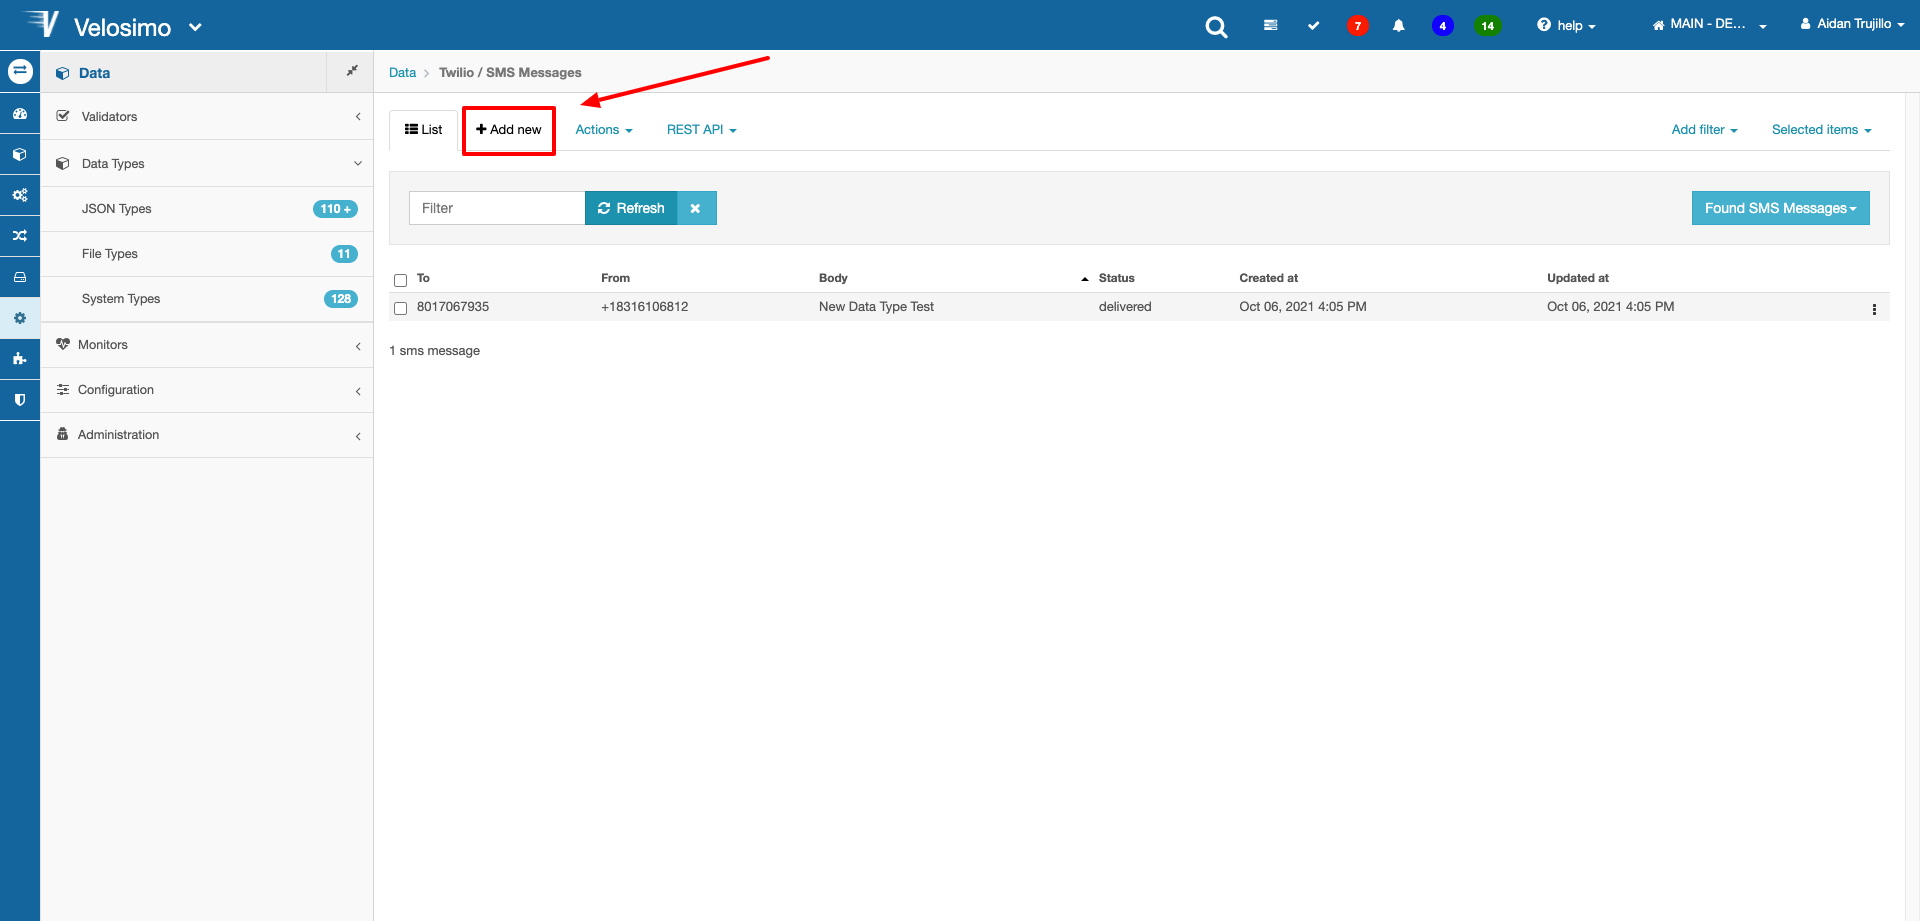
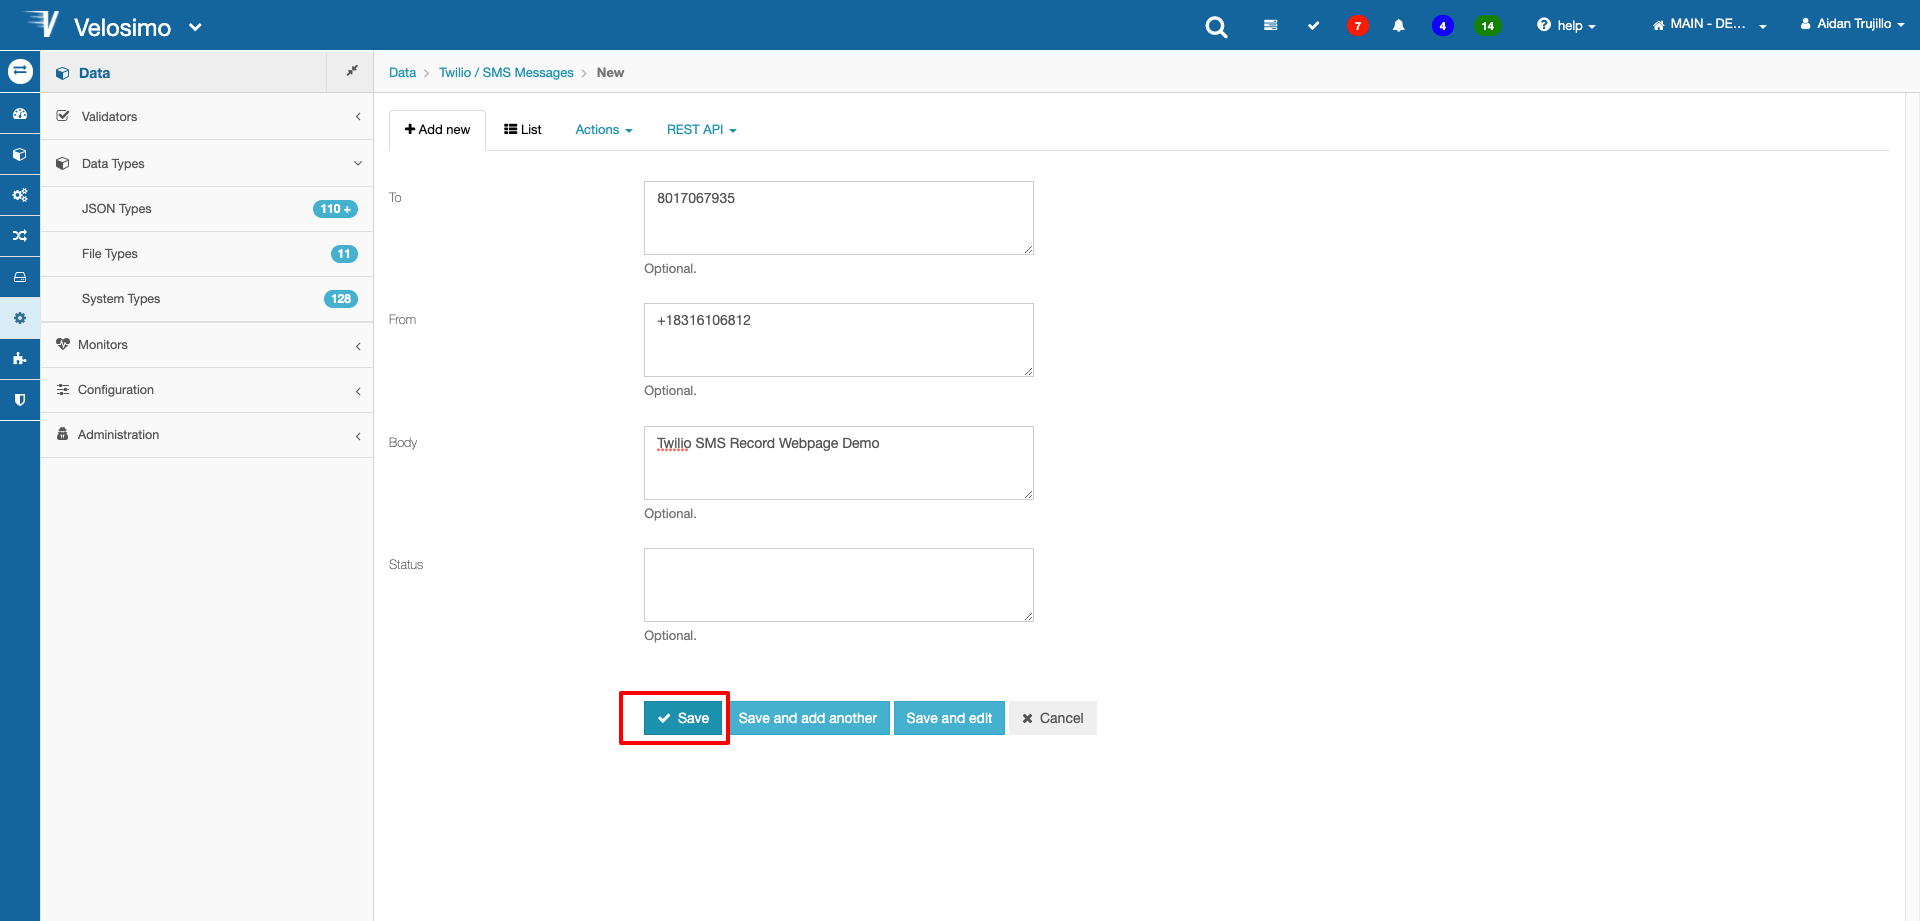
Create a new entry and save it.
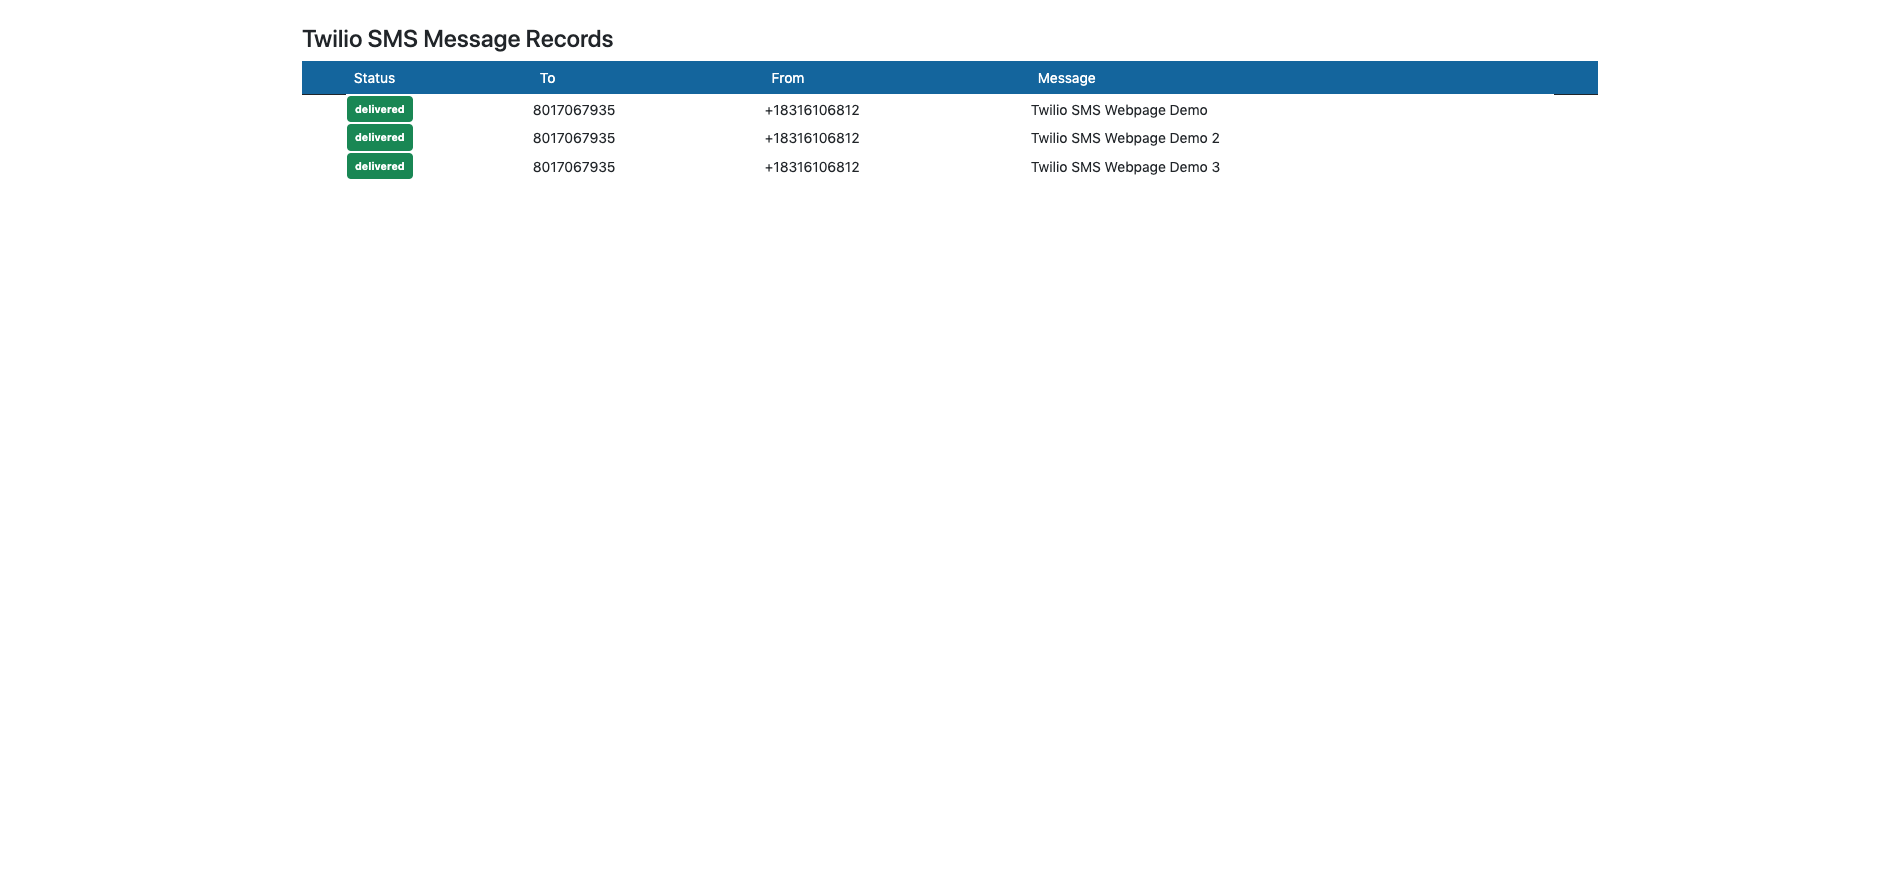
Now enter the URL to your app with the Webpage template action path into your browsers search bar.

If there were no errors with the API, you will now be able to see your data type records on the Webpage.
Creating a Collection
The Velosimo Platform makes the transfer of elements and data between Velosimo Tenants very simple. To do this we must create a Collection and export it from it's current tenant, then import it to the new Tenant.
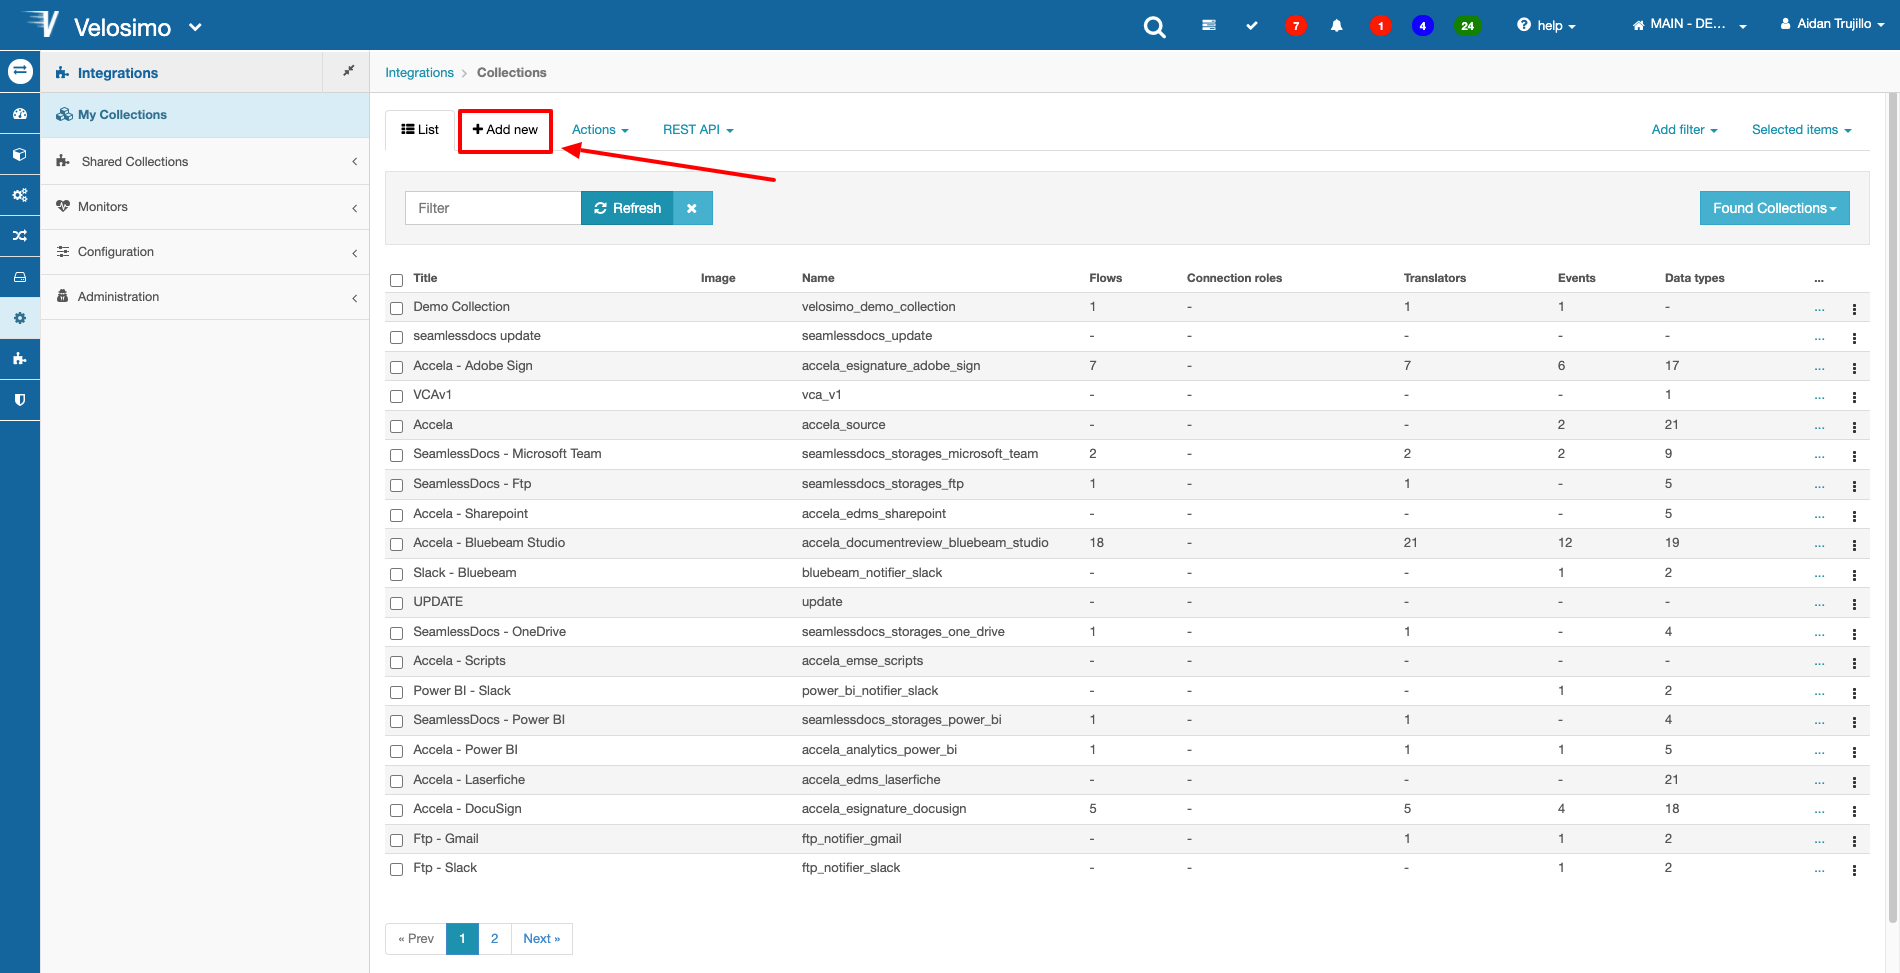
Navigate to Integrations -> Collections on the Velosimo Menu.
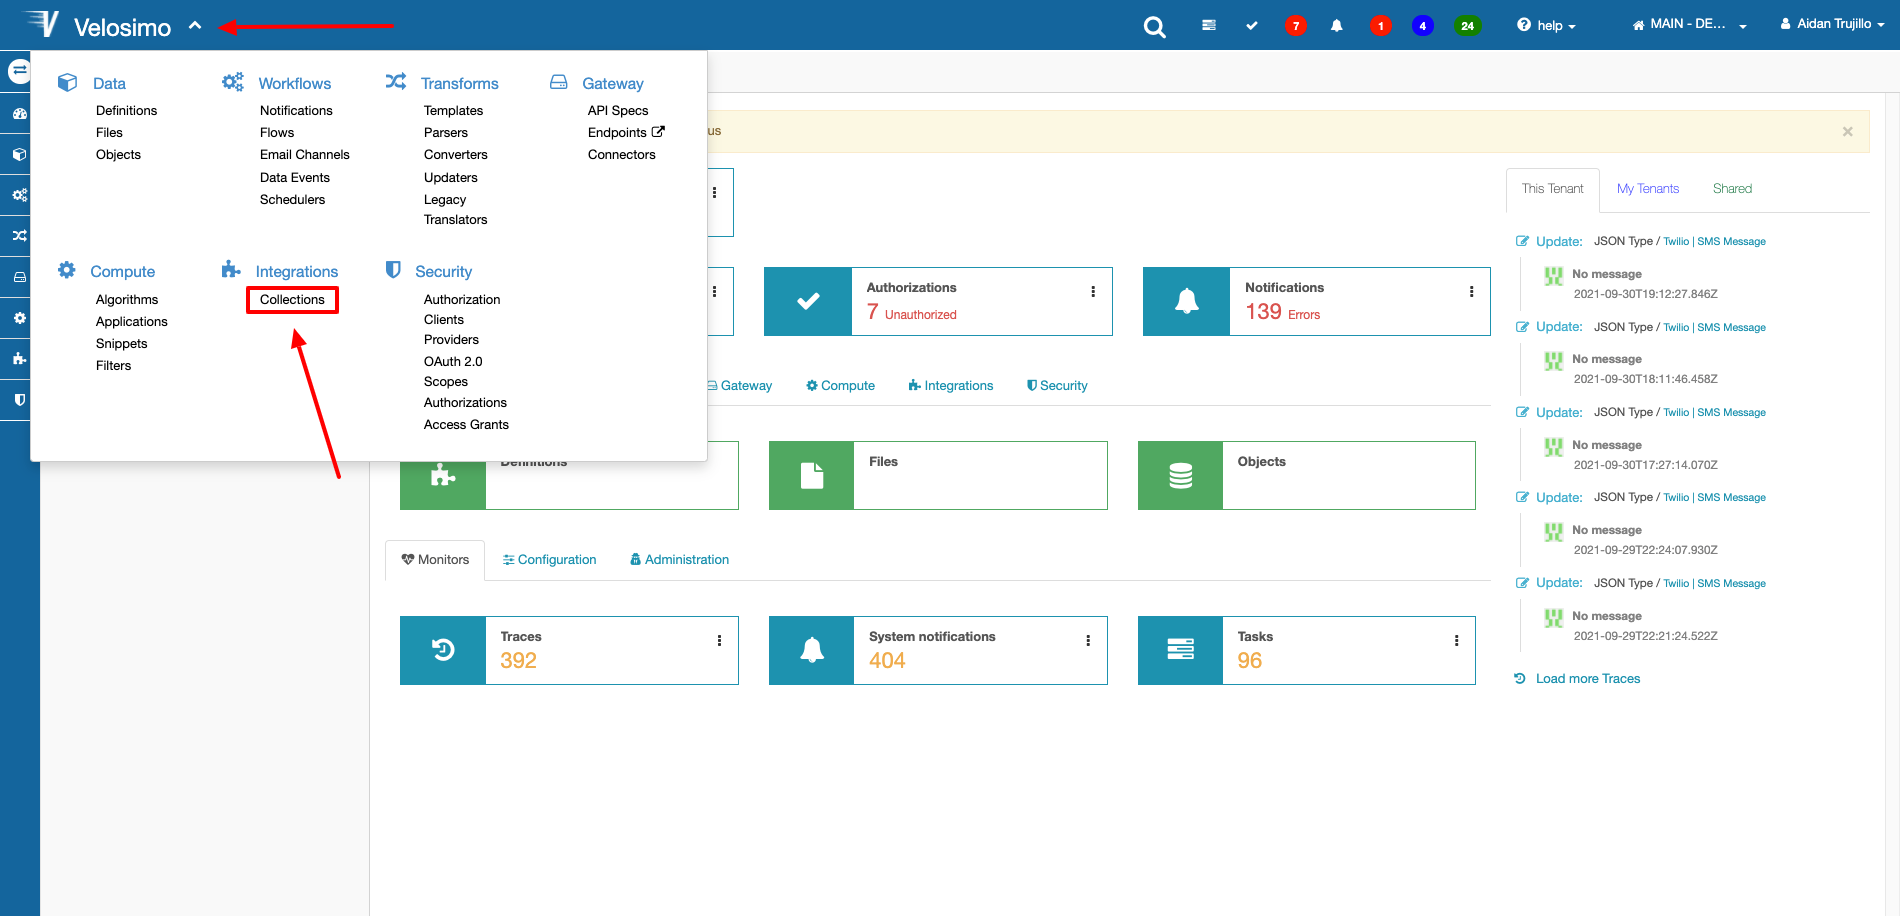
Click Add new at the top of the page.
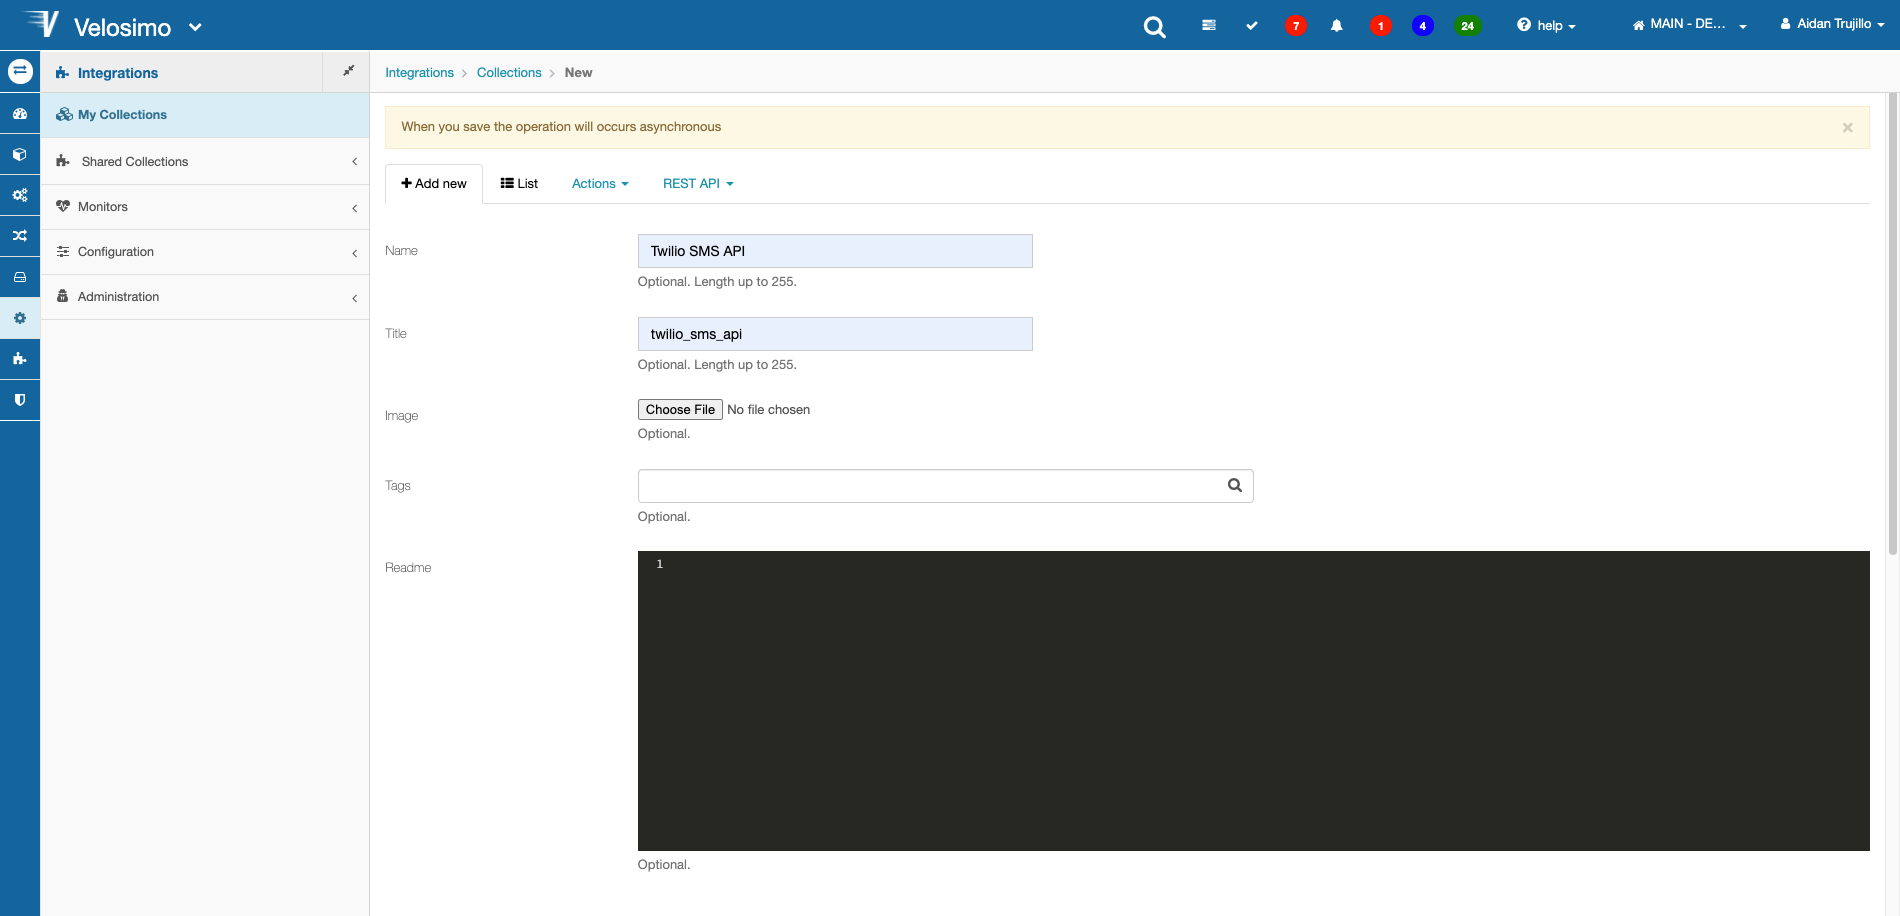
Enter a name and title for the collection. Optionally, you can attach an image file and create a readMe file.
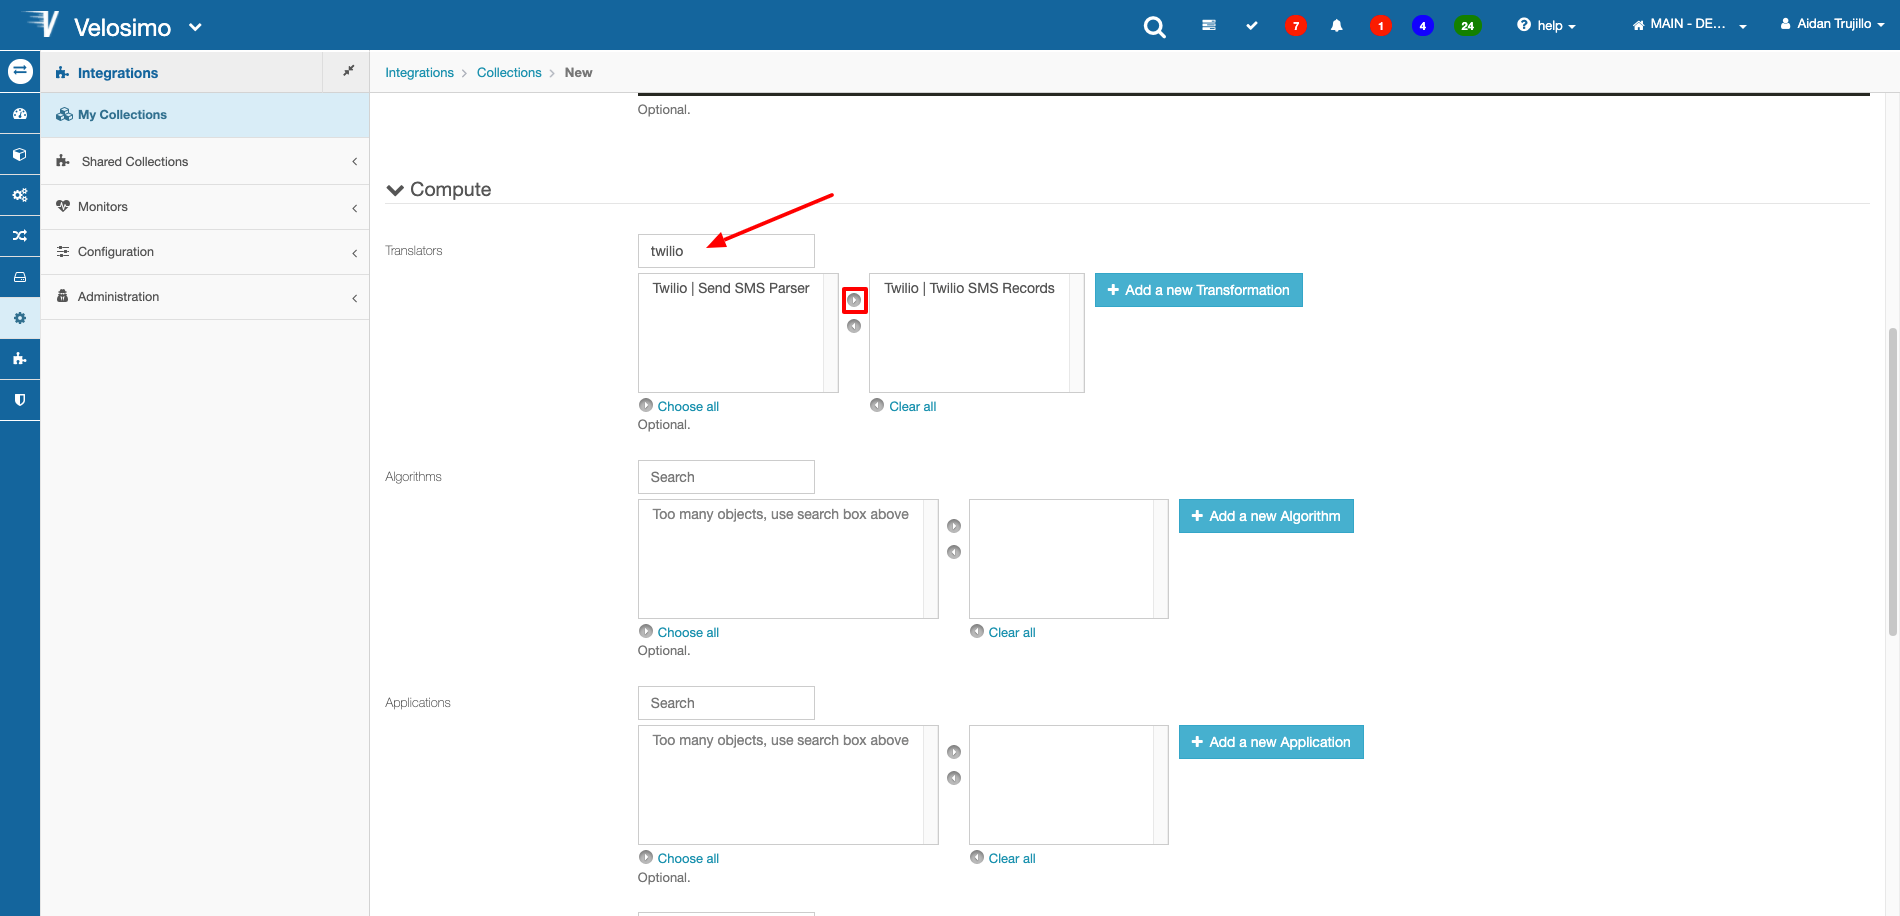
Next, under compute, add the Translators, Algorithms, and App you want to transfer to the new Tenant. To add elements, search the name in the search bar then select it and click the right arrow. Elements that are in the box to the right will be added to the Collection.
Do the same for all desired sections.
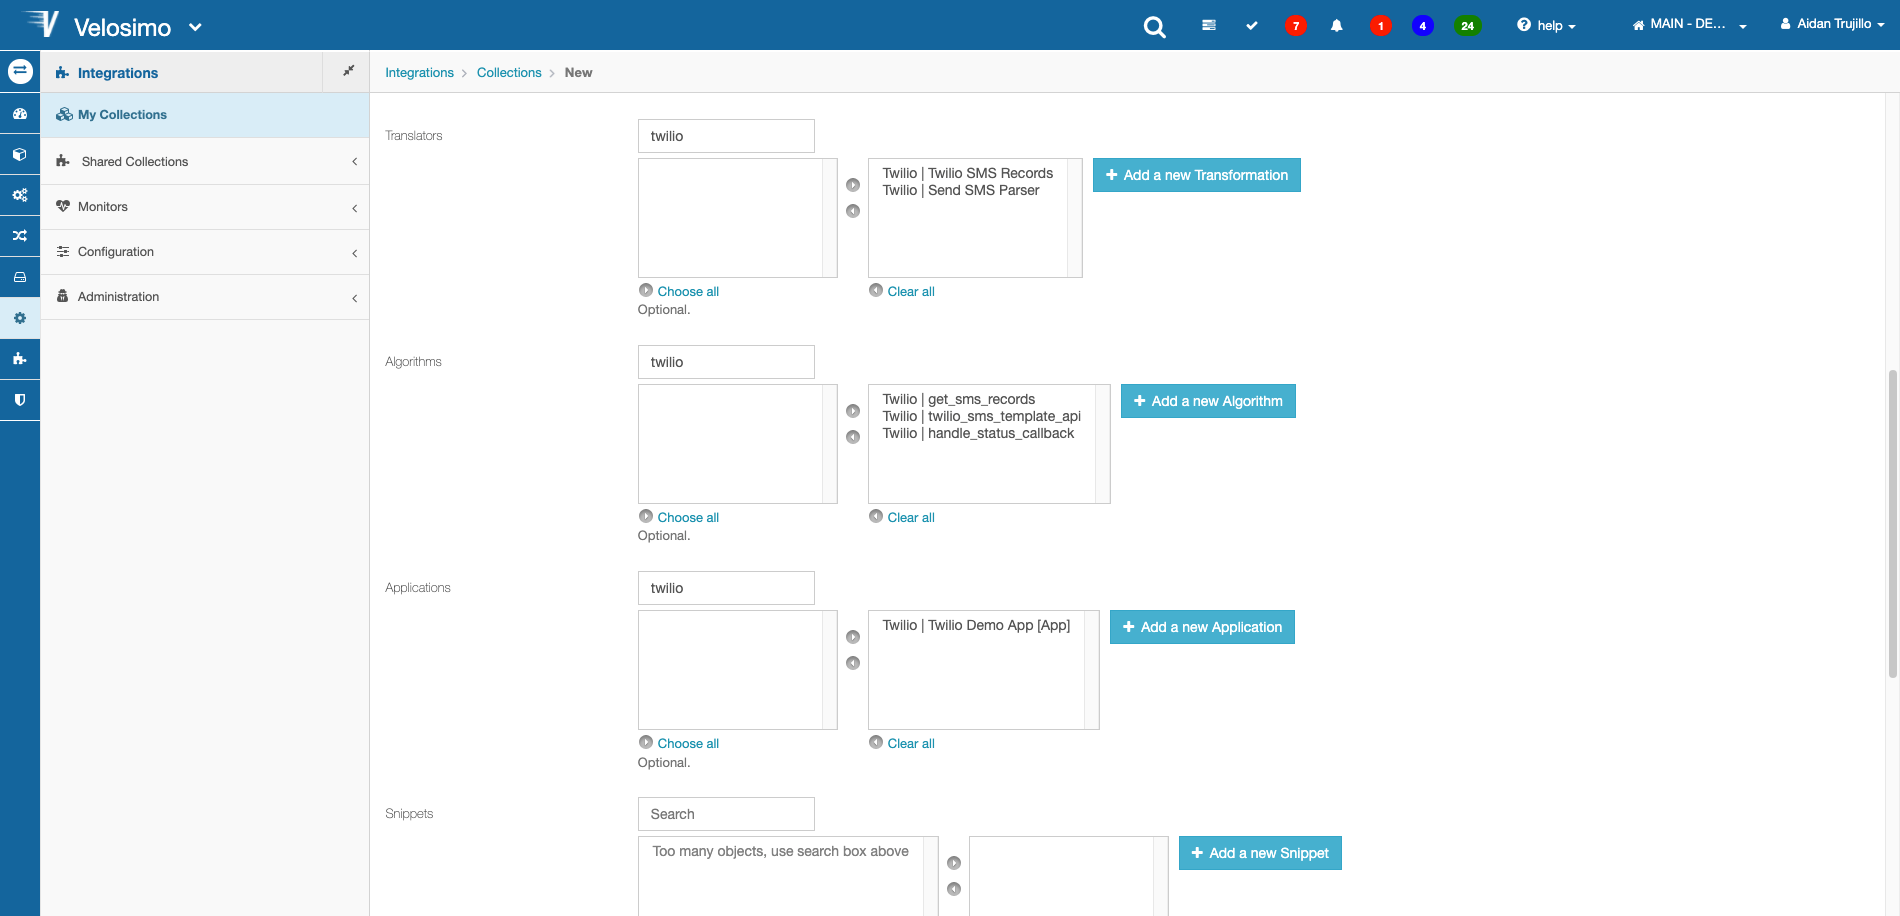
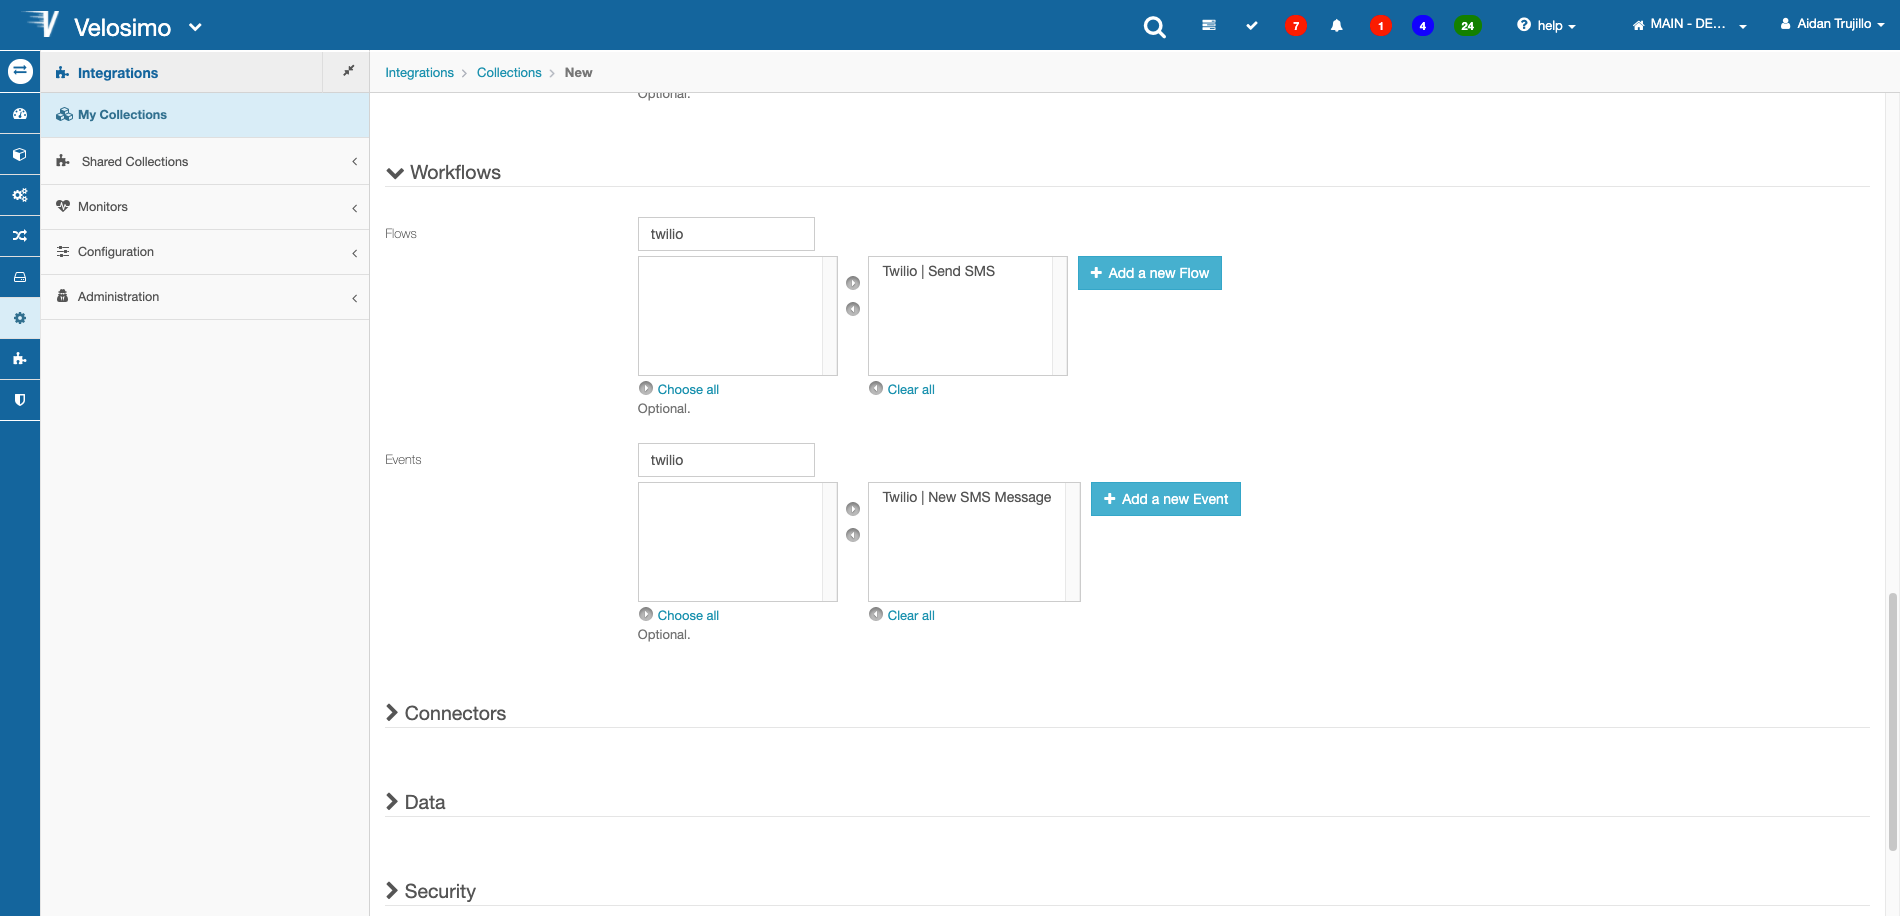
In Workflows, add the Flow and Event.
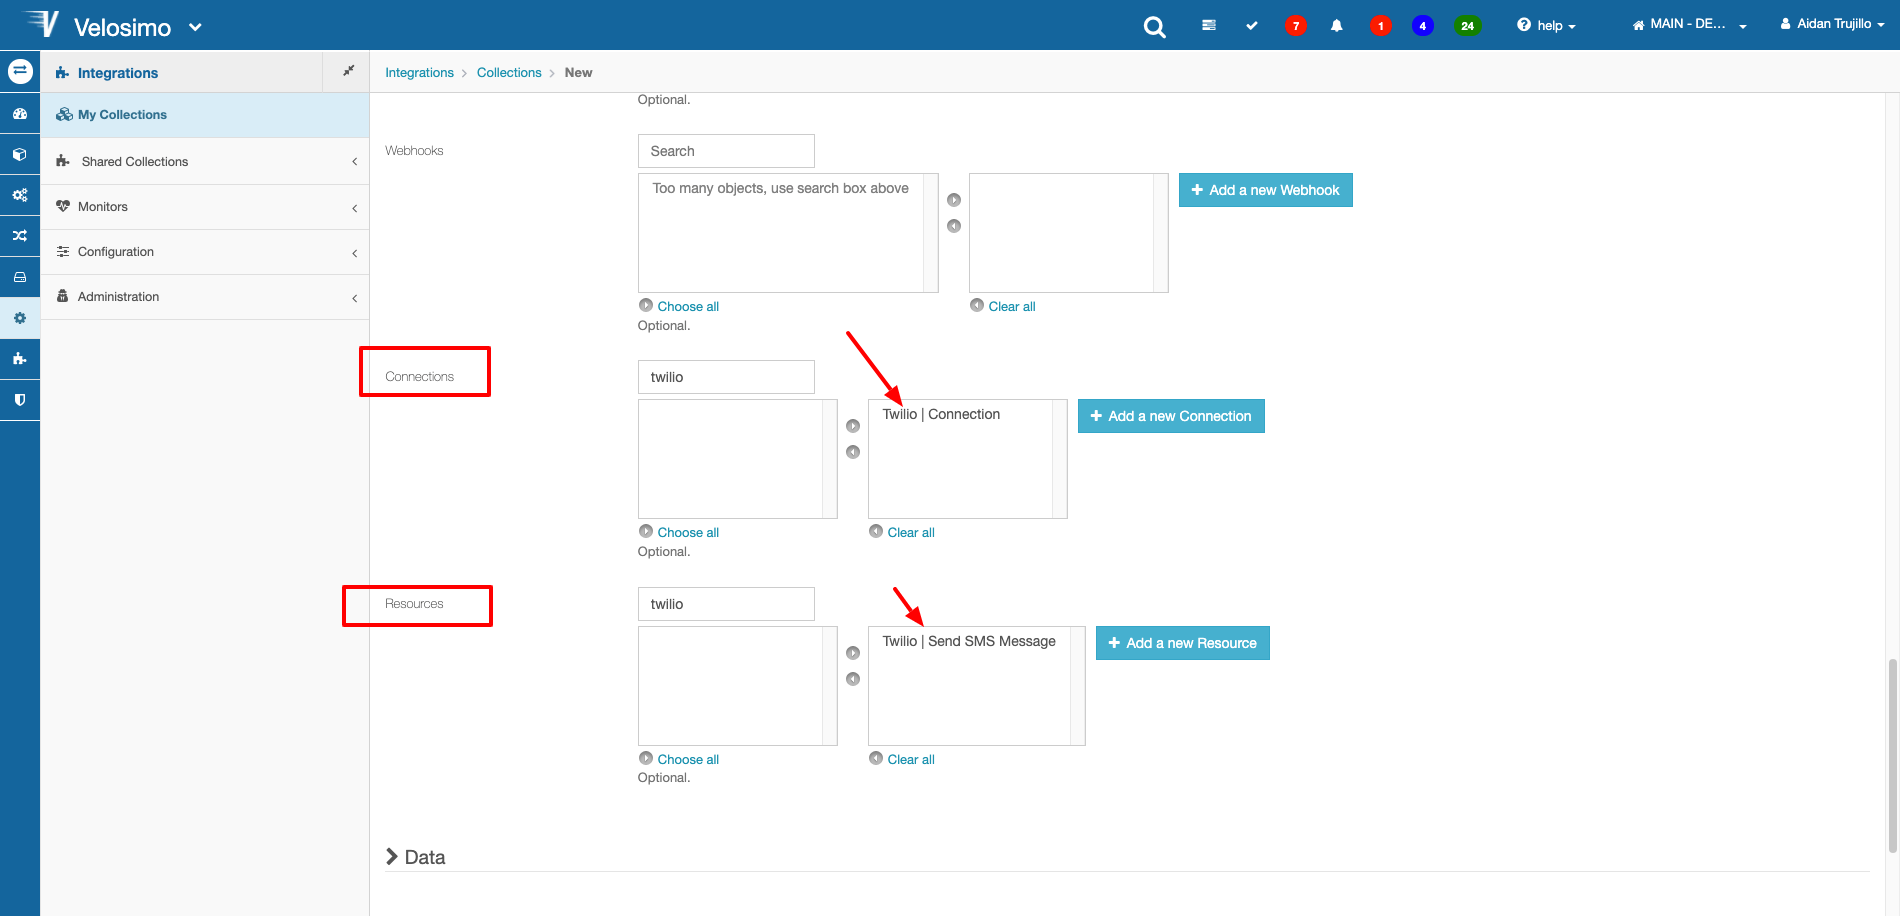
In Connectors, add the Connection and Resource.
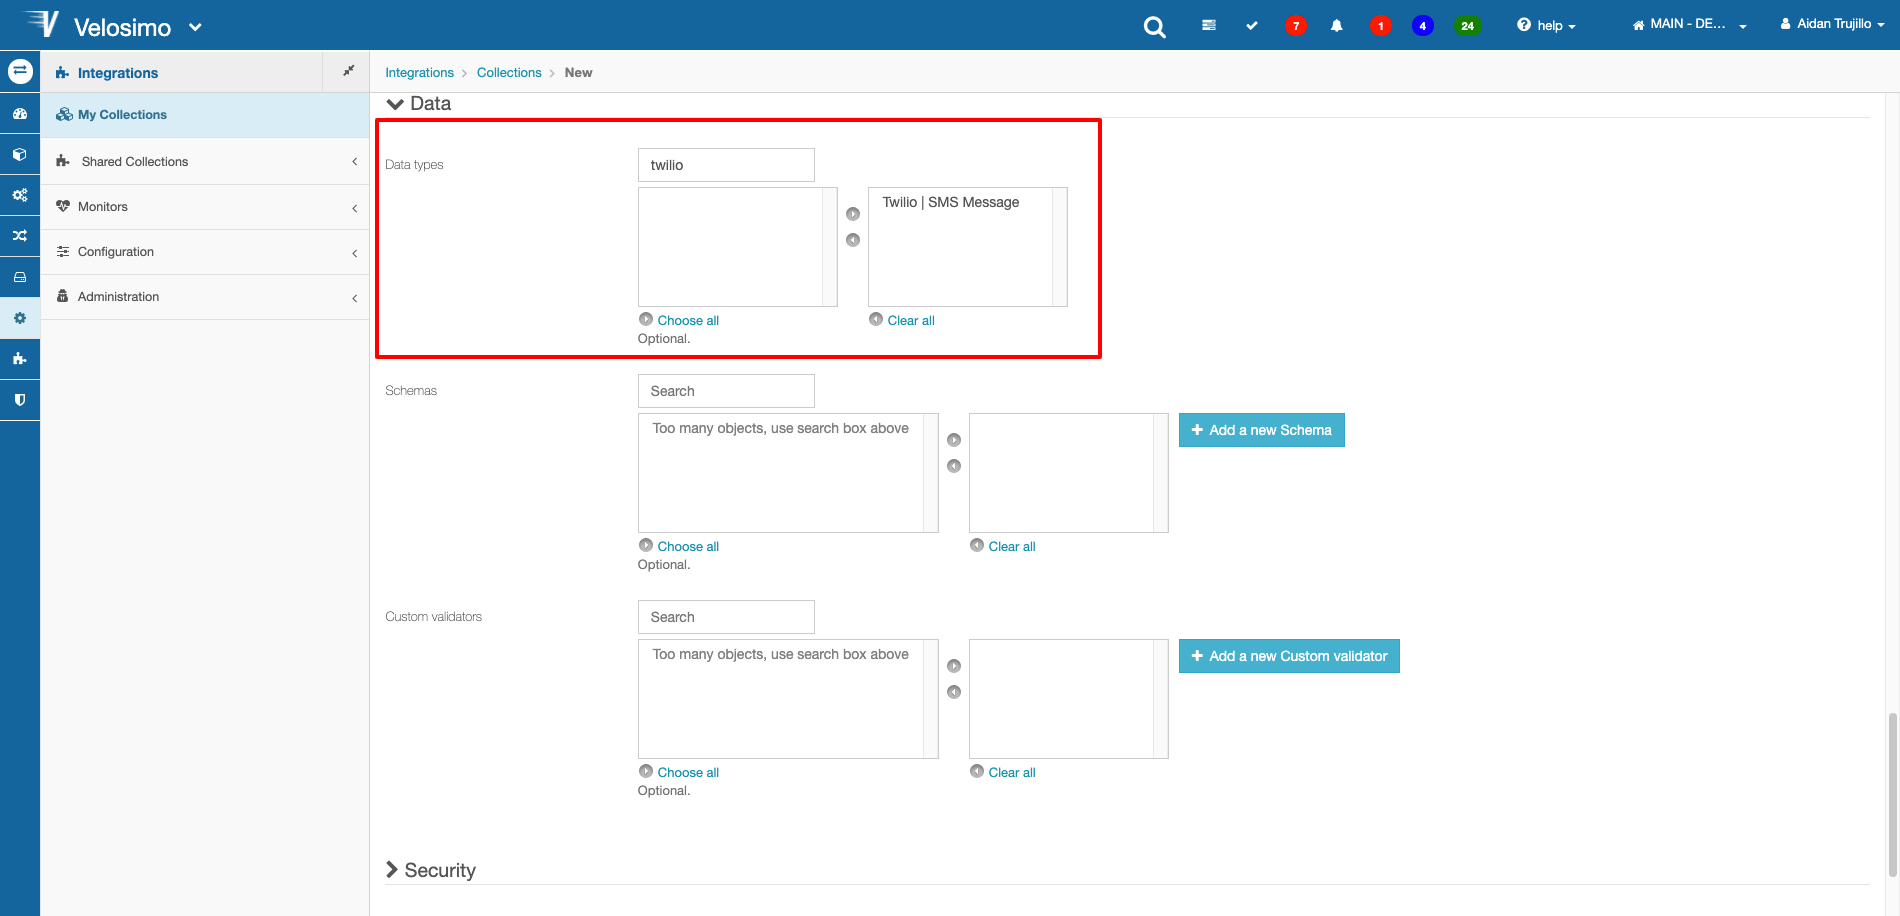
In Data, add the Data Type.
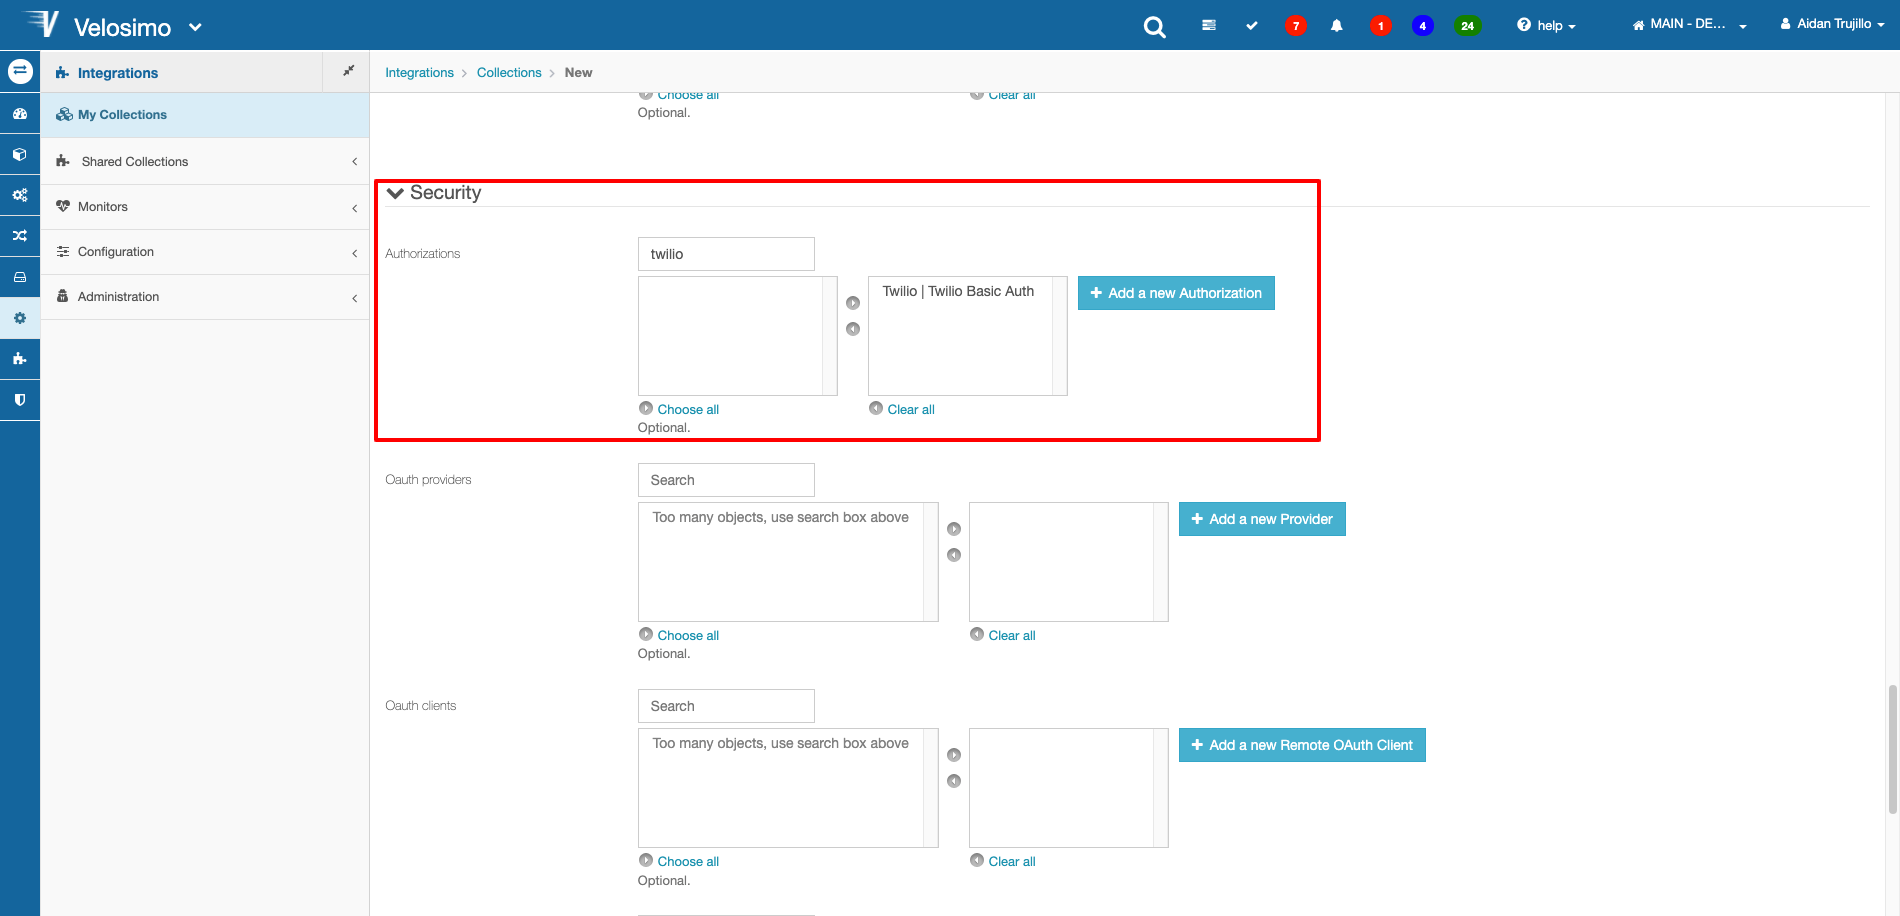
Then, in Security add the Authorization.
Click Save once complete.
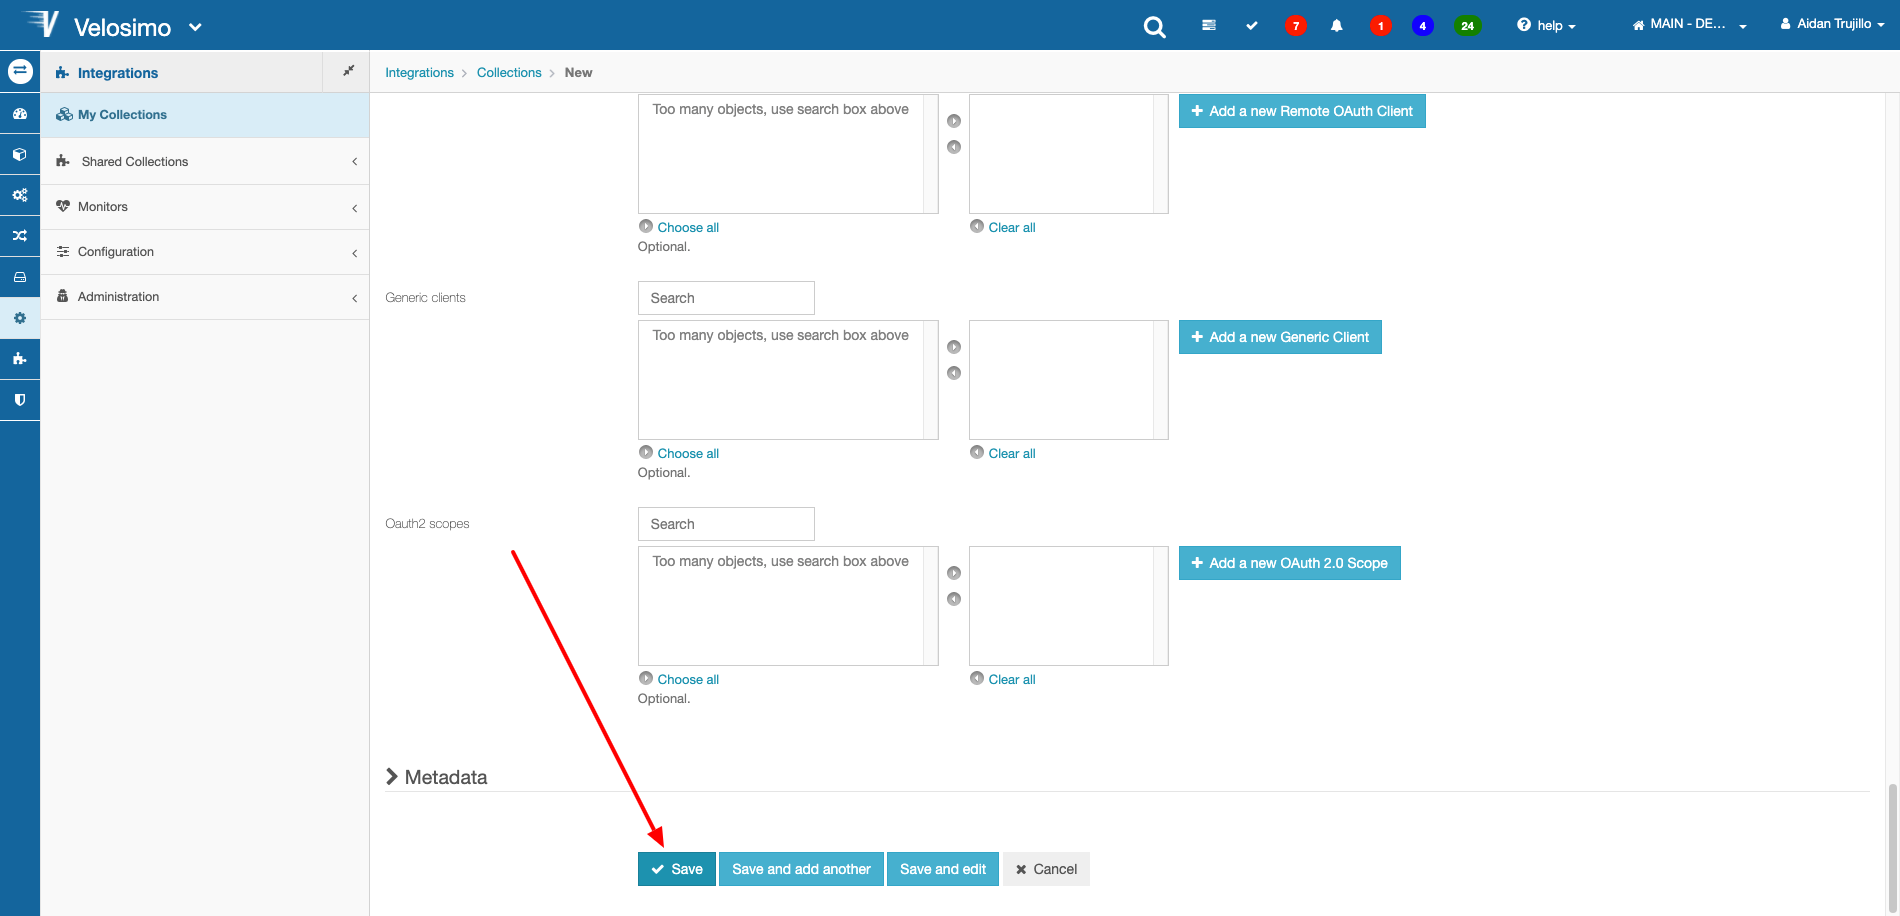
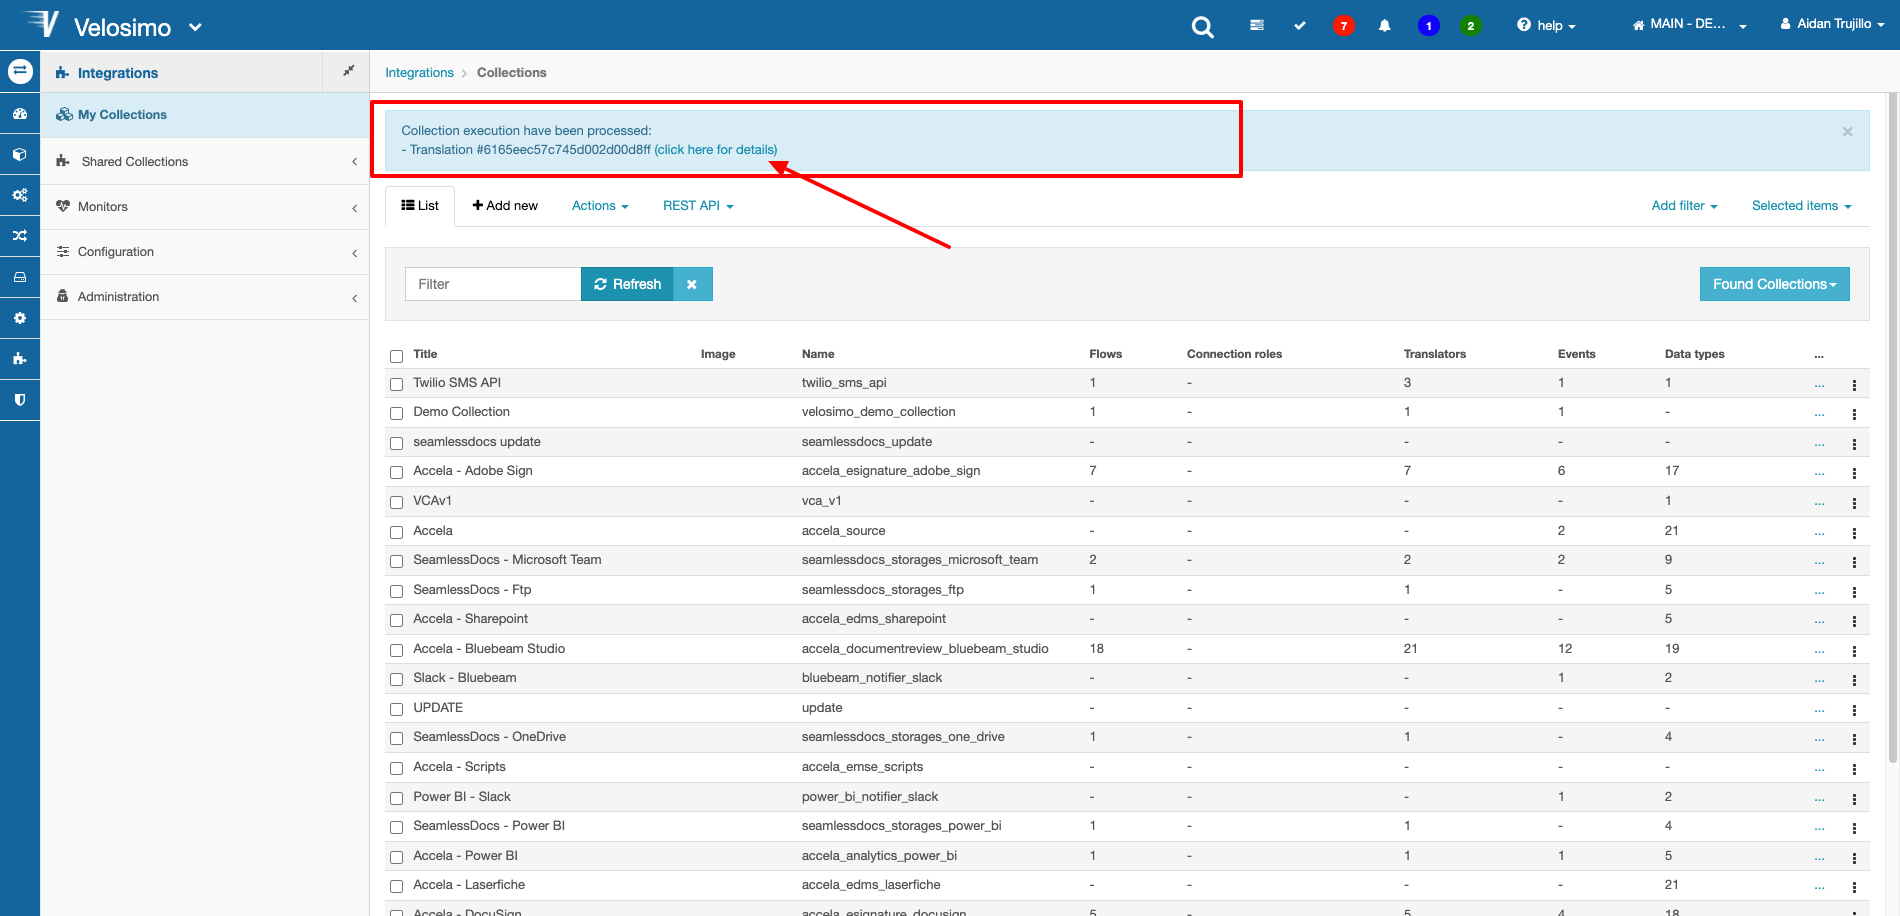
A message will display saying the execution has processed. Click the Refresh button.
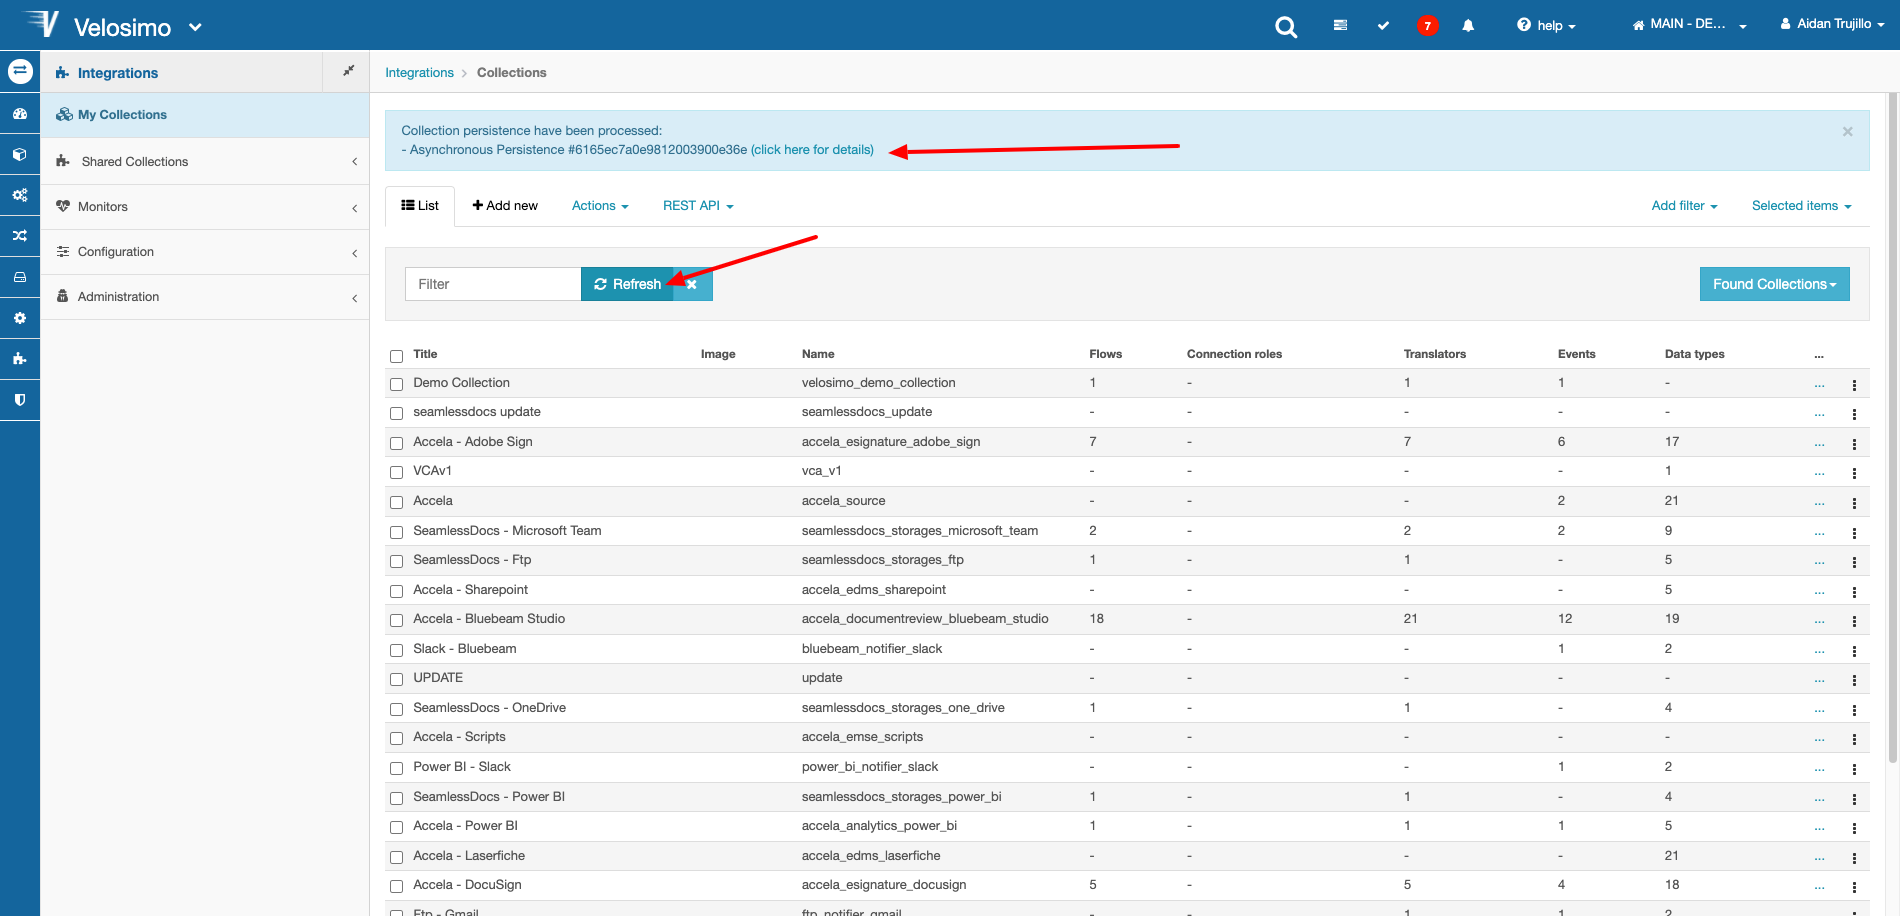
Now you will see the Collection that was created. Select the Action menu and click Export.
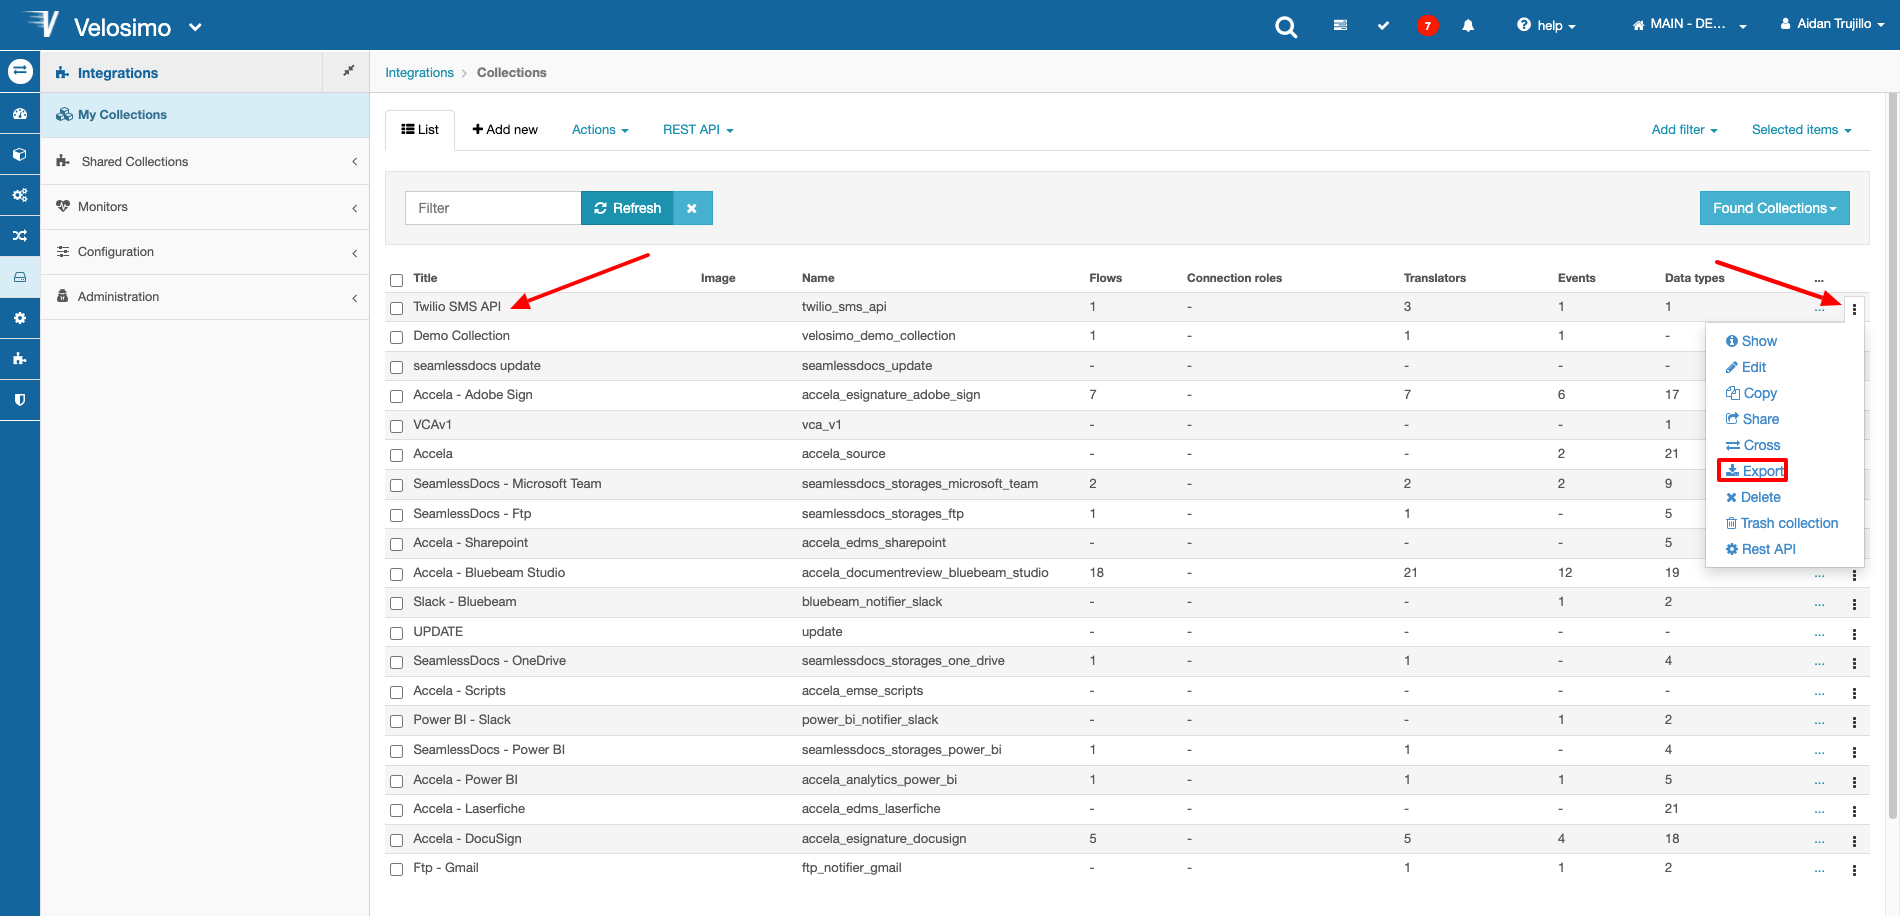
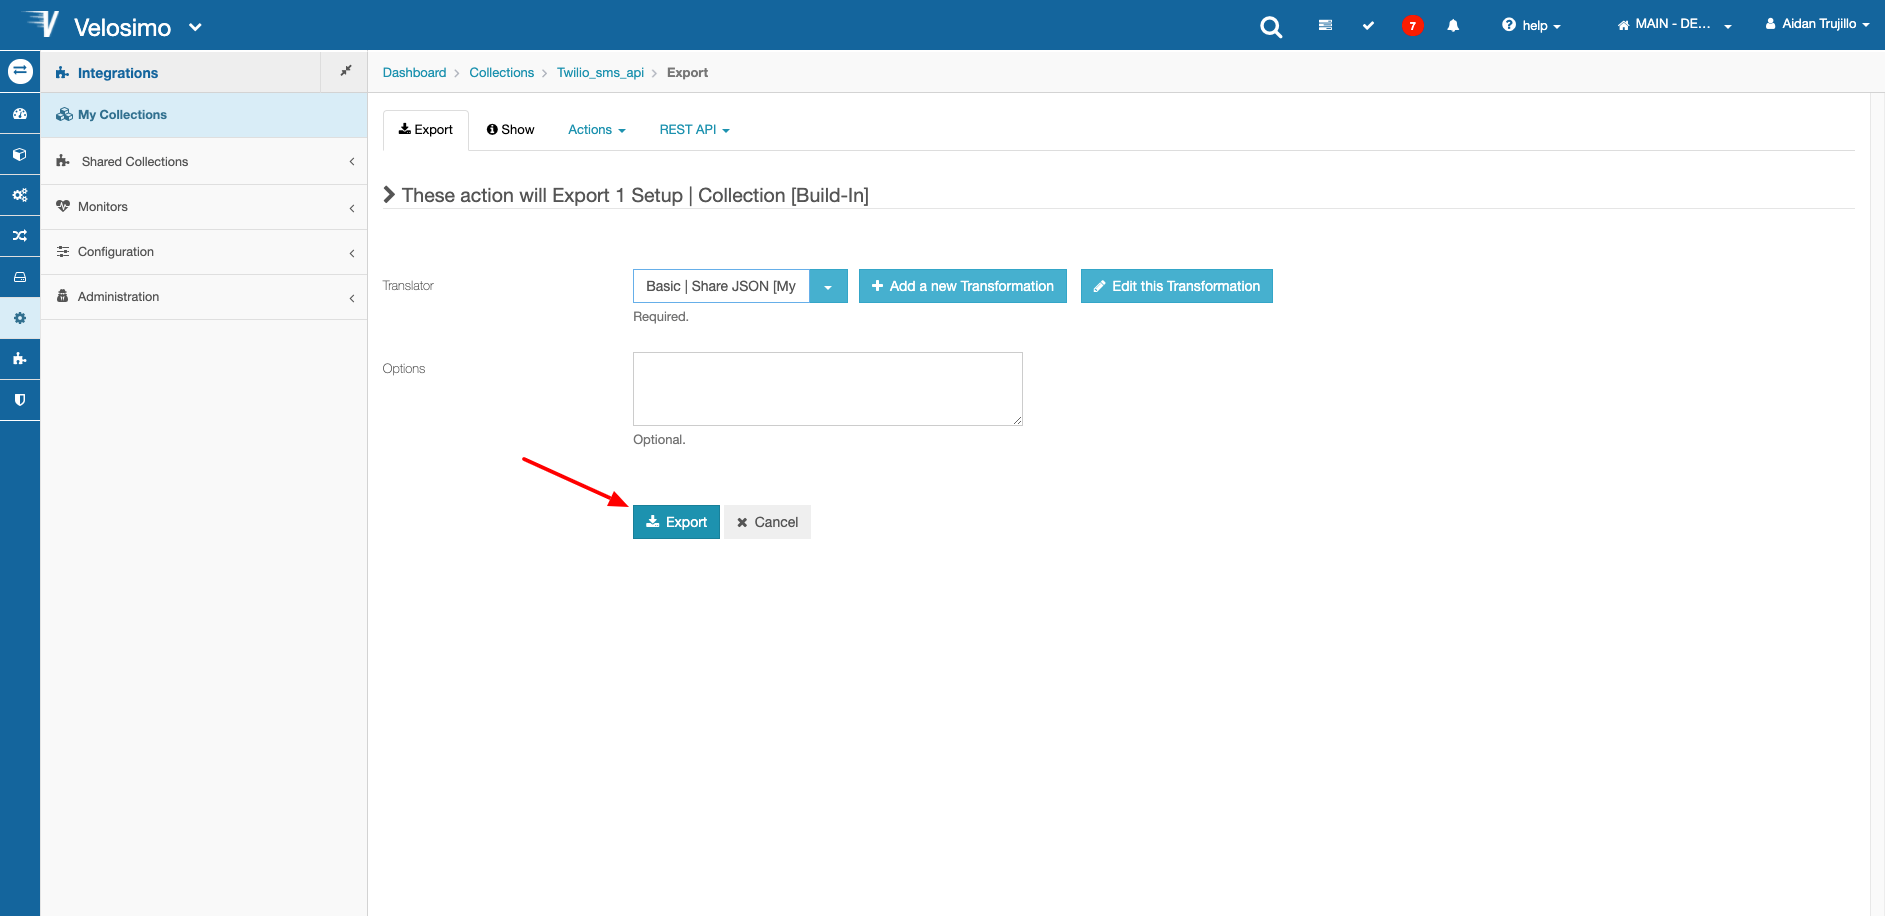
Select Basic | Share JSON from the list.
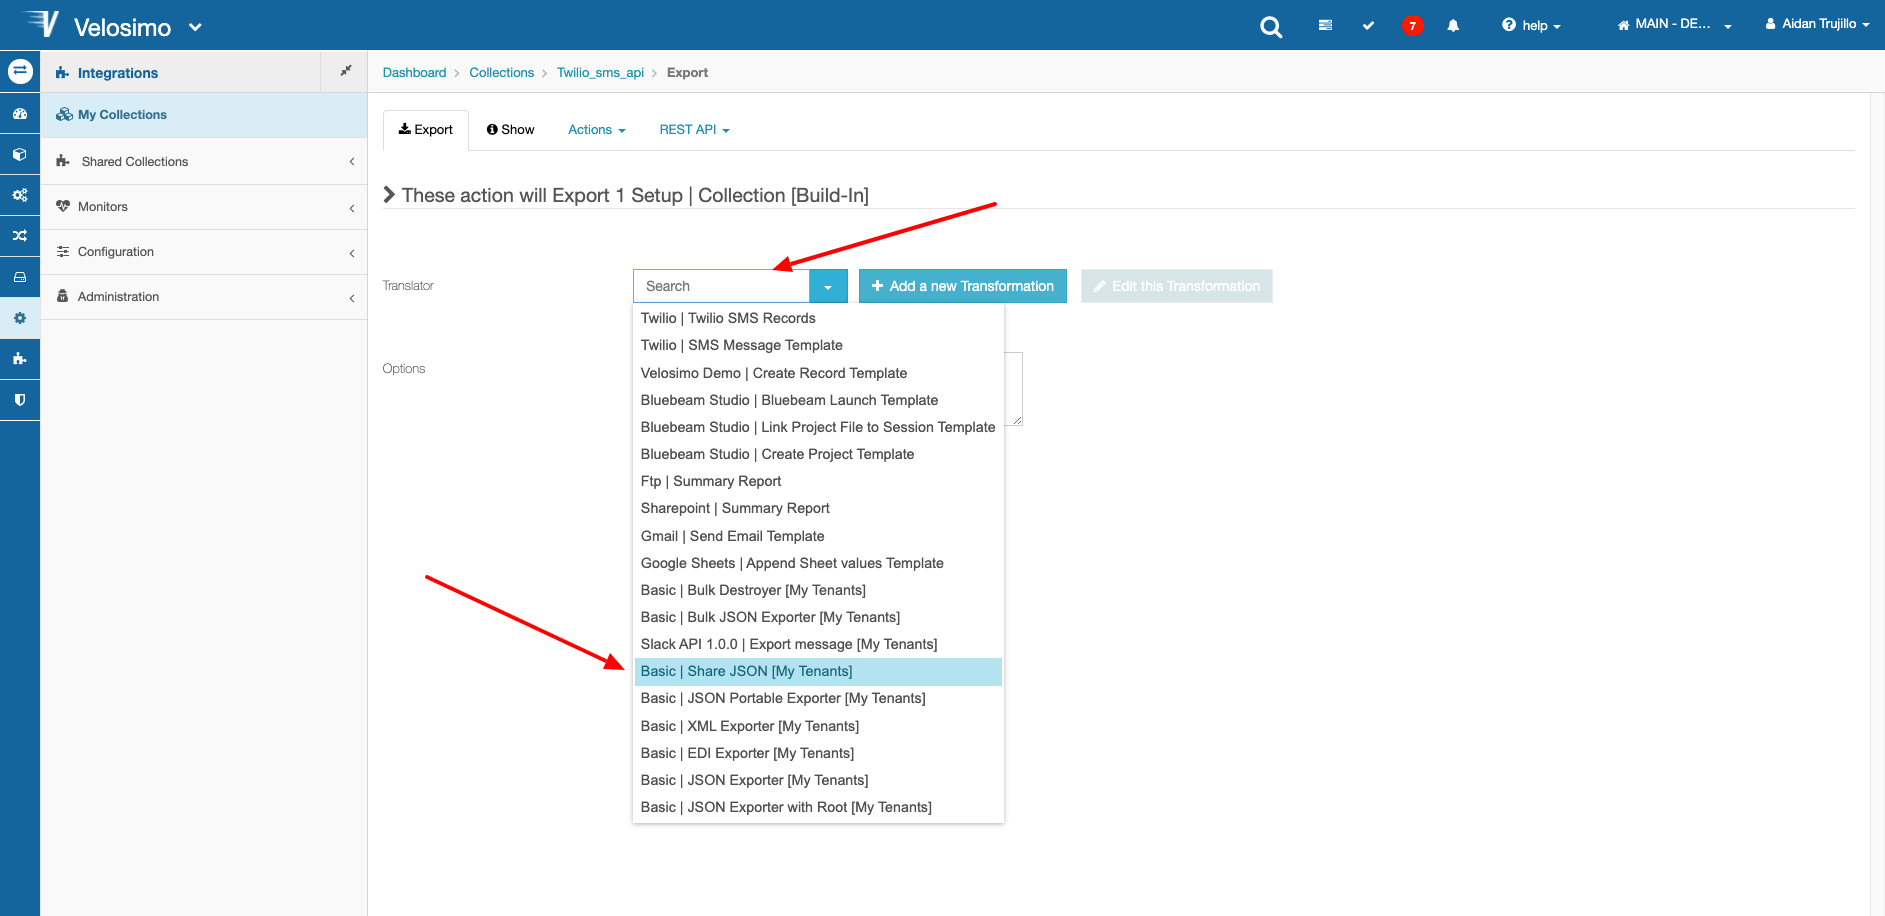
Click Export.
An execution will then fire, click the link for more details.
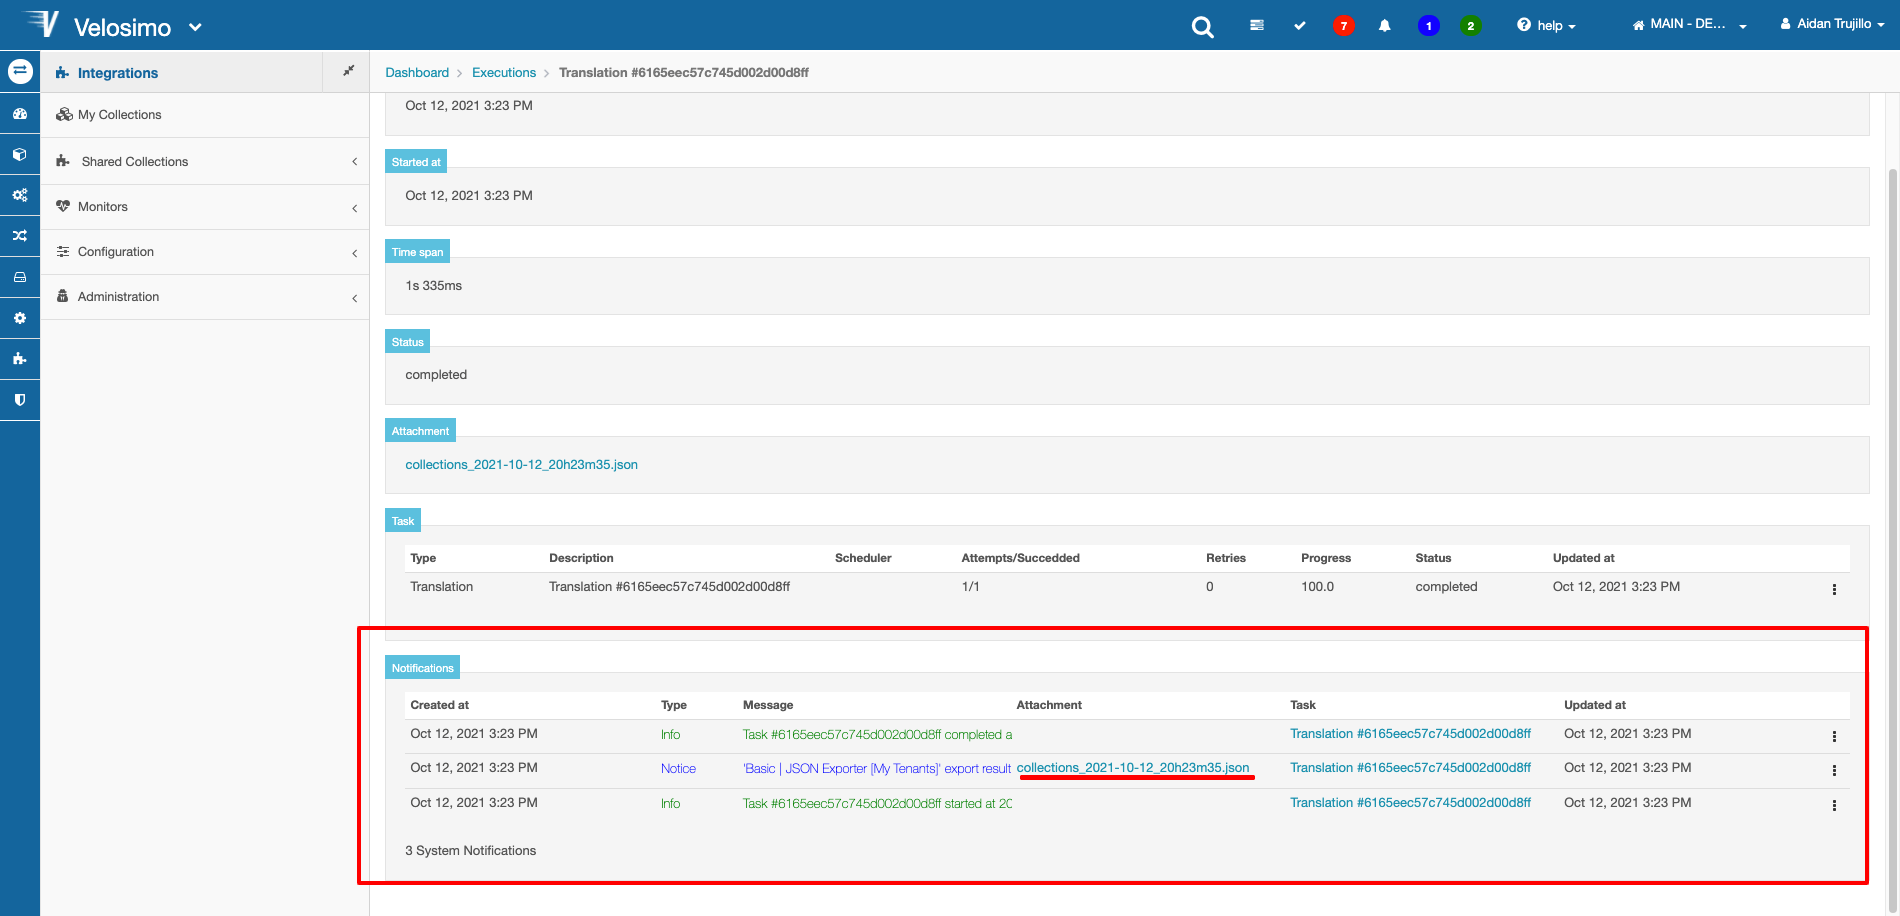
At the bottom of the page under notifications, click and download the JSON attachment.
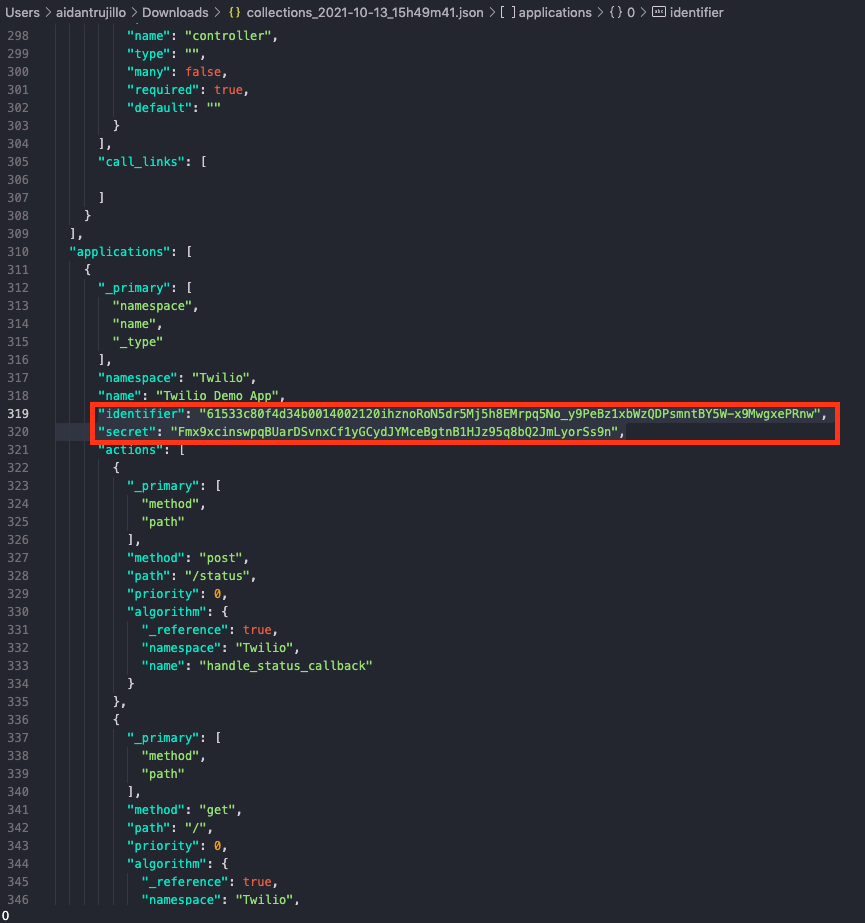
Next, we need to edit our JSON export. Since our Collection contains an app which has an identifier value and a secret value, we cannot import a collection with these values. Open the JSON in a code editor and search for the identifier and secret property and delete them.
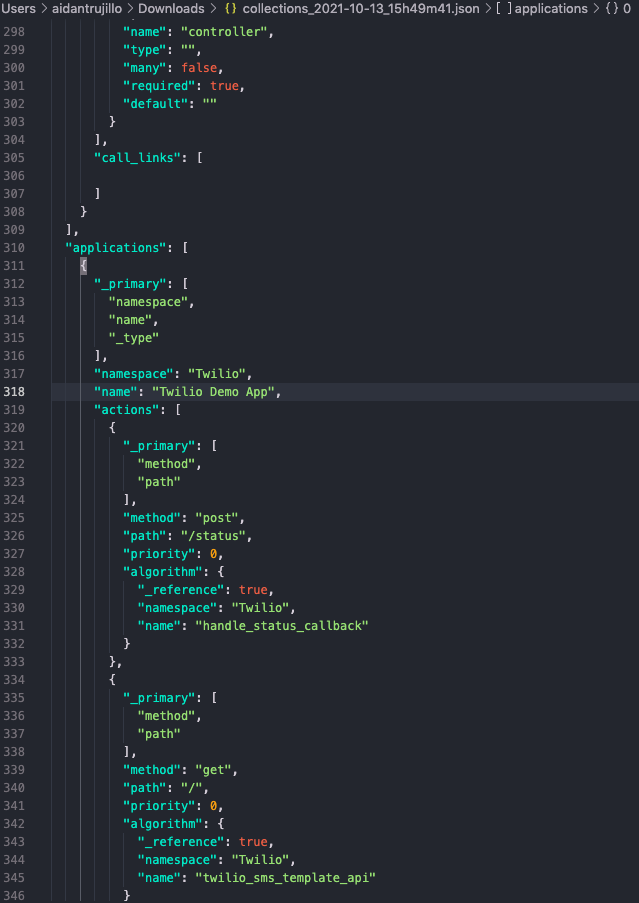
The next step is to switch over to the Tenant you want to import the Collection into. For this example, we will be importing to another Velosimo subdomain, dev.velosimo.io, and exporting from connect.velosimo.io. Keep in mind that Collections can be imported to other Tenants on the same subdomain as well.
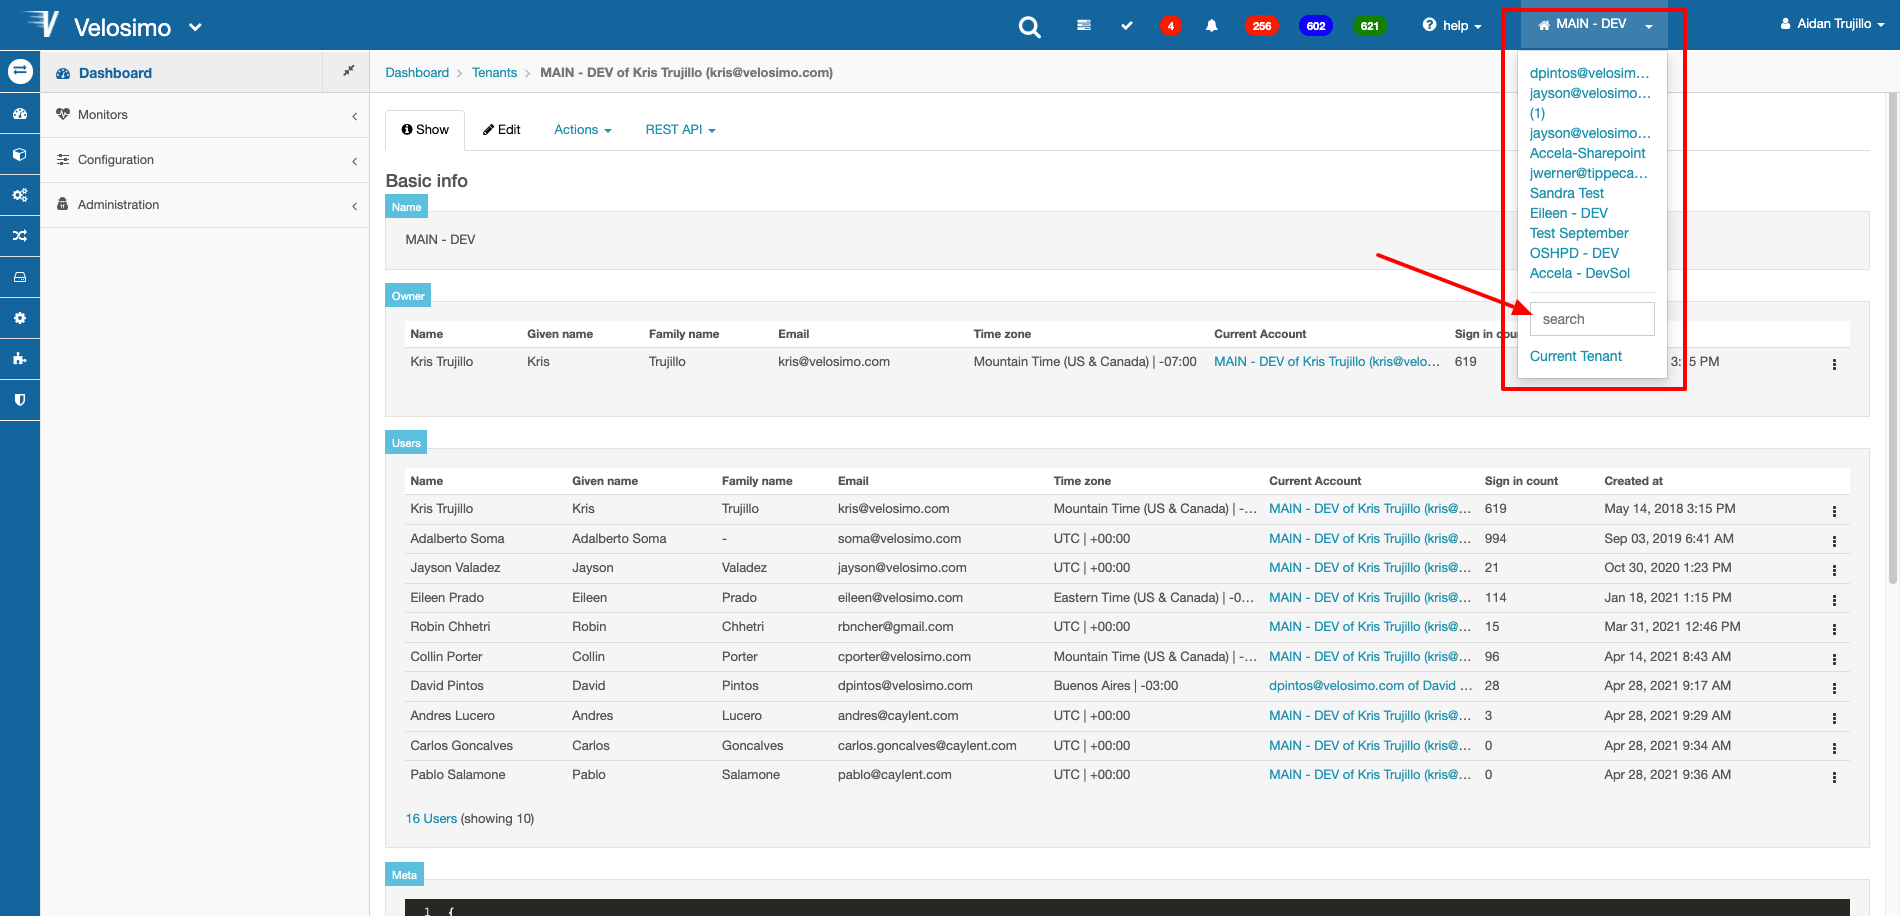
To change the Tenant you are in, click the drop-down menu in the top right of the Nav-Bar. Keep in mind that not all Tenants will show in the list. If you are having trouble finding the Tenant you want, use the search bar.
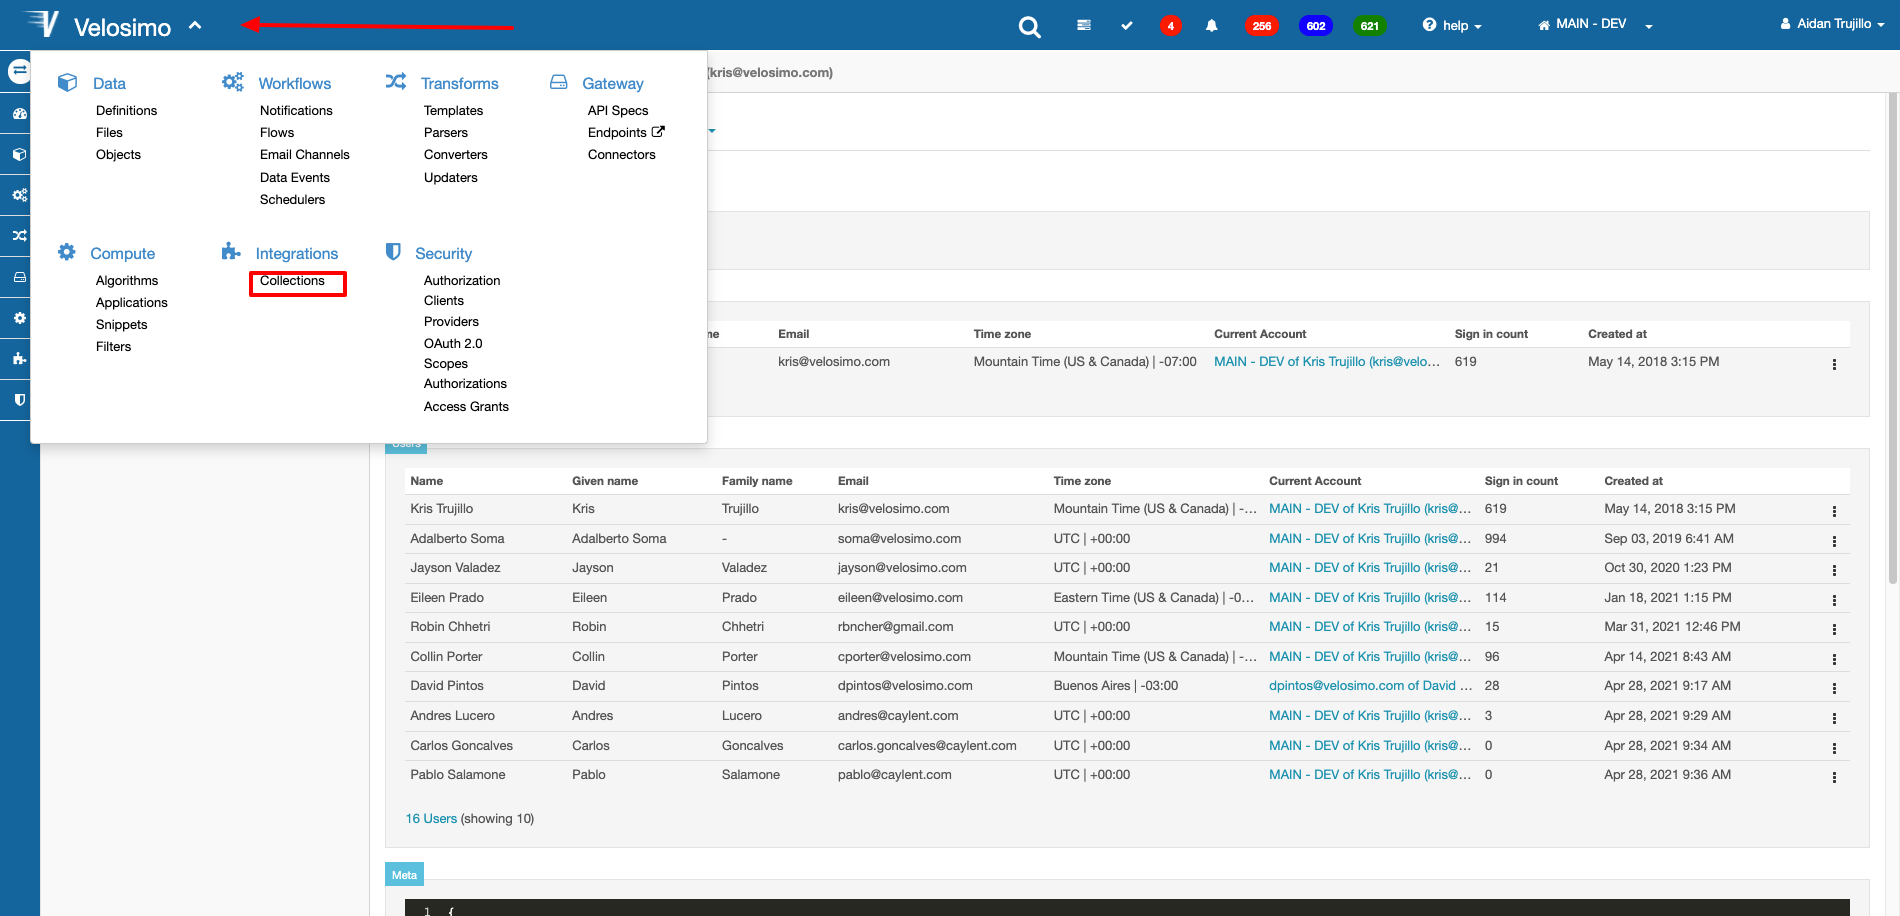
In the new Tenant, navigate to Integrations -> Collections on the Velosimo Menu again.
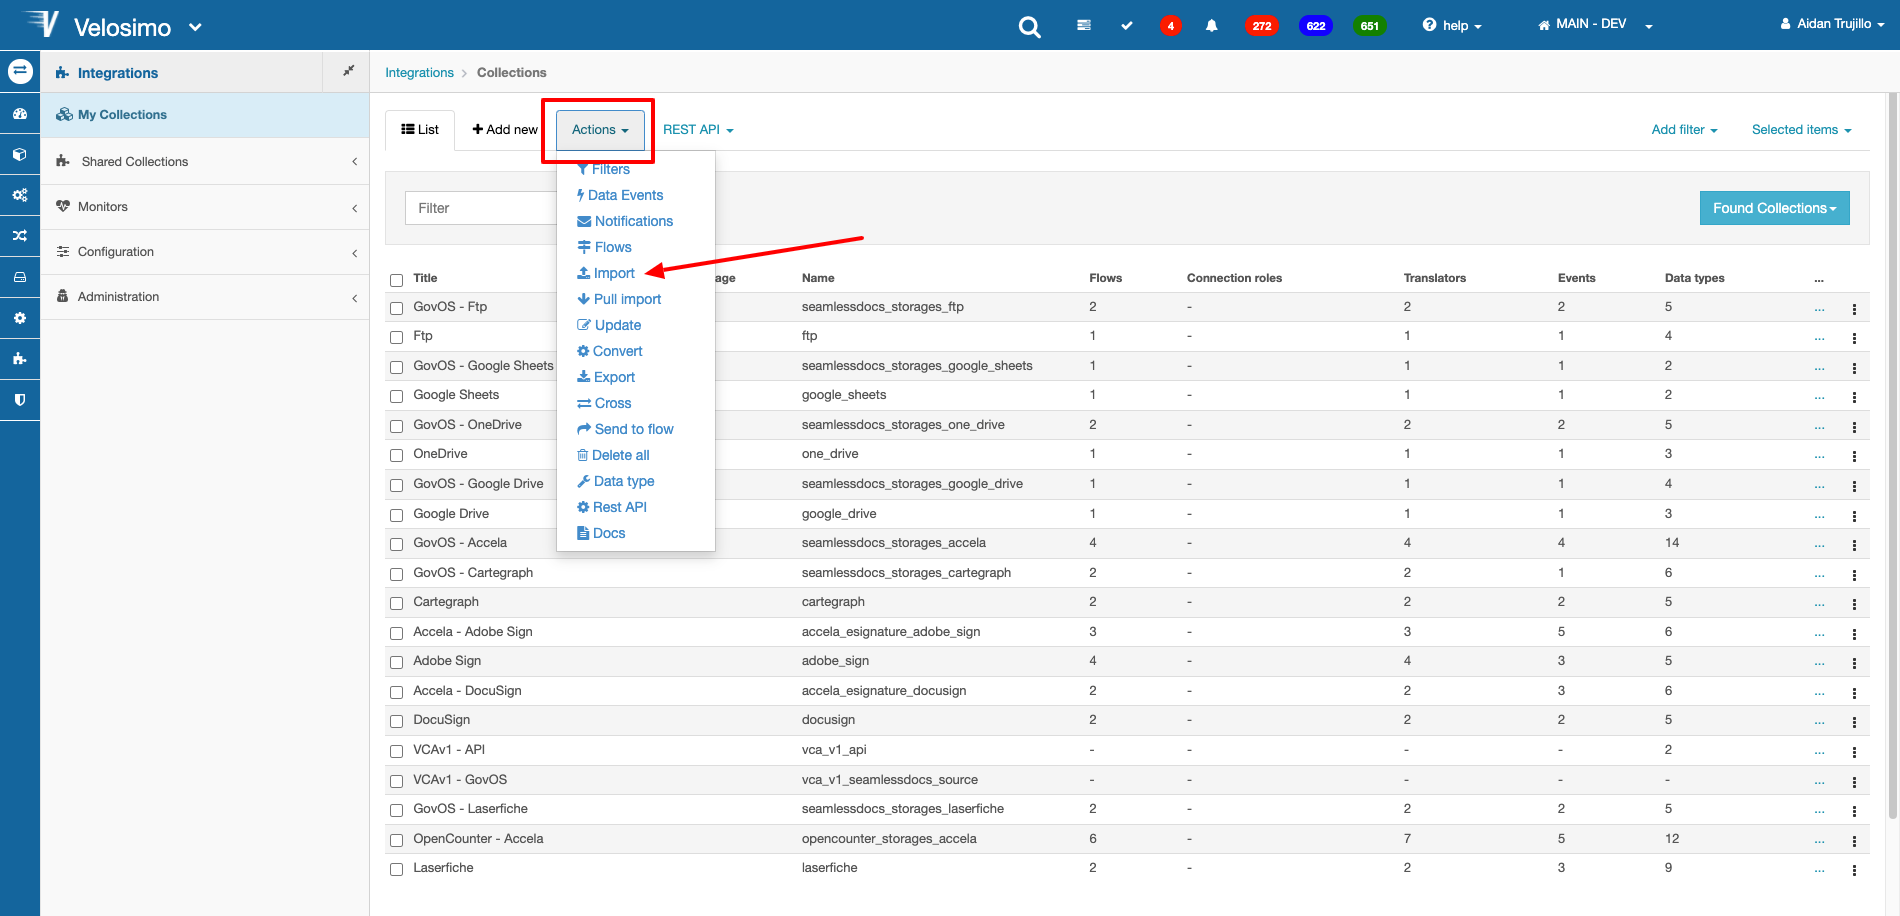
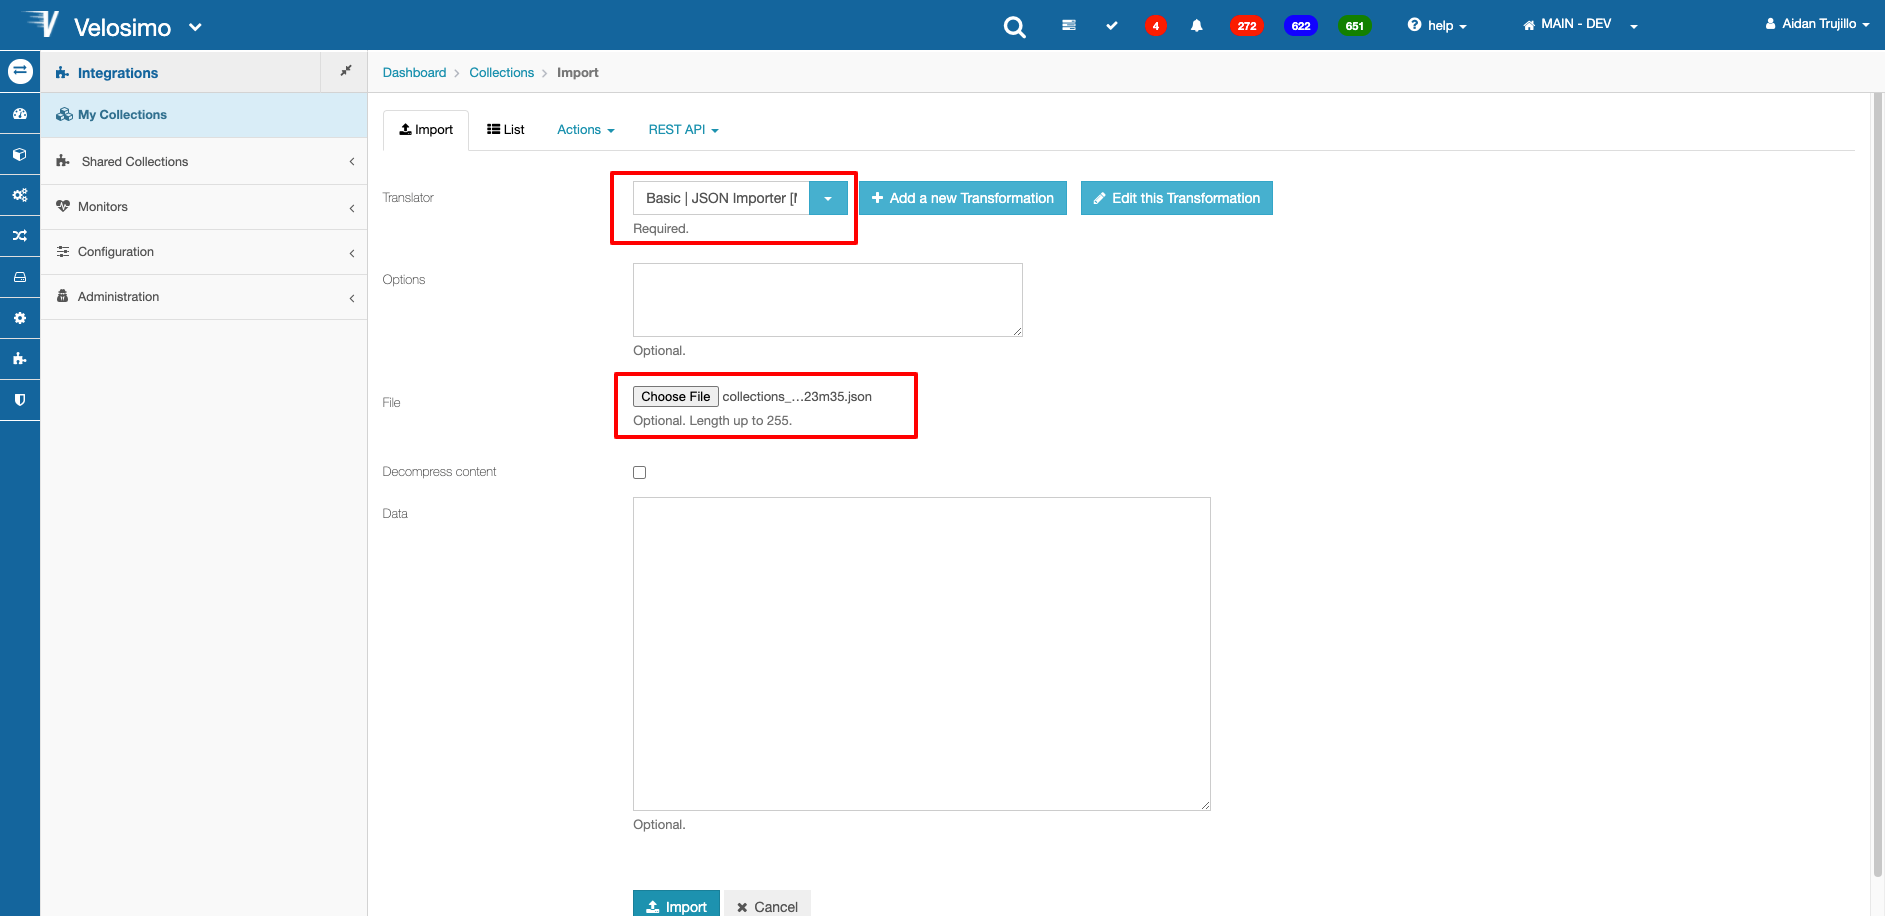
Now Select the Action menu at the top of the screen and click Import.
Select Basic | JSON Importer for the translator. Then attach the JSON file exported from the old Tenant to the File section.
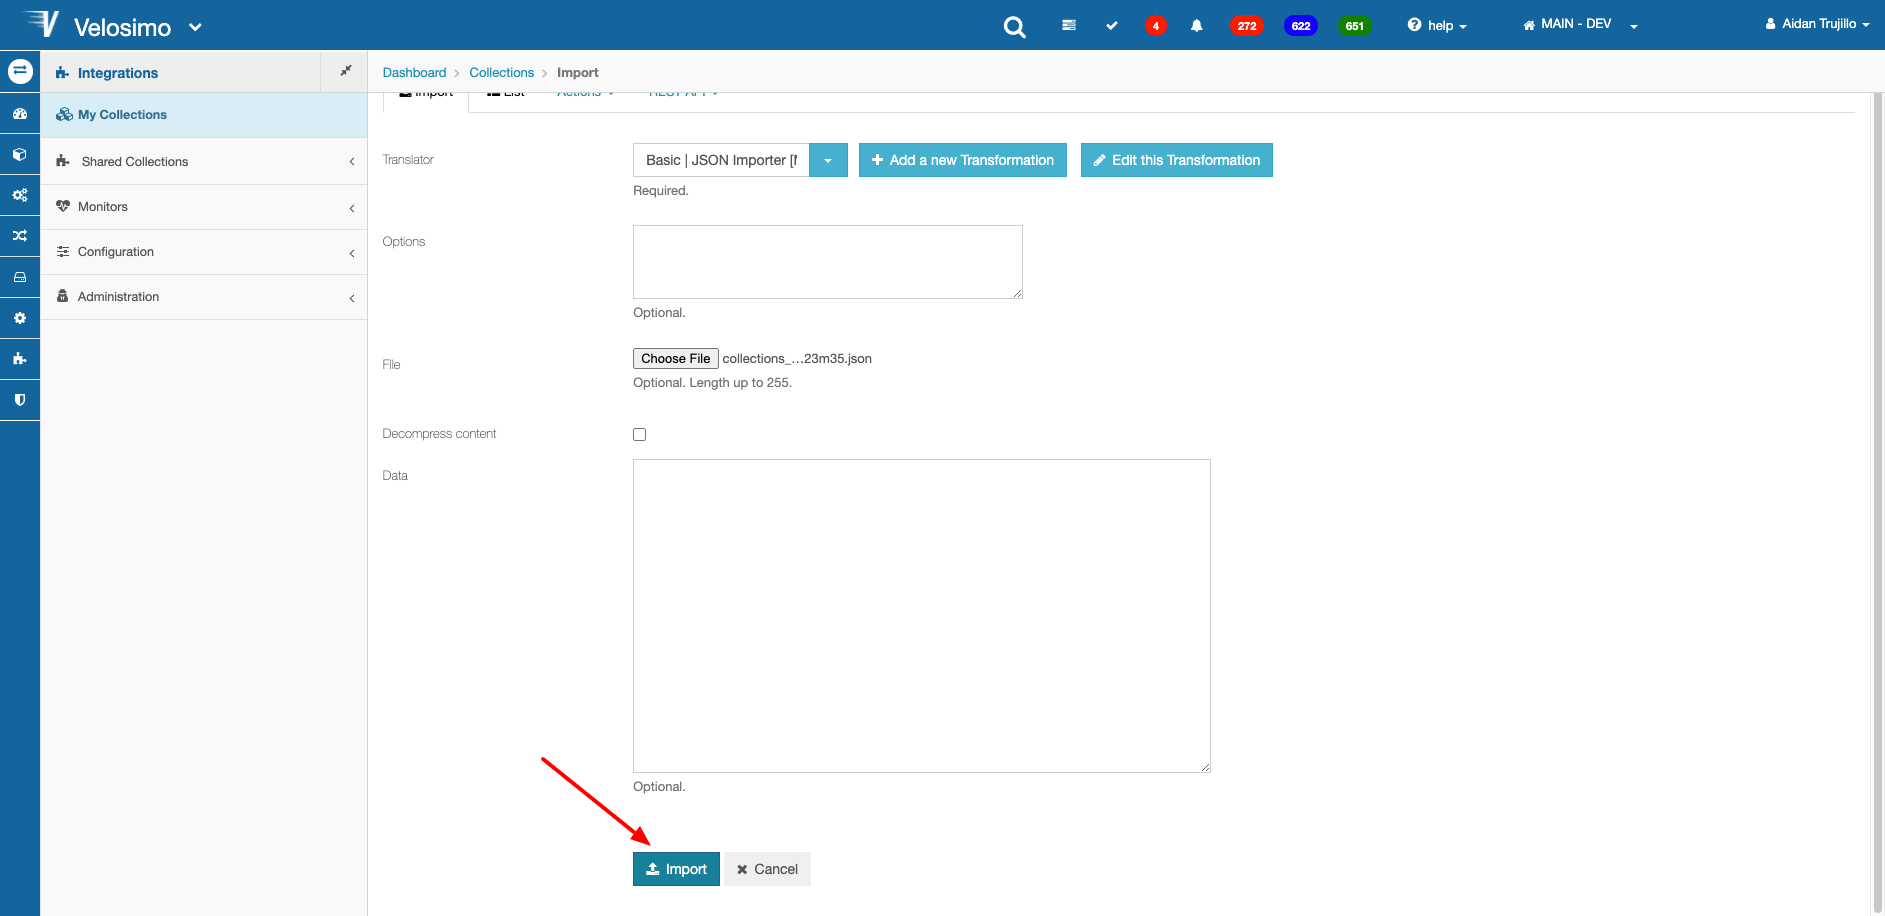
Click Import.
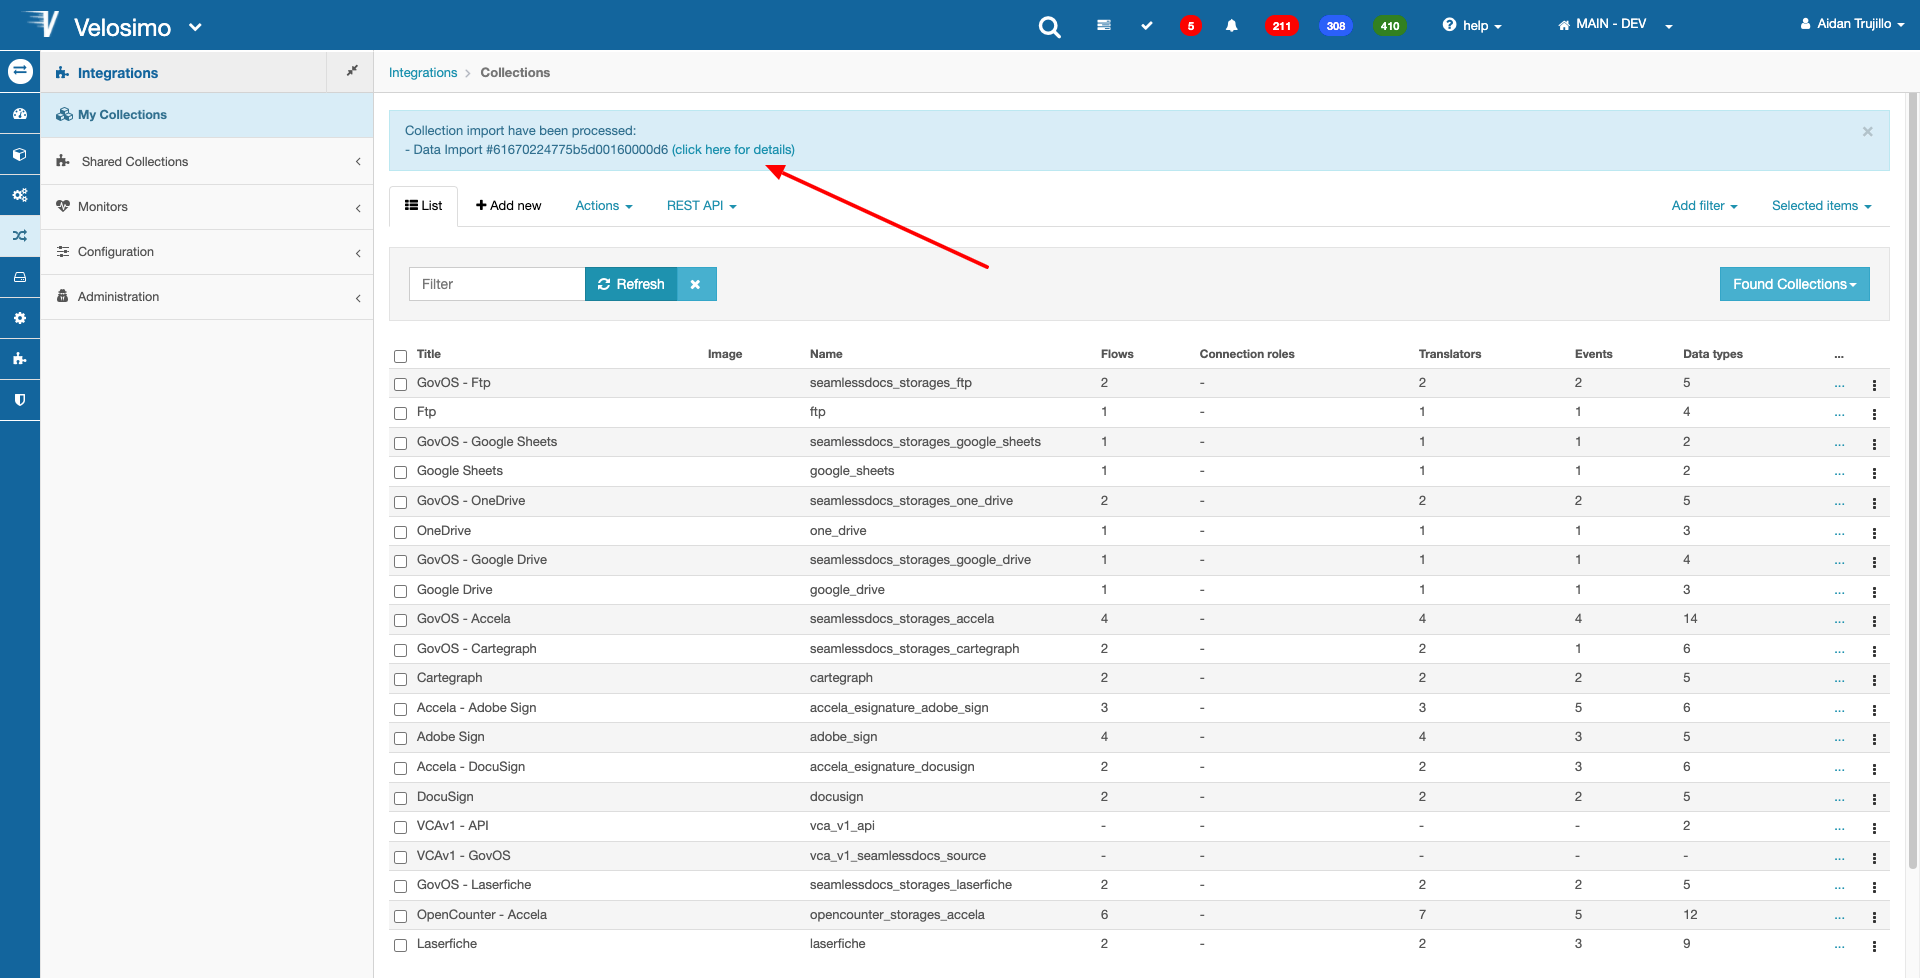
Then an execution will fire. Click the link for more details.
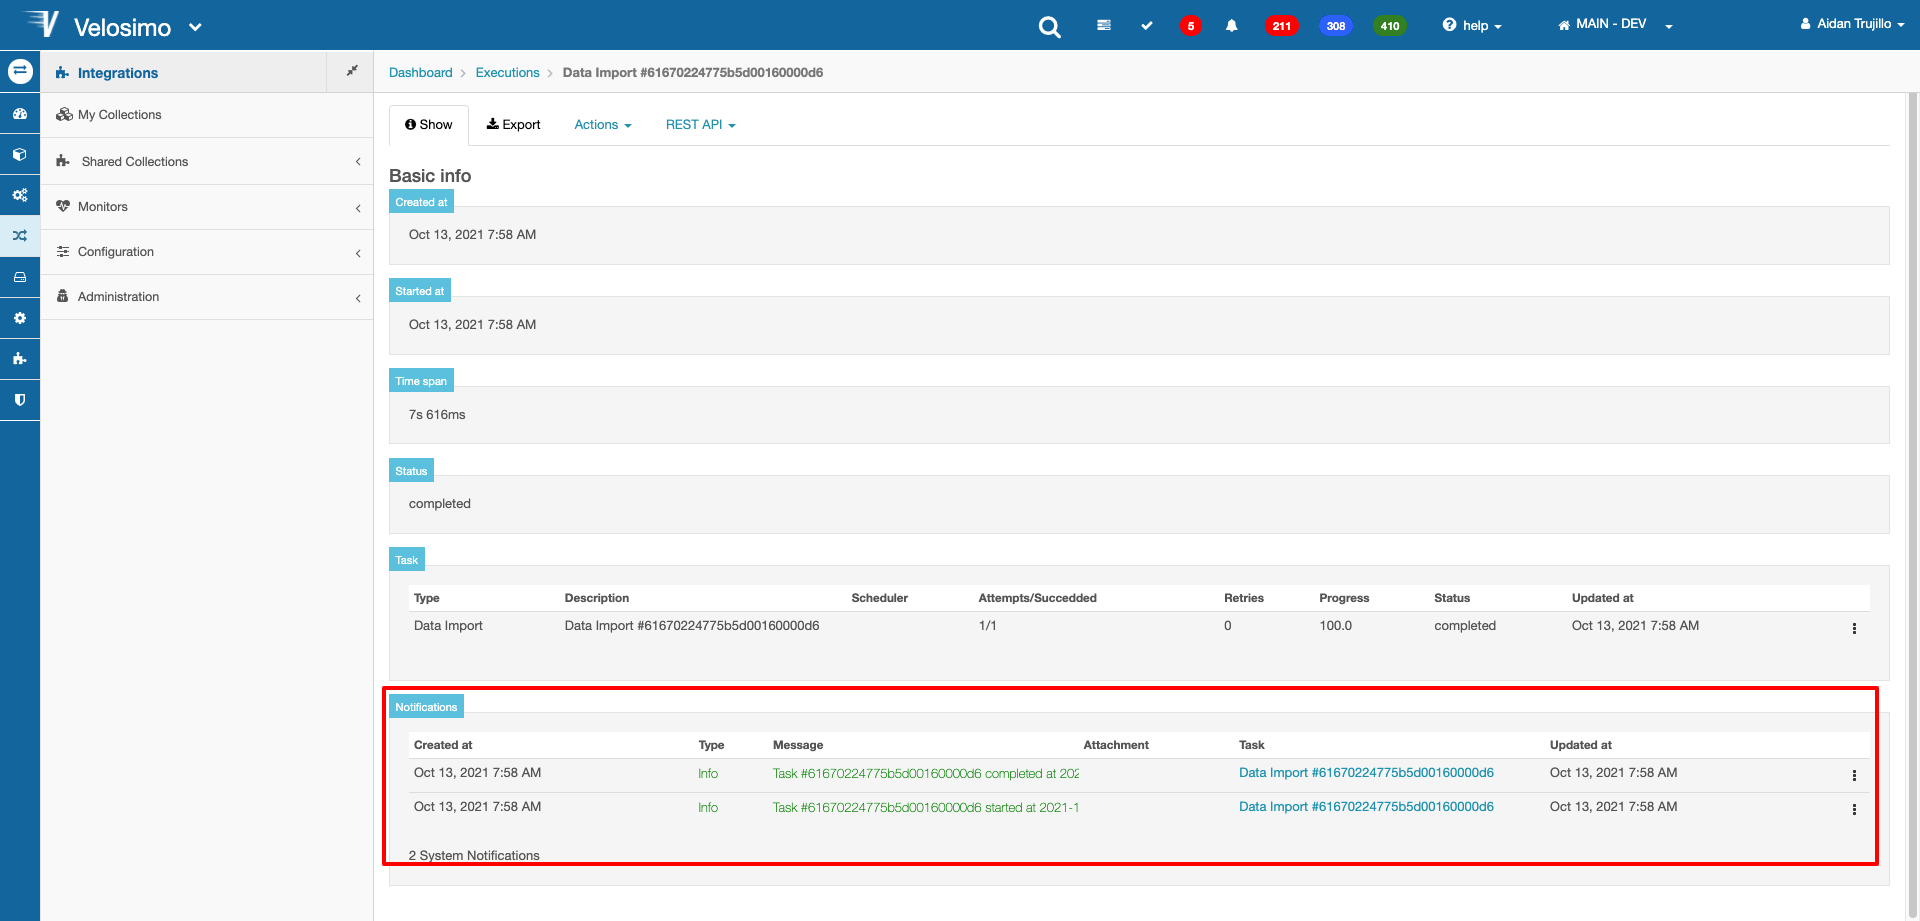
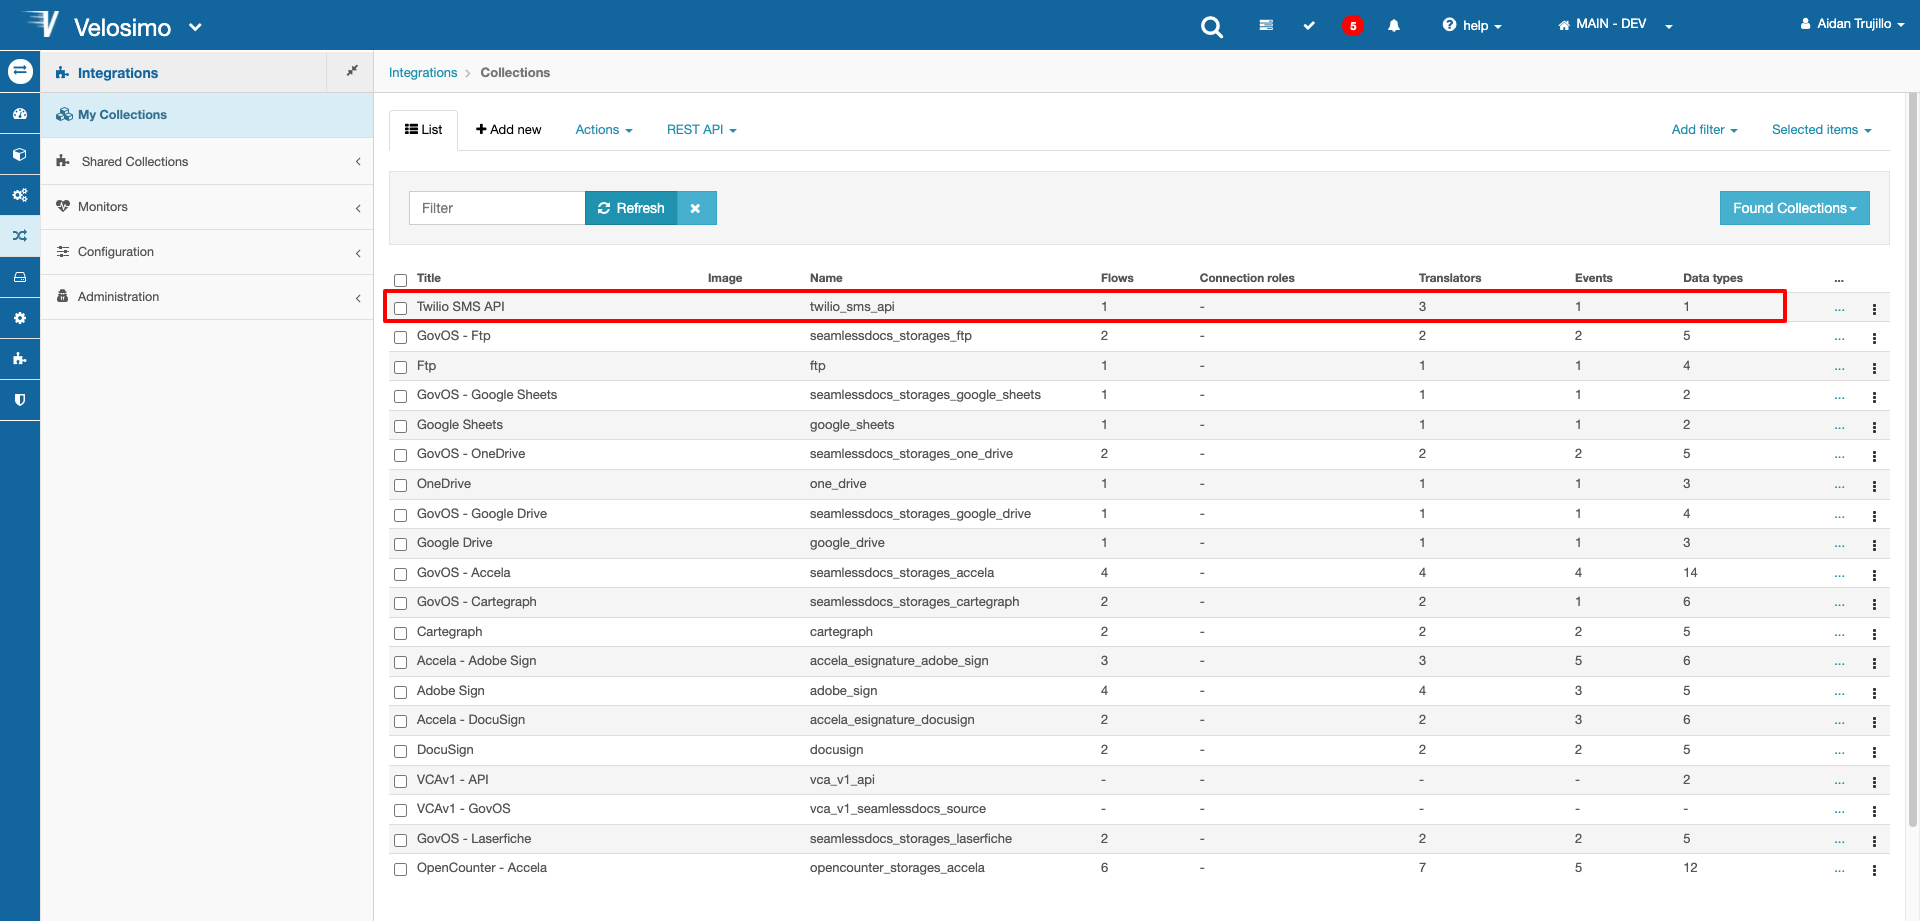
In the Notifications section we can see the status of the execution. If it was successful, go back to the Collections and refresh the page. The imported Collection should now appear.
Updated 3 months ago
