Configure: Accela + Laserfiche
Prerequisite
The Authorization of Laserfiche and Accela should be set before configuring the connector
Configure Accela- Laserfiche
Open the Velosimo Login page and complete with appropriate user credentials.
Once you get logged in, the following UI is diplayed. Click on Integrations to open it.

Then click on Accela-> EDMS:

Ones you are in Accela- Laserfiche Integration, you will see this page:

Click on Enable Laserfiche checkbox to configure it. The following fields will be displayed:
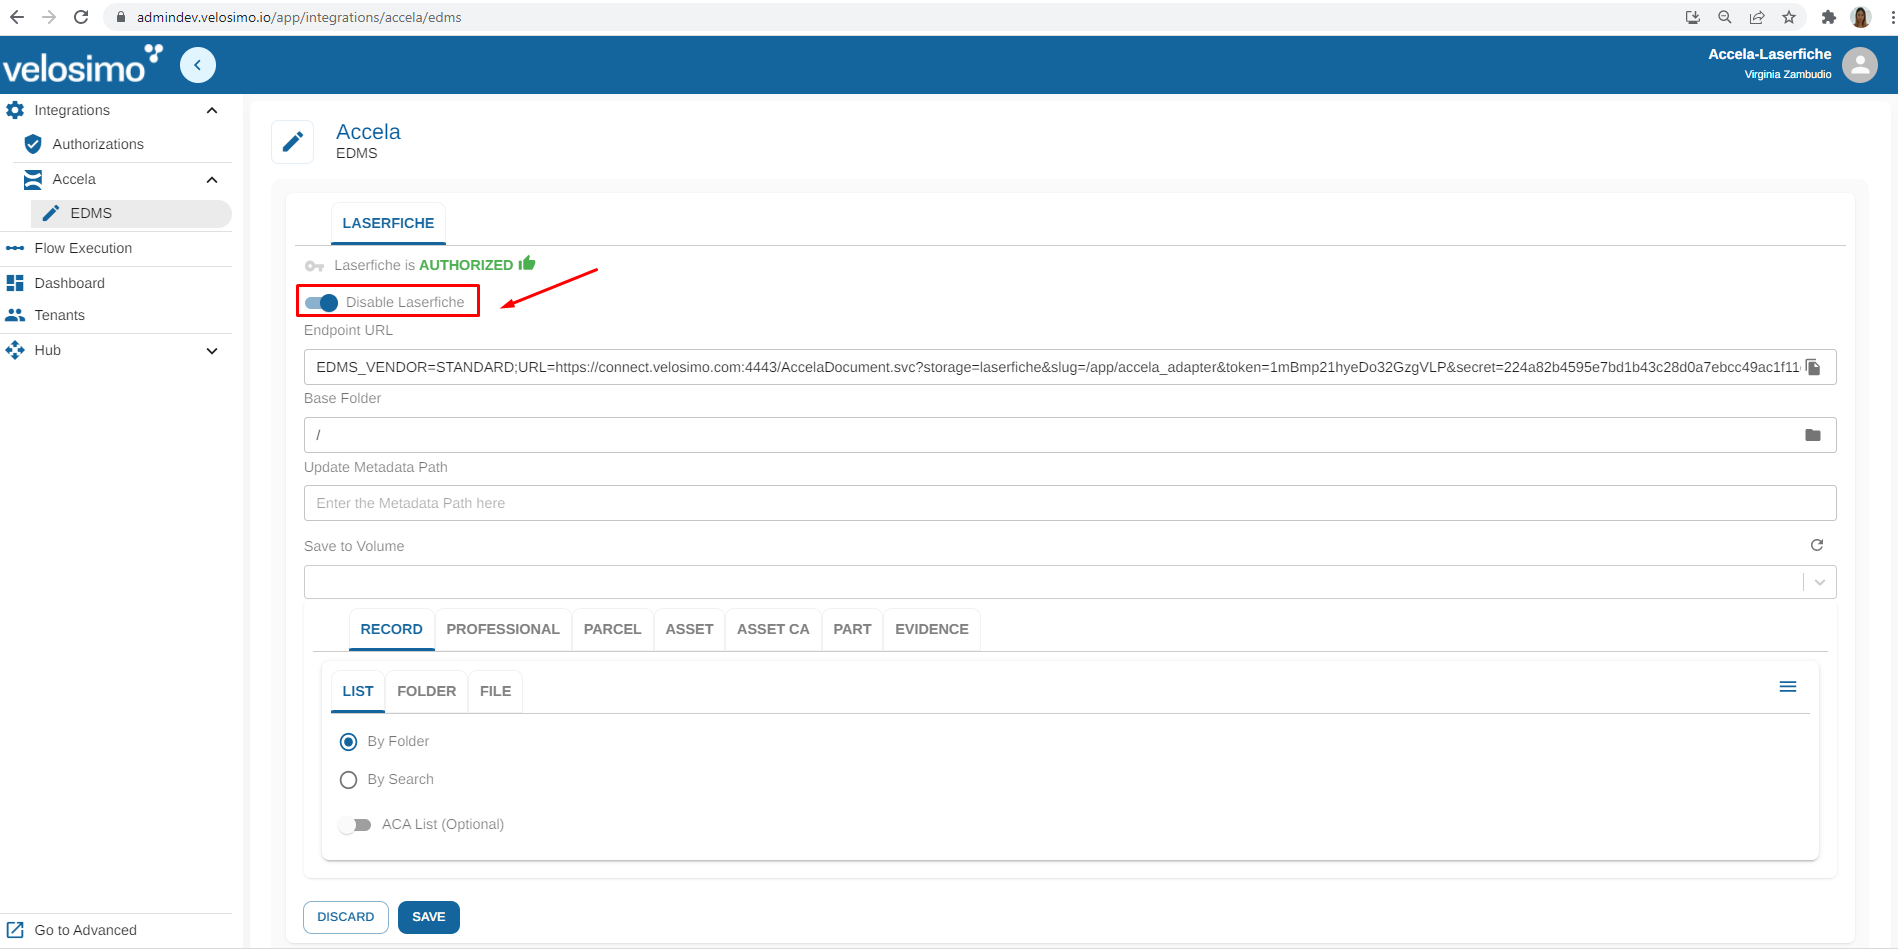
Endpoint URL is the value you have to copy and paste to configure Accela. See previous page 'Accela Configuration for Laserfiche'.
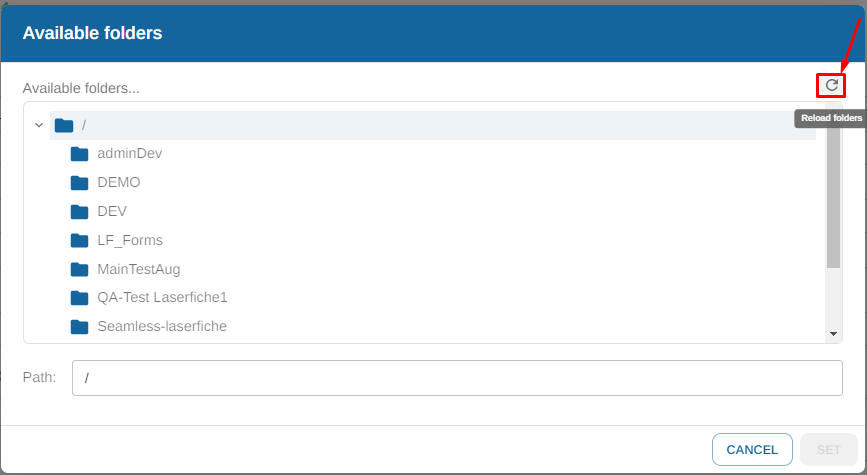
Complete the Base Folder field clicking on the folder icon on the right and selecting one valid folder of Laserfiche:
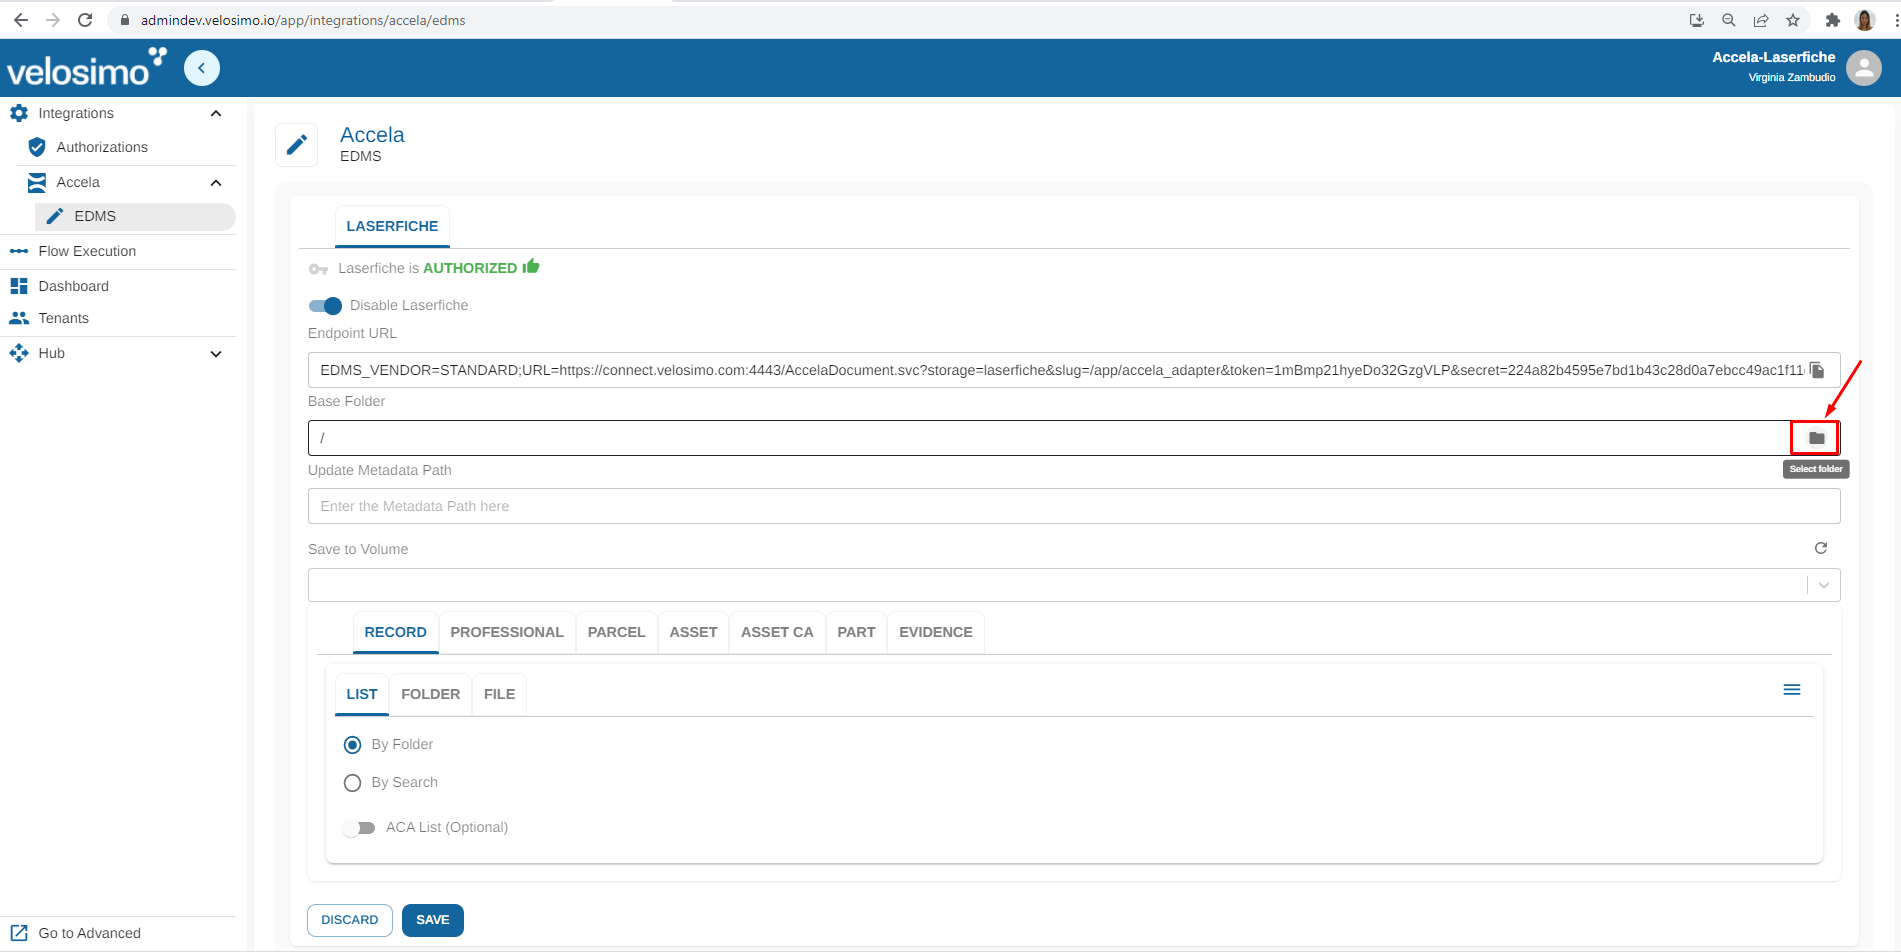
Also you can update an select a template:
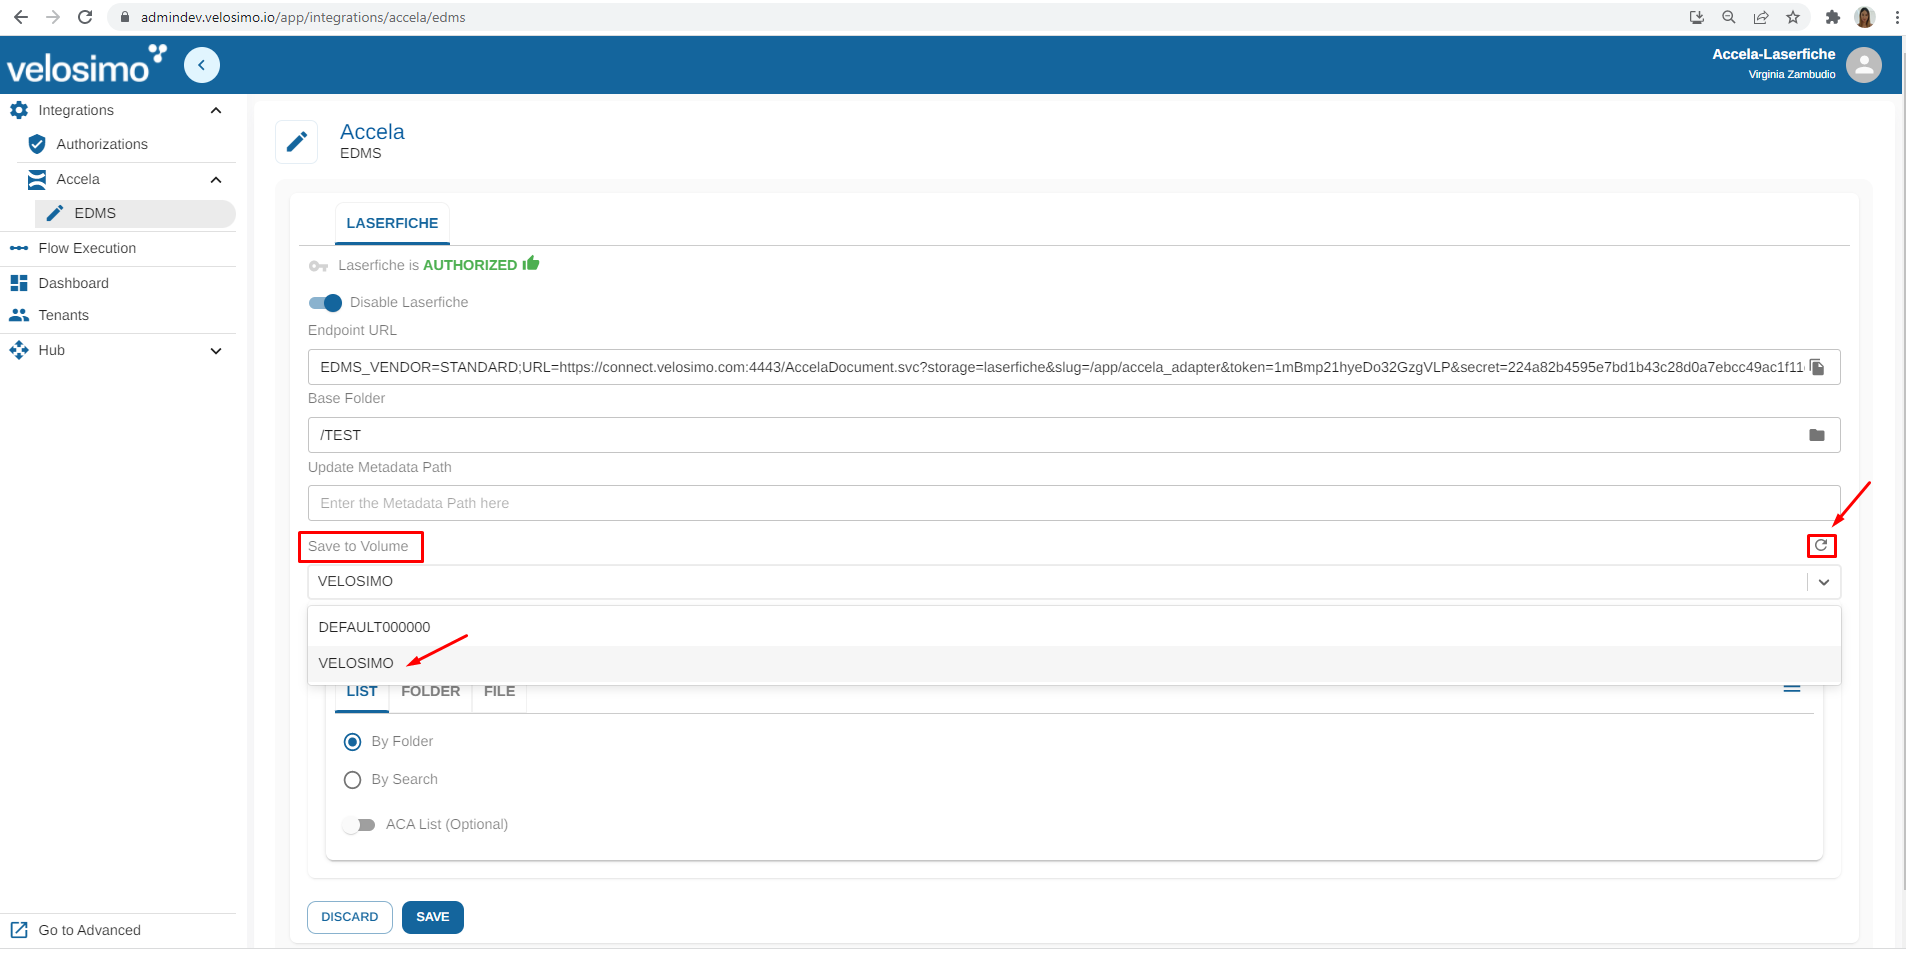
The folders will be displayed. Use refresh icon to reload them:
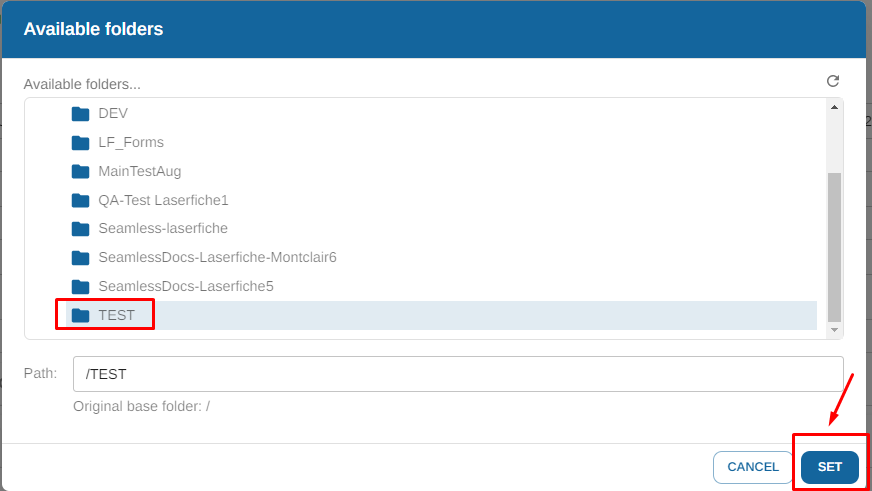
Select one folder and click on 'SET':
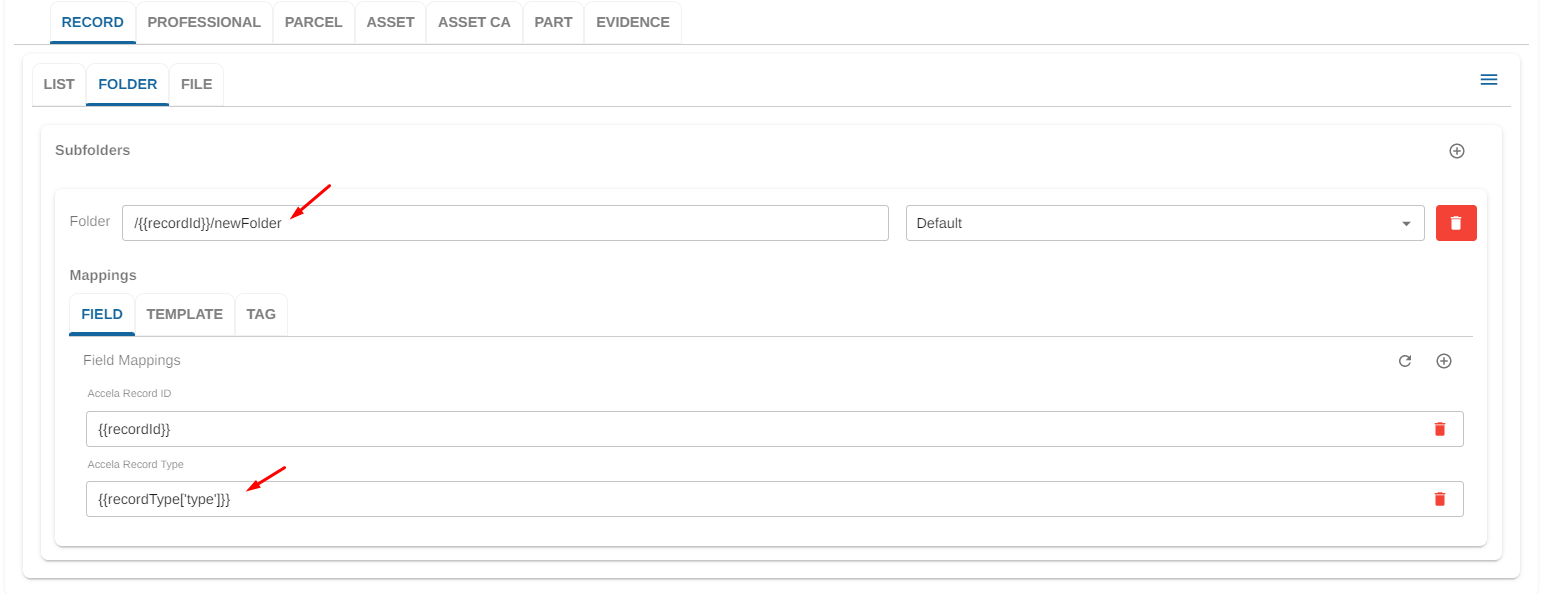
Then, to configure a tab, complete the name of Folder using mappings or strings. Also you can add mappings:
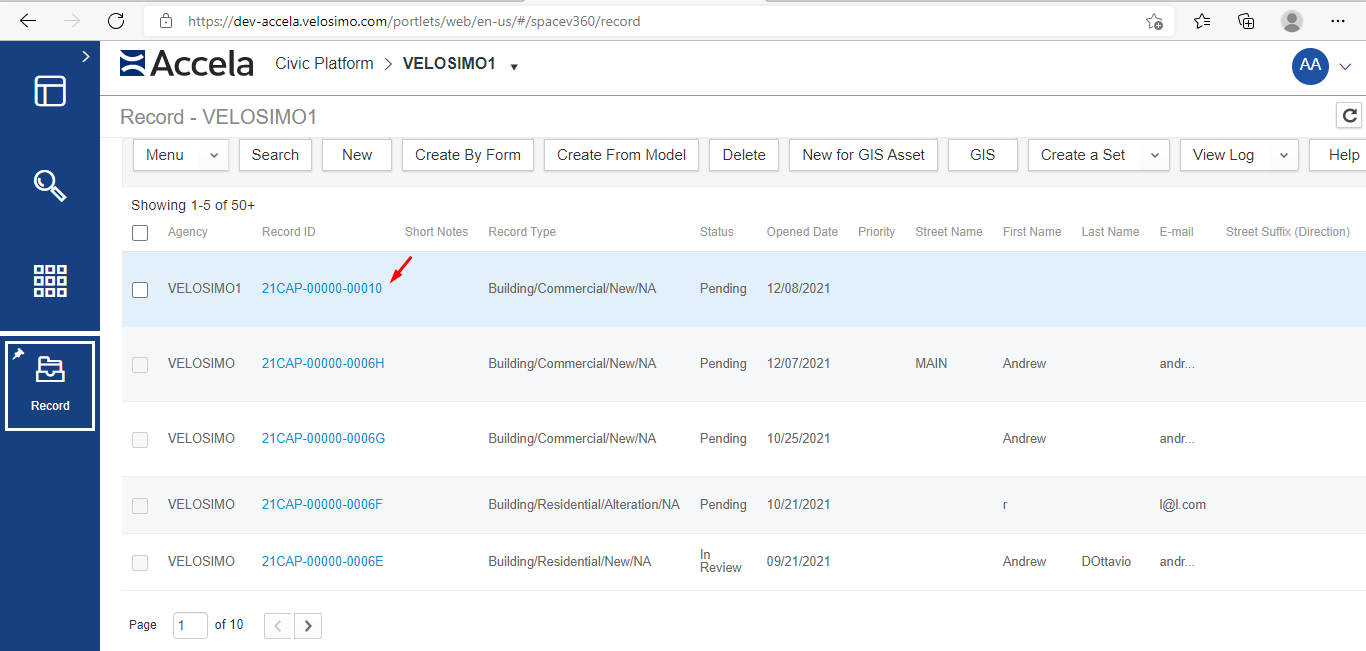
Go to Accela and select a record:
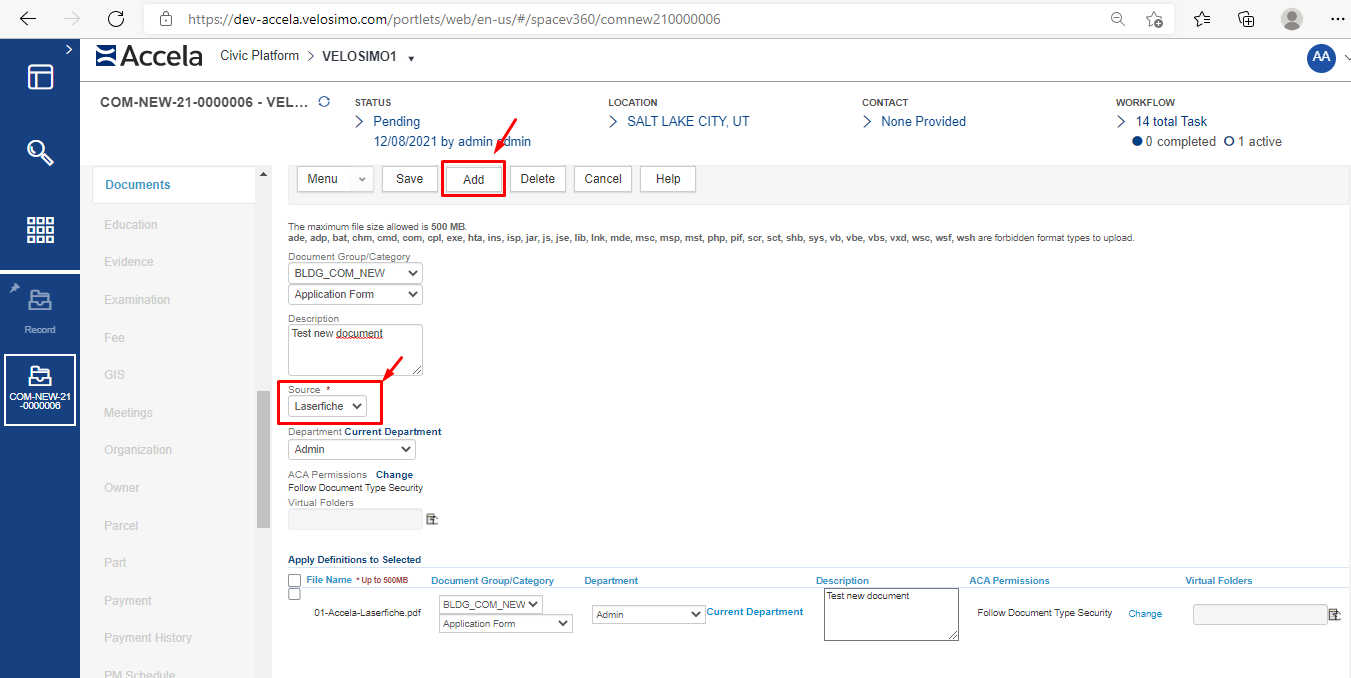
Go to Documents and upload a file seelcting the Source laserfiche:
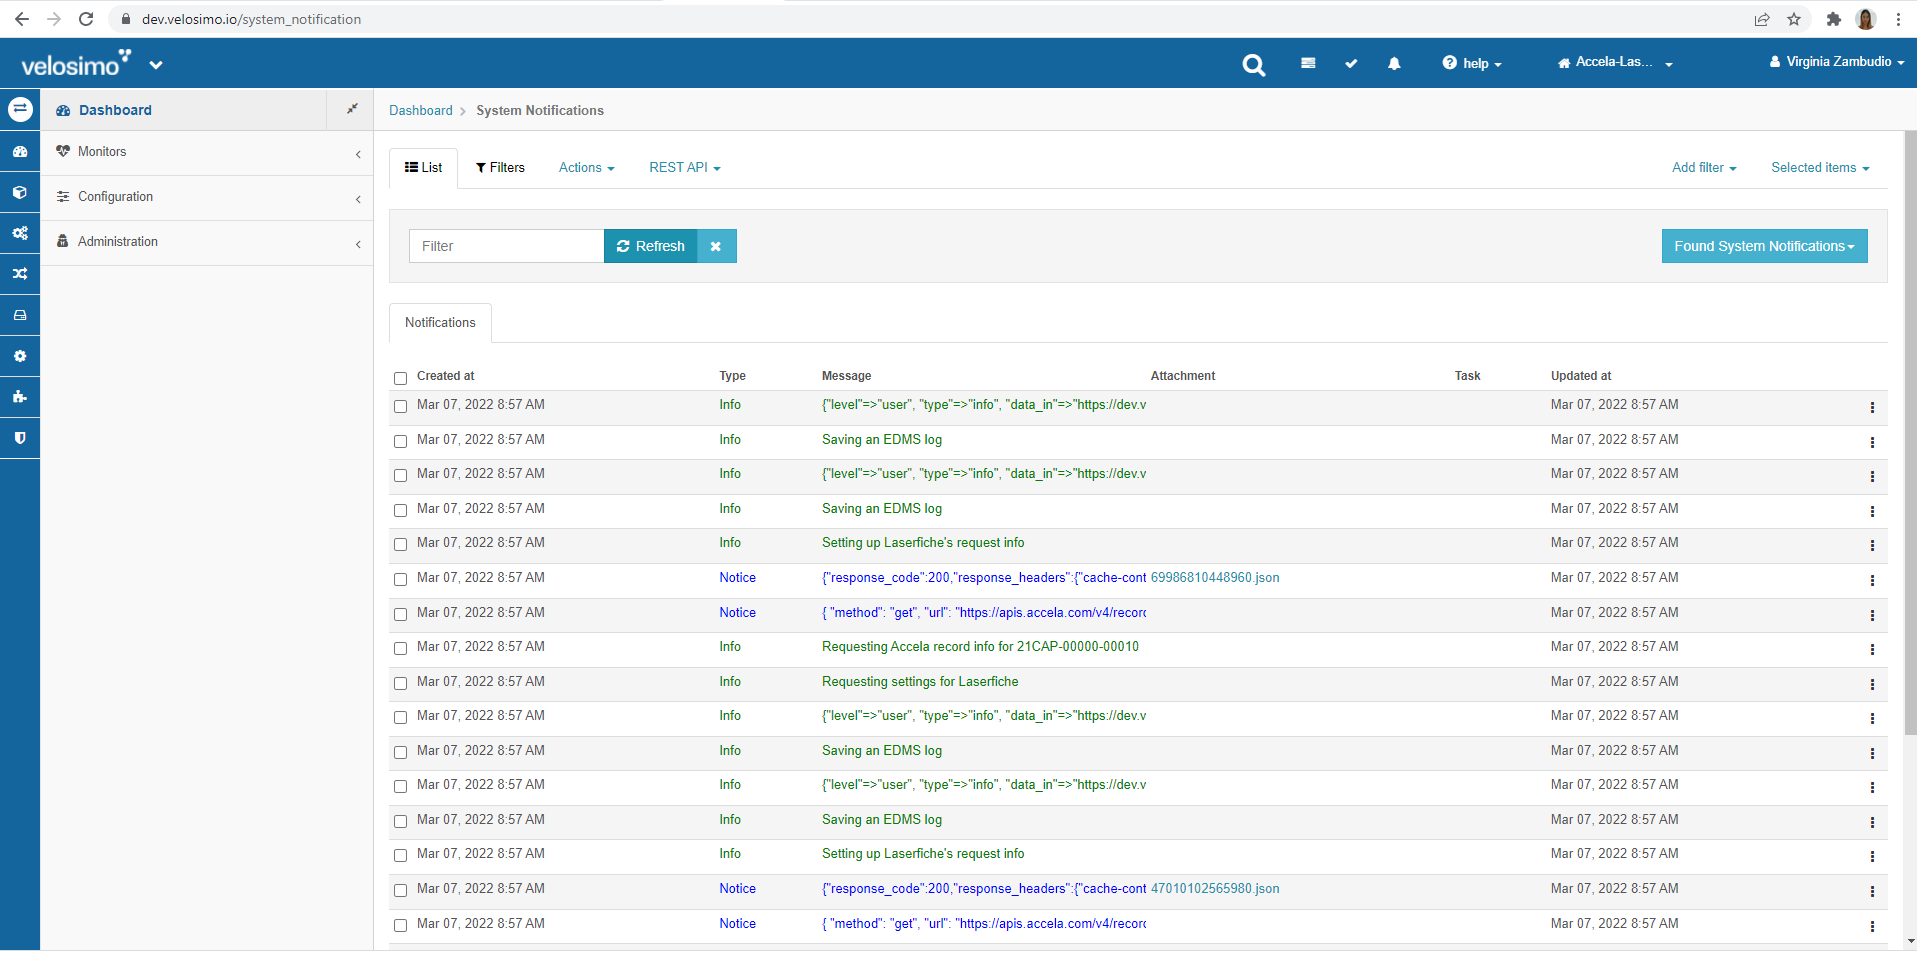
Velosimo will get notifications from EDMS process:
Common causes for errors:The Laserfiche user permissions need to be updated to allow for upload, create, and read for any files, folders, templates and volumes that are being used. Please confirm the user permissions and that a volume has been defined in Laserfiche.
The allowed field character length in Laserfiche should be set to match the field length allowed in Accela. If the metadata coming from Accela is longer than allowed by Laserfiche, this will result in an error.
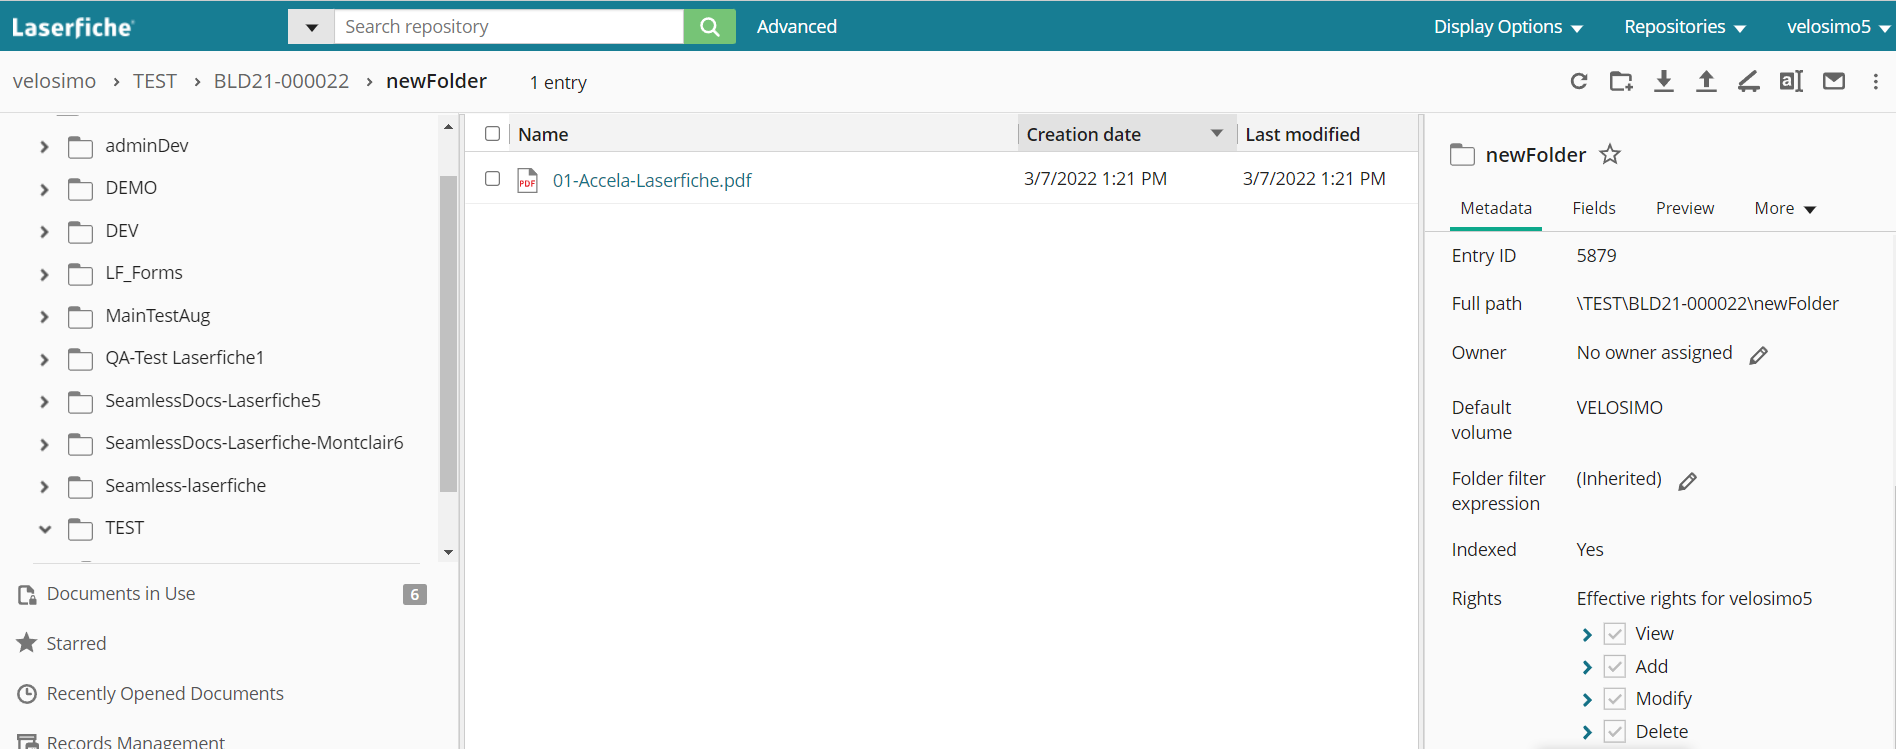
Go to Laserfiche and verify the folder is created, the file is uploaded and the mappings are correct:
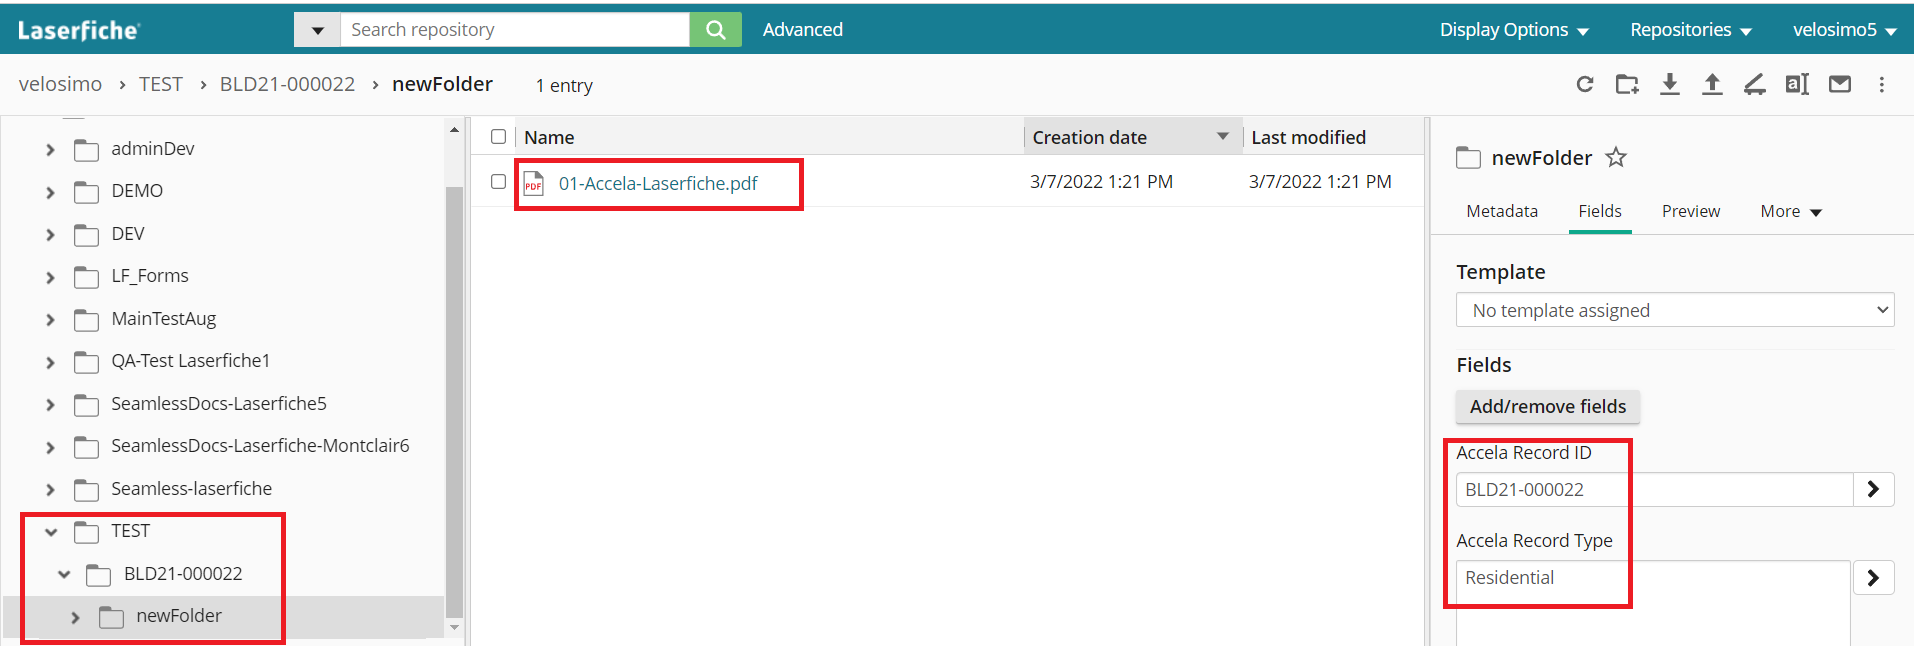
File upload in the folder created. Fields with mappings.
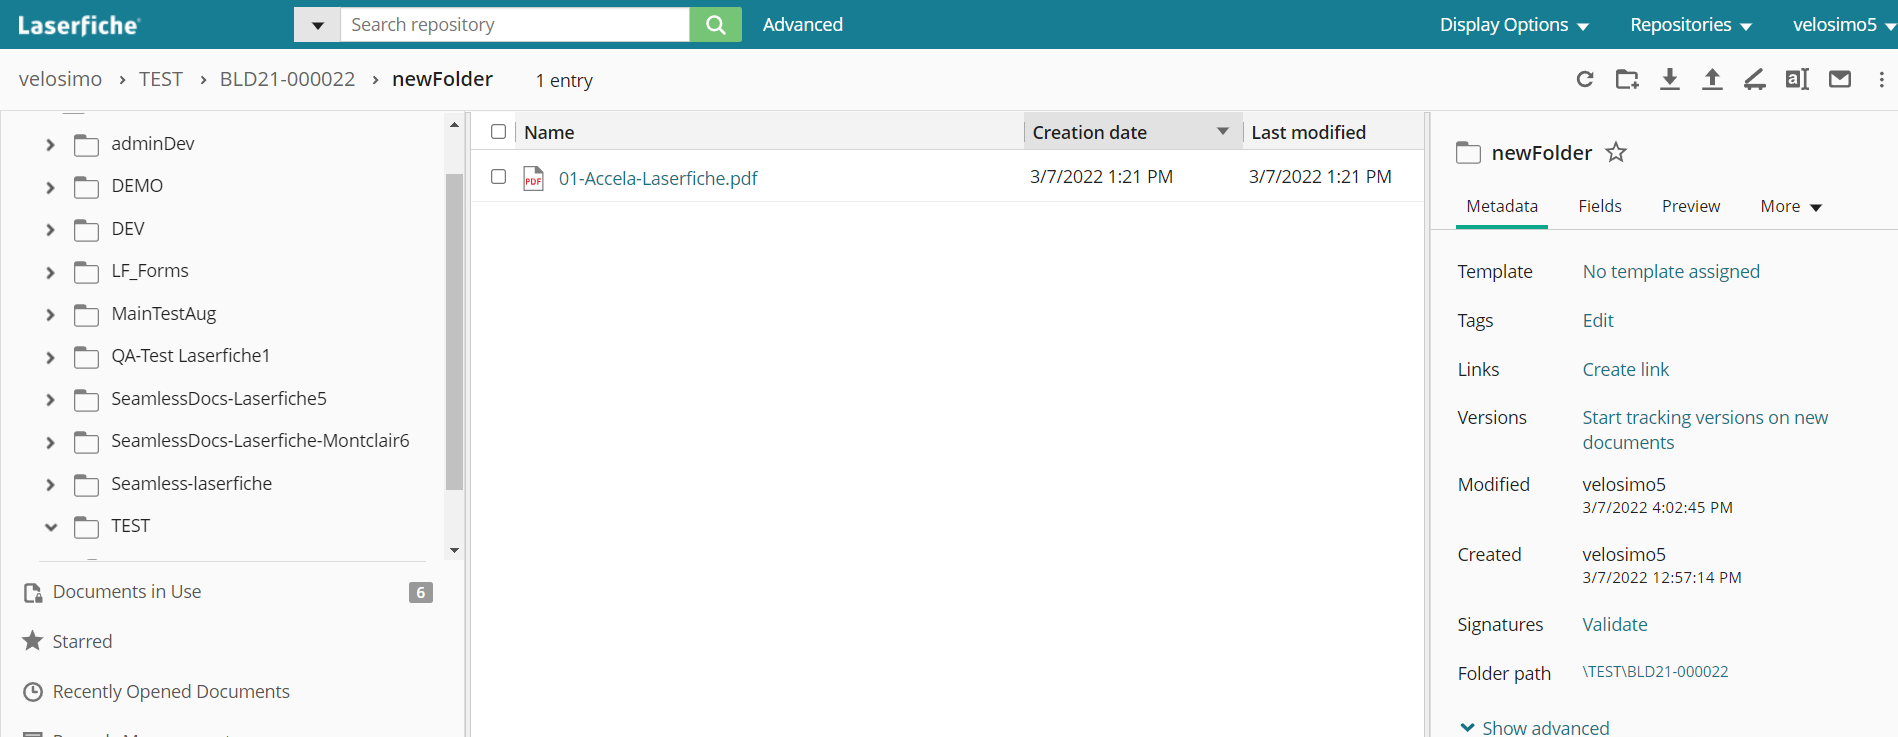
Metadata
Advanced Metadata
Updated 3 months ago
