Configure: SeamlessDoc Form to Google Sheets
Prerequisite
-You must connect SeamlessDocs to Velosimo to complete the next step:
Connect SeamlessDocs to Velosimo
-The Authorization of Google Sheets should be set before.
Authorizing Google Sheets
Access your Form(s)
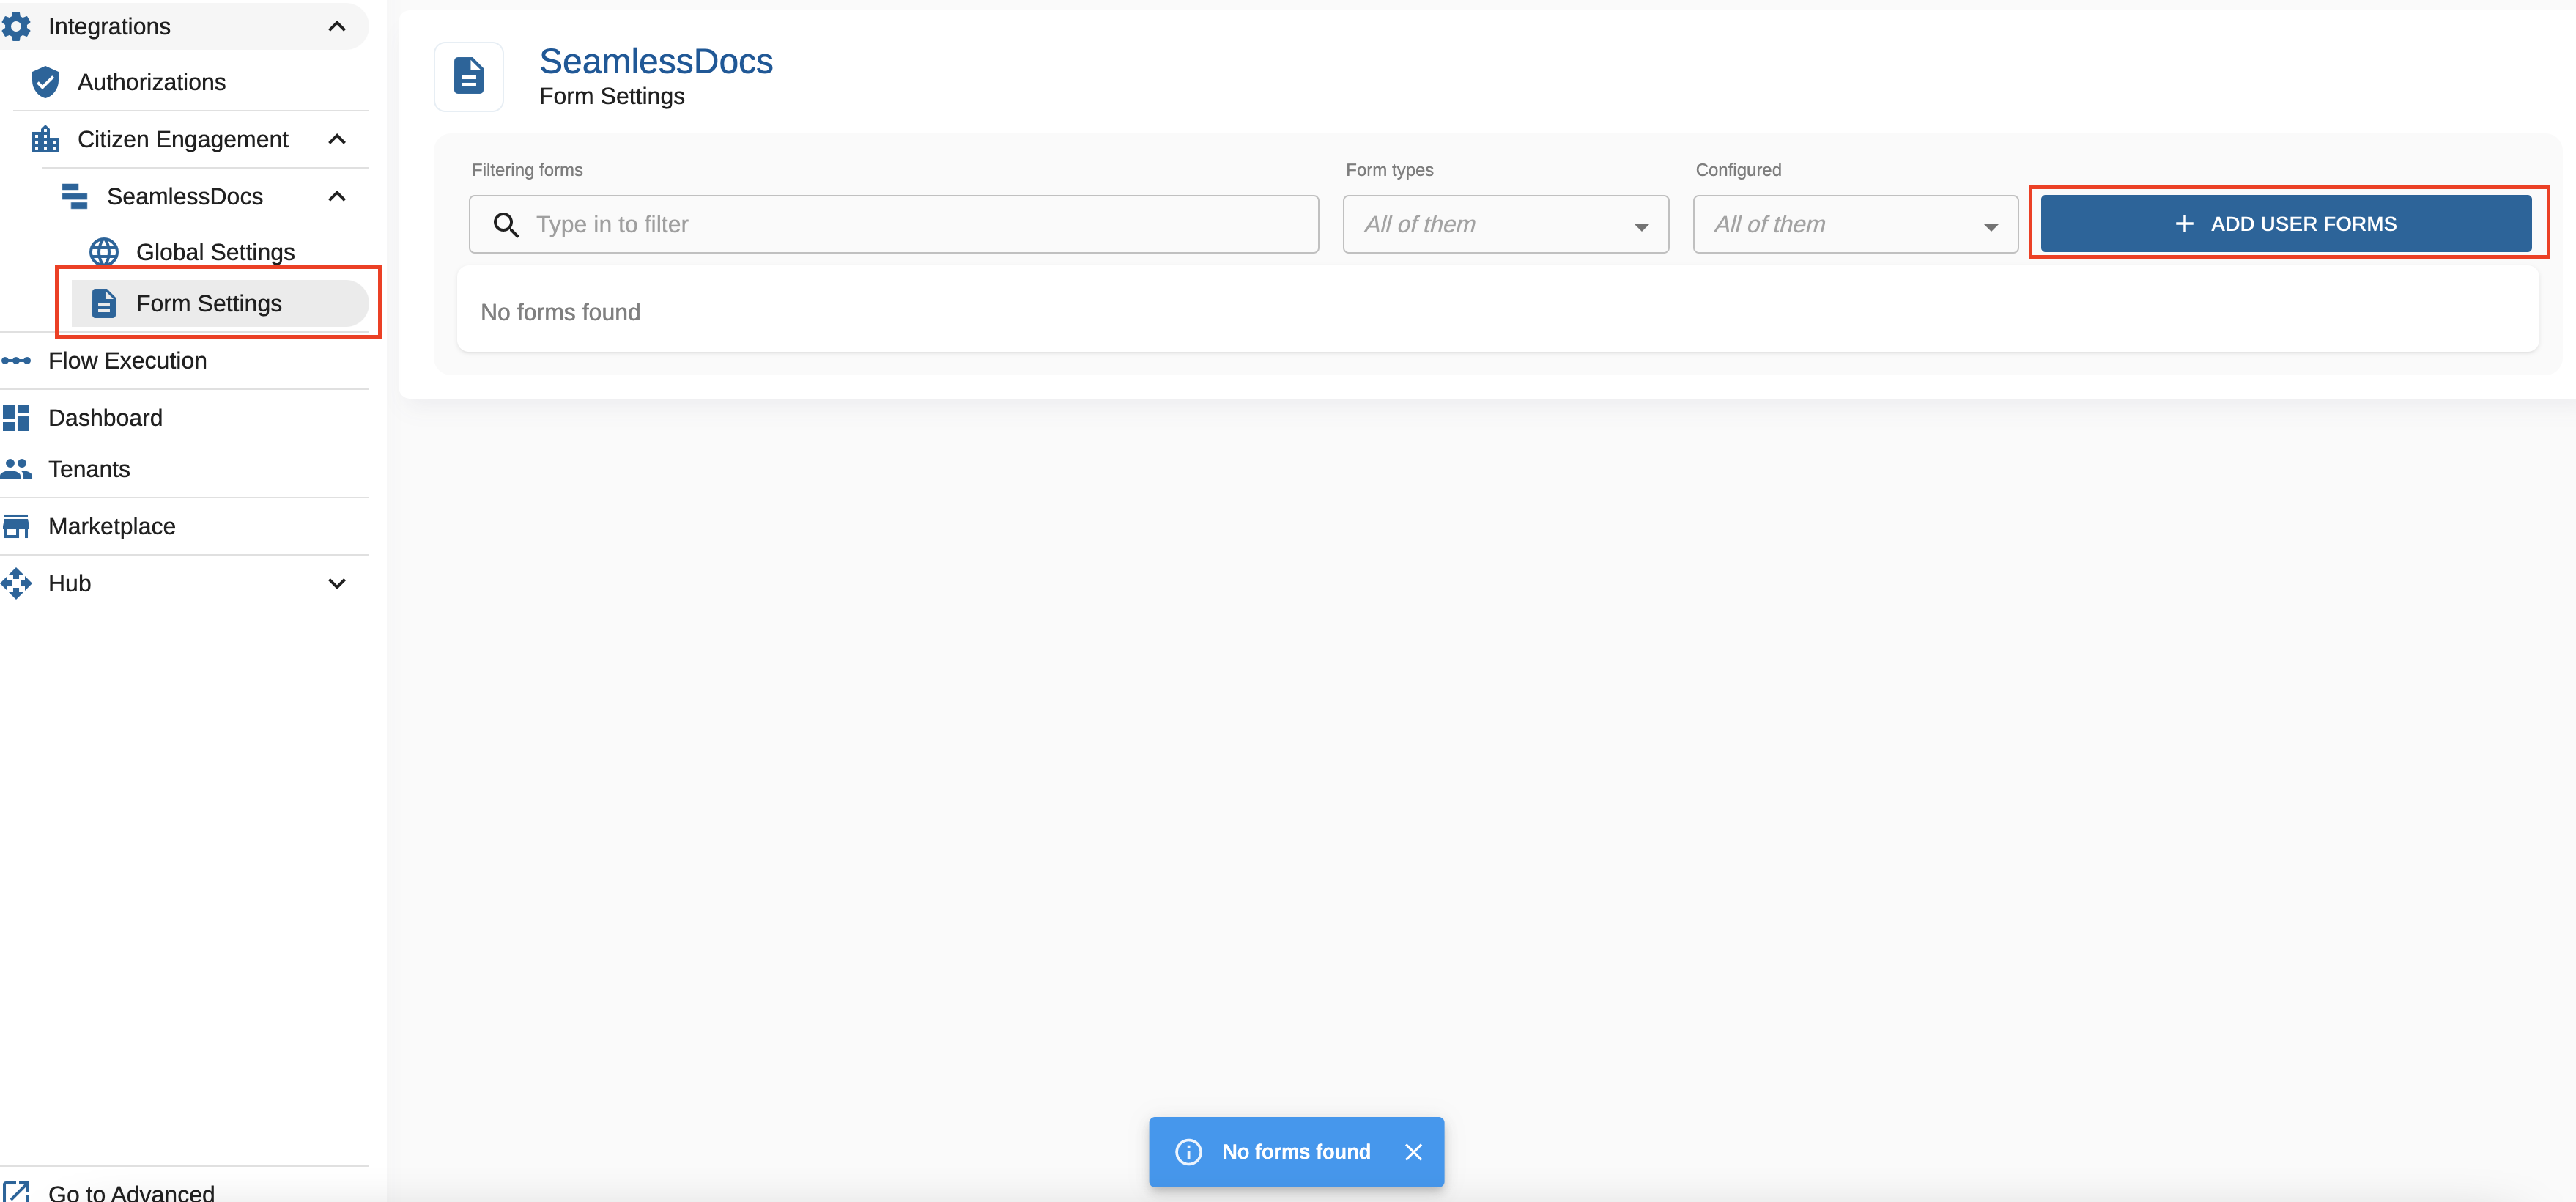
In Velosimo’s GovOS SeamlessDocs administration portal under Form Settings, administration users have the ability to filter and create user specific form lists.
As a new user, the form list will be blank. To populate your user-specific form list, filter and select specific forms that you want to configure or to easily access.
Steps:
- Navigate to “Form Settings” in the left menu under the SeamlessDocs integration node
- Select "+ ADD USER FORMS
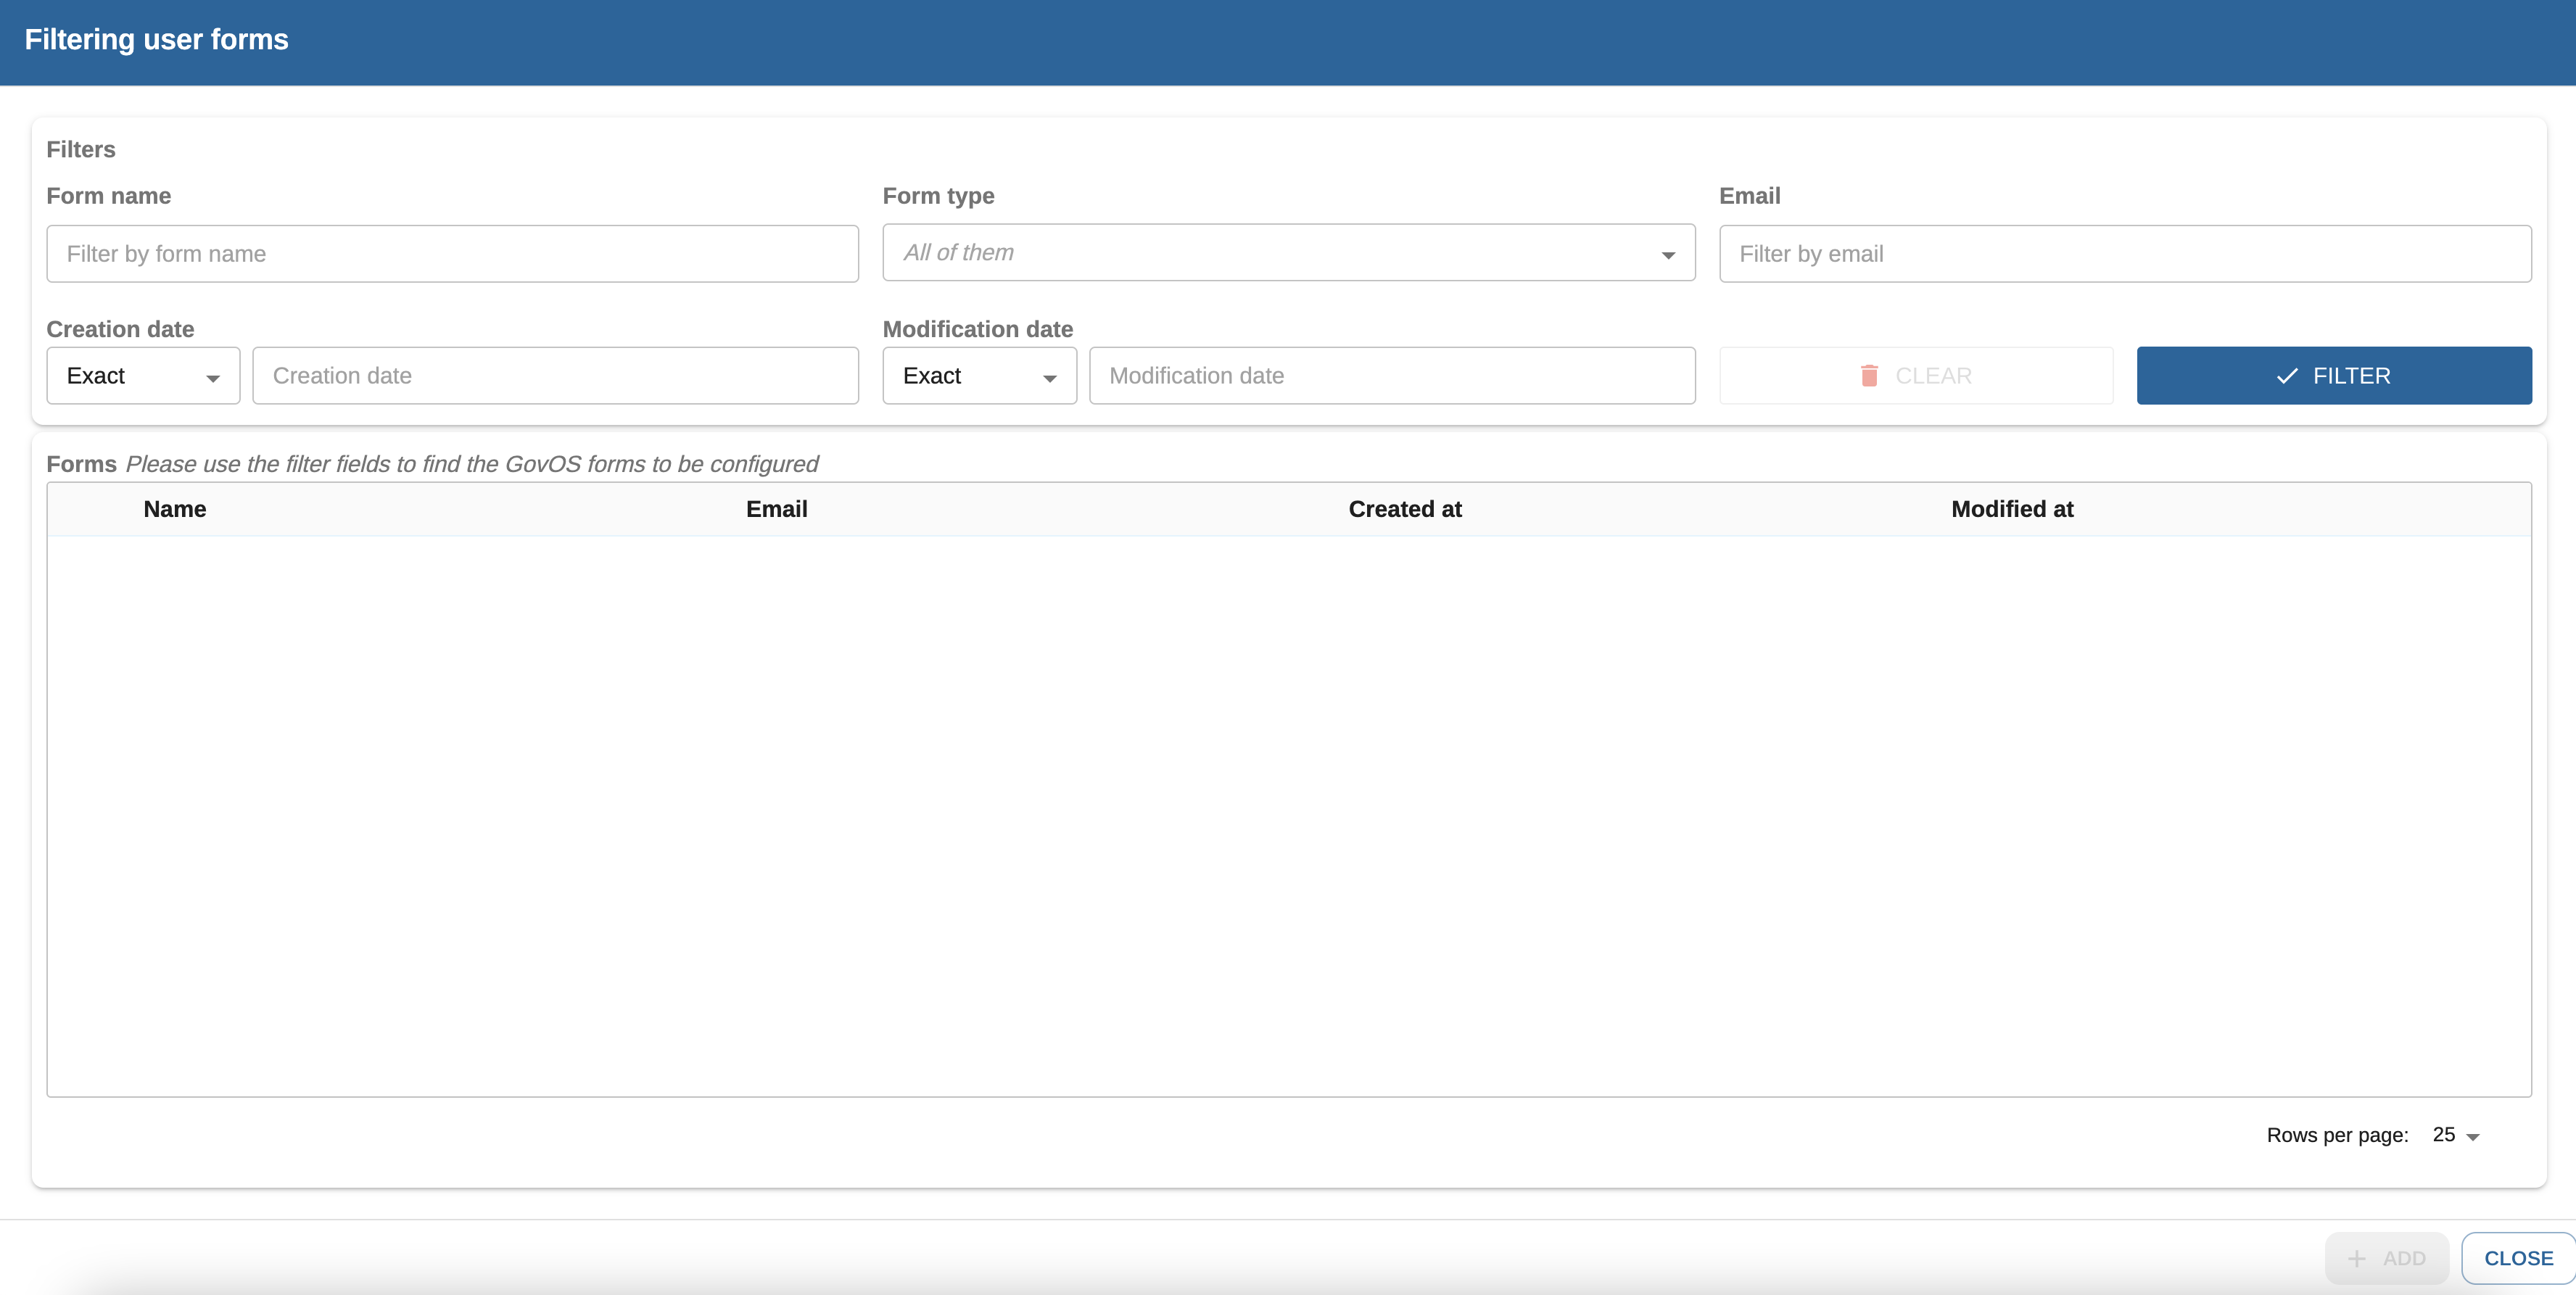
To find your desired form(s), you can filter on any of the attributes by entering data or selecting from the form type drop down to filter/search for the form(s). The filter attributes include:
Form Name, Form Type (web forms or document forms), user email address associated with the form, created date or modified date.
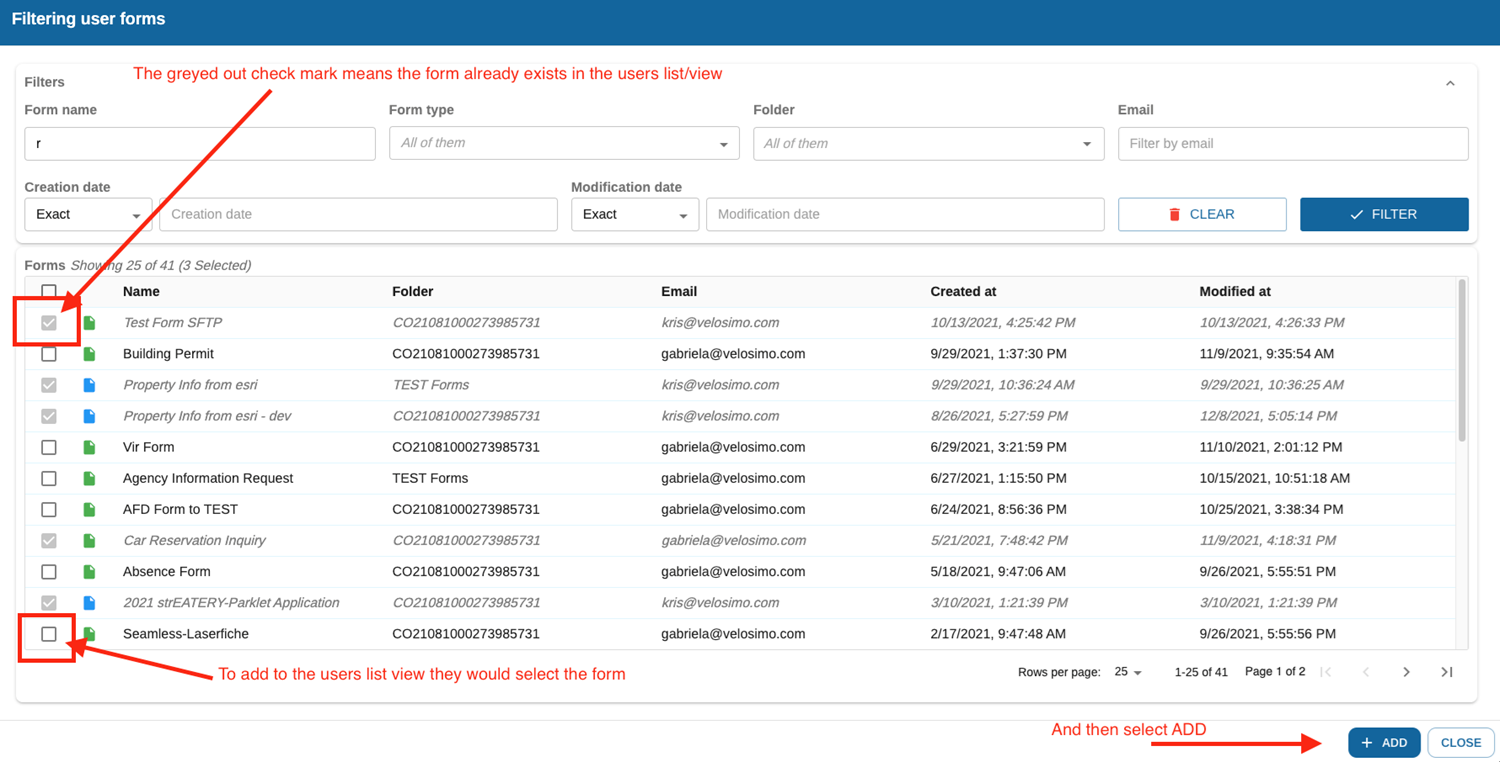
Once you have filter results you can select the desired form(s) that should be on your form list every time you access "Form Settings".
Steps:
- Select the check box for the form you would like to add to your Form Setting list
- Select Add
Note: if the check box is greyed out, that indicates that the form already exists in your "Form Settings" view.
Configure SeamlessDoc Form to Google Sheets
Navigate to “Form Settings” in the left menu under the SeamlessDocs integration node and select a form to configure.
Google Sheets only supports connections with Document Forms, those with the Blue icon.

Select Google Sheets tab and set the slider to the right to select "Save sheets".

Enter in the Google Sheets id and select Load File.
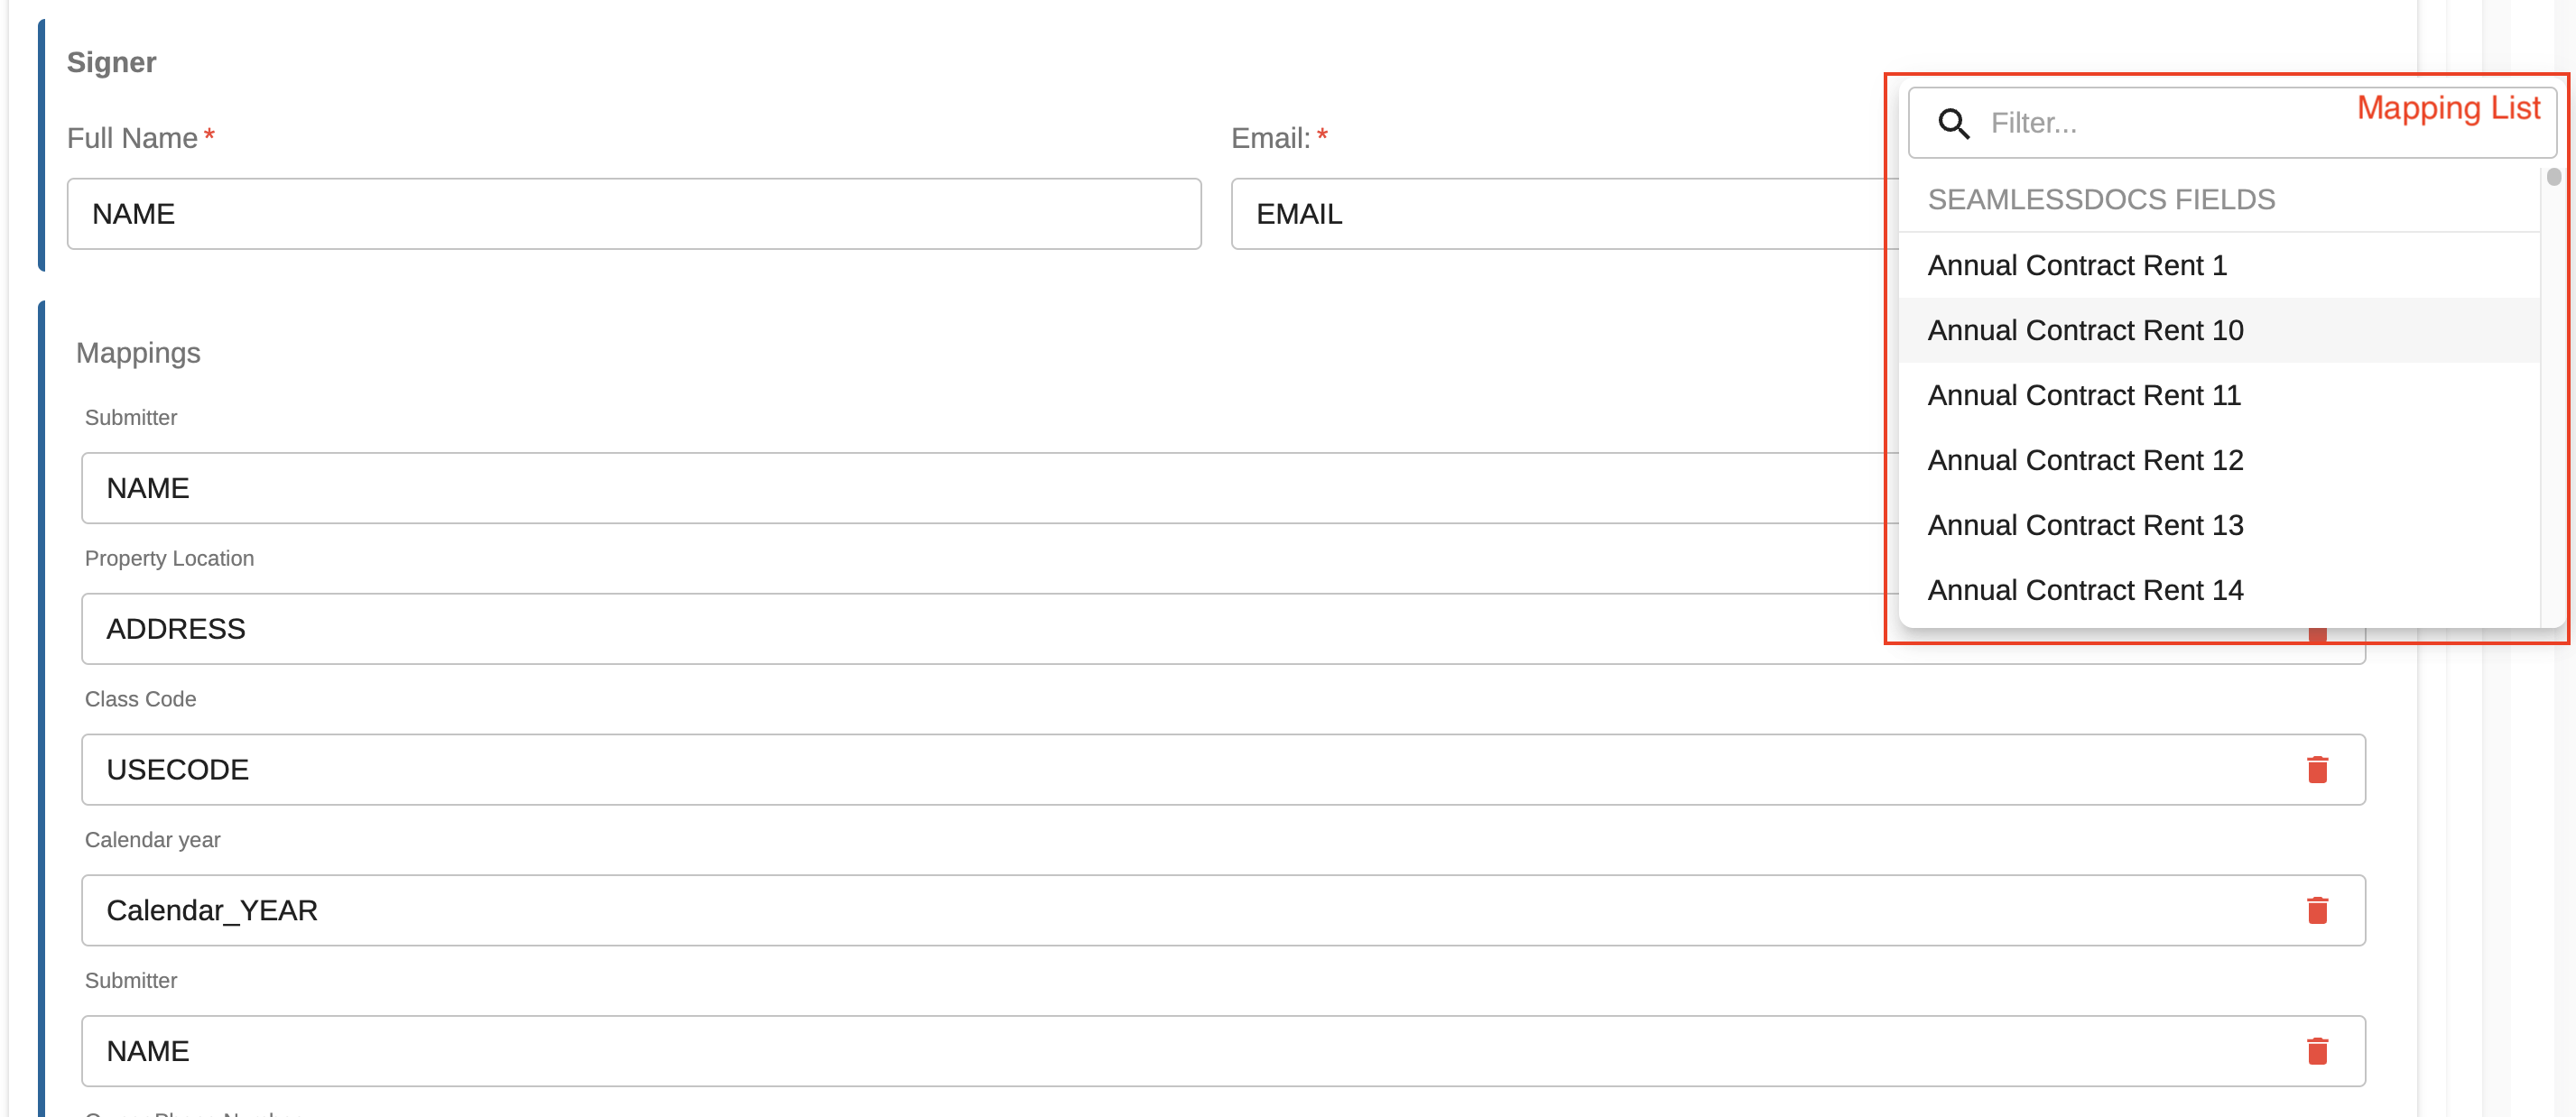
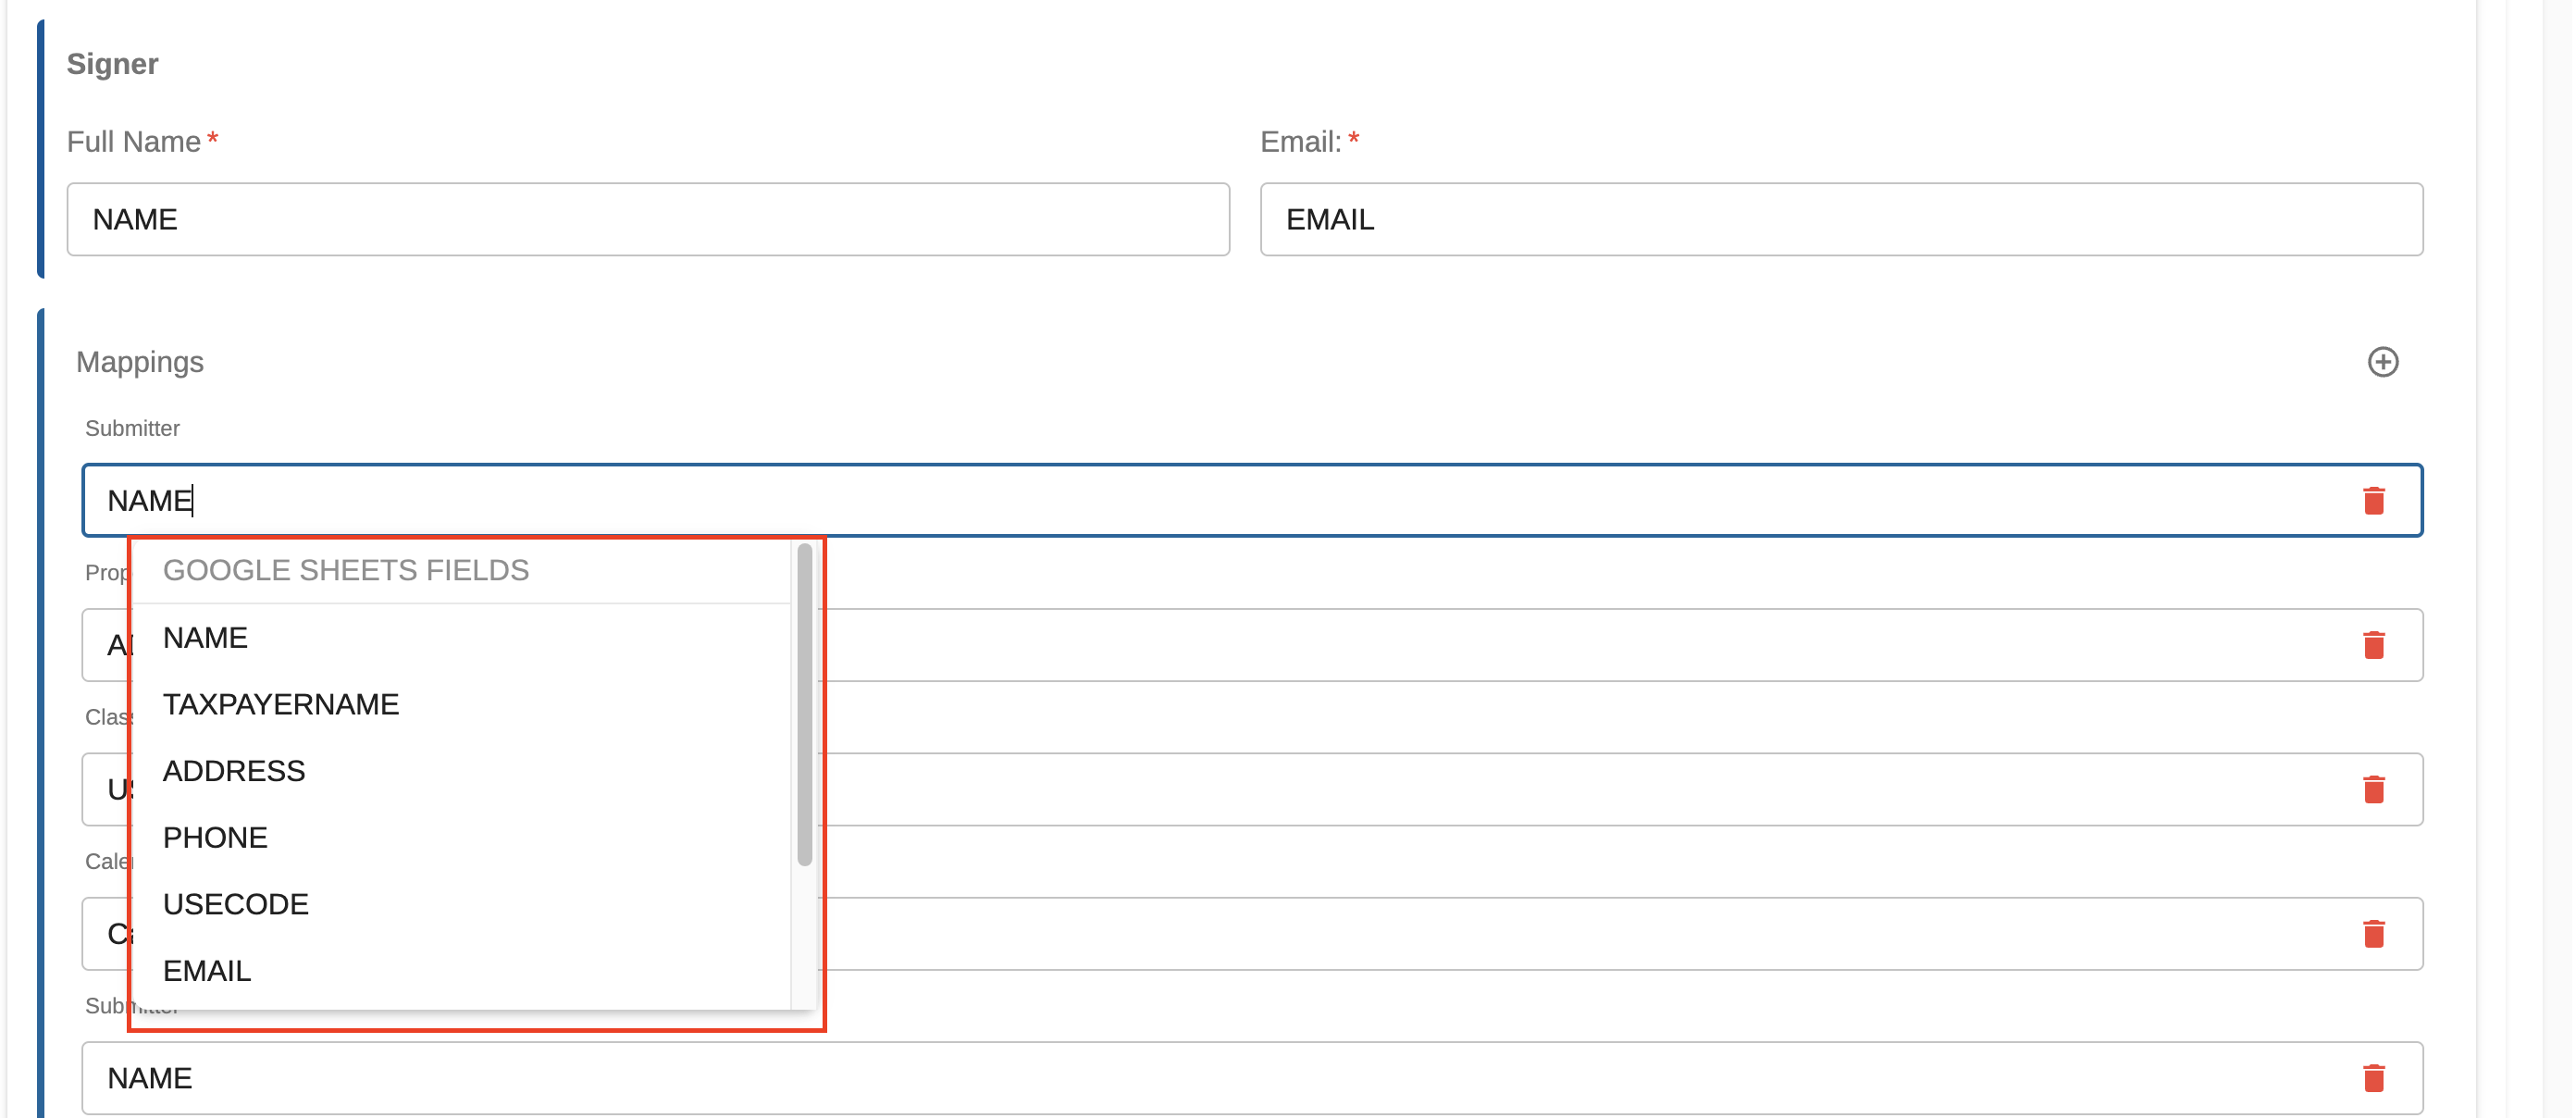
Complete the Signer Information.
Then begin the mapping for the Form Fields and the Google Sheets Column. Select a SeamlessDocs field name from the list. Once you have selected your desired SeamlessDoc field name, then select the associated Google Sheets column to configure all of the desired fields/columns under “Mappings”.
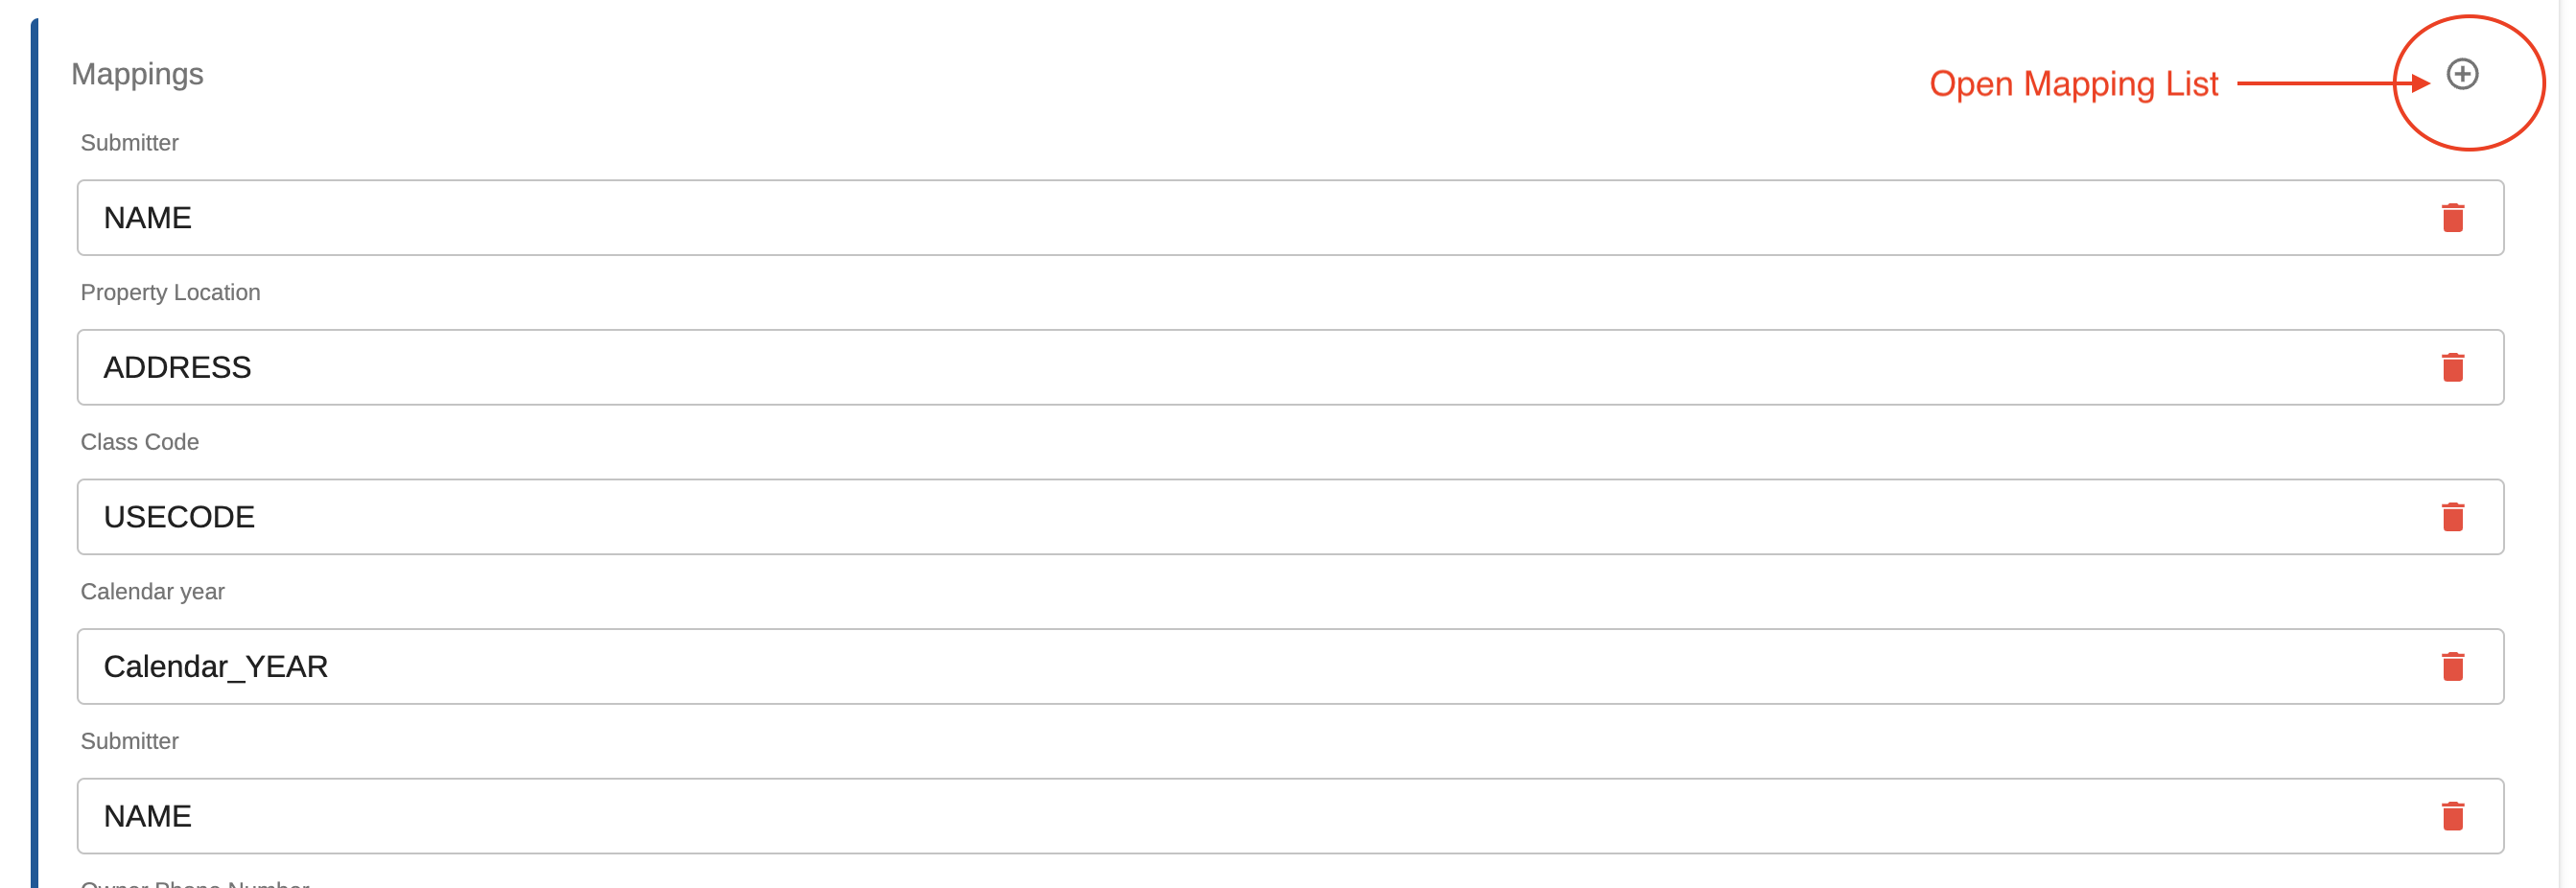
Once the mappings are complete, select SAVE.
Once ready to process the Prepare Form function, select PROCESS
Updated 8 months ago