Create Sharepoint App
Create Sharepoint App
Login to your Microsoft Sharepoint site
Navigate to the this URL once you are logged into Sharepoint - https://youragency.sharepoint.com/_layouts/15/AppRegNew.aspx
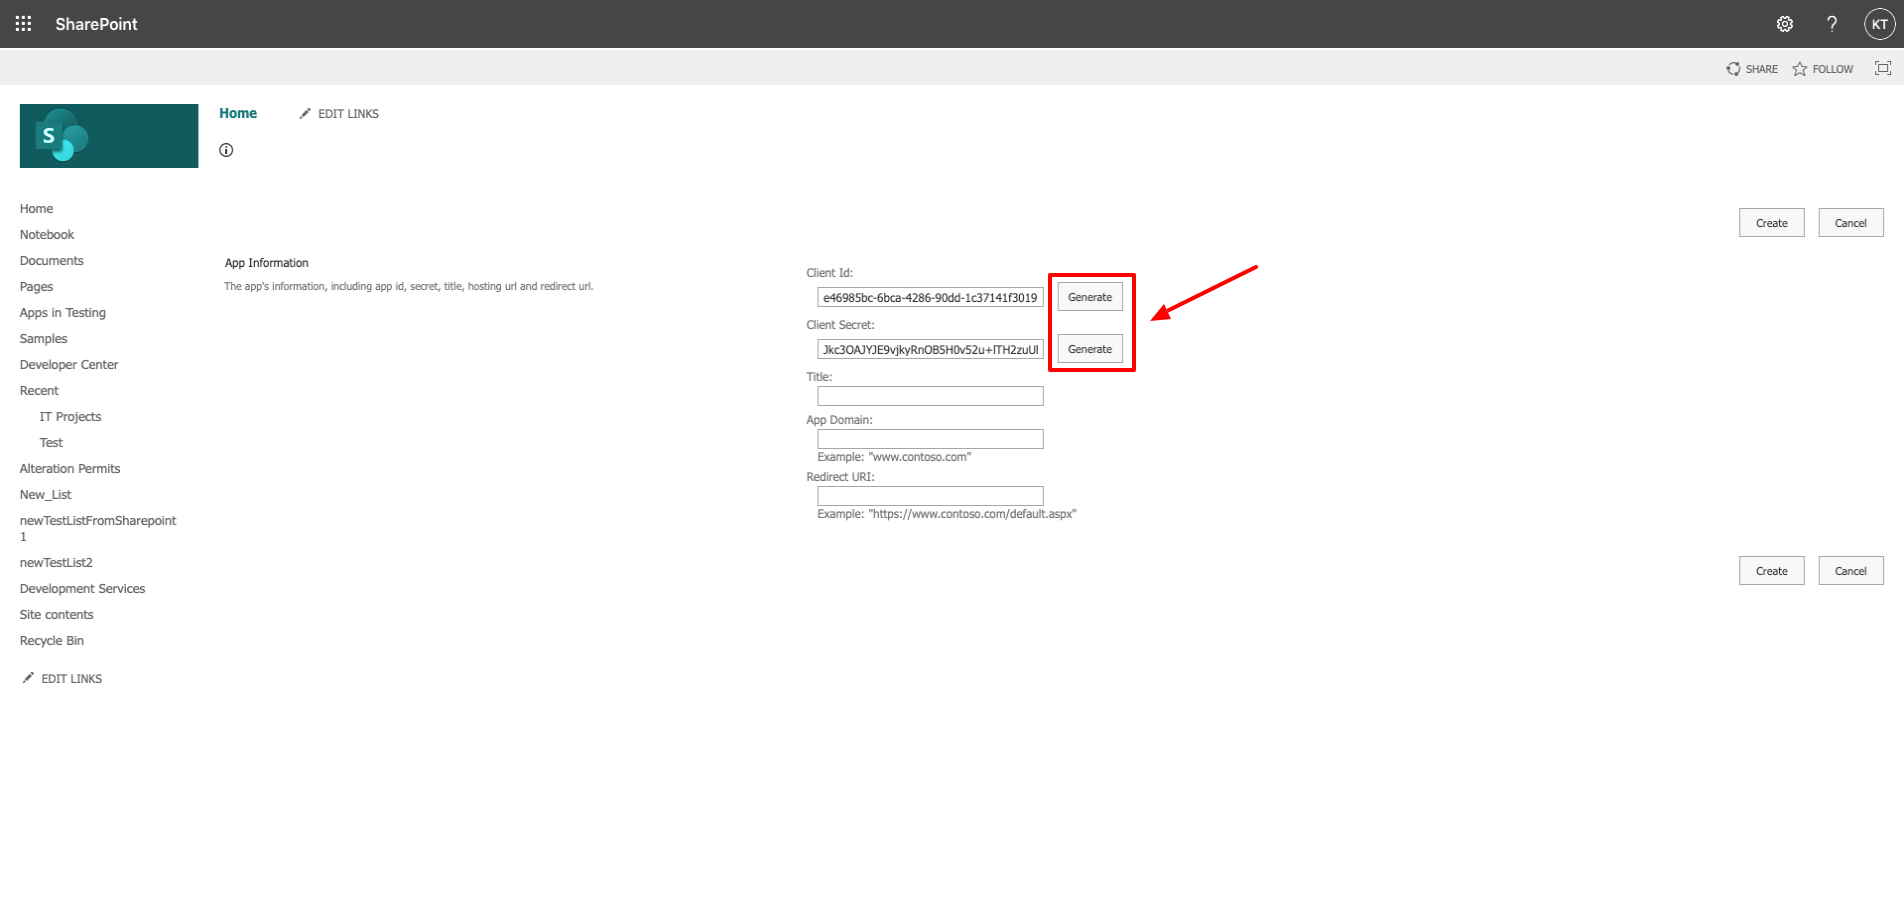
Click Generate a Client ID and Client Secret. Copy the Client ID to clipboard, you will need this for the next section.
Enter ‘Velosimo’ into the Title field, 'connect.velosimo.io’ into the App Domain field, and ‘https://connect.velosimo.io/oauth/callback’ into the Redirect URL field
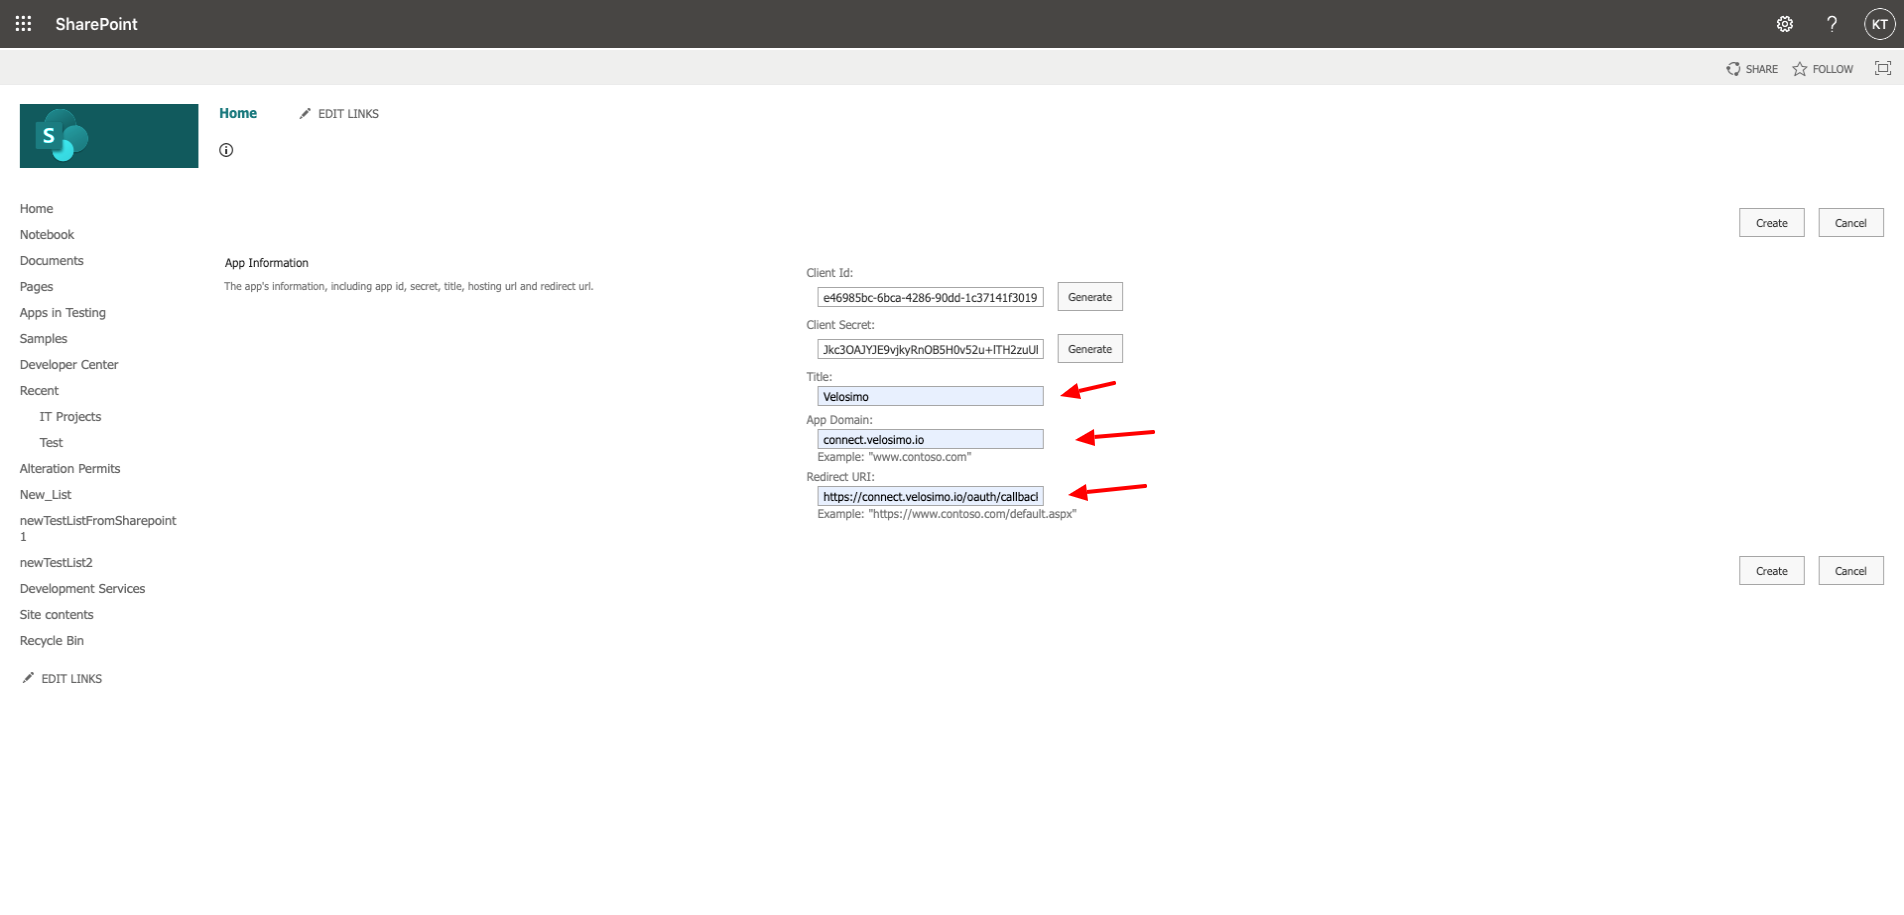
Click Create
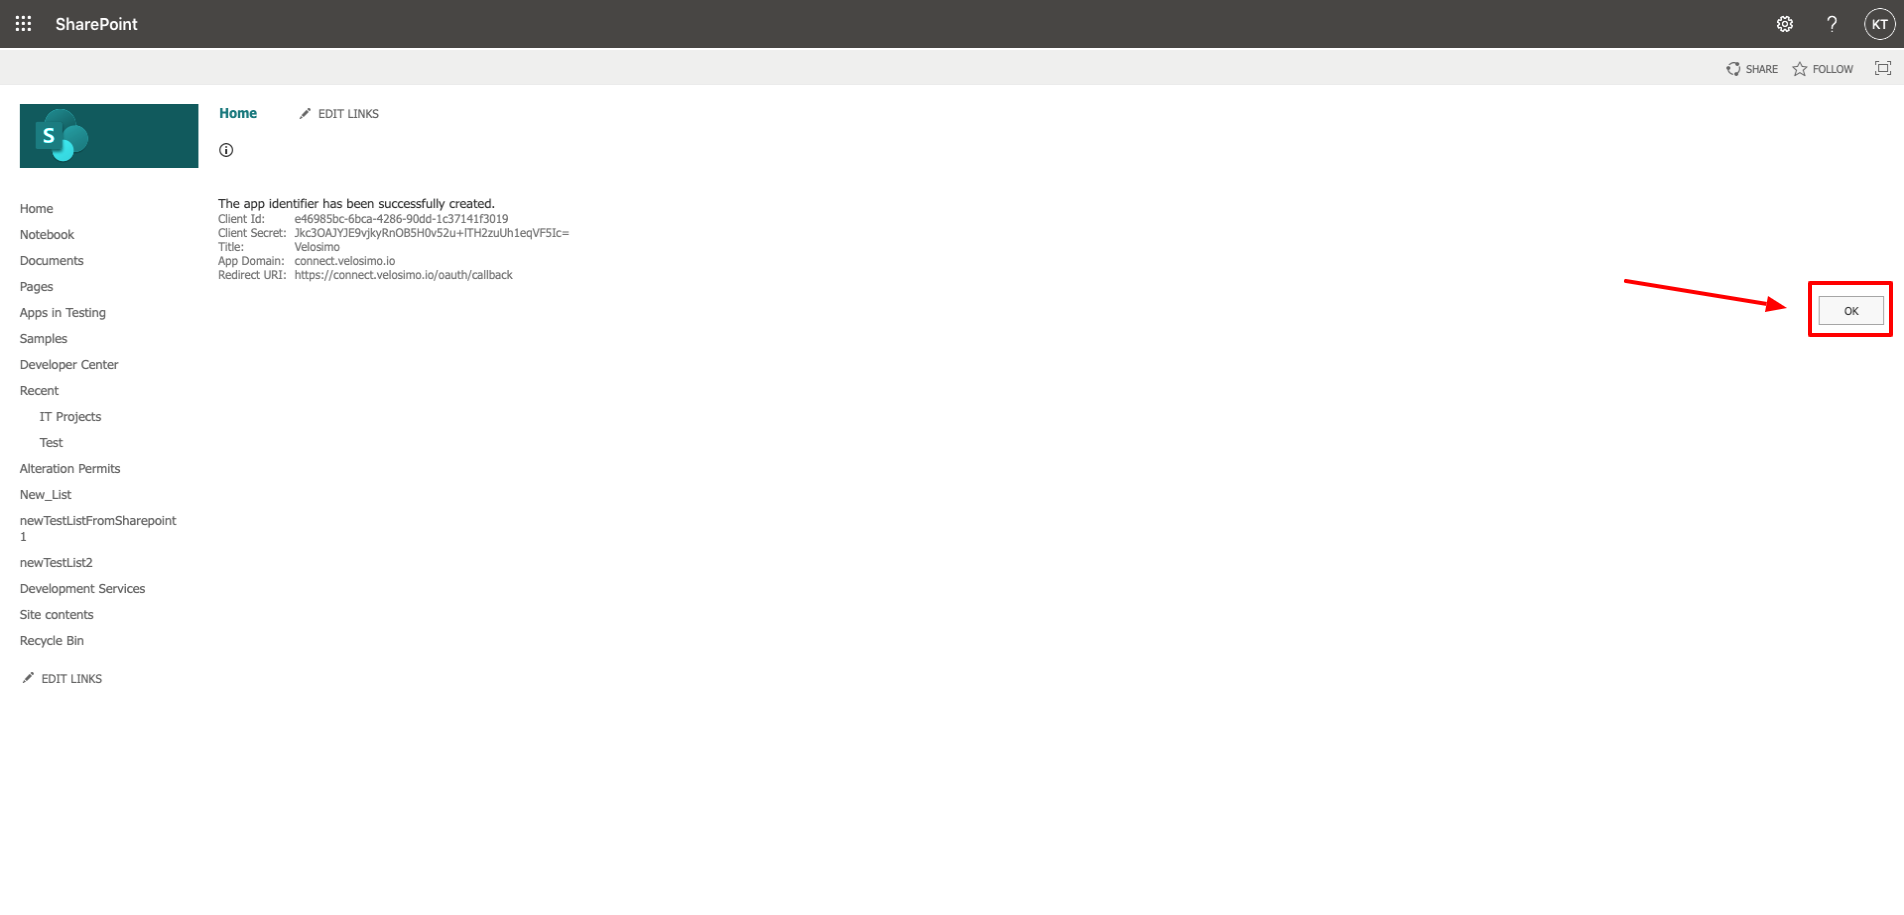
You will be redirected to this message screen after successfully creating the app. Click OK.
Grant App Permissions
Redirect your browser to https://<your sharepoint>/_layouts/15/appinv.aspx
Paste the Client ID you generated in step 4 of the previous section into the App ID and click “Lookup”.
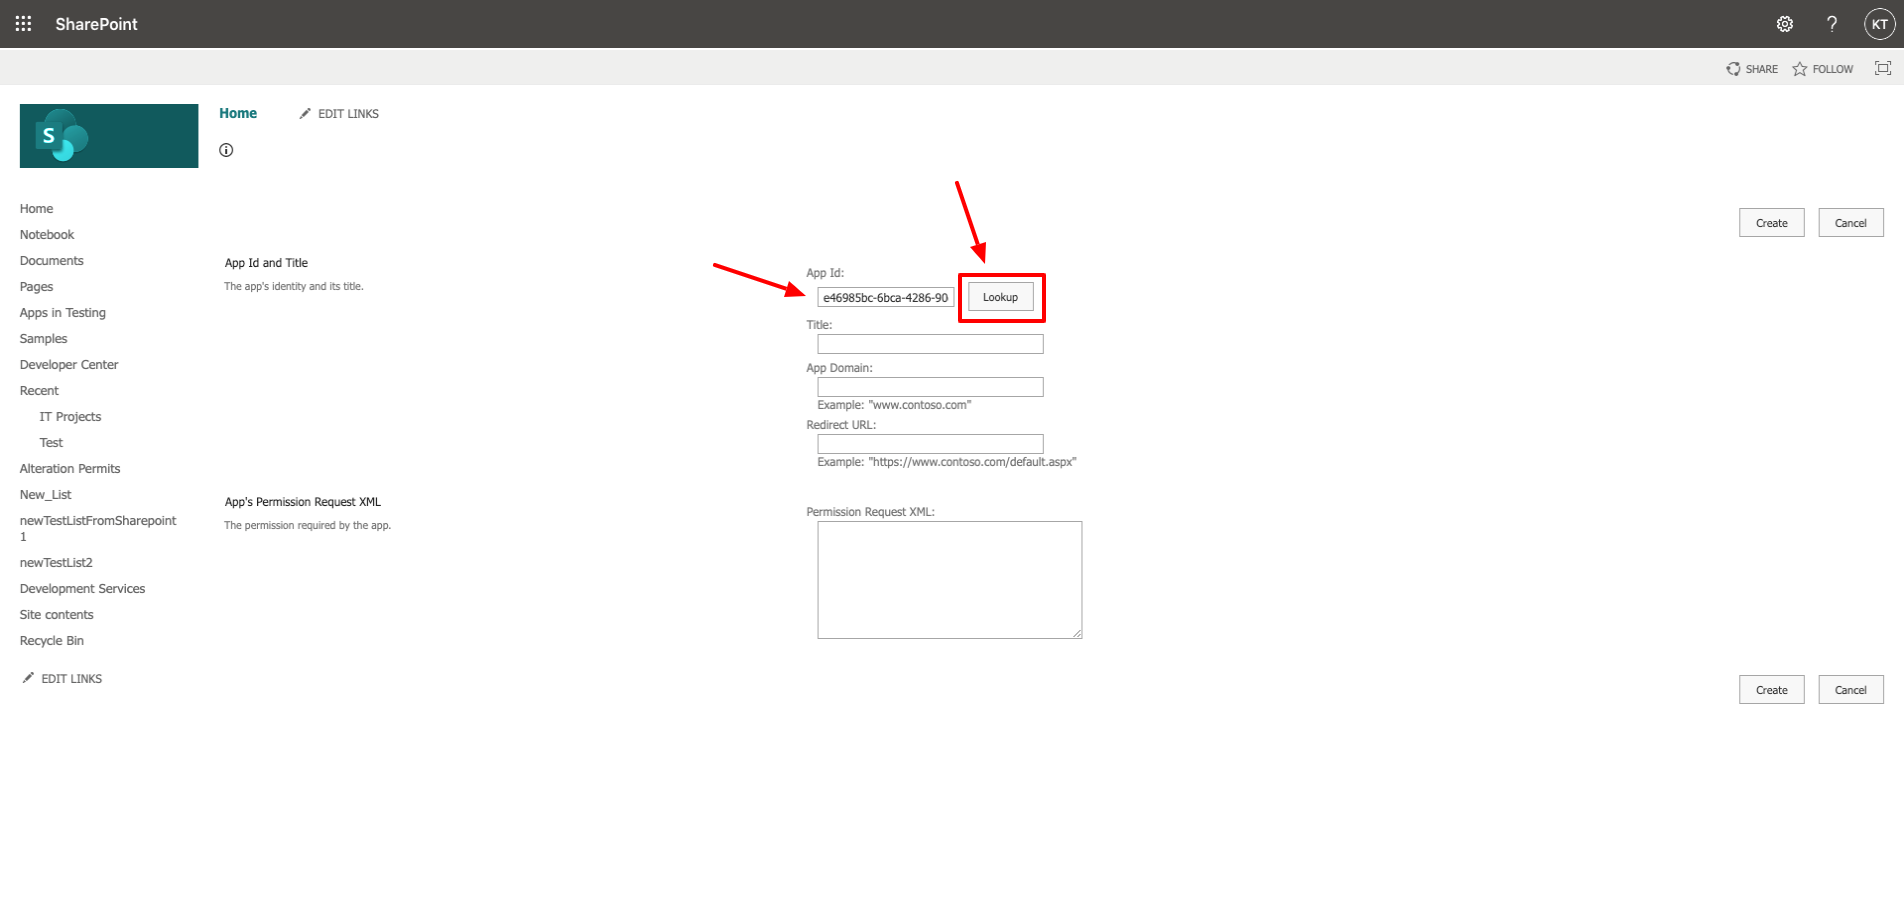
Copy & paste the following into the the Permission Request XML field
<AppPermissionRequests AllowAppOnlyPolicy="true">
<AppPermissionRequest Scope="http://sharepoint/content/sitecollection" Right="FullControl" />
</AppPermissionRequests>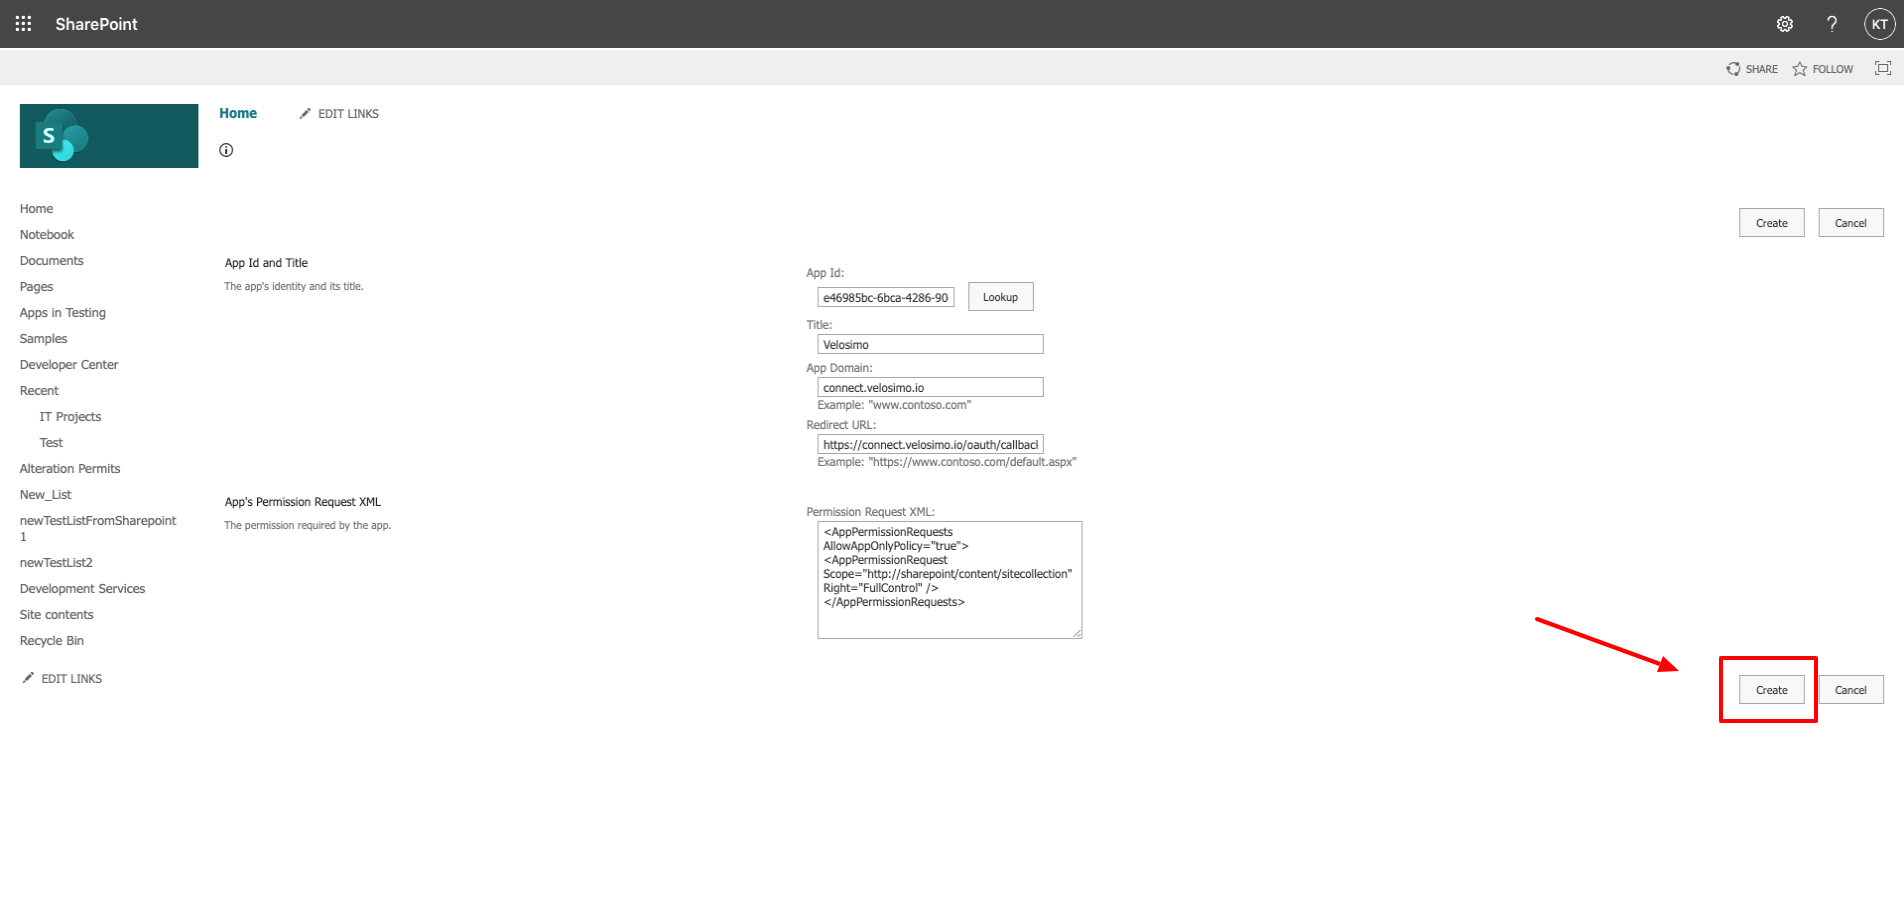
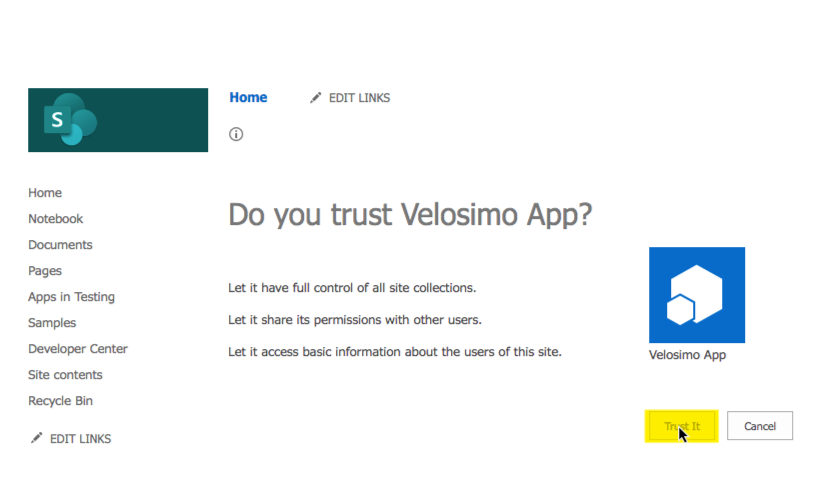
Next, the permission consent dialog displays. Click the Trust It button to grant the permissions.
On-Premise Network Settings
For on-premise Sharepoint deployments you will need to provide firewall access to the Velosimo Cloud's IP addresses 54.70.20.215, 35.164.131.175, 3.222.241.24.
Updated 3 months ago
