Authorizing the Endpoints
Create/Define Integration Users
For Accela Civic Platform:
Velosimo requires a named user within Accela that has Full Access to FID 0364.
Although not required, the best practice is to create a "SharePoint Integration" user. The Accela user that is used during the authorization process will appear in Accela as the user that took action, like uploading a file from SharePoint to Accela. For audit purposes, it would be more informative to have the integration user identified for the actions that are taken by the integration.
FID 0364 provides access for the integration user to access Construct API, which is the method in which velosimo is connected to Accela.
Please remember to select the correct Accela tenant when prompted (TEST/SUPP/PROD) during the login process.
Authorizing the Connector Endpoints from the application
Navigate to admin.velosimo.io and login with appropriate user credentials. Once logged in, click Authorizations from the left side menu:

Authorizing Microsoft Sharepoint
Login to Velosimo Connect Admin - https://admin.velosimo.io
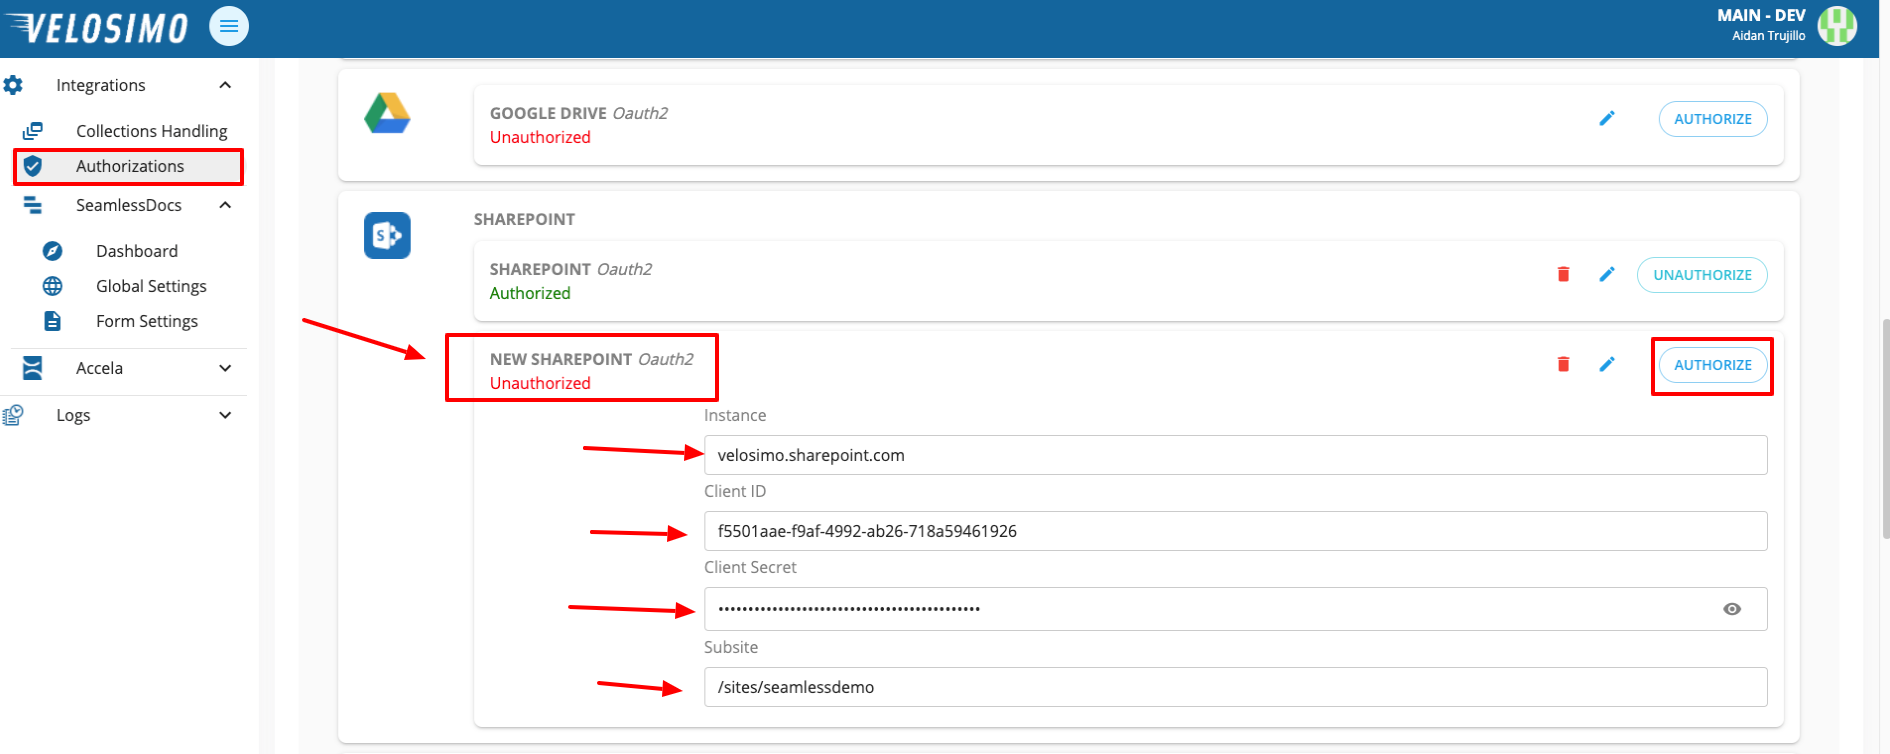
Navigate to the “Authorizations” tab. Find Sharepoint in the list and enter an Instance, Client ID, Client Secret, and Sharepoint Subsite. Once completed click the Authorize button.

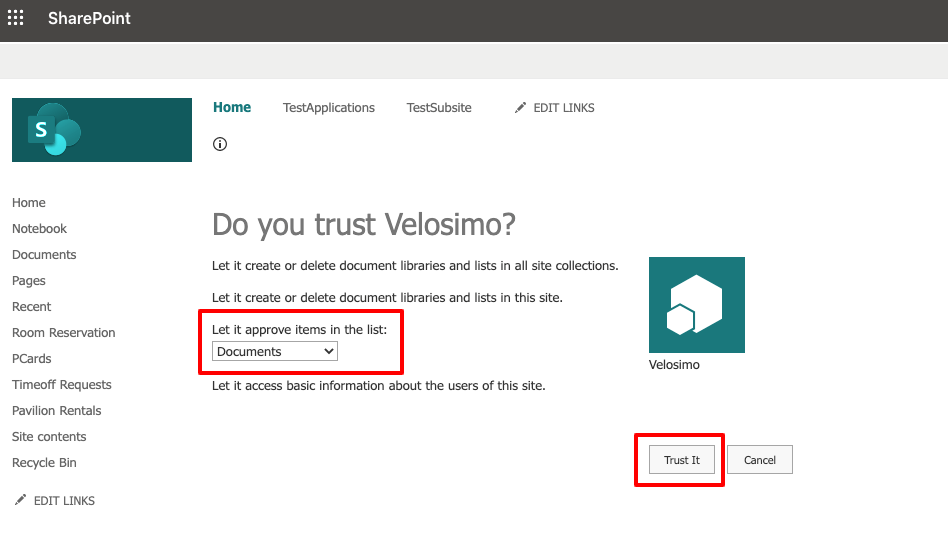
If the credentials are validated Velosimo will redirect you to your Sharepoint. Under “Let it approve items in the list” make sure the correct item is selected. Click the Trust It button to accept the connection. The page will redirect to the Velosimo Connect Admin and Sharepoint will be authorized.

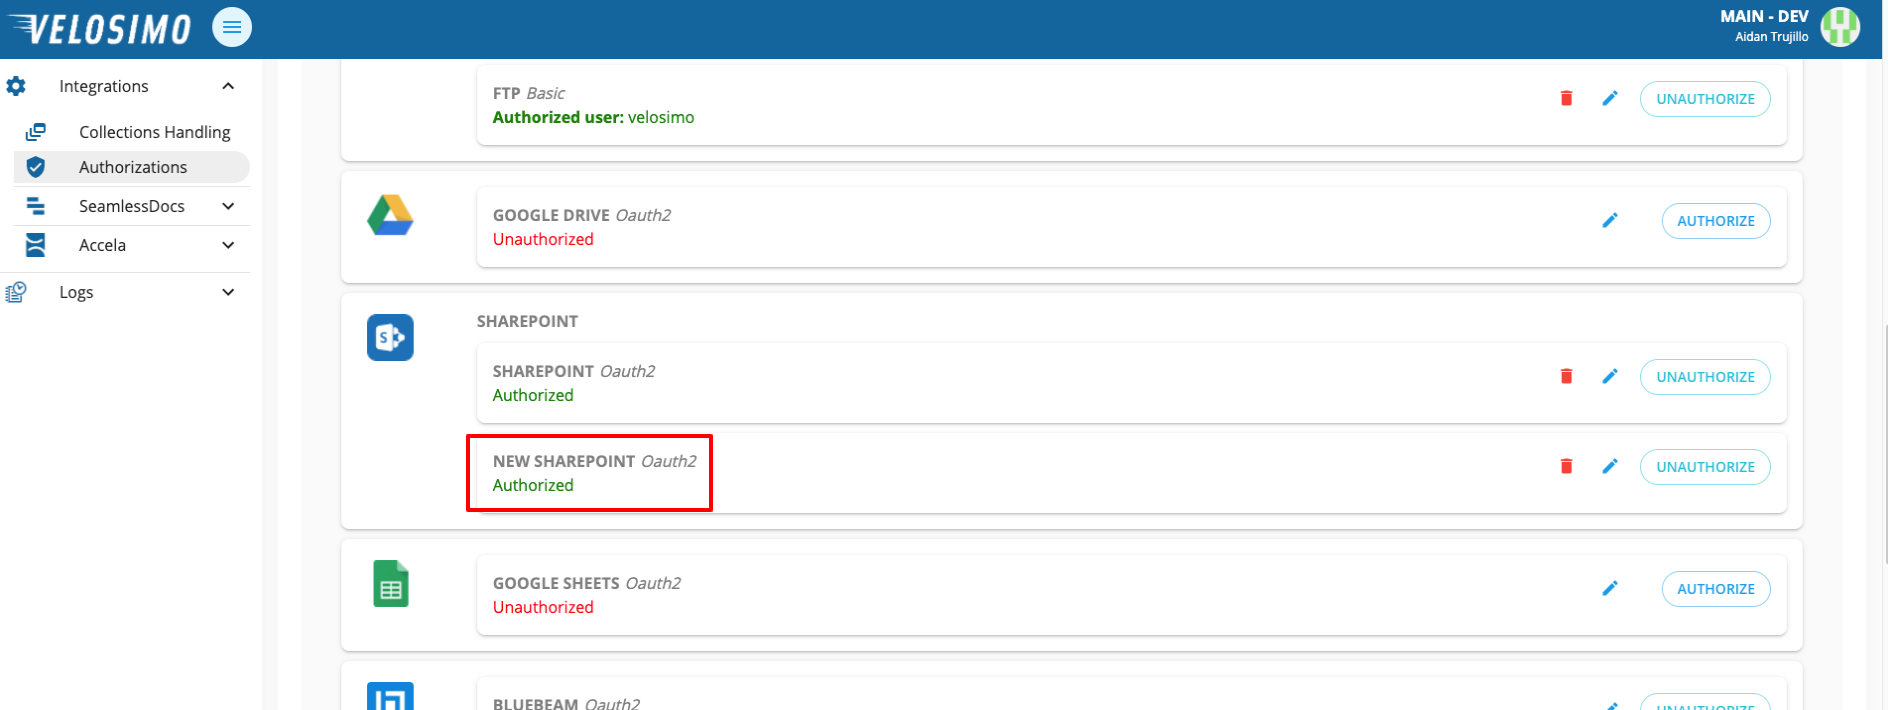
If the credentials are validated, you will be redirected back to the Authorizations page and Sharepoint will be authorized.

Multiple Authorization
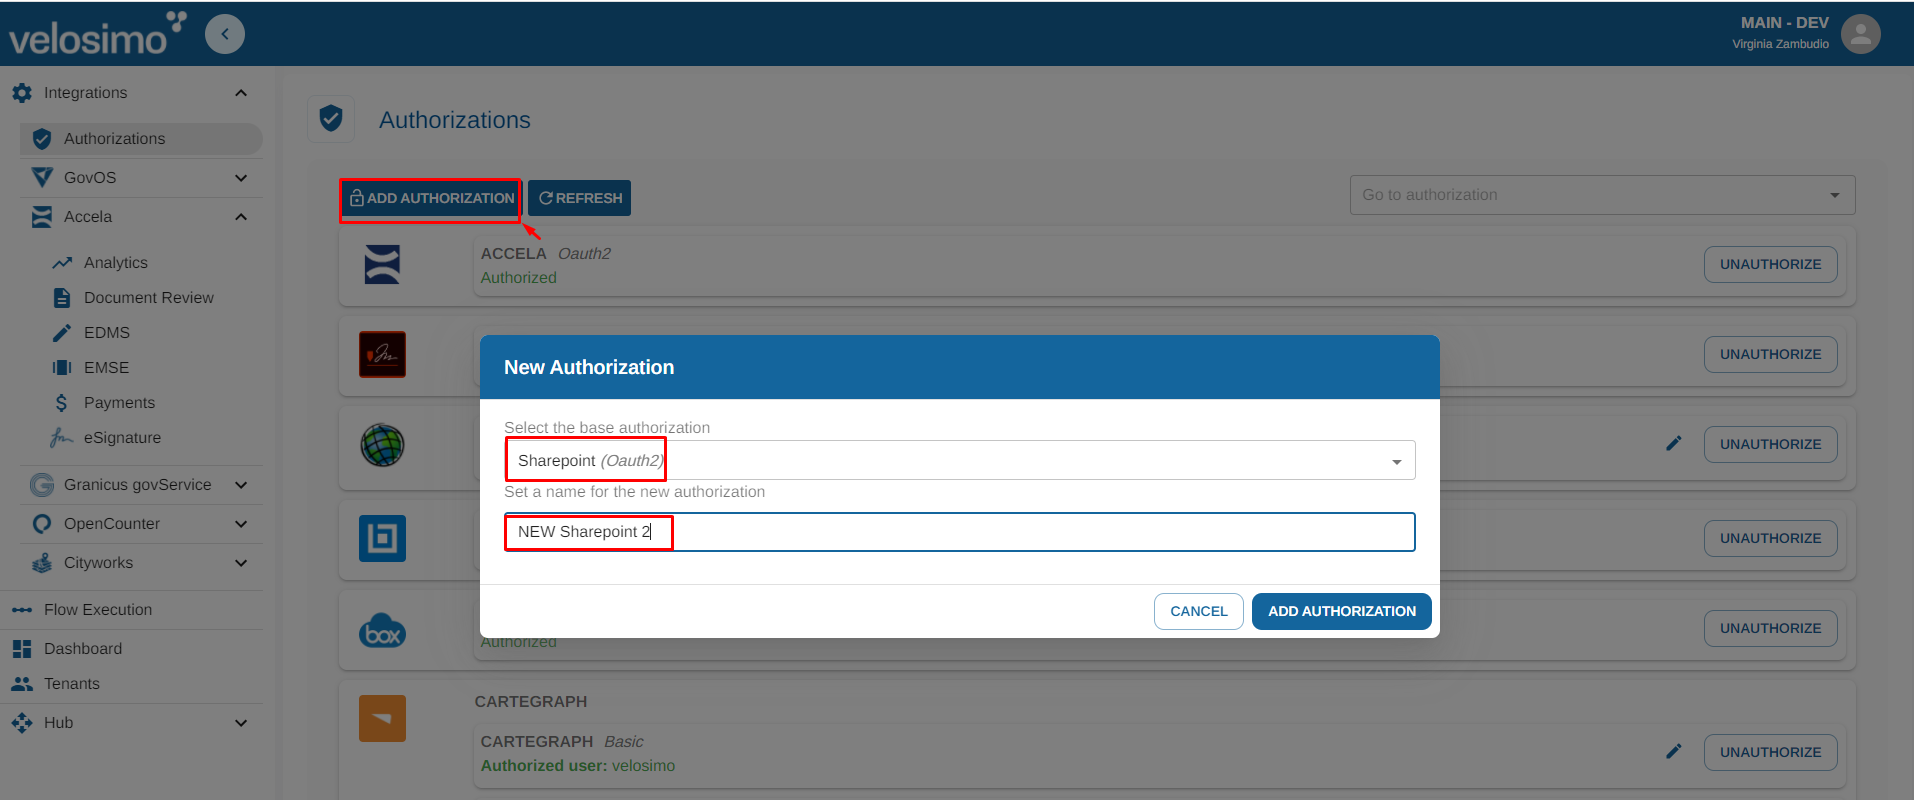
Sharepoint allows multiple authorizations. If you want to use more than one authorization for Sharepoint you can select the "Add authorization" button.

Select the base authorization for Sharepoint and set the name for the new authorization, select "Add authorization".

Select de base authorization for Sharepoint and set the name for the new authorization, select "Add authorization".
Updated 3 months ago
