Configure Connector Data Mappings
Create mappings between Survey123 and Cartegraph
To set up data mappings between the two systems, the Agency administrator must be presented with a list of available fields in each system. For this connector, the integration with Cartegrahh provides a real-time collection of fields. However, ArcGIS Survey123 does not. To have the ArcGIS Survey123 fields available for data mapping, it is necessary to post a survey result to a special URL/Endpoint of Velosimo. Once completed, the URL will be returned to its normal use value.
Initial Velosimo Connector Form Setup
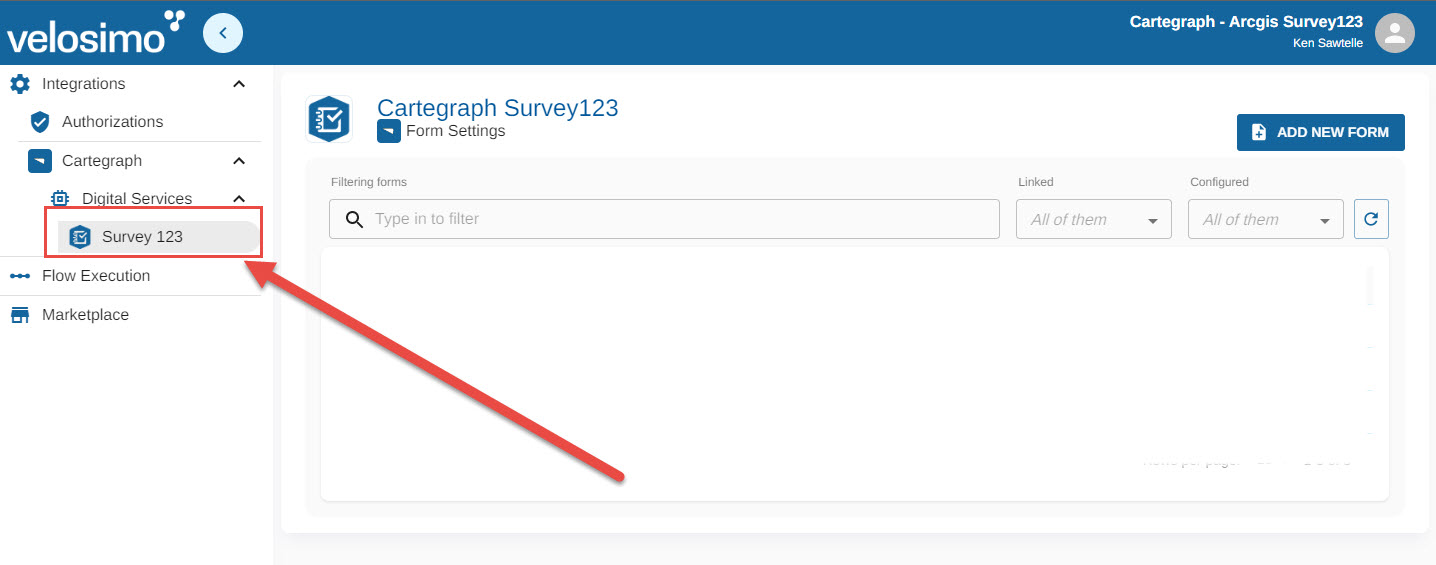
The first step is to get the form structure set within Velosimo so that we have access to the URL needed for the next step. Log into the Administrator Site and then select 'Survey 123' under 'Digital Services', which is under 'Cartegraph' in the left Menu:
Then Click 'ADD NEW FORM' on the top right:
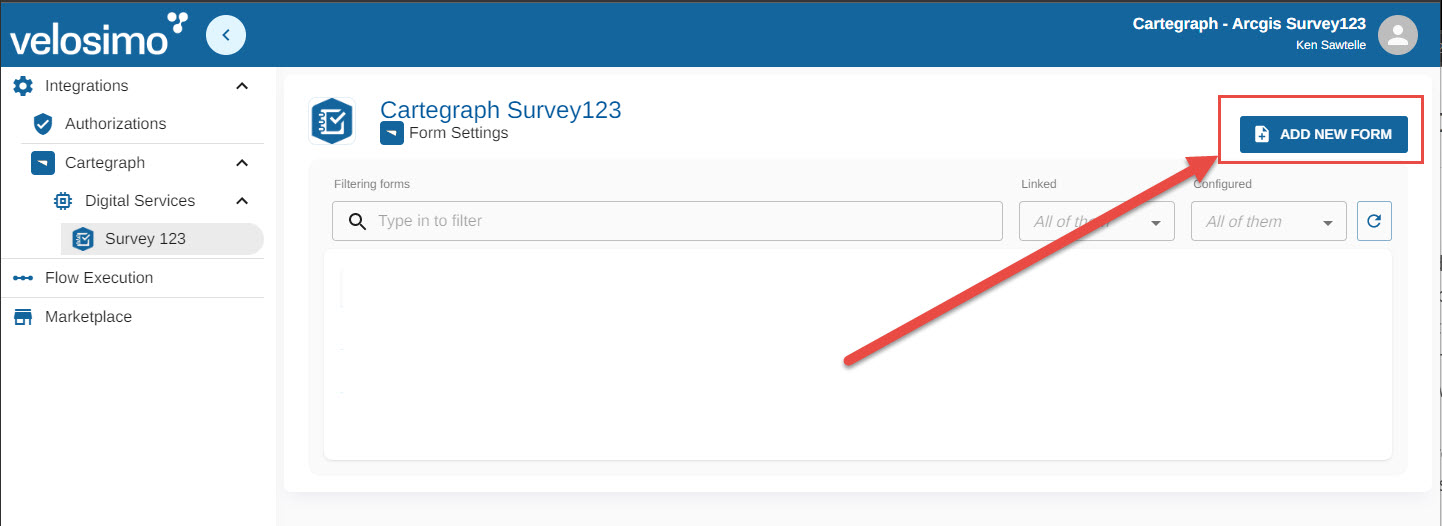
You will see a 'New form' popup. This is your 'Velosimo' form where you define the data mappings between the ArcGIS Survey123 Form and Cartegraph.
Enter the name of your form and click "OK":

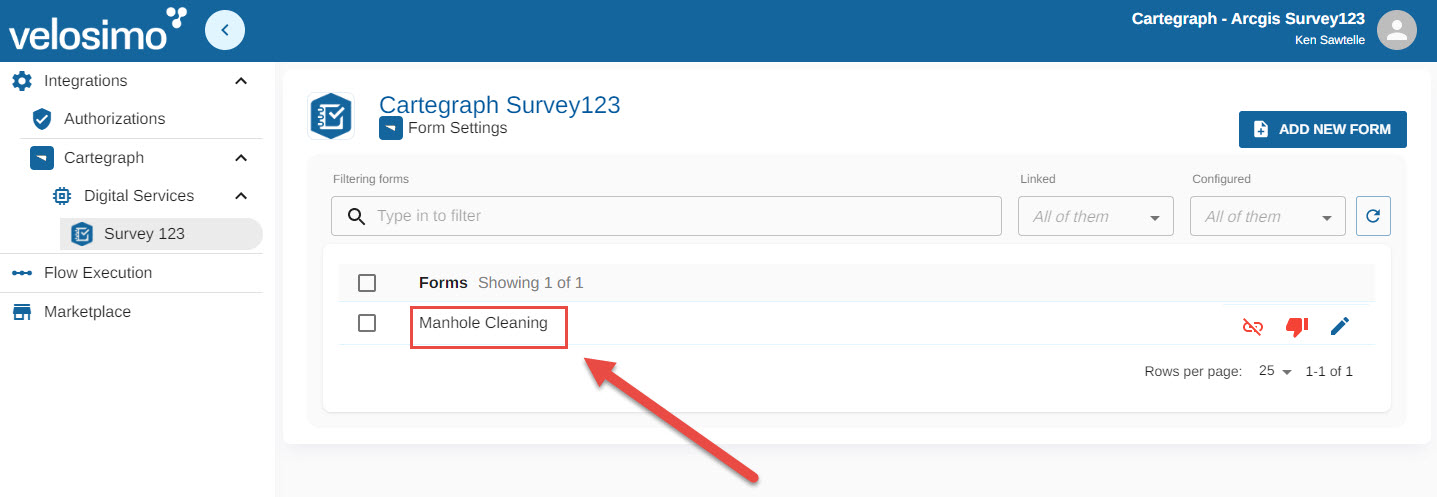
You will be taken back to the Cartegraph Survey123 forms listing screen. Click the name of your new connector:
If you happen to have another form defined and linked, you must first unlink that form to proceed.
You will see a popup that displays the setup Endpoint URL. Click the copy icon and then click close:
You now have the URL in memory for the next step.

Send Survey123 Form Fields to Velosimo
The second step is to set the URL Endpoint value to Velosimo setup, post the Survey123 form fields to Velosimo, and then reset the URL Endpoint value for normal use.
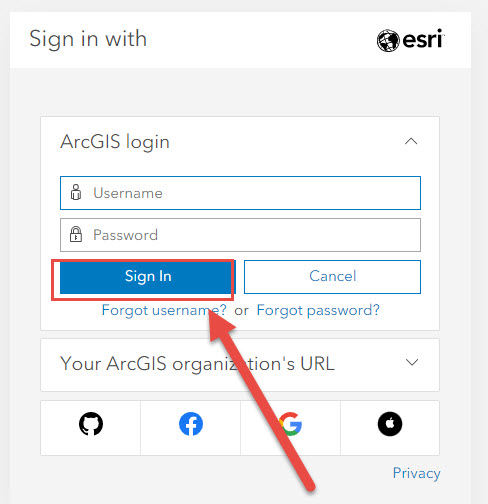
Log into ArcGIS Survey 123:
Click the Form set up prior:
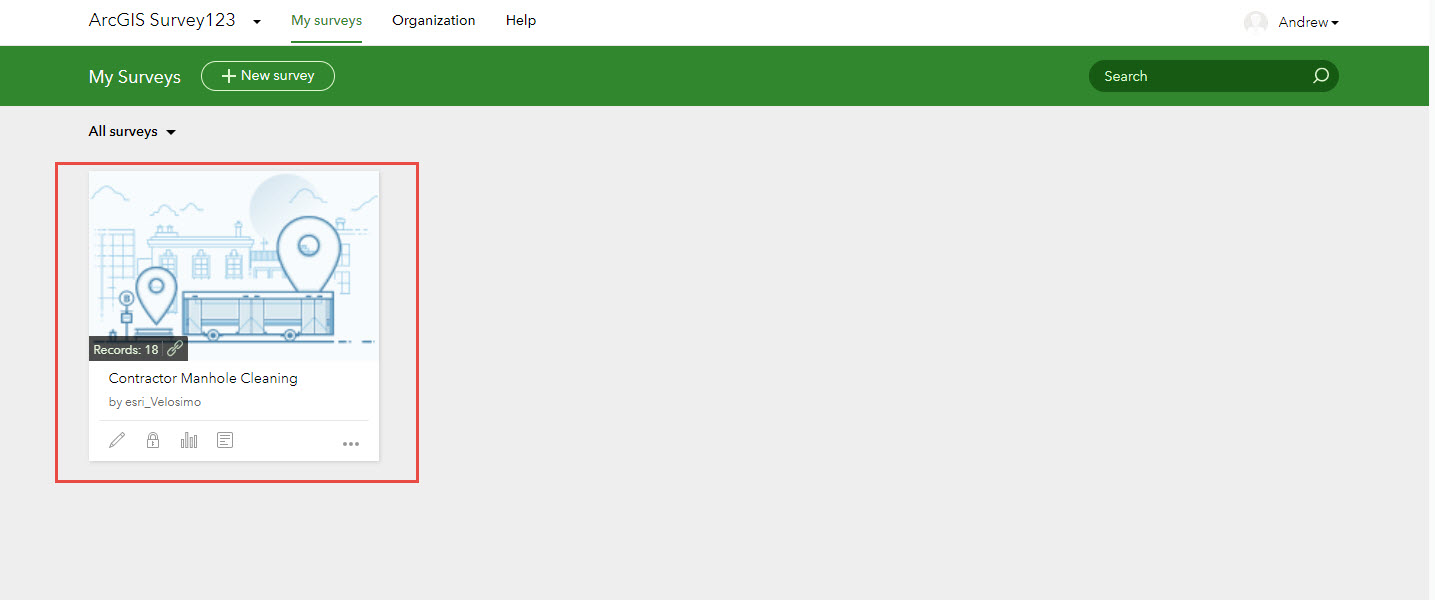
Set Survey123 Webhook for Setup
Now let's set the payload webhook so that Survey123 sends the information to the Velosimo connector setup endpoint. Click 'Settings'

Now click 'Webhooks':
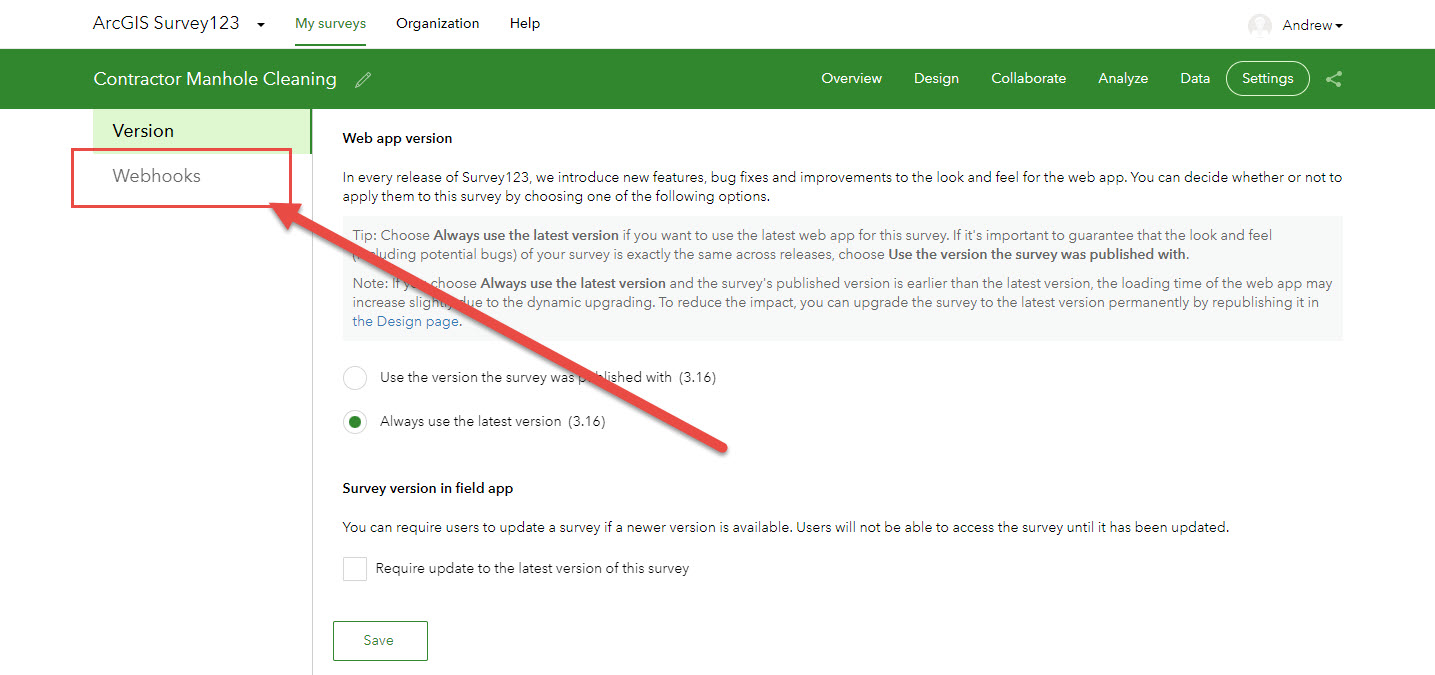
Next, click the edit link under 'Operations' for your ArcGIS Survey123 Form:

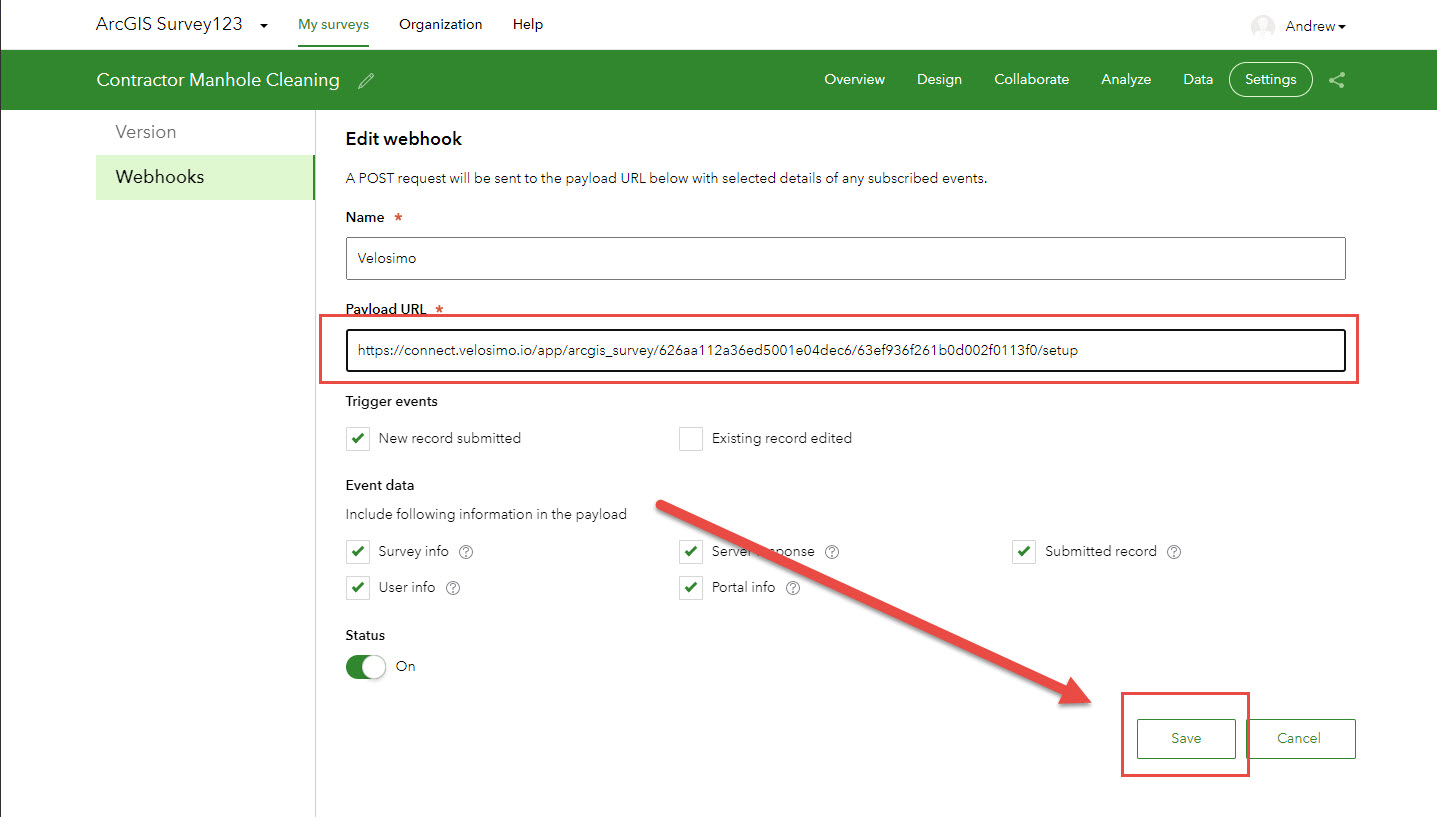
Now paste the setup URL Endpoint value from the Velosimo form into the 'Payload URL' field and click "Save":
Post Survey123 Form Fields to Velosimo
Now that we have set the endpoint to which Survey123 will post, we now need to submit the form which will result in velosimo receiving the form field values from the Survey123 form:
Click the 'Collaborate' menu item:

Once redirected to the 'Share survey' screen, click on the Open icon next to the link box:
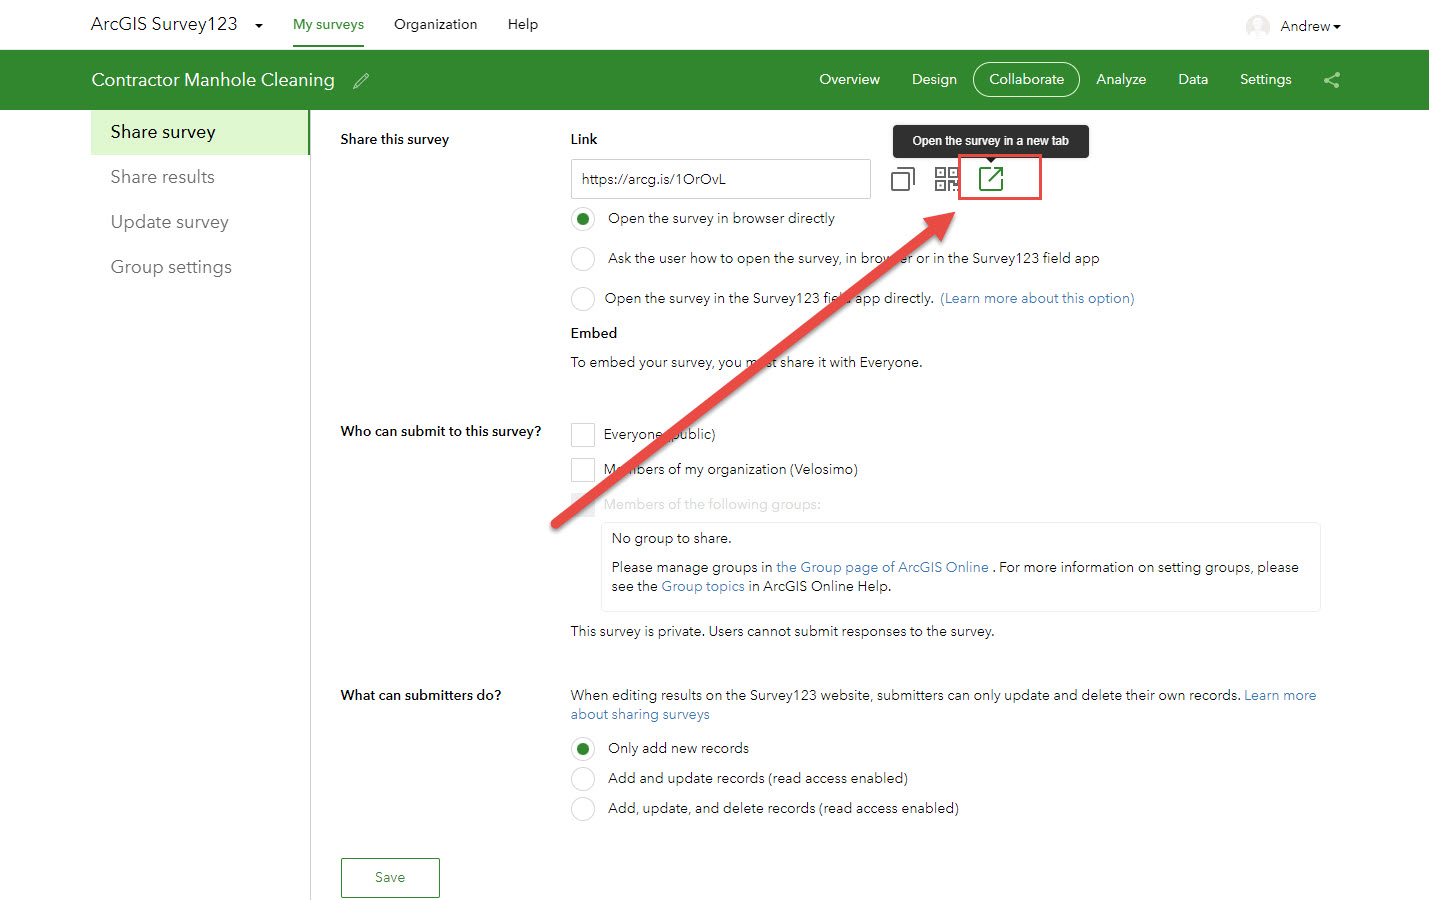
You will be taken to the Survey123 form, ready for input and submission.
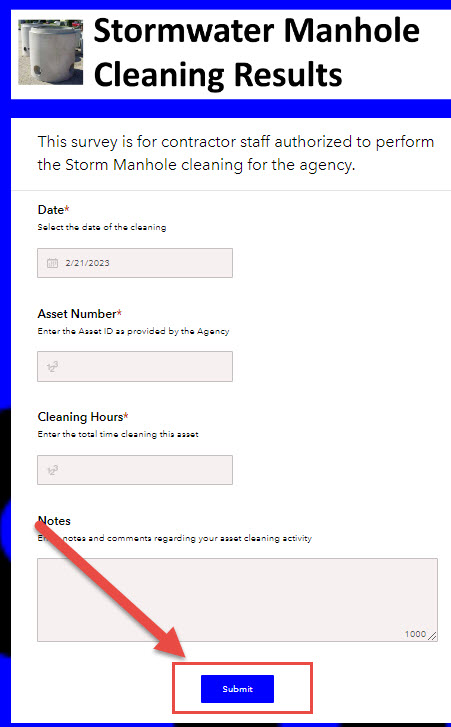
This step is special because we are using this form submission to send the field data to Velosimo for the upcoming mapping exercise. As a result, there is no need to input any data into the fields except for any fields you set as required during the Survey123 form setup.
After you enter any required data, click 'Submit':
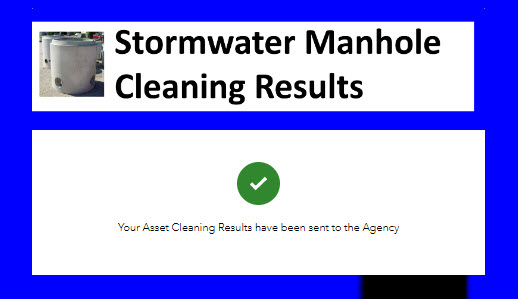
You will be presented with a screen confirming successful submission:
Final Velosimo Connector Form Setup
Now that we have sent the Survey123 form field data to Velosimo let's map the fields between the two systems and then rest the Survey123 webhook to normal use of forms submission.
Map fields from Survey123 to Cartegraph
It's time to configure the actual mappings between ArcGIS Survey123 and Cartegraph. Return to the Agency Administrator site for the Connector and Select 'Survey 123' under 'Digital Services' under the 'Cartegraph' menu item:
Note: if you were already logged into Velosimo, you would need to refresh your screen.

You will notice the green chain link, indicating your prior setup submission from ArcSurvey 123 was successful.
Click the name of the Velosimo form:

Top-Level Mappings
If you were setting up a service request type form, click 'REQUEST.' In this example, we are setting up an asset cleaning, so we will select "ASSET":
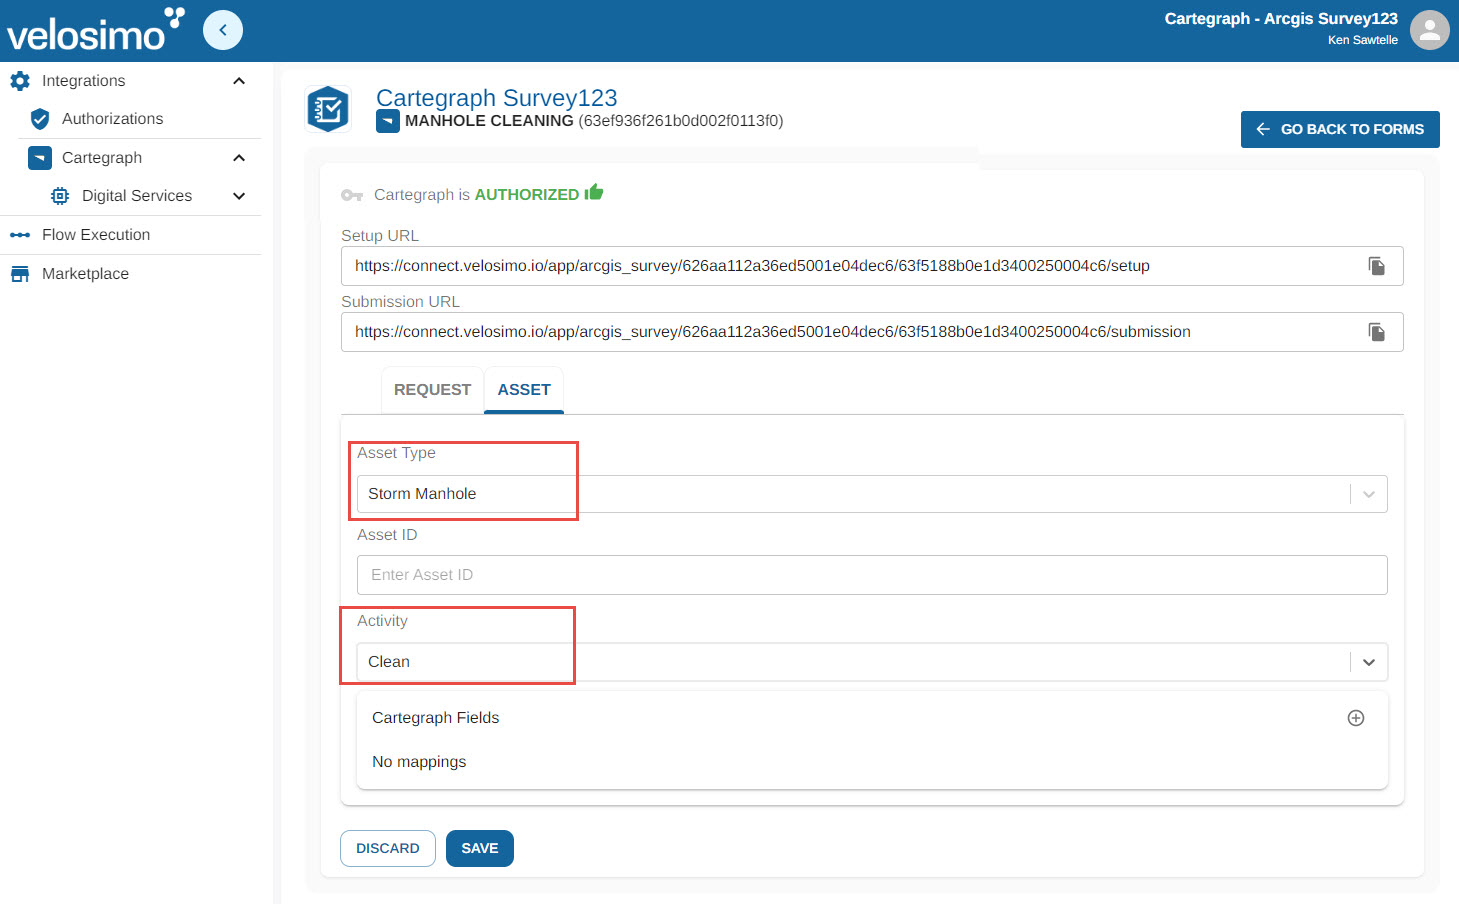
Next, complete the top-level mappings as per your connector. This example will set the Aset Type to 'Storm Manhole' and Activity to 'Clean.'
We will save our work after performing at least one field-level mapping next
Field-Level Mappings
Once finished, we will map the fields, starting by clicking the '+' (added Mapping) button:
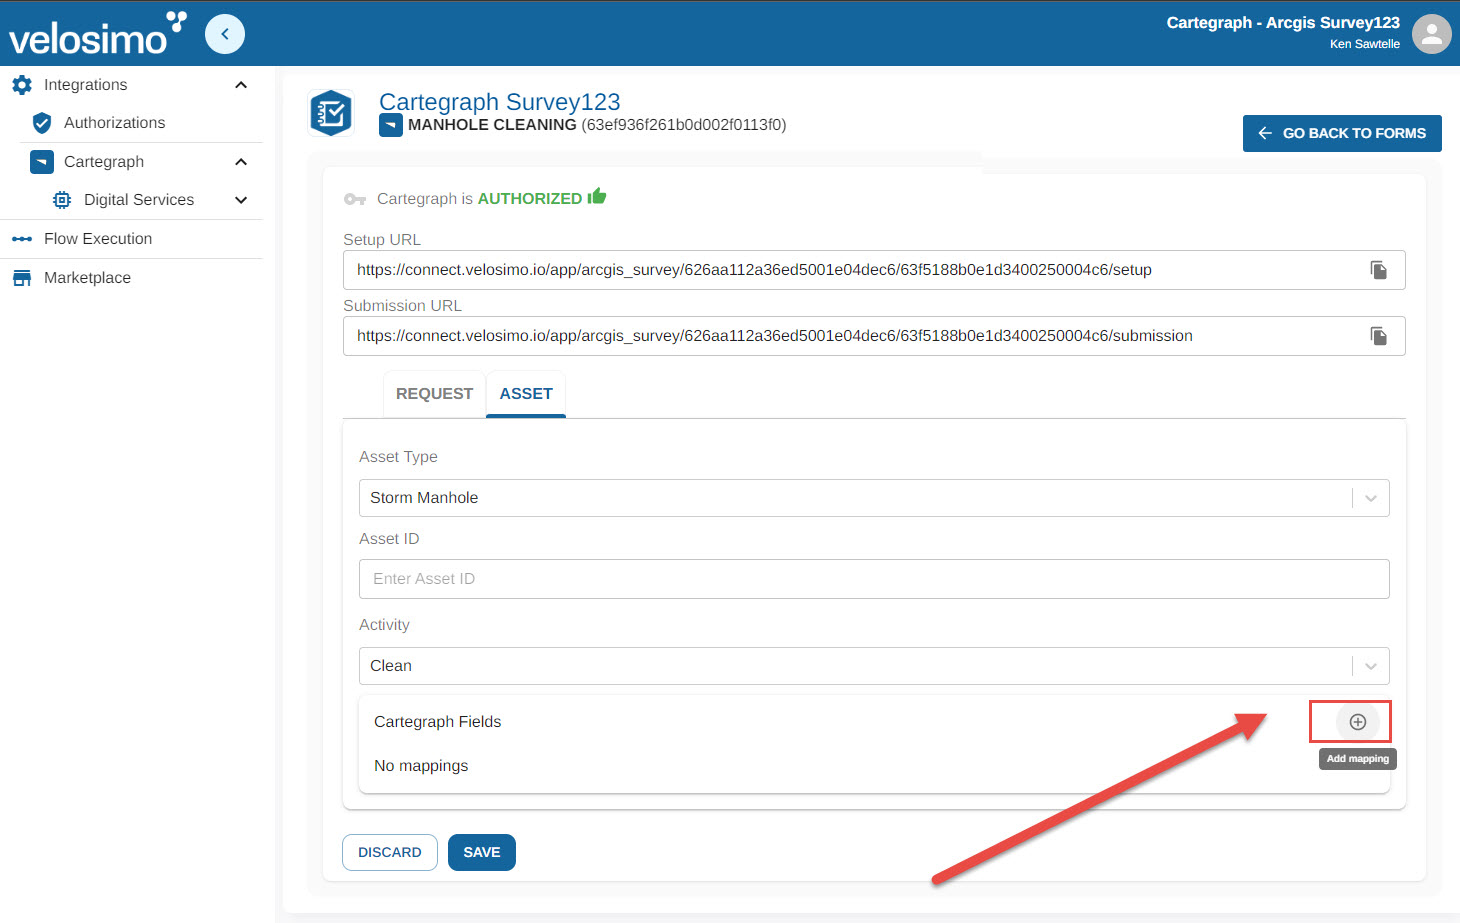
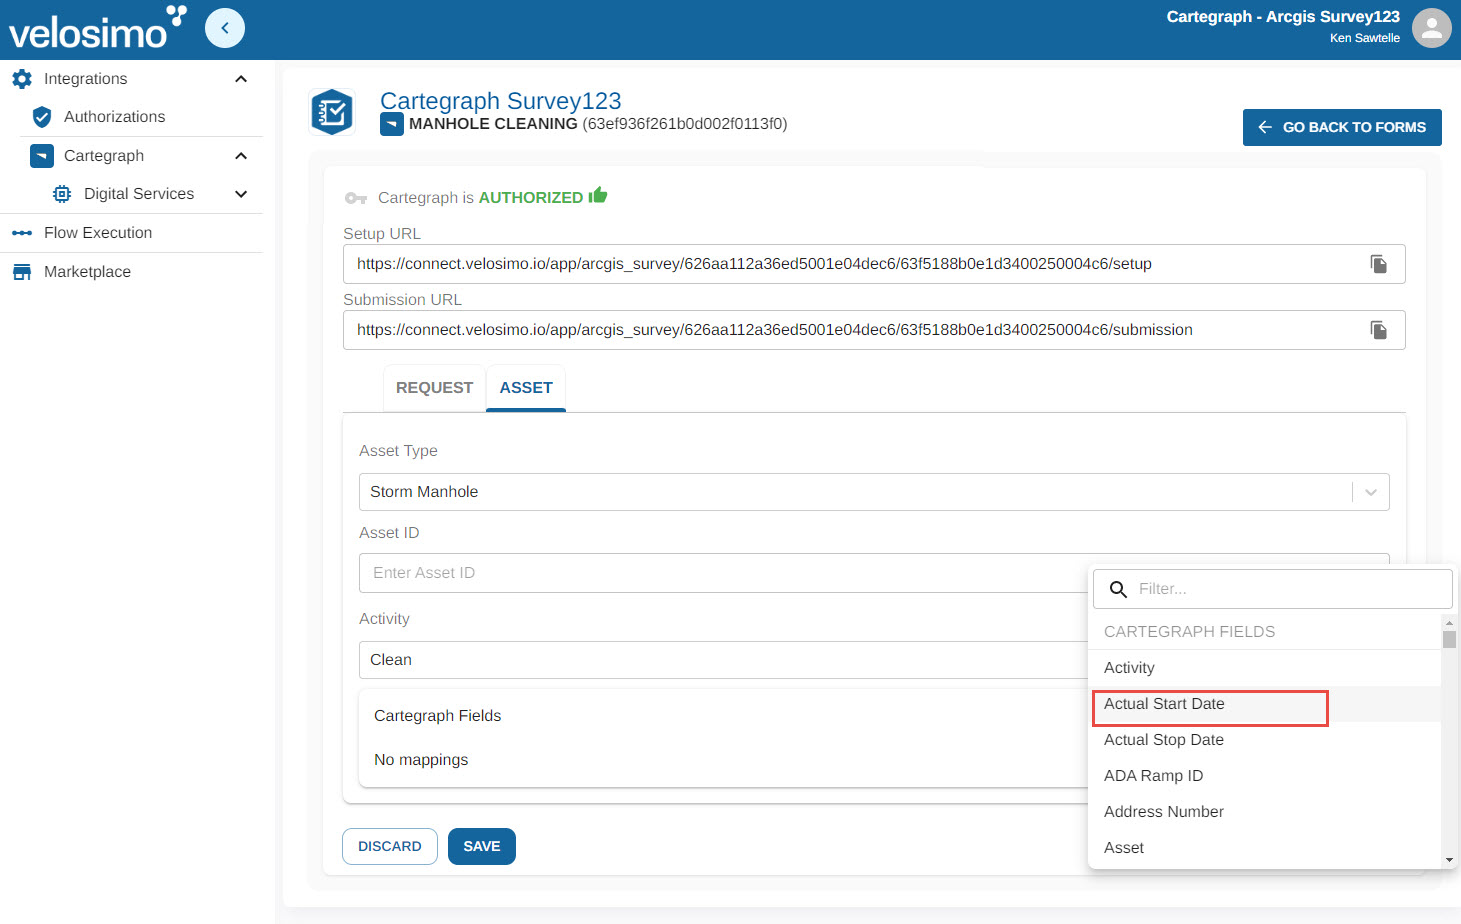
Next, you will see a popup with the Cartegraph fields. Select the first one you wish to map to your Survey123 form. In this example, we select 'Actual Start Date':
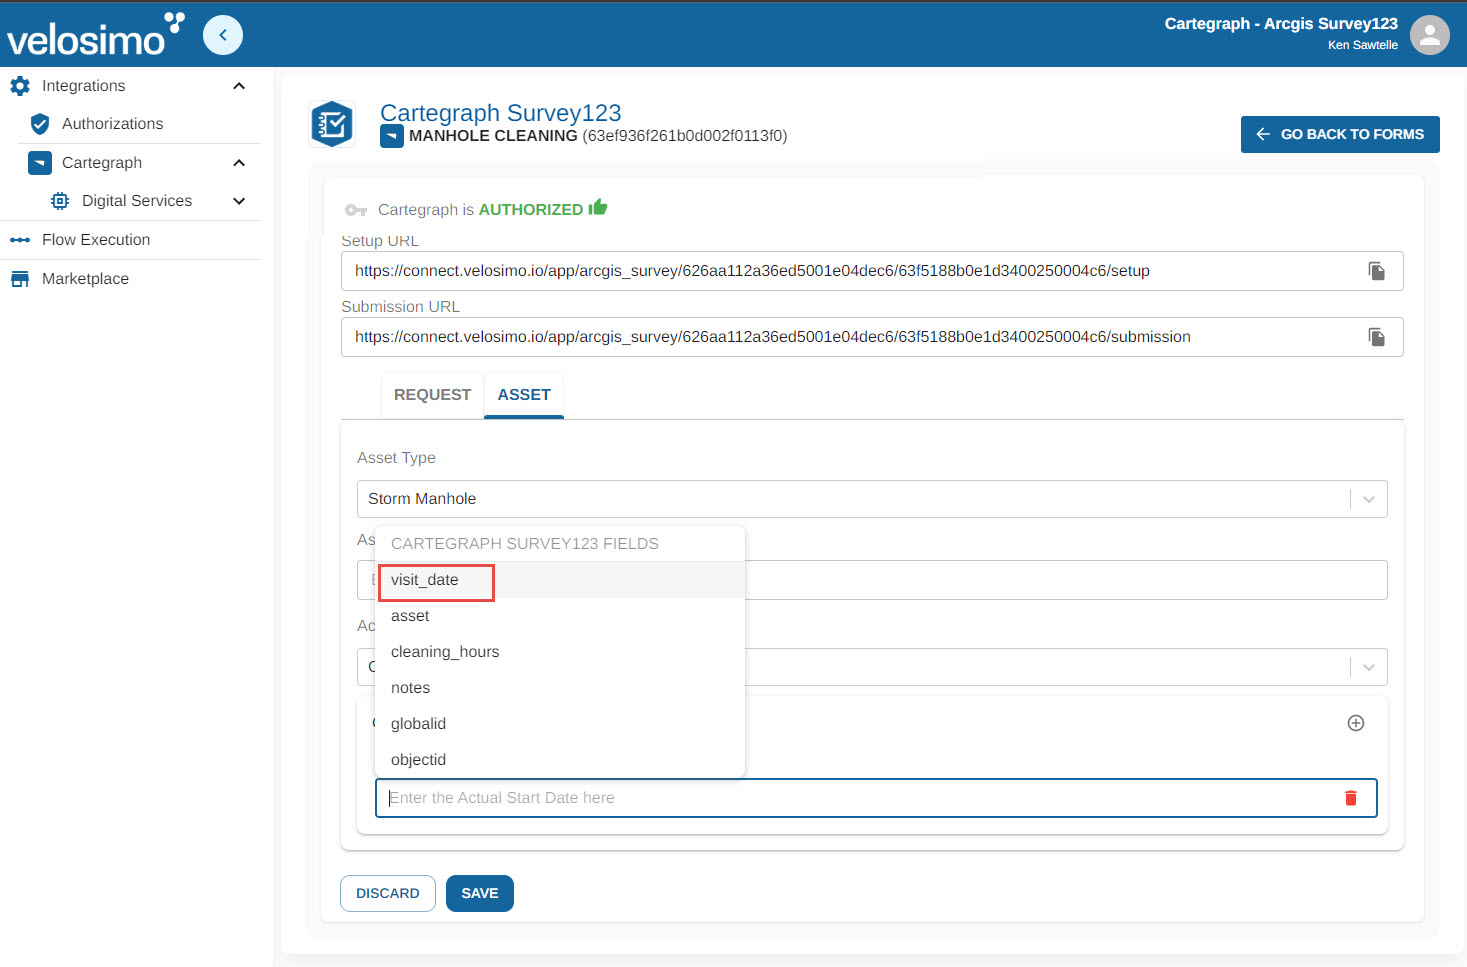
Next, you will see a popup showing the Survey123 fields. Select the one you want to map to the Cartegraph field and click 'Save'. In this example, we select 'visit_date':
Note that the Survey123 field names displayed are the key field IDs created by ESRI but should resemble the field names you entered when designing the survey form.
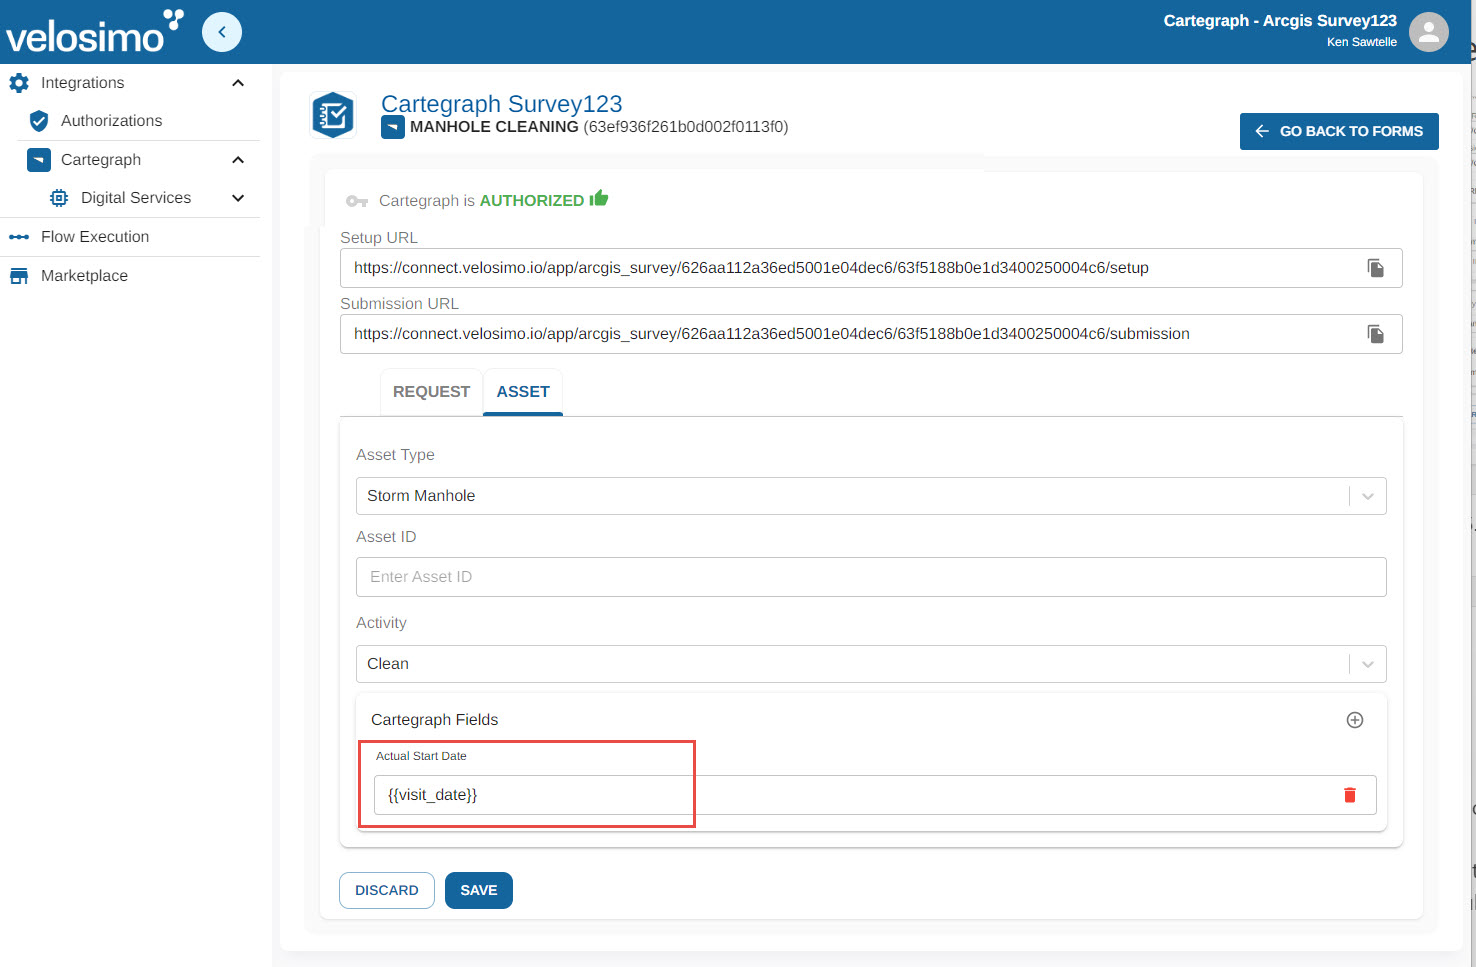
After mapping each field, your mapping screen will refresh, noting the new mapping:
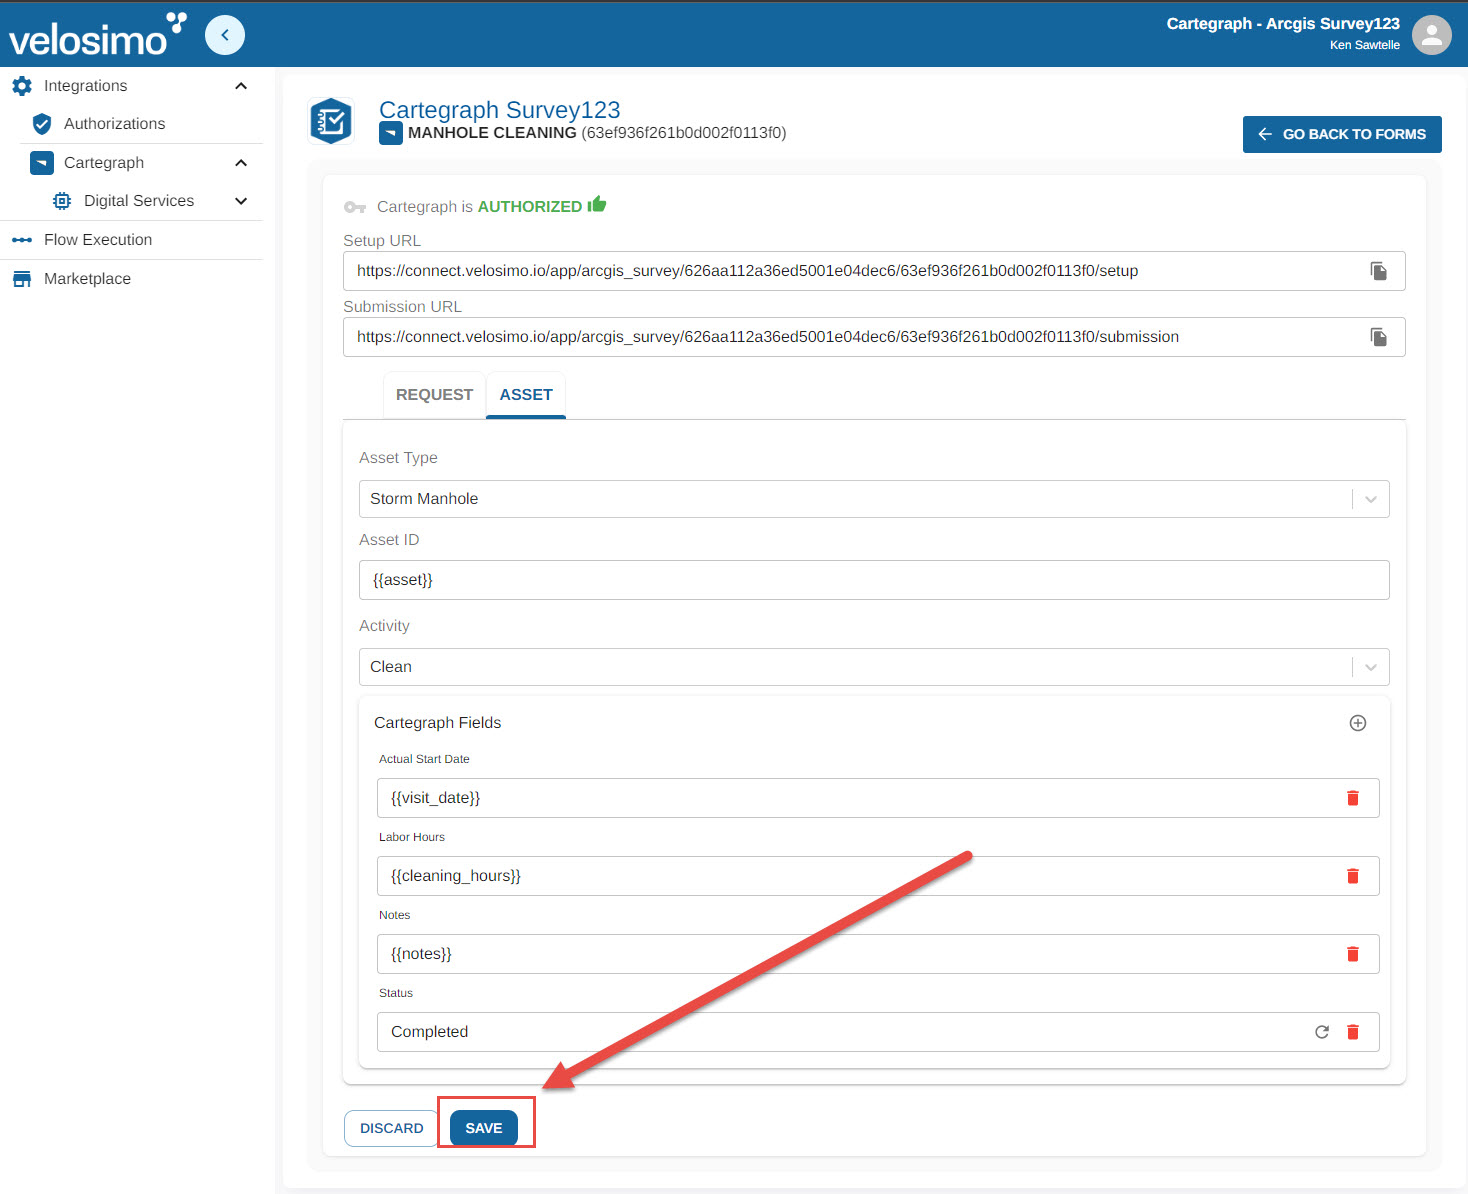
Once you have completed your mappings, click 'SAVE':
Set Survey123 Webhook for Normal Use
It's time to test our connector, but first, we need to set the payload webhook in Survey123 to normal survey collection: the Velosimo submission endpoint.
Copy the Submission URL from Velosimo
If you are not continuing from the prior step, log into Velosimo Admin for the connector and navigate to Digital Services 123 and select your Velosimo form completed in the prior step.
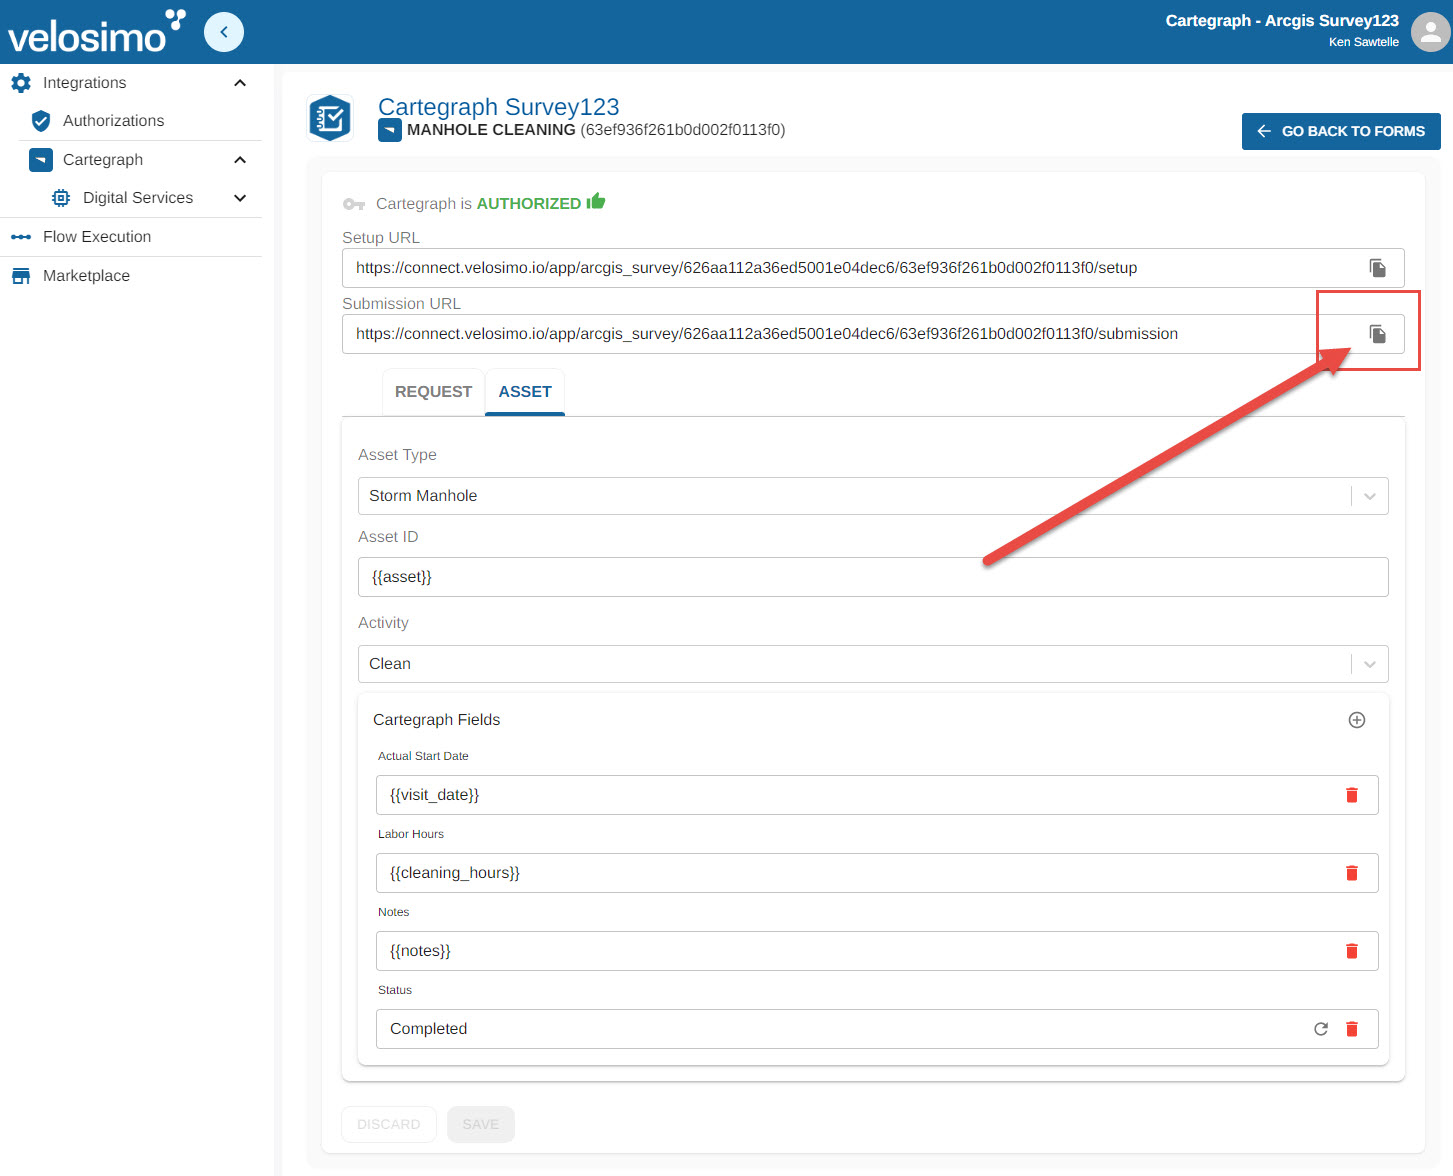
Click the 'Copy' Icon on the 'Submission URL' form field at the top of the page. This will place the URL into memory:
Paste the Velosimo Submission URL into the ArcGIS Survey123 webhook field
If you no longer have your Arc Survey123 window open from the previous steps, log in to ArcGIS Survey123 and navigate to the survey form configured in a prior step.
Click the 'Settings' menu item in the top right:

Click 'Webhooks' in the top left:
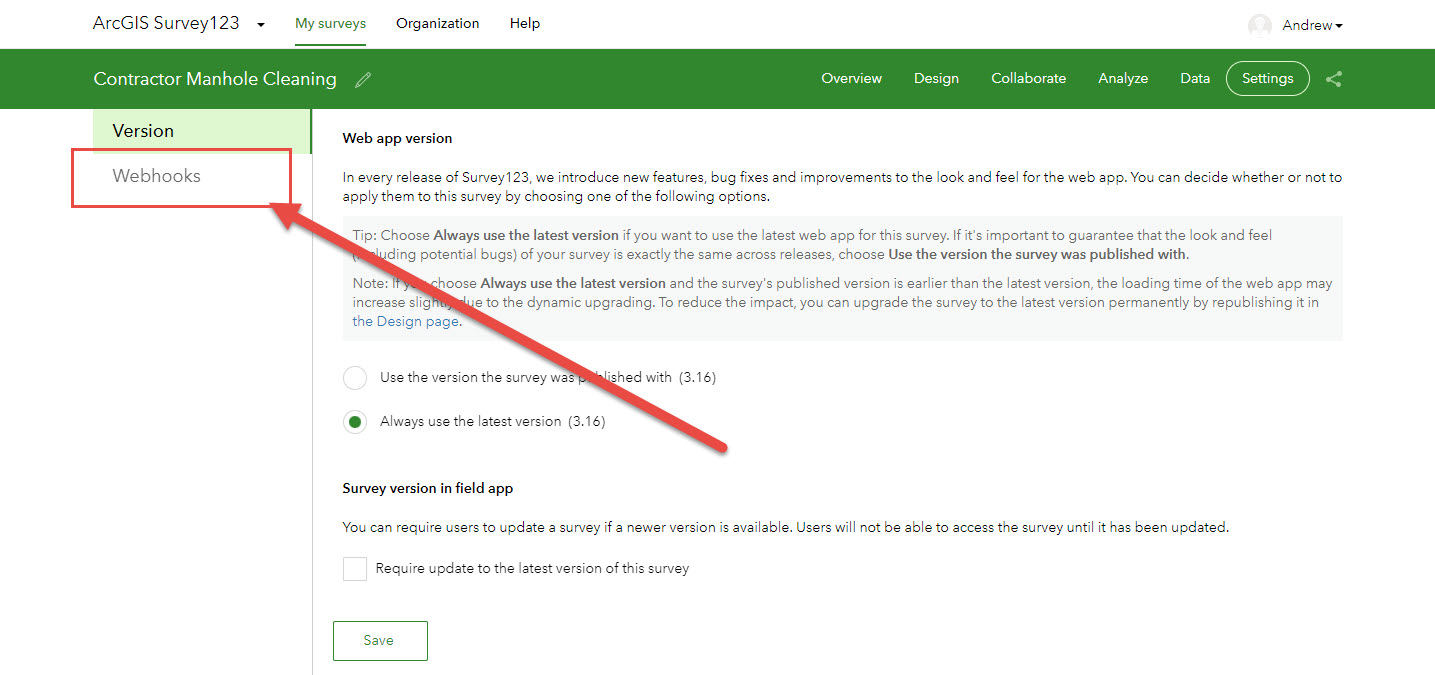
Click the edit pen under 'Operations':

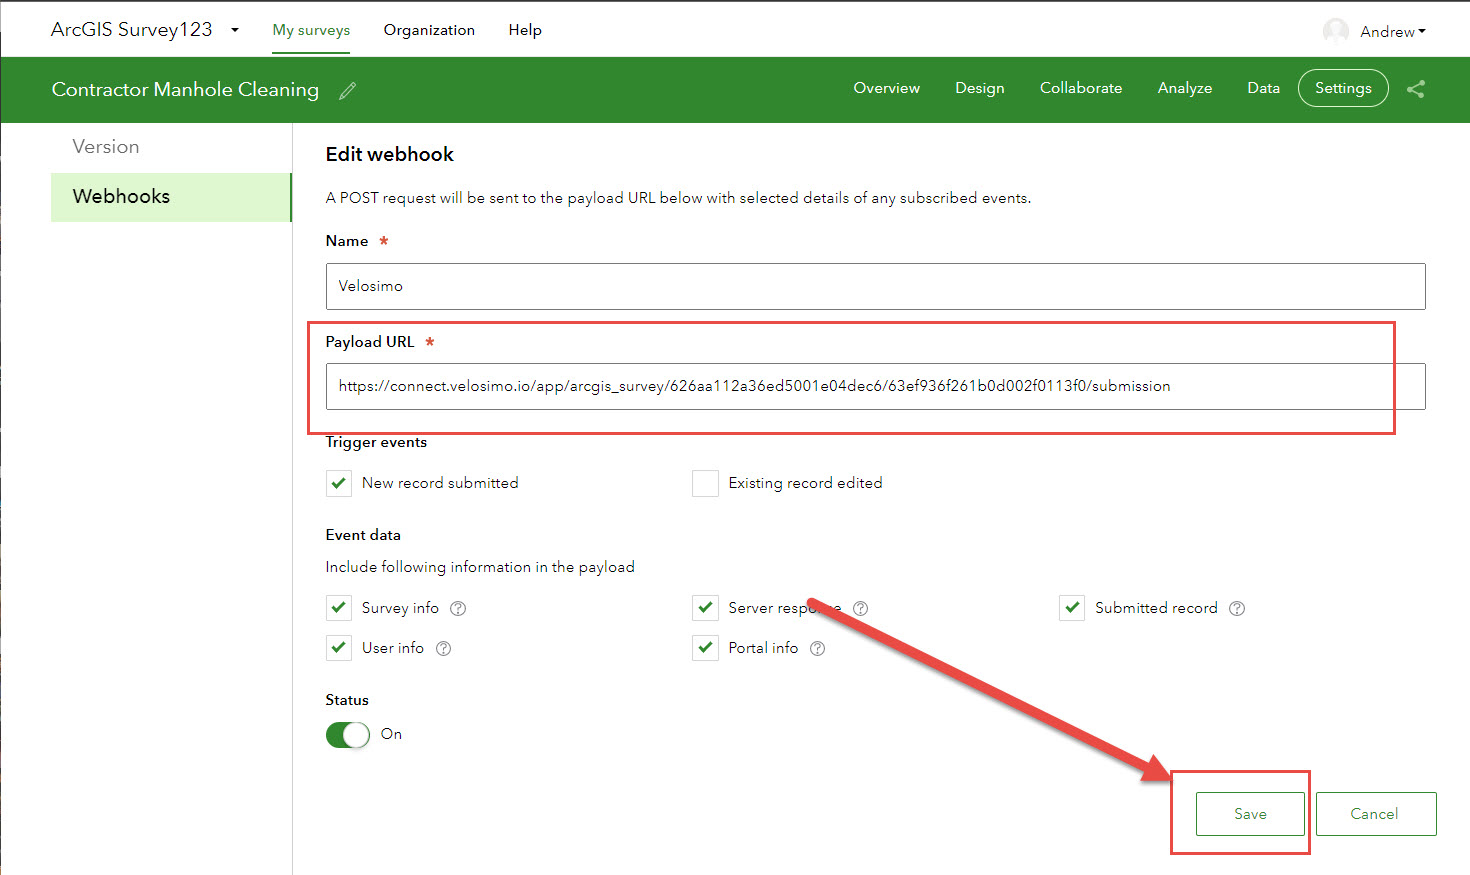
Paste the Velosimo Submission URL into the 'Payload URL' field and click 'Save':
You will be directed back to the webhook screen:

Congratulations, you have fully setup your Velosimo Connector for ESRI ArcGIS Survey123 to Cartegraph!
Updated 3 months ago
