Configure: Accela - Microsoft Sharepoint
Prerequisite
The Authorizing of Sharepoint should be set before:
Authorizing Microsoft Sharepoint )
Complete the Accela - Sharepoint configuration
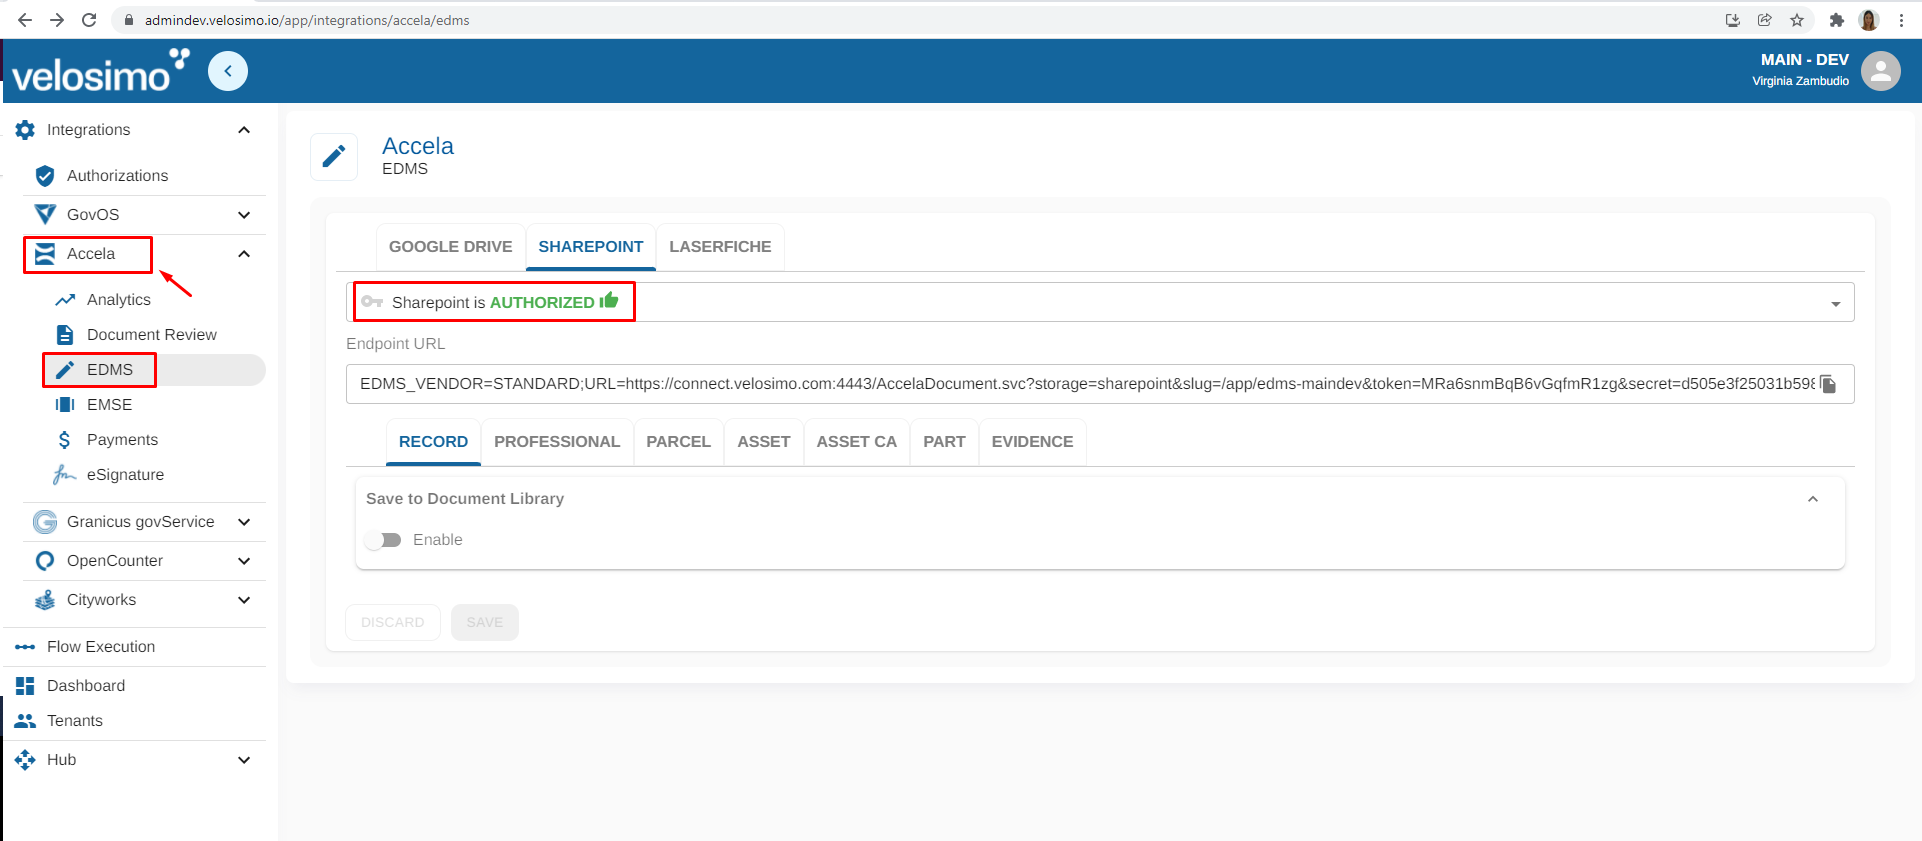
Open the velosimo application and go to Accela -> EDMS -> Sharepoint tab. The following screen will be displayed:

First step is to select a Sharepoint Authorization from the dropdown. Then complete with the Endpoint URL provided by velosimo.

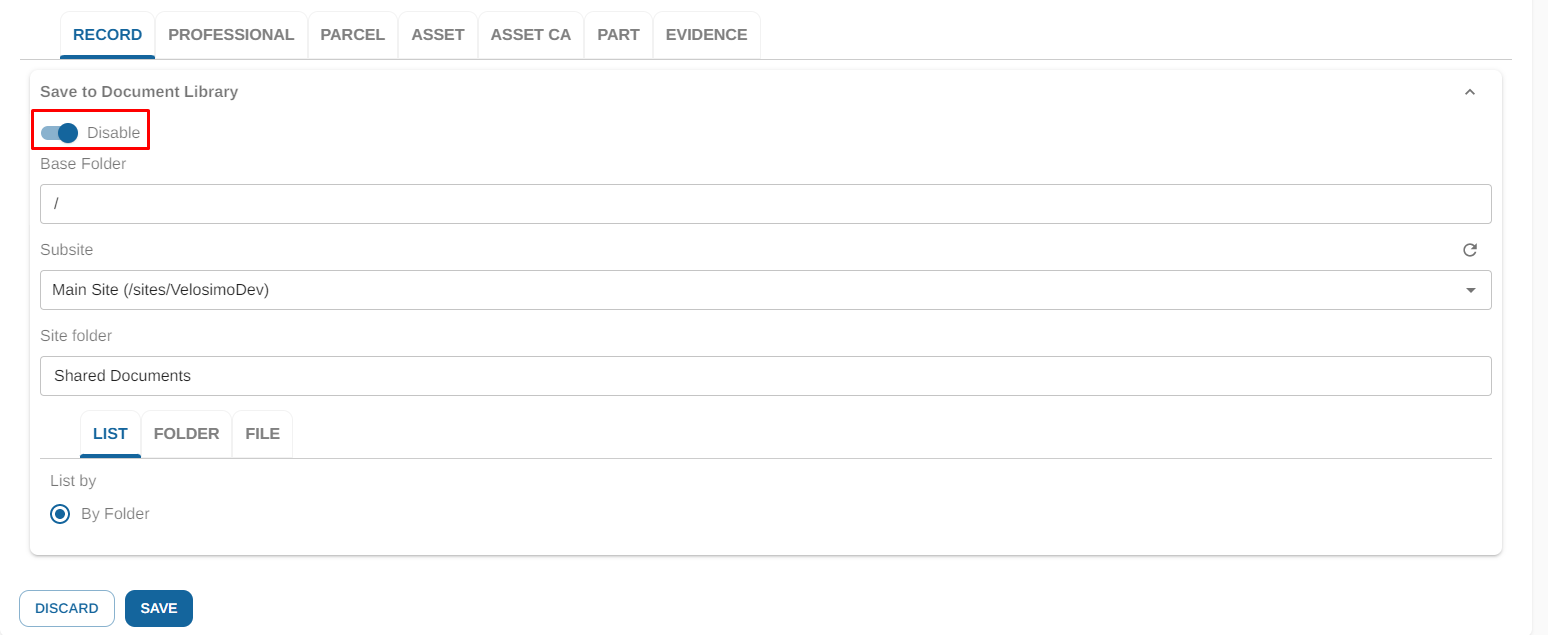
Click on Enable button. It will display the setting to configure the folder:

Complete the desired base folder path. It is the folder where the file will be uploaded. If the folder exists, the file will be uploaded there, if not, the folder will be automatically created before saving the file there.

Refresh the subsites using the icon. Select one of them.

Go to Folder tab

Complete subfolder and mappings:

Then click 'Save'.

Updated 3 months ago
