Configure: Accela + Tyler Cashiering
Setup Accela
- Install the VELOSIMO_PAYINVOICE script provided to you by Velosimo.
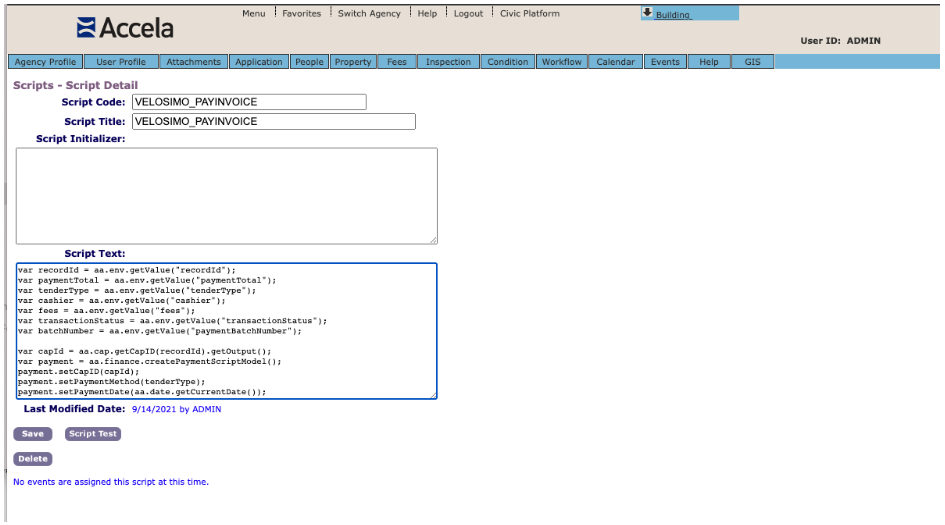
Install the VELOSIMO_PAYINVOICE script
Setup Tyler Cashiering
- To get started, go to the Admin Dashboard in Tyler Cashiering and click on the External Systems options on the Dashboard.
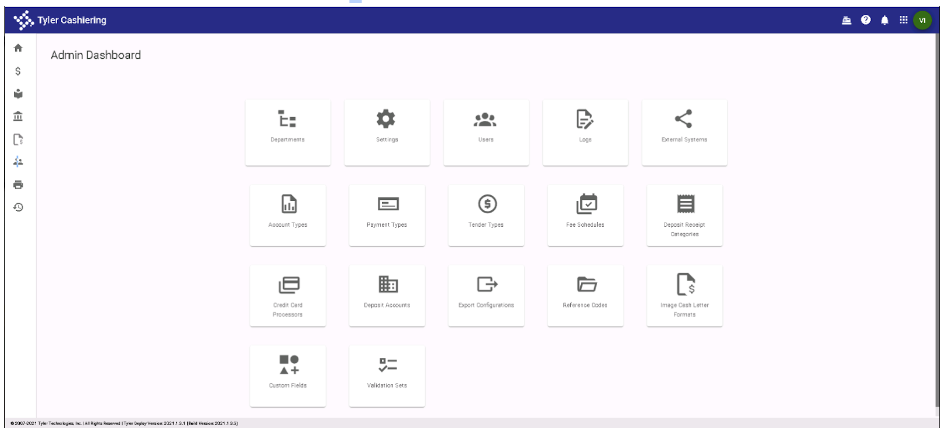
Admin Dashboard
- This will display a list of currently configured External Systems. Click the + sign on the top right of the list. This will start the process of adding a new External System.
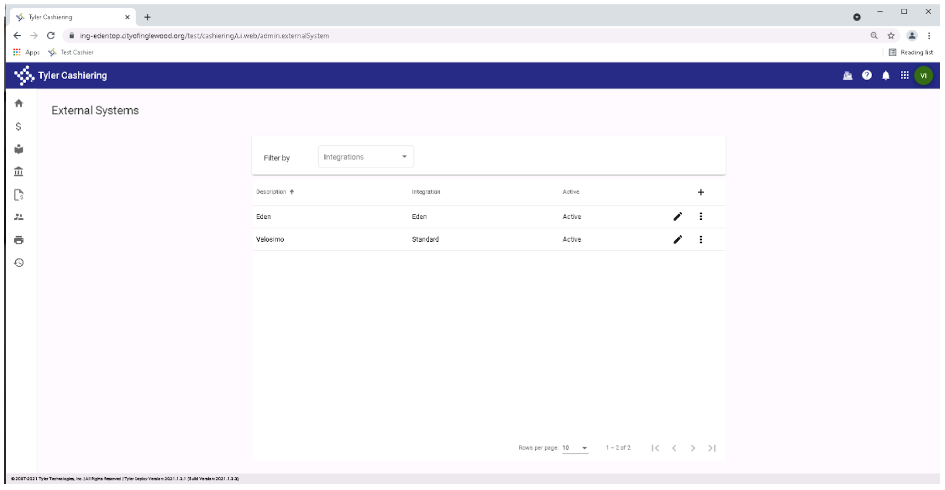
External Systems
- To add Velosimo as a new External System, select V2, enter Velosimo into the Description field, select Standard from the Integrations drop-down, and set the Authentication Type to Basic and make sure that it is Active. Next enter the Endpoint Address URL, Access ID, and Access Password provided to you by Velosimo into the fields on the form. Then scroll down and add two additional settings for the X-Tenant-Access-Key and X-Tenant-Access-Token values provided by Velosimo. Once done, click Save at the bottom of the dialog to save the new External System.
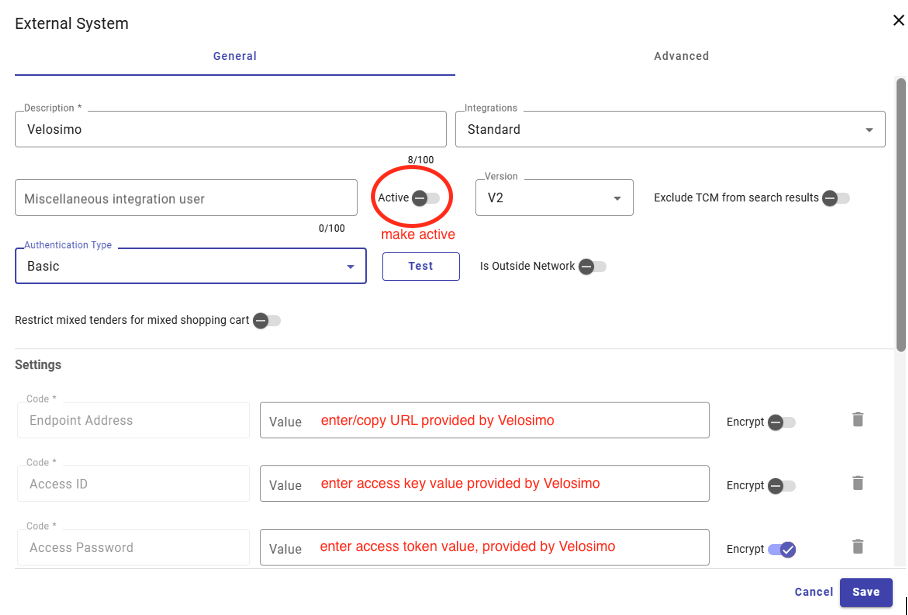
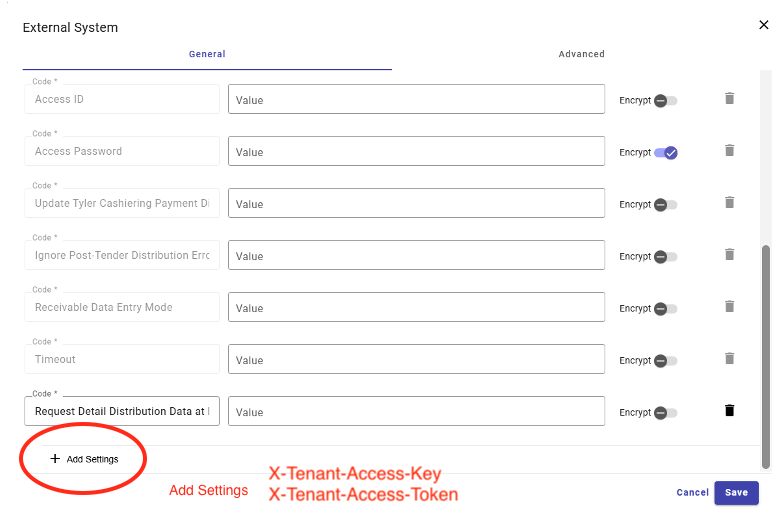
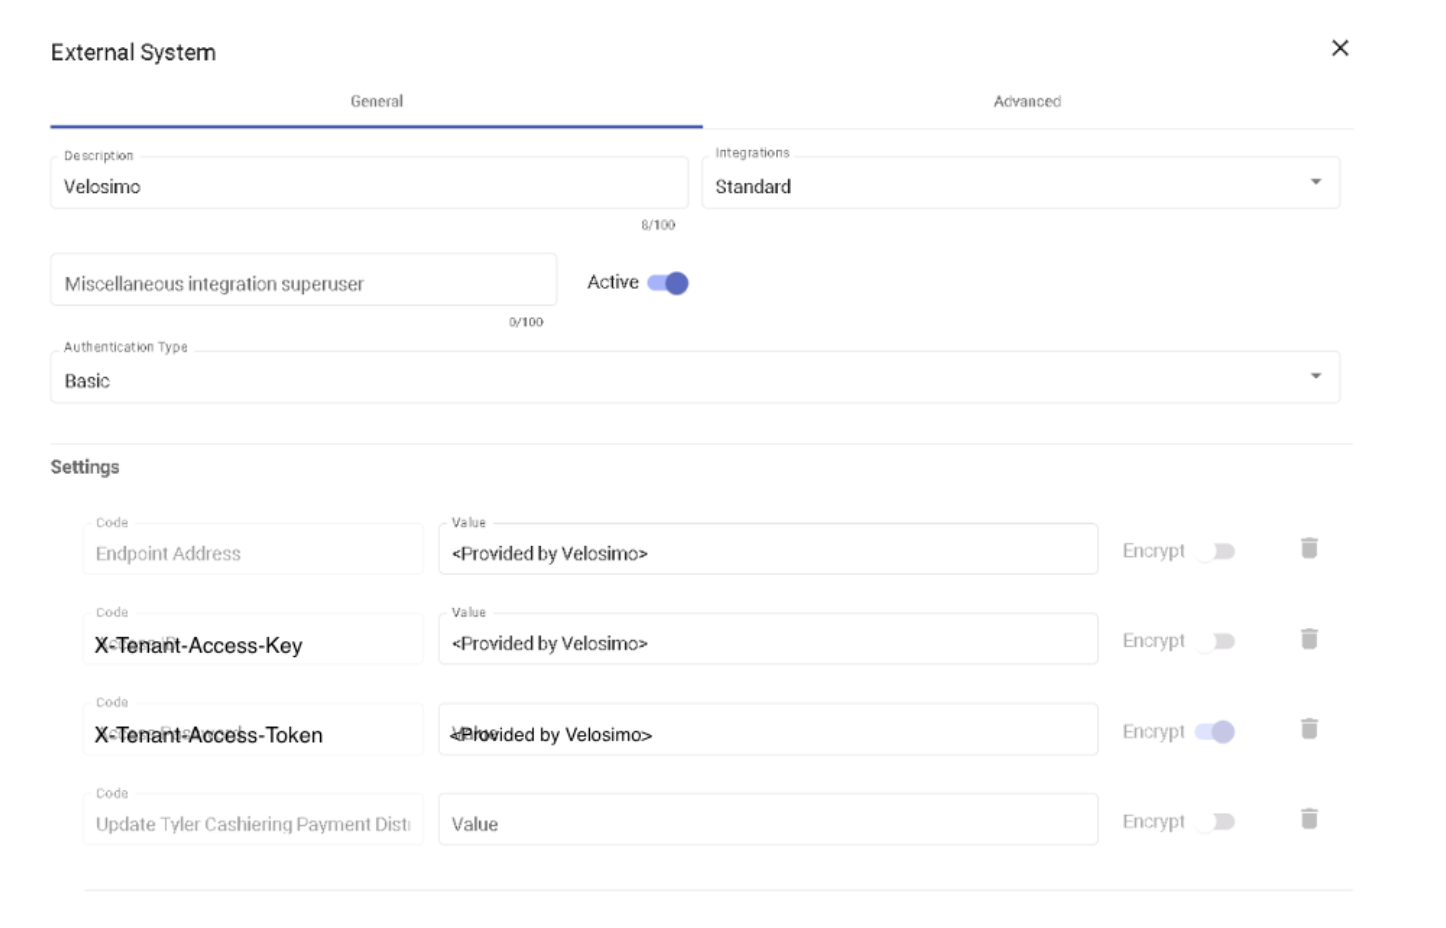
Create new External System
- After clicking Save on the New External System dialog you will now see Velosimo in the list of External Systems
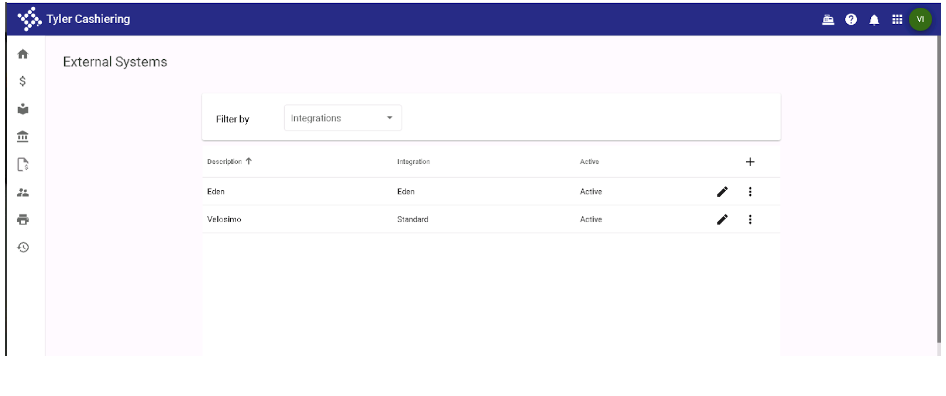
External System created
- Next go back to the Admin Dashboard and navigate into Payment Types
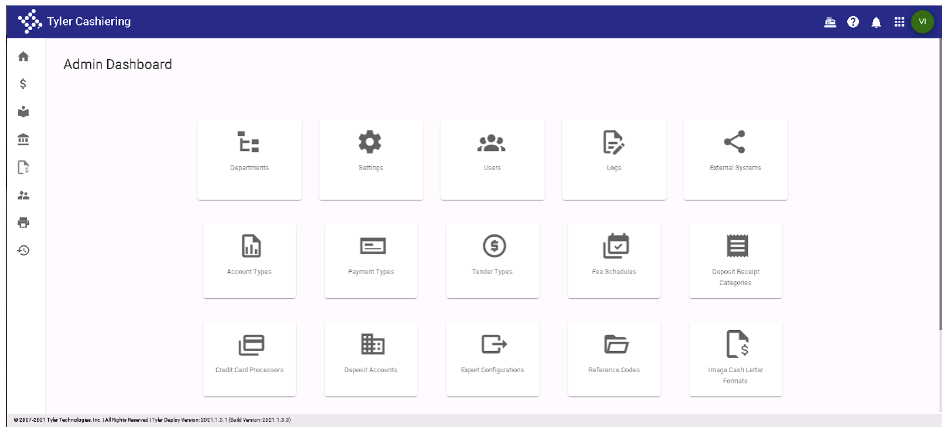
Admin Dashboard- Payment Types
- On the Payment Types screen click the + to add a new payment type
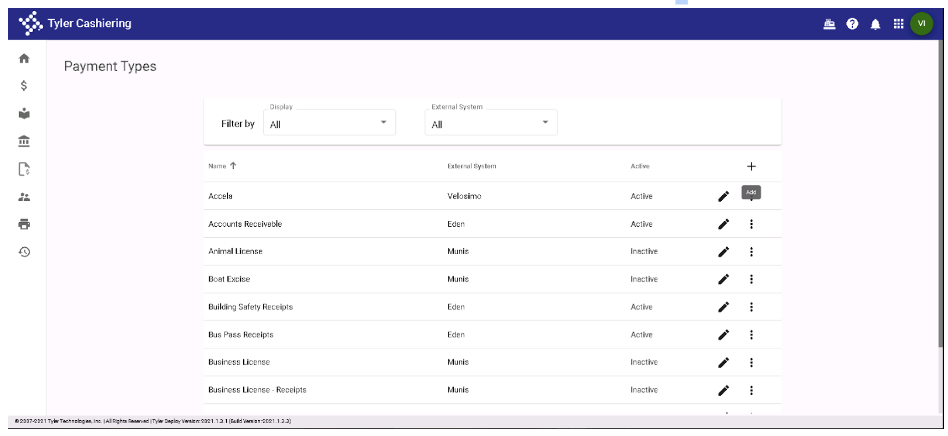
Payment Types
- On the new Payment Type screen select Velosimo from the External System dropdown list and then select Accela from the Payment Type list. Enter Accela as the name, code as ACC (or whatever you desire) and a description. Next navigate to the Searching tab.
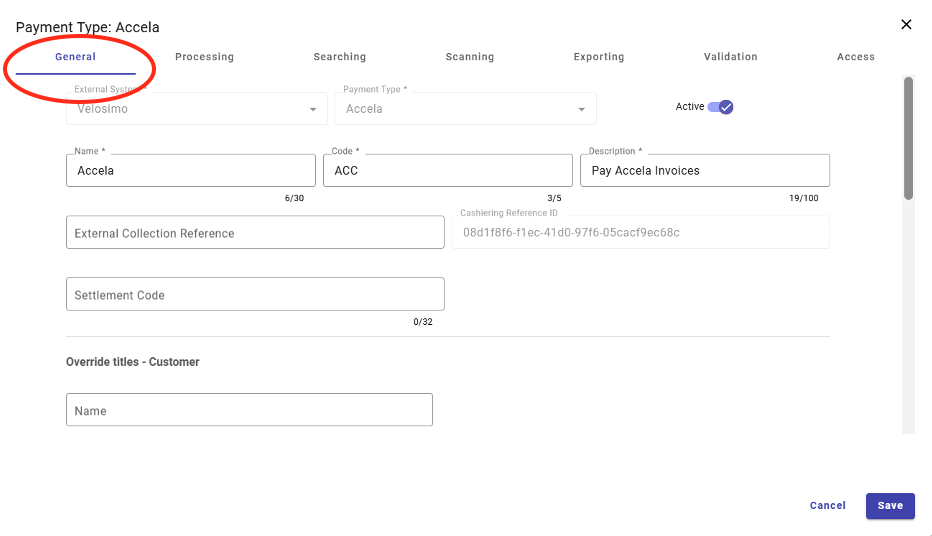
Payment Type: Accela
- On the Searching tab enable the Record Address and Record ID options
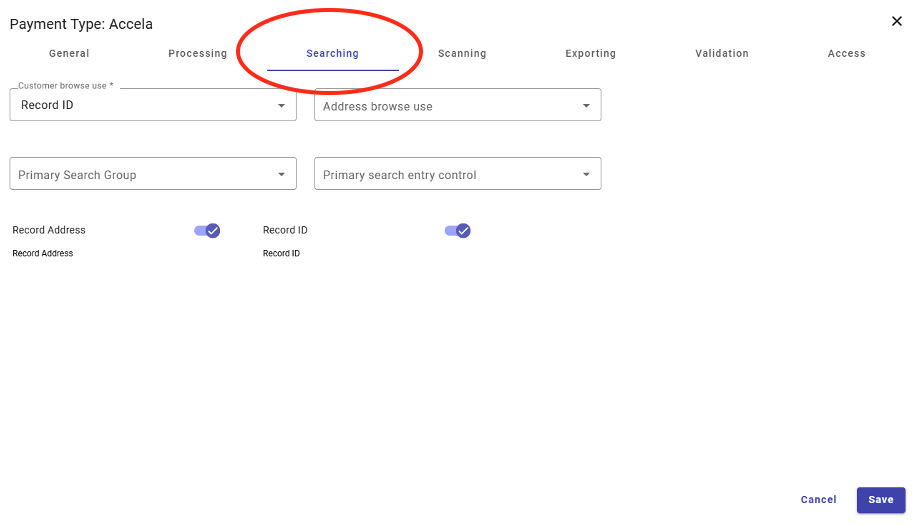
Payment Type: Accela-> Searching Tab
- Click Save at the bottom of the dialog to add the new Payment Type. You will now see Accela listed as a Payment Type in the list of payment types.

Accela is listed as a Payment Type
- At this point the integration with Accela is now configured and ready for use. Navigate to the Home page and start or resume a batch.
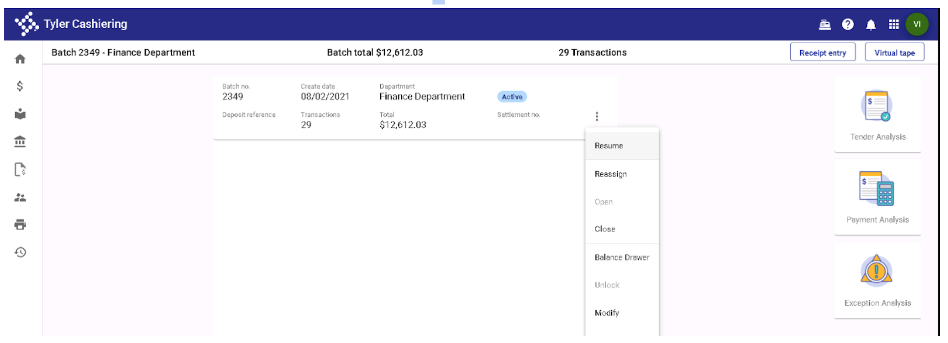
Home Page- Options
Updated 3 months ago
