PayPal PayFlow Gateway Setup and Configuration
Pre-requisites
- PayPal PayFlow Pro Gateway account with Test and Live access
- PayPal Pay Flow Pro account that supports Hosted Checkout Pages
- PayPal Manager API User - A PayPal Manager API user is a specific user account created with designated permissions for API access. This user is used for system integrations rather than manual logins.
- To create an API user in PayPal Manager, you must call PayPal Support to add the API user and assign the appropriate privileges.
PayPal Support
888-883-9770, option 2 (gateway support)
Hours of operation: Monday - Friday, 8:00 a.m. to 8:00 p.m. Central time
- To prepare for the call with PayPal Support to create the API User, you'll need to provide them with:
-
- Contact Name: A descriptive name, such as "API User"
- Email: An email address
- User Login Name and Password: A unique username and password for this new API-specific user.
- Select a Predefined Role: Choose the API_FULL_TRANSACTION role
- Set "User Status" to Active.
- Confirm with PayPal support the values that are required for Velosimo to connect to the API User account for the integration, this should include the values for Partner, Merchant Login, User and Password. Take note of these values as they will need to be added to Velosimo before testing can begin.
-
- If you have IP Whitelisting enabled for your PayPal account, please add these Velosimo IPs to your IP whitelisting settings, which may include both the manager login as well as API access.
- 34.202.31.200
- 52.0.244.9
- 54.174.42.90
PayPal Portal Configuration Steps
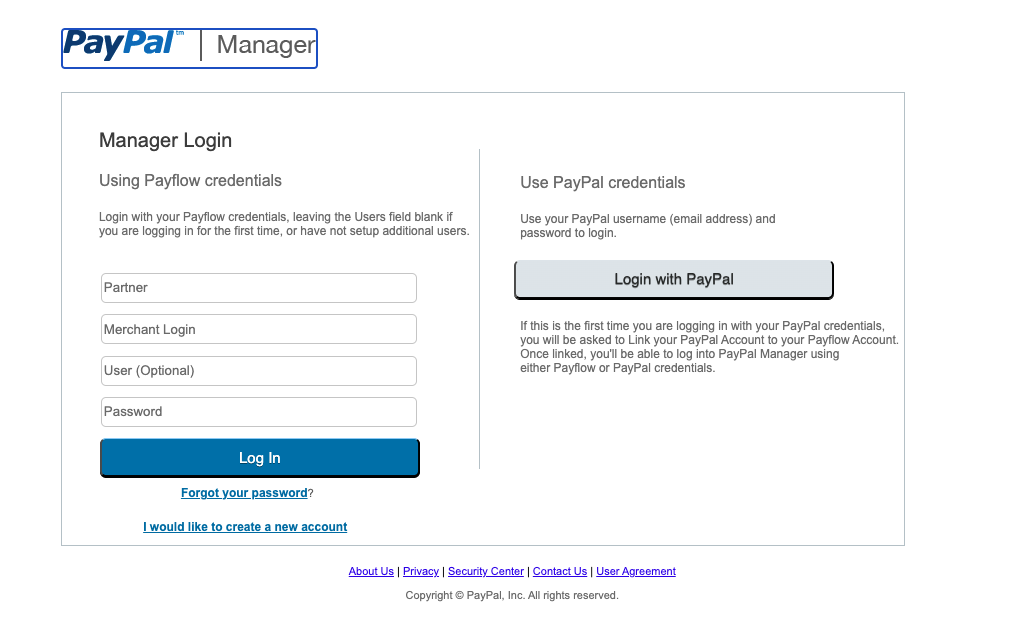
Login to your PayPal Manager Account for the Admin user
Navigate to manager.paypal.com and sign in with the following parameters:
- Partner - The Payflow partner.
- Merchant Login - The Merchant Login ID that you use to log into PayPal Manager.
- User - The name of the user whom you added to your account for API transactions.
- Password - The password of the user whom you added to your account for API transactions.
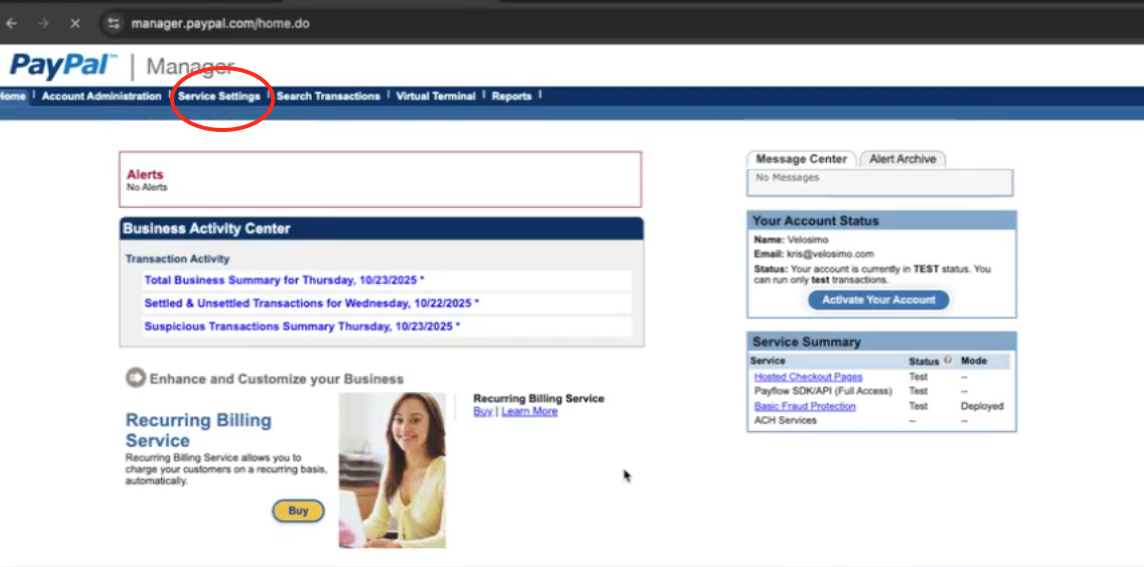
Once logged in, please validate that the API user has been added to your account.
Service Settings
Navigate to the Service Settings menu
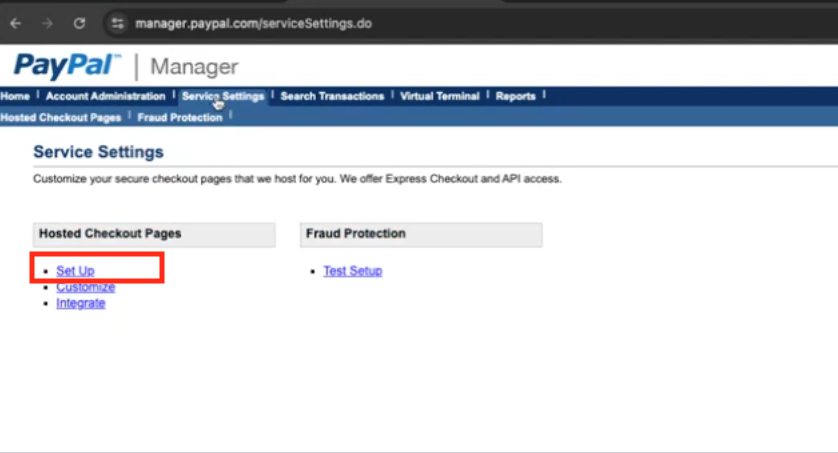
Hosted Checkout Pages Setup
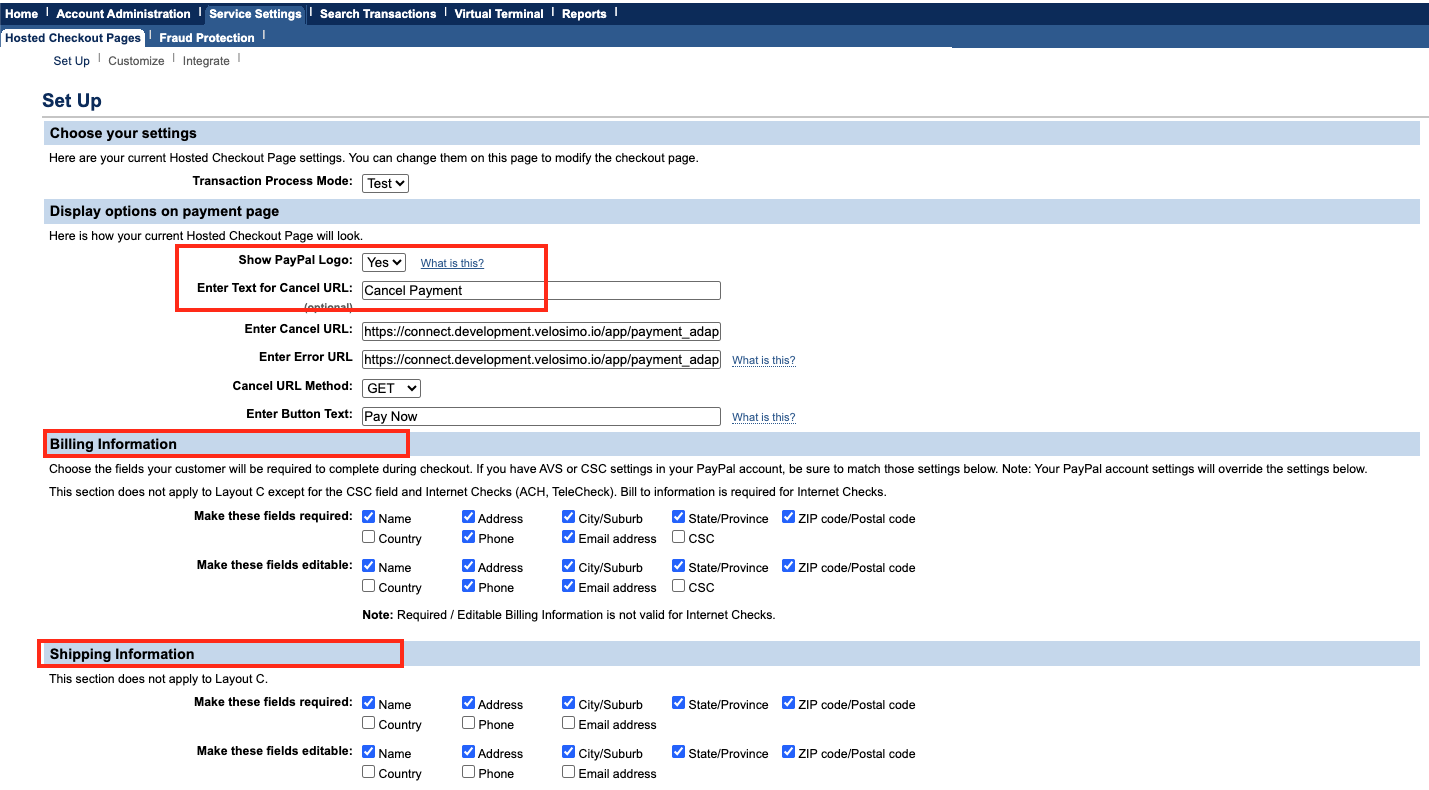
Select Set Up under the Hosted Checkout Pages menu
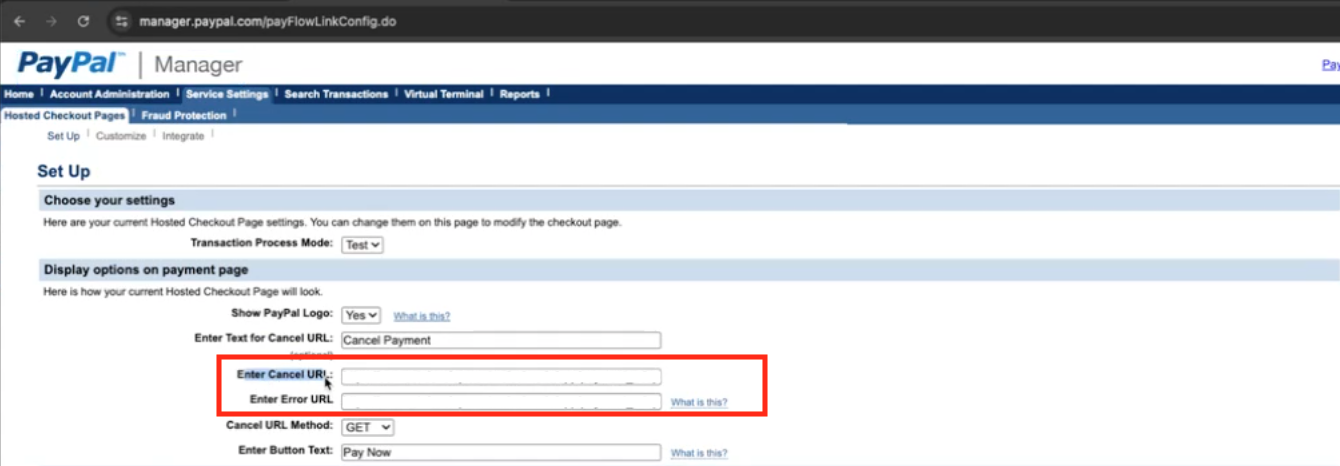
Enter Cancel URL and Error URL values in the Display options on payment page section
The URLs will be provided to enter in these fields
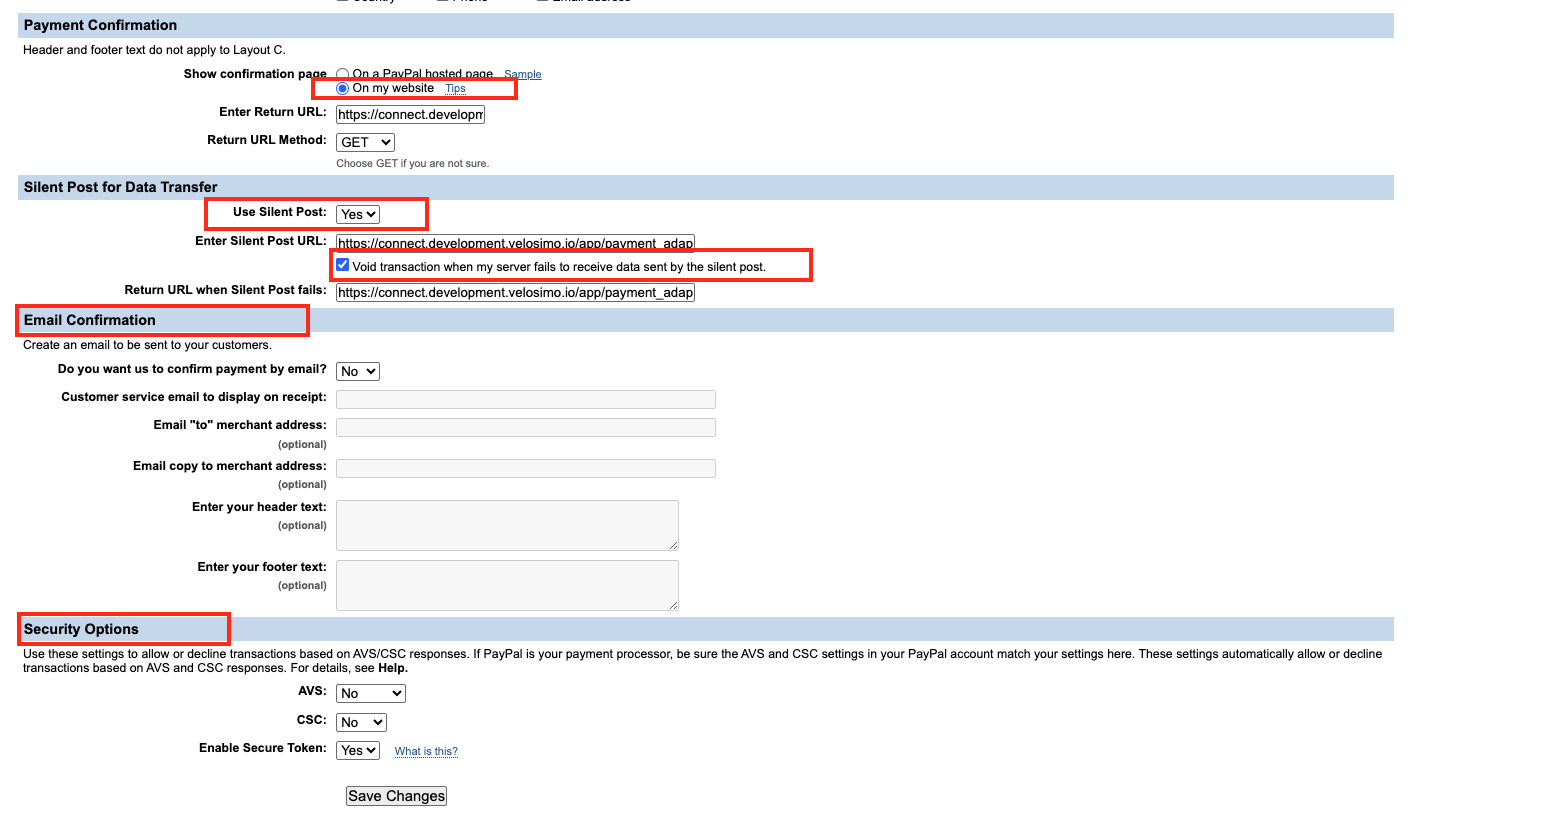
Enter Return URL and settings for Payment Confirmation

Enter Silent Post URL and Return URL when Silent Post fails in the Silent Post for Data Transfer section
The URLs will be provided to enter in these fields
Make sure the checkmark is also checked as shown in the screenshot below

Enable Secure Token in the Security Options section

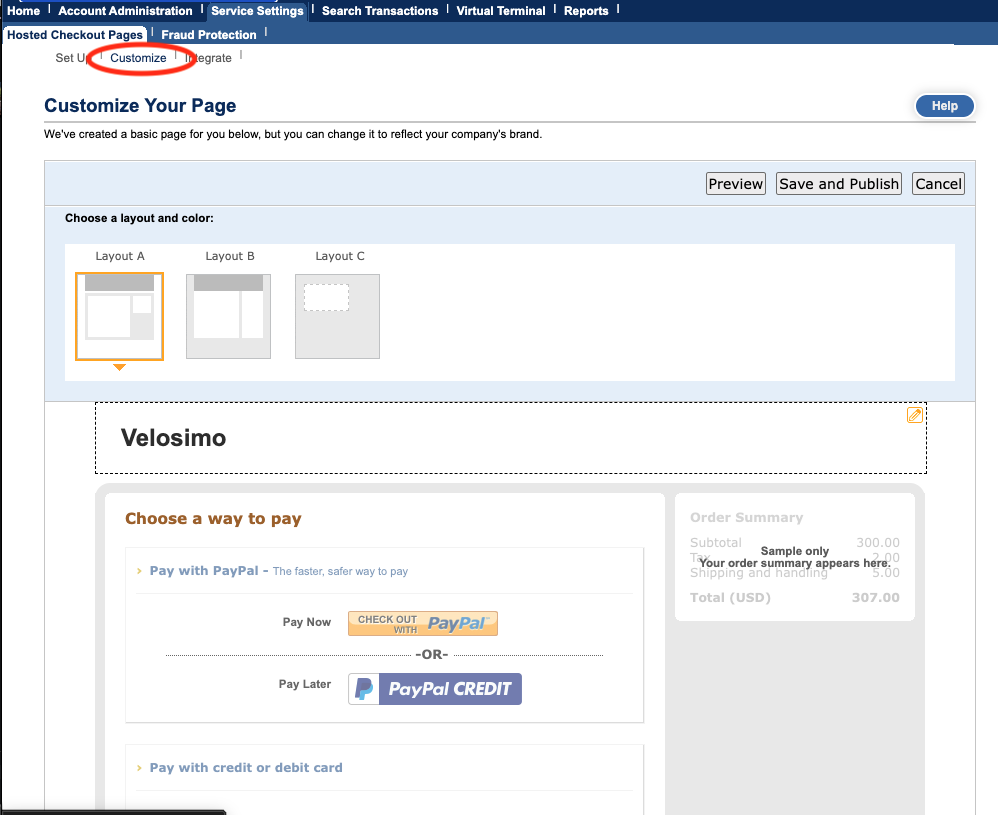
Customize your configuration and Hosted Checkout Pages
If you haven't already customized the hosted pages to meet your business requirements, please review the following sections of the Hosted Checkout pages setup and customizations.
Customize your setup to meet your business needs
Please research and set your PayPal Payflow Pro AVS (Address Verification) and CSC (Card Security Code) settings according to your business requirements and ensure that you include this in your testing use cases.
Customize the layout
This is the end of the PayPal Portal setup and configuration. Once completed please notify your implementation team.
Test credit card information
To test credit card processing, use this test credit card information:
Visa number - 4111 1111 1111 1111
Expiration date - any future MM/YY
Card security code - 123
To test approved transactions, the amount needs to be under $1,000
To test transactions with an error, the amount needs to be between $1,001 and $2,000
To test declined transactions, the transaction amount needs to be over $2,001
ACH Testing information, per PayPal's documentation: https://developer.paypal.com/braintree/docs/guides/ach/testing-go-live/
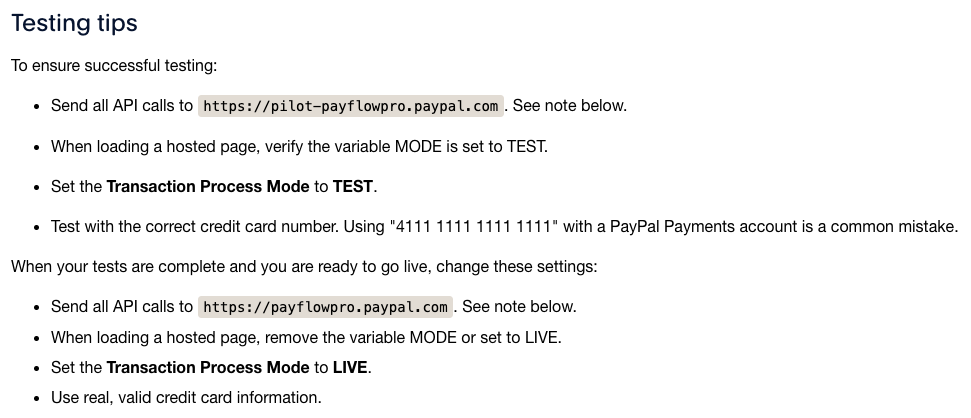
Testing Tips provided by PayPal
Updated 5 months ago