
Connecting to the Velosimo MCP
Add the Velosimo MCP server to Claude as a custom connector in about 5 minutes.
This guide walks you through adding the Velosimo MCP server to Claude as a custom connector. When you're done, Claude can work with your Velosimo tenant (collections, flows, tasks and more) right from a chat.
Time needed: about 5 minutes
Before you start
You'll need:
- The Claude desktop app, signed in to your Claude account
- A web browser such as Google Chrome for the one-time sign-in step
- The following details, provided by Velosimo:
| Item | Value |
|---|---|
| Connector name | Provided by Velosimo (for example, Velosimo PROD) |
| MCP server URL | Provided by Velosimo |
| OAuth Client ID | Provided by Velosimo |
| OAuth Client Secret | Not needed. Leave blank unless Velosimo tells you otherwise. |
Keep your Client ID privatePaste it only into Claude's connector settings. Don't share it in chats, email or screenshots.
Step 1: Open Settings
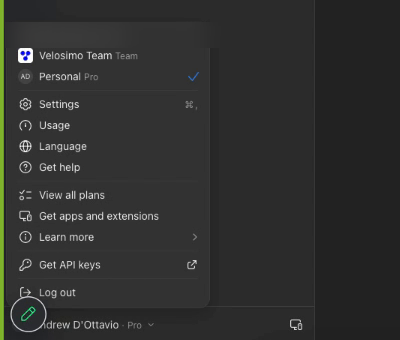
Click your name in the bottom-left corner of Claude, then click Settings.
Step 2: Go to Customize
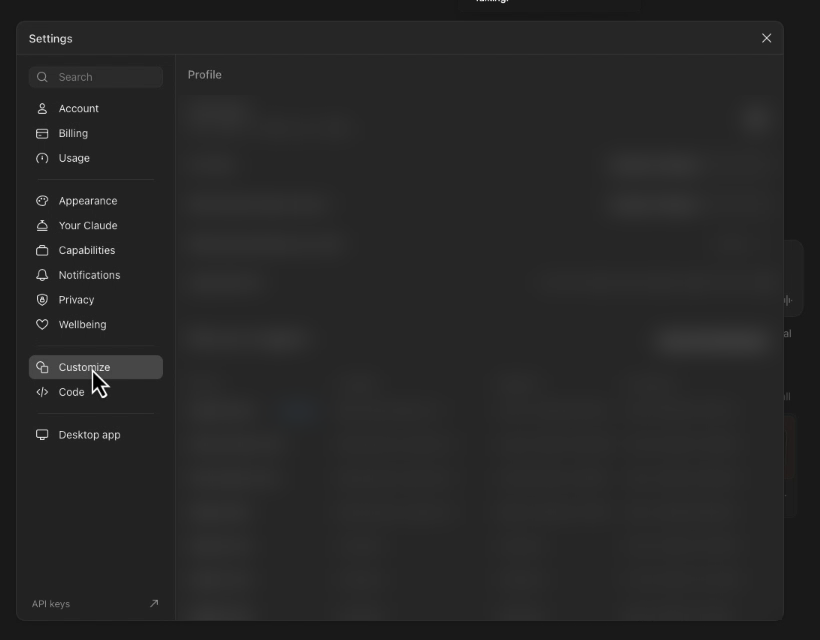
In the Settings menu on the left, click Customize.
Step 3: Add a custom connector
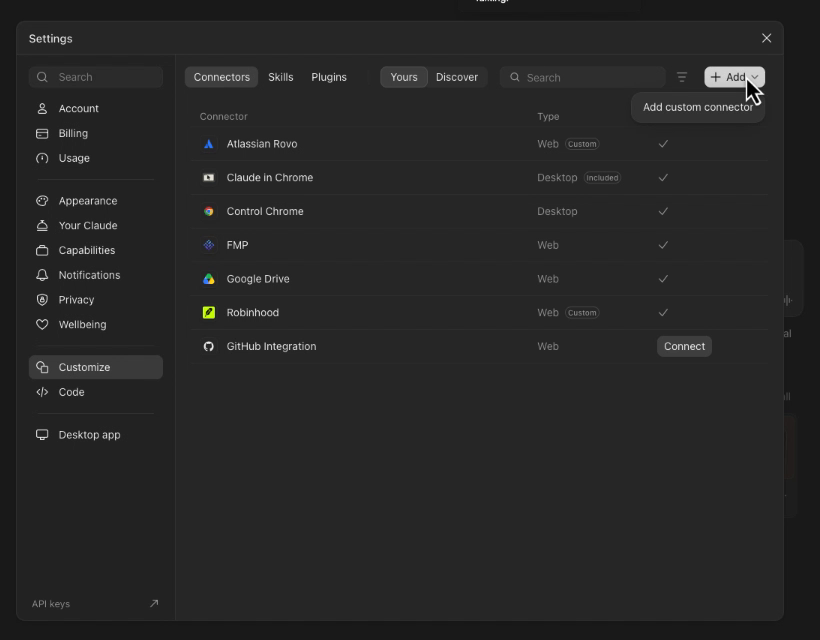
On the Connectors tab, click + Add in the top-right corner, then choose Add custom connector.
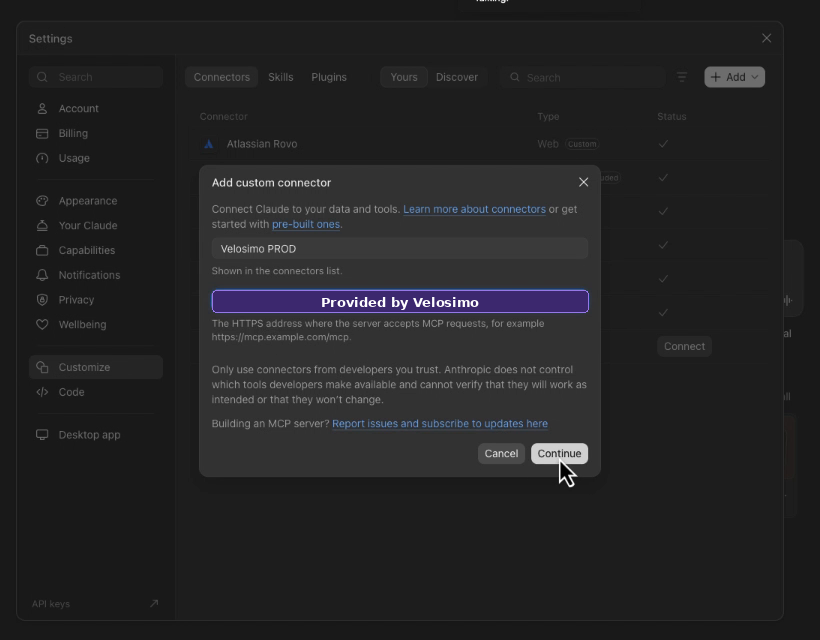
Step 4: Name the connector
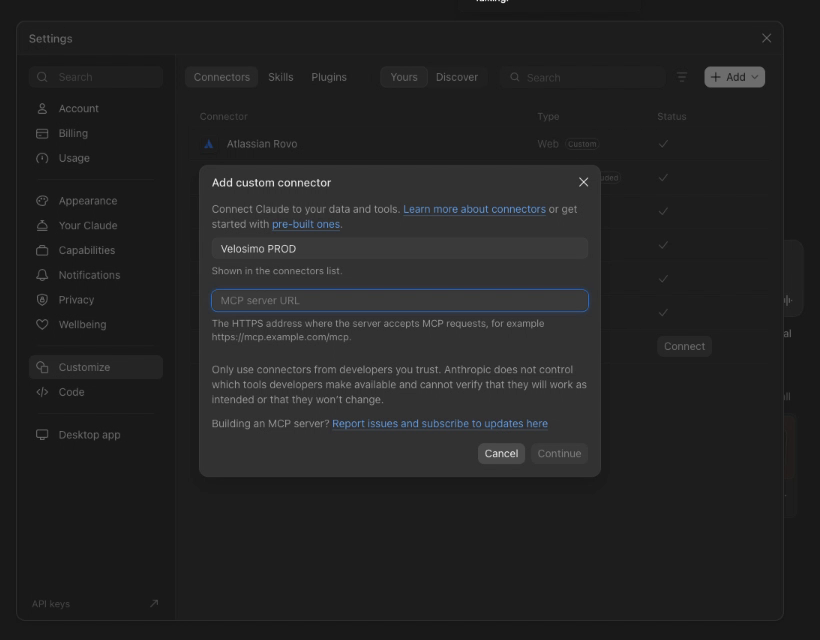
In the Add custom connector window, type the connector name provided by Velosimo (for example, Velosimo PROD). This is the name you'll see in your connector list.
Step 5: Enter the MCP server URL
Paste the MCP server URL provided by Velosimo into the MCP server URL field, then click Continue.
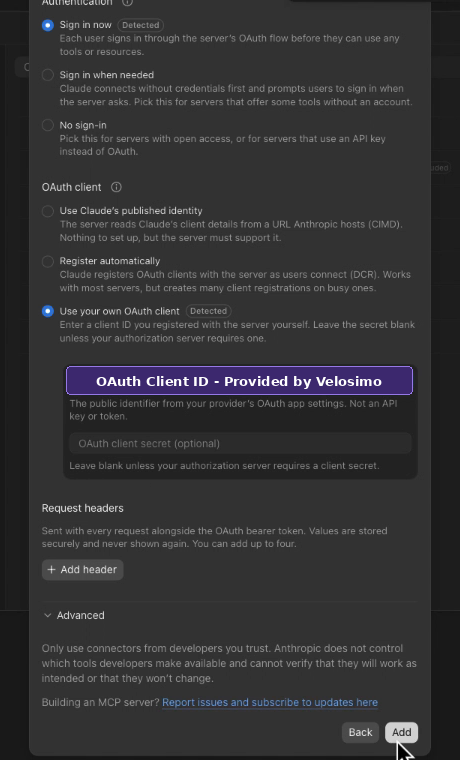
Step 6: Set up authentication
Claude detects the right settings for you. Confirm the following:
- Under Authentication, Sign in now is selected.
- Under OAuth client, Use your own OAuth client is selected.
- Paste the OAuth Client ID provided by Velosimo into the OAuth client ID field.
- Leave OAuth client secret blank.
- Leave Request headers and Advanced as they are.
Click Add.
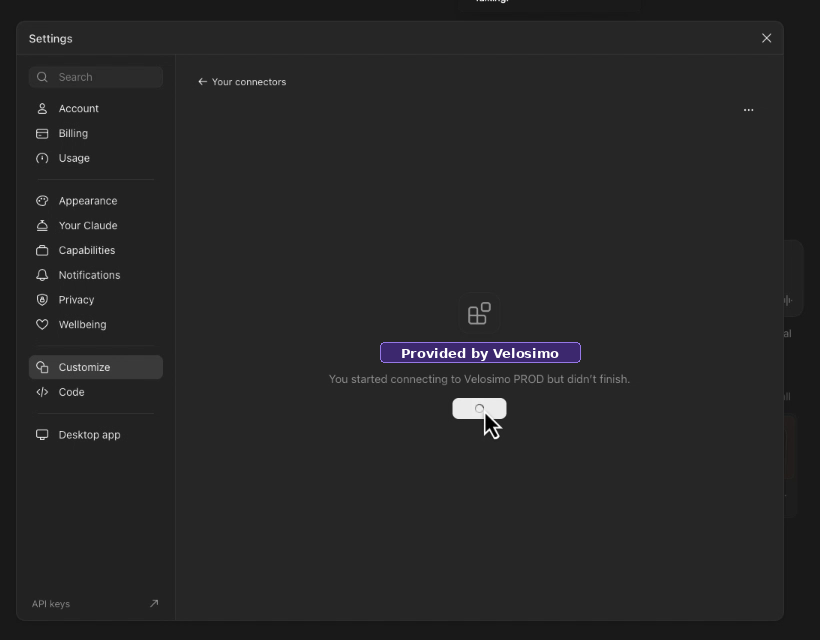
Step 7: Finish connecting
Claude checks the connection and opens your web browser to finish signing in. If Claude shows "You started connecting to Velosimo PROD but didn't finish," click the button below that message to open the browser again.
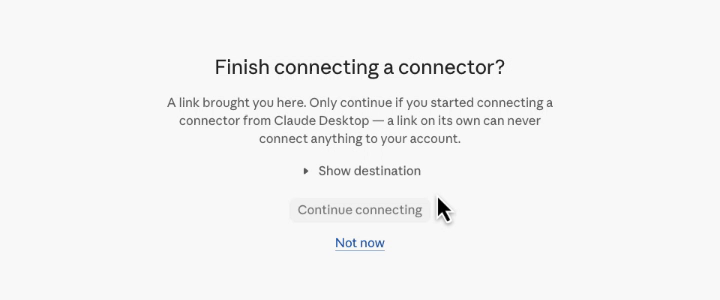
Step 8: Confirm in your browser
Your browser (for example, Chrome) opens a page titled Finish connecting a connector? Click Continue connecting.
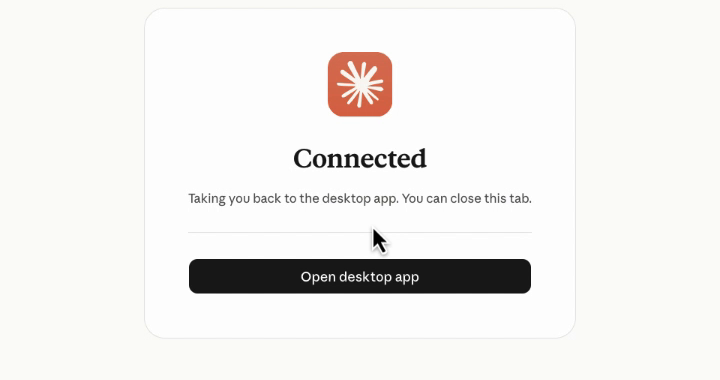
When you see Connected, you're done in the browser. Click Open desktop app to go back to Claude, or close the tab.
Step 9: Review tool permissions
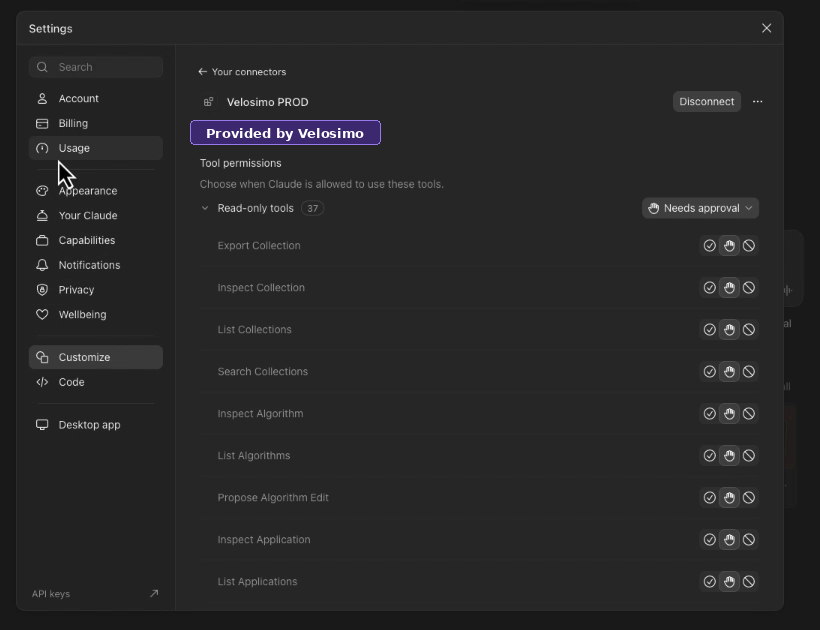
Back in Claude, the connector page opens and a Connected to Velosimo PROD message appears. Under Tool permissions, you can choose how Claude uses each tool:
- Always allow (check mark): Claude runs the tool without asking.
- Needs approval (hand): Claude asks you each time. This is the default.
- Block (circle): Claude can't use the tool.
We recommend leaving the default Needs approval while you get started.
Step 10: Confirm the connector is listed
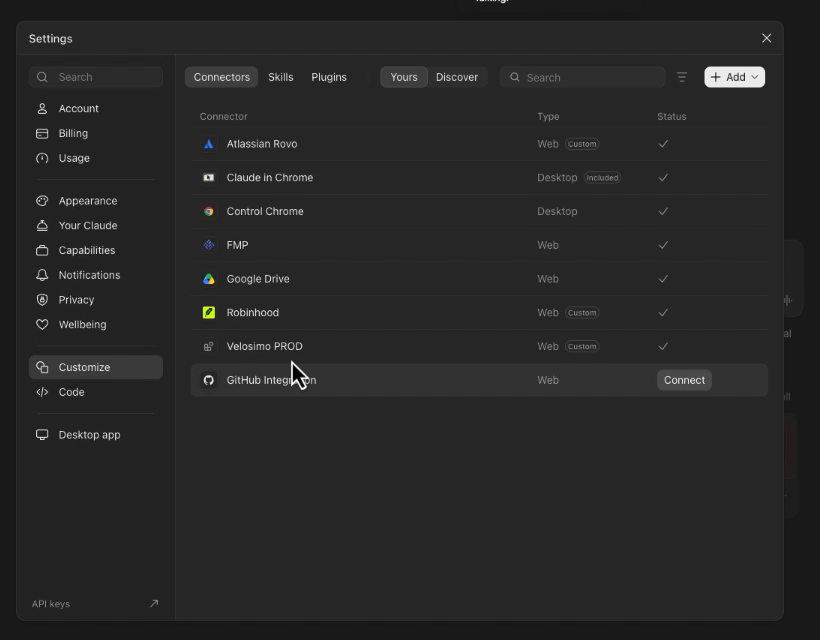
Click ← Your connectors. Velosimo PROD now appears in your connector list with a check mark under Status. Close Settings.
Try it out
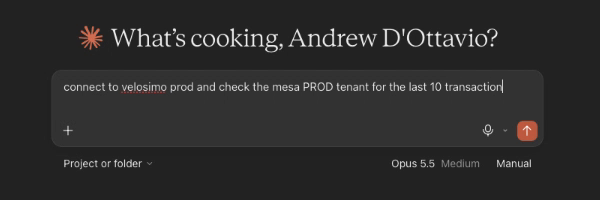
Start a new chat and ask Claude something about your Velosimo tenant. For example:
Connect to Velosimo PROD and check the [tenant name] tenant for the last 10 transactions.
When Claude needs a Velosimo tool, it asks for permission. Click Allow once to approve it this one time, or Always allow to stop asking for that tool. Click Decline to stop.
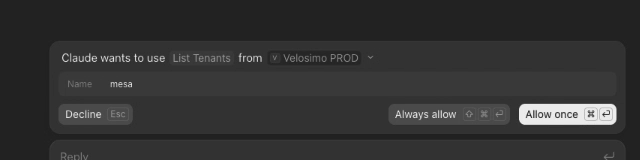
Claude then pulls the data from your tenant and summarizes it for you, for example as a table of recent transactions with their status.
Troubleshooting
| Problem | What to try |
|---|---|
| Continue stays grayed out in Step 5 | Check that the full MCP server URL provided by Velosimo is pasted, starting with https://. |
| The browser didn't open in Step 7 | Click the button under "You started connecting… but didn't finish" in Claude's Settings. |
| The connector shows Connect instead of a check mark | Click Connect next to the connector and repeat Steps 7 and 8. |
| Sign-in fails or you see an authorization error | Re-check the OAuth Client ID provided by Velosimo. To change it, open the connector, click ⋯, remove it, and add it again. |
| Claude is looking at the wrong tenant | Ask Claude which tenant it's connected to, or tell it the tenant name to switch to. |
Need help? Contact your Velosimo representative.
Updated about 6 hours ago