
Configure: Procore Project Setup
Each Procore project is set up once before its team can import from Tyler Munis. Setup links the Procore project to your Velosimo tenant, picks a budget code mapping profile, and tells the connector which Munis vendors belong to the project. This is usually done by a project or connector administrator.
Using the Tyler Munis Project IDTip: Give the Procore project the same project number as the Munis project code. The connector then fills in the Munis project code automatically.
Run the setup wizard
Open the Procore project, then choose Velosimo Connector from the Apps menu. The first time the app is opened on a project, a four-step setup wizard appears.
Steps 1–2 – Sign in and choose the Procore environment
Sign in with Velosimo, choose Production or Sandbox, and confirm the Velosimo tenant is connected. These steps are the same for every user and are covered in Connect the app to Velosimo in the user guide. The environments offered are the ones authorized in Authorizing Tyler Munis - Procore.
Step 3 – Procore company & project
The Company and Project are filled in from the Procore project the app was opened in. You can pick a different company or project from the drop-downs if you have access to others. Click Continue.
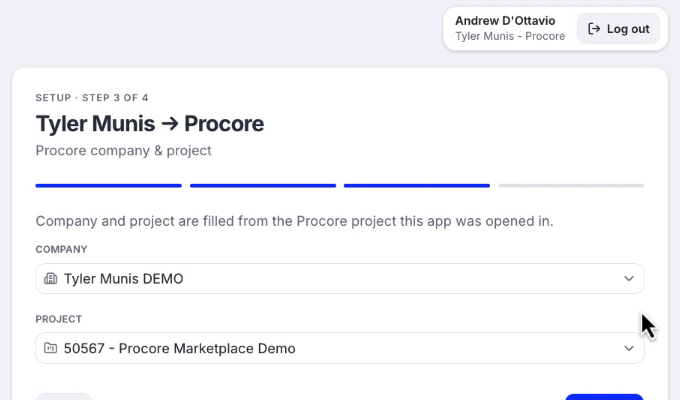
Step 3: company and project are filled in automatically
Step 4 – Budget codes
- Under Mapping profile, select the profile your administrator created in Velosimo Connect Admin. See Configure: Budget Code Mapping Profiles.
- The app checks the profile against the Procore project's budget codes. If any are missing, a message lists them and Finish setup stays disabled until they're added.
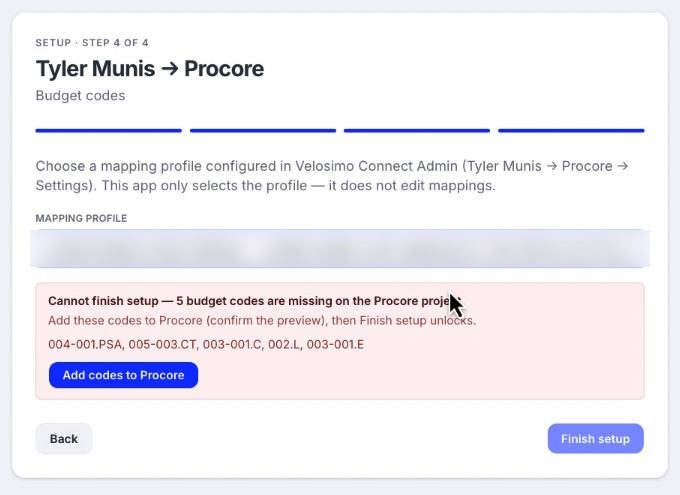
Budget codes in the profile that are missing from the Procore project
- Click Add codes to Procore. The Preview add to Procore window shows the budget codes and cost codes that will be created, and which ones already exist on the project. Review it and click Continue.
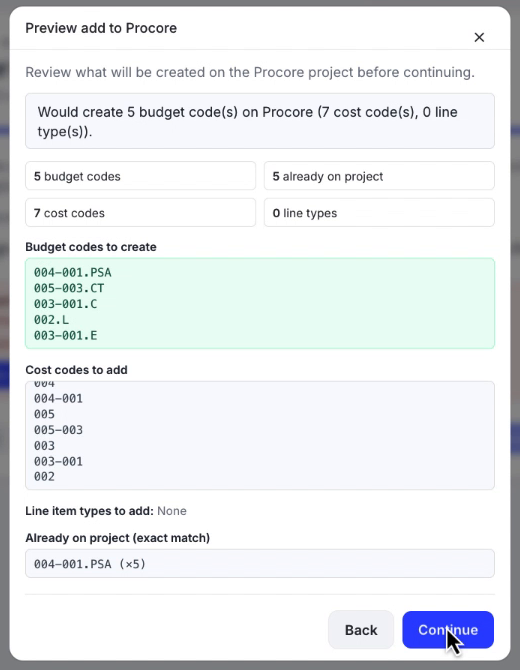
Preview of the budget and cost codes that will be added
- When the codes have been added, the app confirms Profile ready — all mapped budget codes are on the Procore project. Click Finish setup.
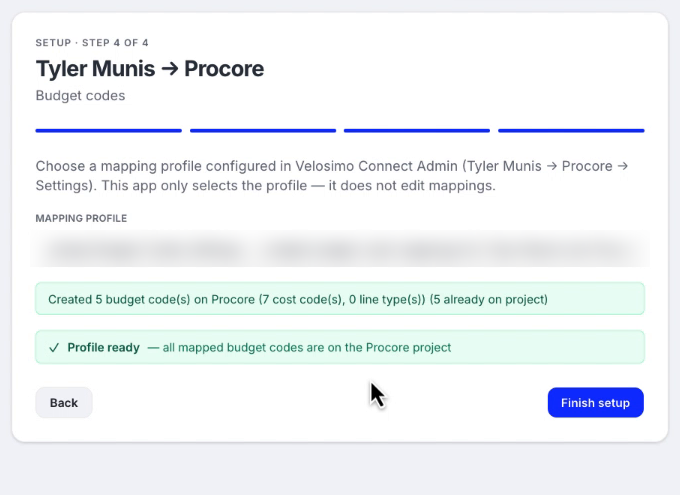
All mapped budget codes are now on the Procore project
Add the project's vendors
The connector uses the project's vendors to find the right purchase orders and invoices in Munis, so at least one vendor must be added before anything can be imported. Until then, the import page shows a message that no purchase orders were found.
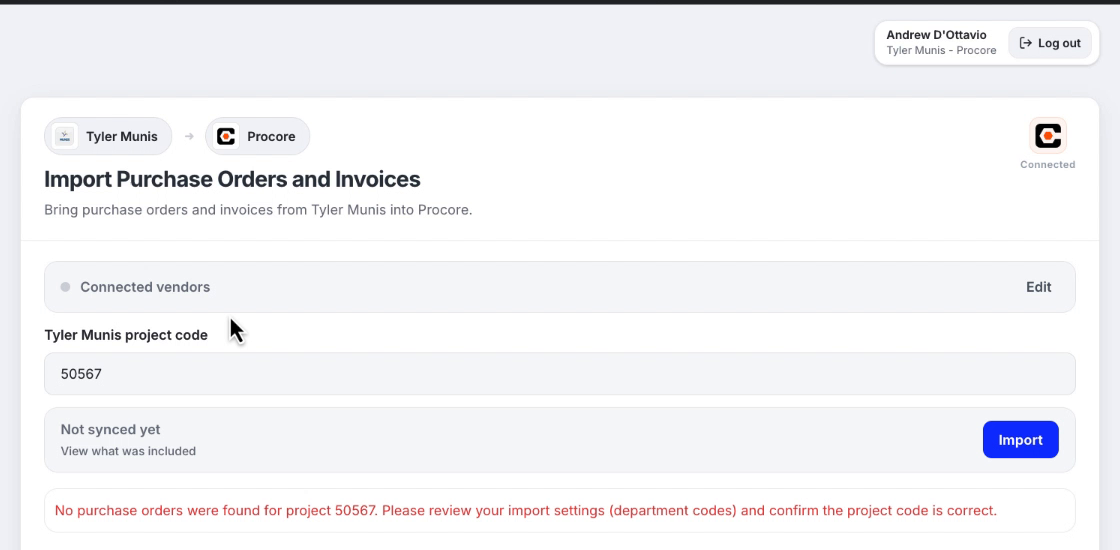
No purchase orders are found until vendors are added
- On the Import Purchase Orders and Invoices page, click Edit next to Connected vendors. The Import settings window opens.
- Scroll to Purchase order vendors. In Add vendor, search Tyler Munis by vendor name, DBA, or vendor ID and select each vendor working on the project.
- Click Save settings. The page now shows Connected vendors with the number of vendors added.
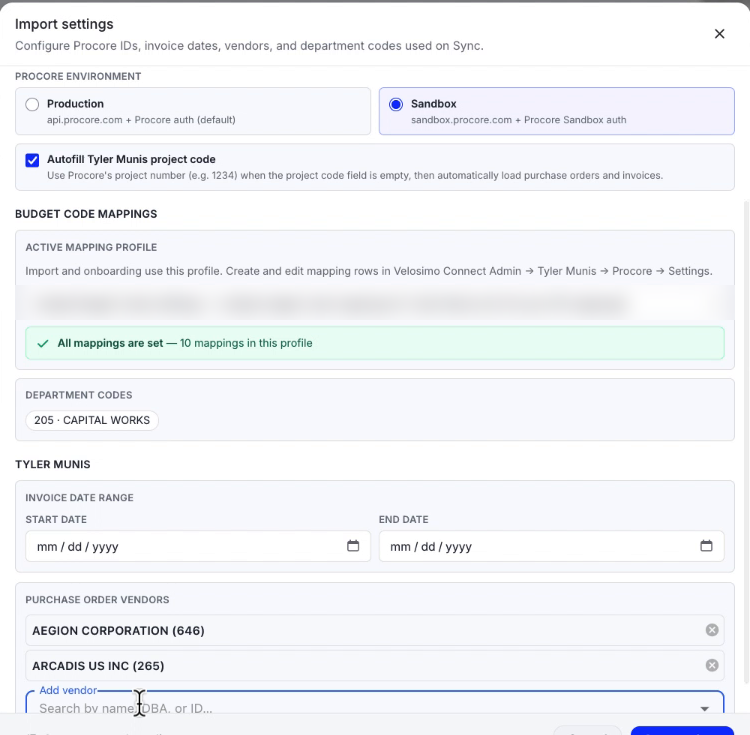
Adding Munis vendors to the project in Import settings
Import settings reference
You can reopen Import settings at any time with the Edit link next to Connected vendors.
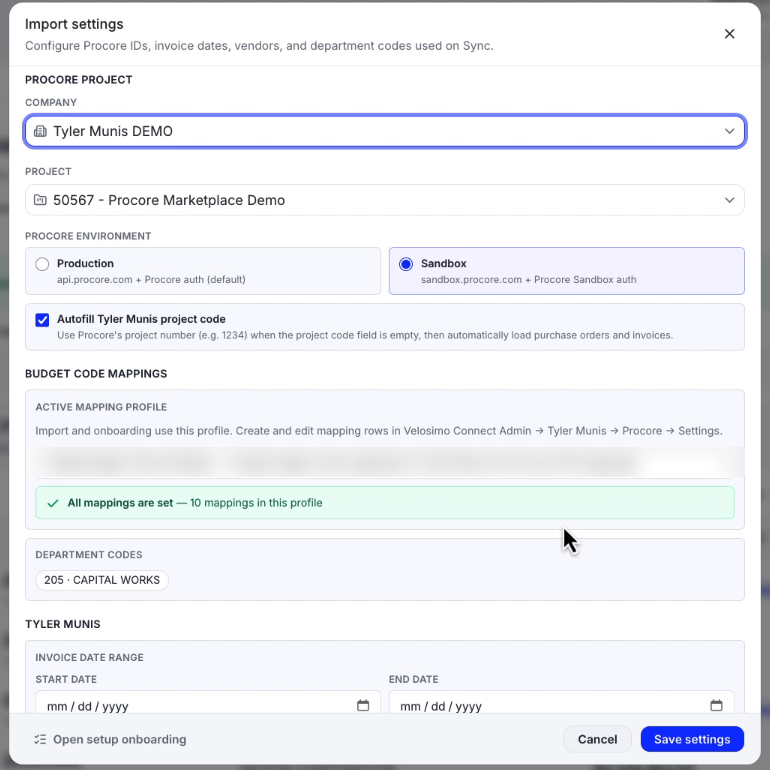
The Import settings window
| Setting | Description |
|---|---|
| Procore project – Company / Project | The Procore company and project that records are created in |
| Procore environment | Production (api.procore.com) or Sandbox (sandbox.procore.com) |
| Autofill Tyler Munis project code | When the project code field is empty, uses the Procore project number (for example, 1234) and loads purchase orders and invoices automatically |
| Active mapping profile | The budget code mapping profile used for imports. Shows whether all mappings are set. Mapping rows are edited in Velosimo Connect Admin → Tyler Munis → Procore → Settings |
| Department codes | The Munis departments included, as set in the mapping profile |
| Invoice date range | Optional Start date and End date to limit which Munis invoices are loaded |
| Purchase order vendors | The Munis vendors whose purchase orders and invoices are loaded for this project |
| Open setup onboarding | Reopens the four-step setup wizard |
Next step
The project is ready. Share the User Guide for Tyler Munis + Procore with the project team.
Updated 20 days ago