
User Guide for Tyler Munis + Procore
Use the Velosimo Connector inside a Procore project to bring purchase orders and invoices from Tyler Munis into Procore. You choose which purchase orders to import, review exactly what will be created, and then run the import.
Associate Vendors to Project in Velosimo AppThe project manager must finish project setup — including adding the project's vendors — before you can import.
1. Open the connector
- Open your project in Procore.
- From the Apps menu in the top navigation, choose Velosimo Connector.
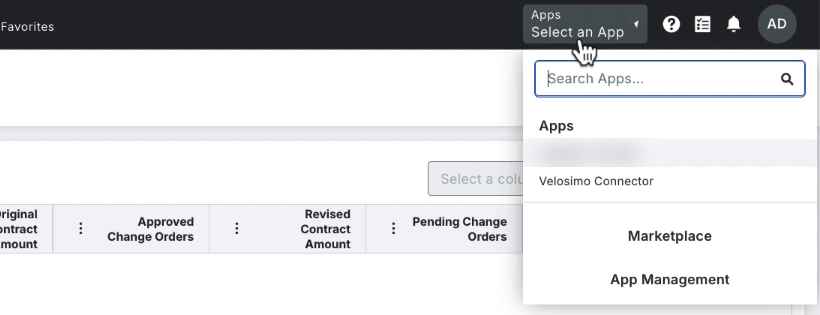
Open Velosimo Connector from the Apps menu
2. Connect the app to Velosimo
The first time you open the connector, you connect it to your Velosimo tenant and choose which Procore environment to work in. The environments available are the ones your administrator has authorized in Velosimo Connect Admin (see Authorizing Tyler Munis - Procore).
- Sign in. A Velosimo sign-in window opens. If nothing appears, click Sign in with Velosimo — browsers often block pop-ups — and sign in with your Velosimo credentials.
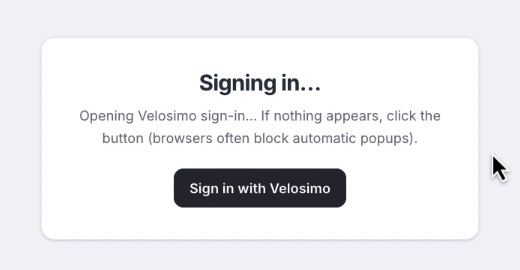
Signing in to Velosimo from the Procore app
- Choose the Procore environment (Step 1 of 4). Select Production for live project data or Sandbox for testing. Each option shows Connected when your administrator has authorized that environment. Click Continue.
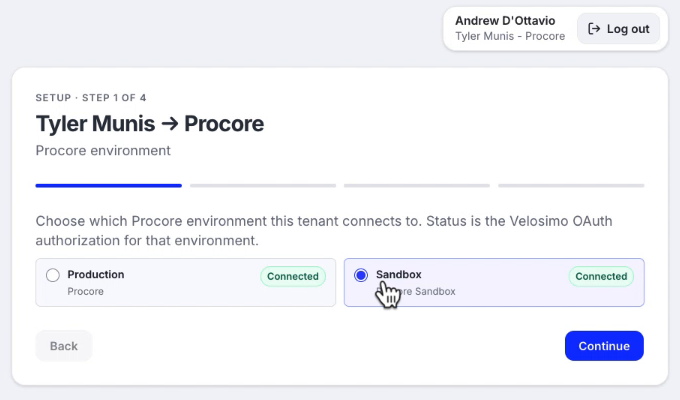
Choose Production or Sandbox — both show Connected when authorized
- Confirm the Velosimo tenant (Step 2 of 4). The app confirms the tenant is authorized for the environment you picked (for example, Connected — Procore Sandbox). Click Continue.
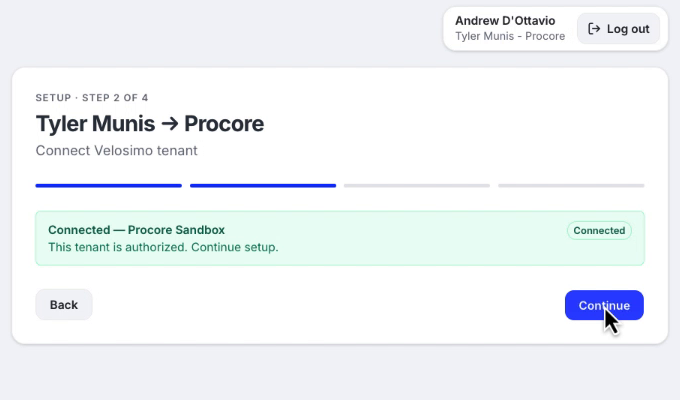
The Velosimo tenant is authorized for the selected environment
- Steps 3 and 4 confirm the Procore company and project and the budget code mapping profile. These are usually completed once per project by your administrator — see Configure: Procore Project Setup.
WarningIf an environment doesn't show Connected, it hasn't been authorized yet. Ask your Velosimo Connect administrator to authorize it on the Integrations → Authorizations page.
When setup is complete, the Import Purchase Orders and Invoices page opens. The Tyler Munis project code is filled in from the Procore project number.
3. Load purchase orders from Munis
Click Import (or Sync if the project has been loaded before). The connector queries Tyler Munis for the project's purchase orders and invoices, which can take about a minute.
When loading finishes, each purchase order is listed with its vendor, amount, and a summary such as 1 line · 9 new / 9 inv — the number of PO lines, invoices not yet in Procore, and total invoices. Click the arrow at the start of a row to see its details.
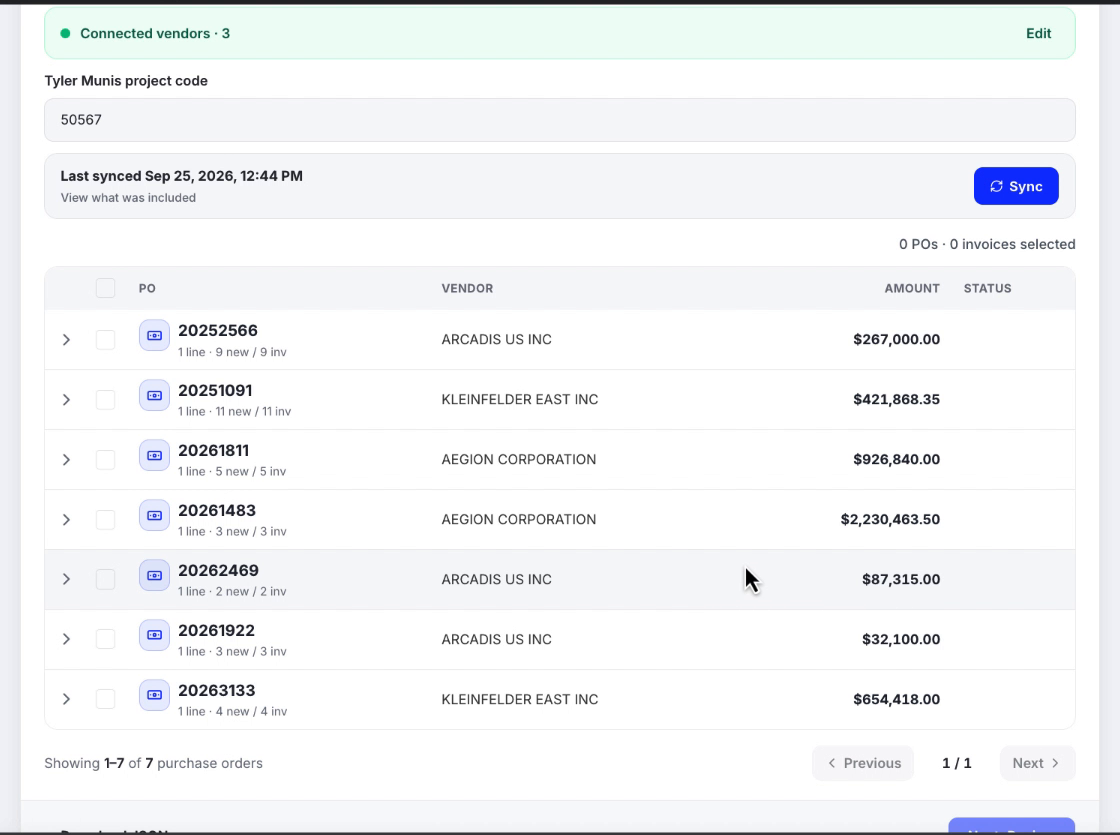
Purchase orders loaded from Tyler Munis
4. Select what to import
Check the box next to each purchase order you want to bring into Procore, or use the header checkbox to select all. The counter above the list shows how many POs and invoices are selected.
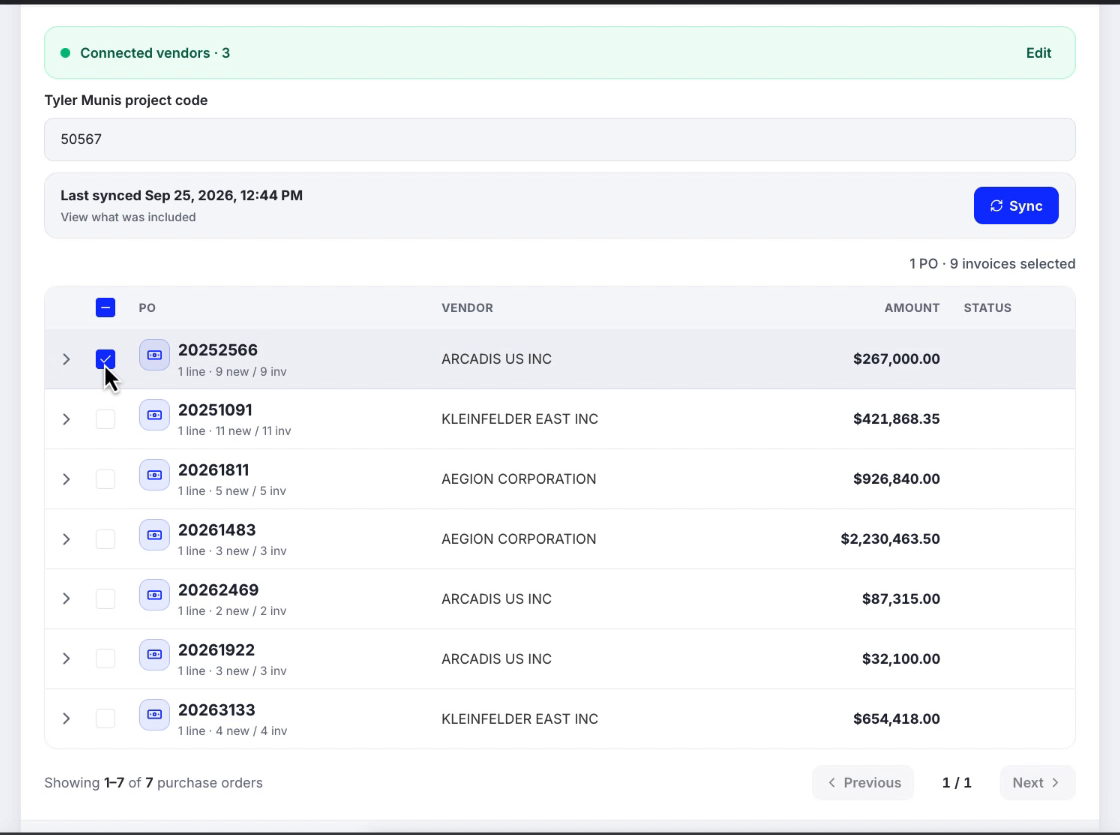
Selecting purchase orders to import
Click Next: Review.
5. Review the import
The review screen shows how the selected Munis records will be created in Procore, with counts for each record type:
- Purchase orders → Purchase order commitments
- PO line items → Schedule of values line items
- Invoices → Requisitions
- Attachments → Requisition attachments
- Paid invoices → Payments issued (contract payments)
It also lists any vendors that will be created in Procore (the vendor isn't in the company directory yet) or added to the project (the vendor is in the company directory but not on this project).
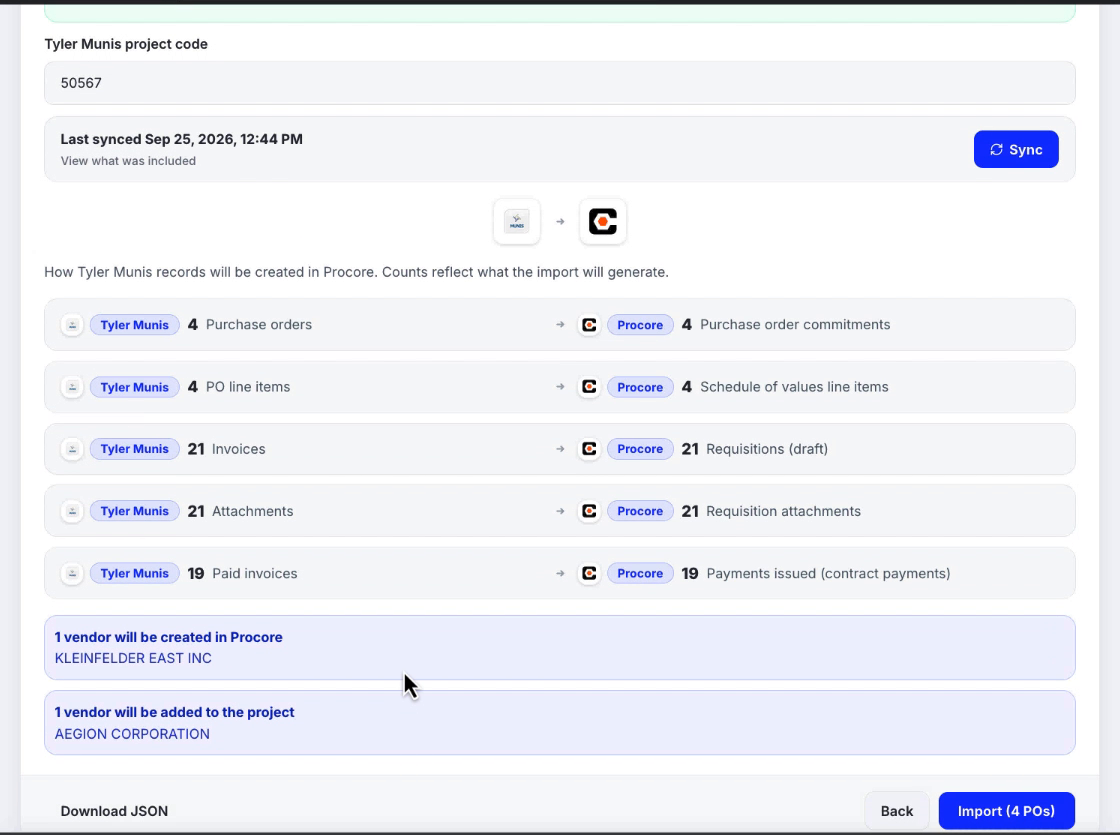
Review what will be created in Procore
Click Download JSON if you want a copy of the import data. When everything looks right, click Import (n POs).
6. Run the import
A progress window shows each step as it runs — fetching budget codes and billing periods, then each purchase order and its invoices, payments, and attachments.
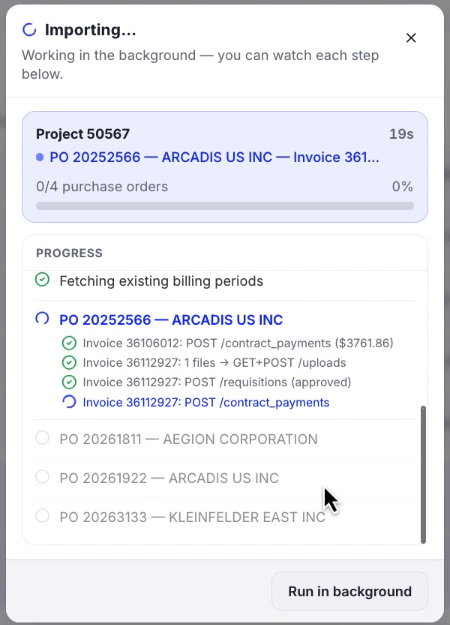
Import progress
You can watch it finish or click Run in background to keep working. When the import completes, the list refreshes and imported purchase orders show an Imported status.
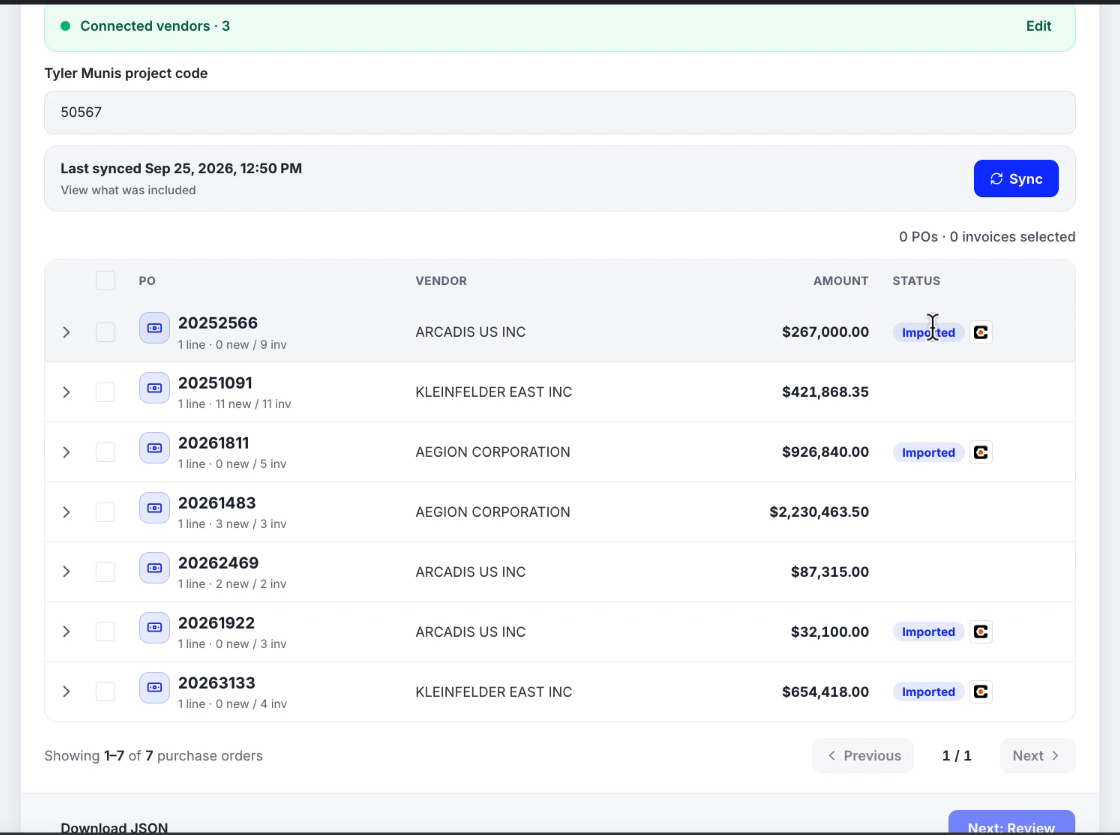
Imported purchase orders are marked in the list
7. Check the results in Procore
Open Project Tools → Commitments. Each imported purchase order appears as a purchase order commitment with its contract amount.
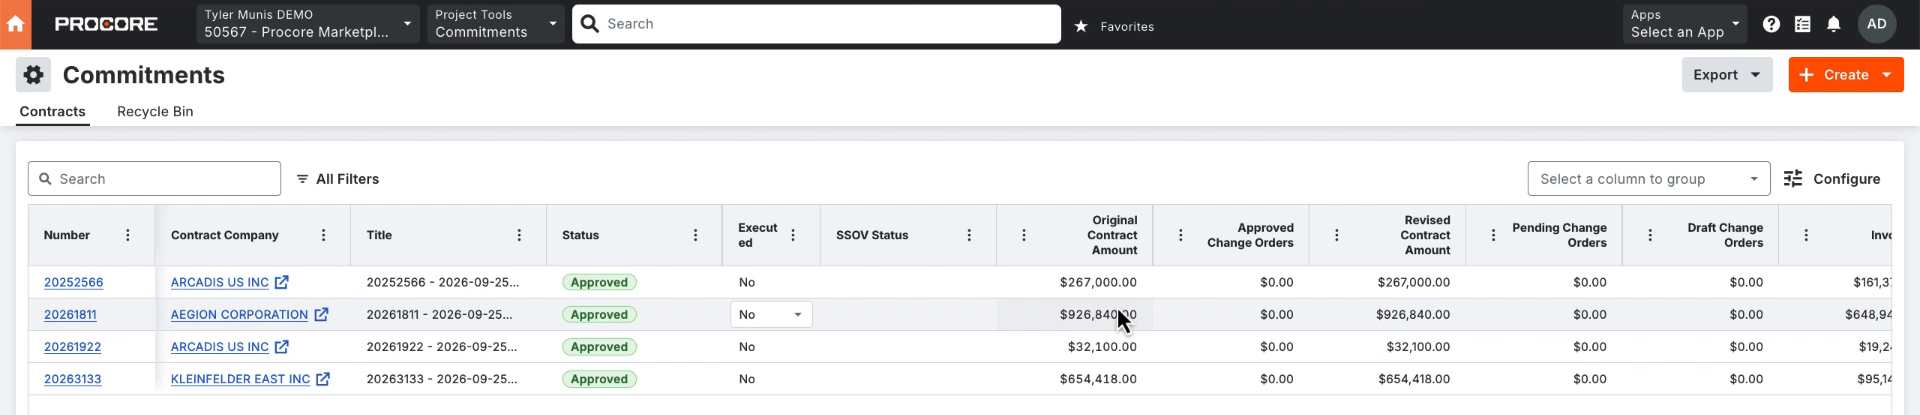
Imported purchase orders in Procore Commitments
Open a commitment to see its details. The Invoices tab lists the imported requisitions, and Payments Issued lists the payments recorded from Munis.
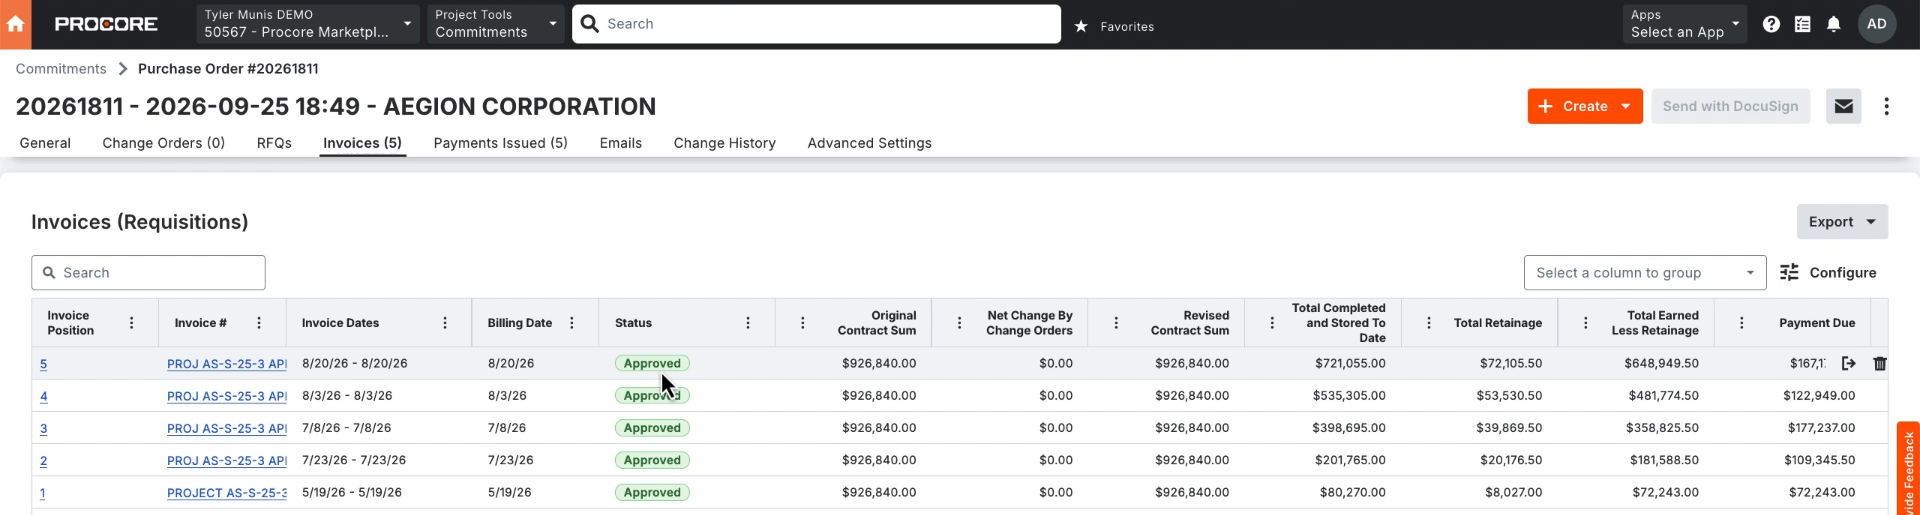
Invoices imported onto a purchase order commitment
Open an invoice to see its billing period, the updated Schedule of Values, and the attached invoice PDF from Munis.
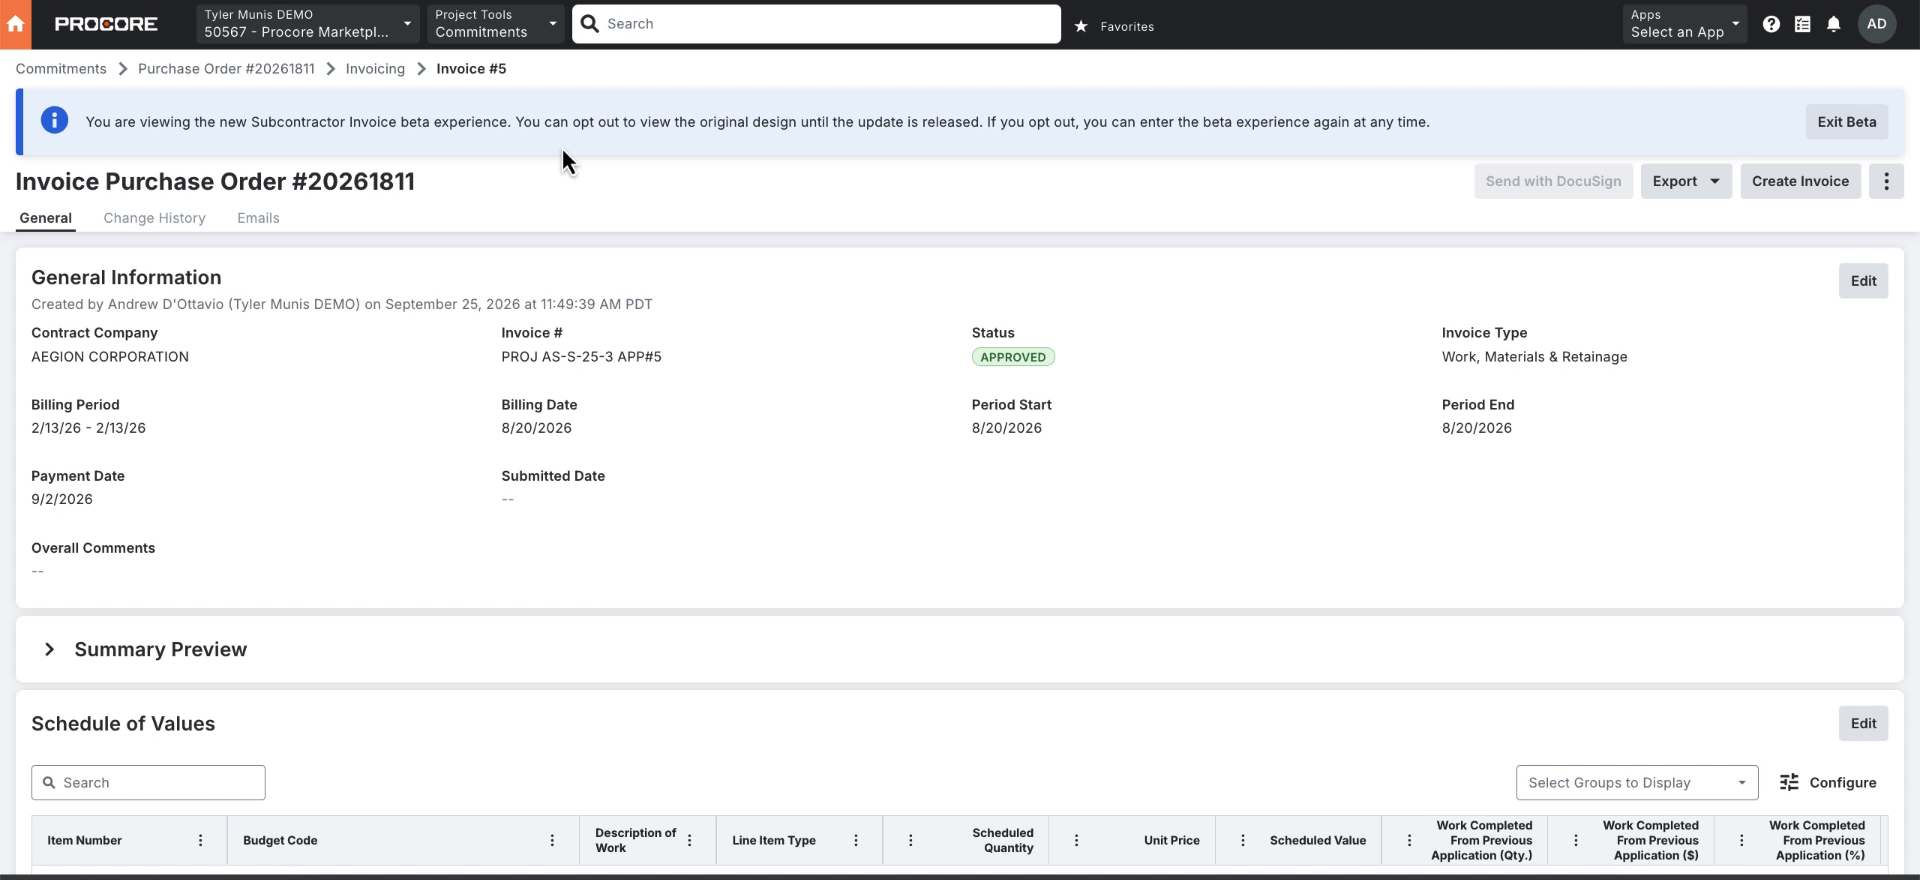
An imported invoice with its schedule of values
Switch between Production and Sandbox
You can move a project between your Production and Sandbox Procore environments at any time, as long as both are authorized.
- On the Import Purchase Orders and Invoices page, click Edit next to Connected vendors to open Import settings.
- Under Procore environment, choose Production (
api.procore.com) or Sandbox (sandbox.procore.com). - Click Save settings.
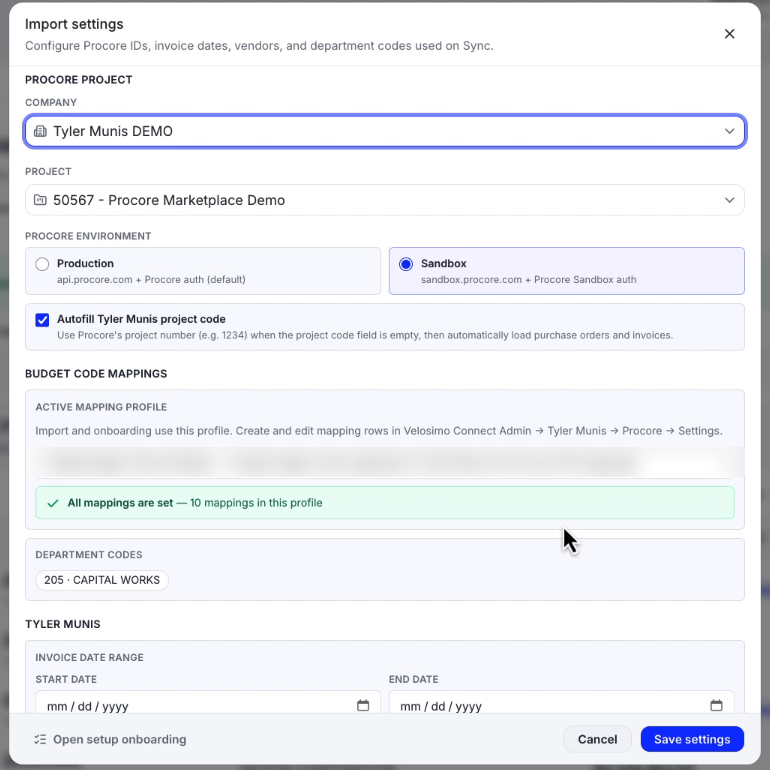
Switching the Procore environment in Import settings
You can also click Open setup onboarding at the bottom of Import settings to go back through the setup steps and pick a different environment.
Importing more later
You don't have to import everything at once. Come back to Velosimo Connector at any time and click Sync to load the latest data from Munis. Purchase orders that have already been imported keep their Imported status, and the new count on each row shows invoices that haven't been brought over yet. Select those purchase orders and repeat steps 4–6.
Common messages
| Message | What to do |
|---|---|
| No purchase orders were found for project … | Confirm the Tyler Munis project code is correct and that vendors have been added under Connected vendors → Edit. If it persists, ask your administrator to check the department codes in the mapping profile. |
| Cannot finish setup — budget codes are missing on the Procore project | Click Add codes to Procore during setup, or ask your administrator. See Configure: Procore Project Setup. |
Updated 20 days ago